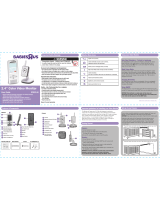
Motorola MBP26/4 User manual

Category
Baby video monitors
Type
User manual

This manual is also suitable for

USER’S GUIDE
MBP26, MBP26/2, MBP26/3, MBP26/4
BABY MONITOR
USER’S GUIDE
The features described in User's Guide are subject to
modifications without prior notice.
This User's Guide provides you with all the information you need
to get the most from your product.
Before you can use the baby monitor, we recommend you insert
and fully charge the battery in the parent unit, so that it continues
to work if you disconnect it from the power supply to carry it to
another location. Please read the Safety Instructions on page 6
before you install the units.
Got everything?
1 x Parent unit
1 x Baby unit (camera)
1 x Rechargeable Ni-MH battery pack for the Parent unit
1 x Power adapter for the Parent unit
1 x Power adapter for the Baby unit
In multi-camera packs, you will find one or more additional
camera units with power adapter units.
Welcome...
to your new Motorola Baby Monitor!
Thank you for purchasing the MBP26, MBP26/2, MBP26/3,
Ple
ase retain you
r original dated sales receipt for your records.
For warranty service of your Motorola product, you will need to
provide a copy of your dated sales receipt to confirm warranty
status. Registration is not required for warranty coverage.
For product related questions, please call:
US and Canada 1-888-331-3383
On the Web: www.motorola.com
playroom.
MBP26/4. Now you can see and hear your baby sleeping in
another room or you can monitor your older children in their
Overview of the Parent Unit
Parent unit display icons
1. Display (LCD screen)
2. Scroll Up/Volume+ Button
3.
Scroll Down/Volume- Button
4. Return/Switch Camera Button
Press to return to previous menu level.
Press to switch camera units
(if paired with more than one camera).
Press to pan left in digital pan/tilt mode.
5. Menu/OK Button
Press to open the menu options.
Press to confirm a selection.
Press to pan right in digital pan/tilt
mode.
6. Digital Pan/Tilt
Press to enter/exit digital pan/tilt mode
7. Tal k Key
Press and hold to talk back through
8. Power indicator LED Blue
when mains adaptor power ON.
9. Unit ON/OFF LED (Green)
10. Audio Level LED (Green, Orange,
Red, Red)
11. Power / Video On-Off Button
Press and hold to turn the unit
ON or OFF.
In monitor mode, press to turn the
12. Battery cover
13. Stand
14. Speaker
15. Power Adapter Socket
Signal Level Indication (3 Levels)
N
Night Vision Mode (Video also changes to Black/White)
Battery Level Indication (3 Levels)
*
Volume Level Control (8 Levels)
Brightness Level Control (8 Levels)
Alarm Setting (6h, 4h, 2h, OFF)
Select Camera
Add Camera
Delete Camera
Digital Pan/Tilt
mode On
the camera.
display On/Off.
Camera scan mode set
POWER
1
2
7
5
3
10
6
8
11
15
14
13
12
9
4
Overview of Your Baby Unit
Important guidelines for installing your Baby Monitor
To use your Video Monitor Baby and Parent Units together, you must
be able to establish a radio link between them, and the range will be
affected by environmental conditions.
Any large metal object, like a refrigerator, a mirror, a filing cabinet,
metallic doors or reinforced concrete between the Baby and Parent
Unit may block the radio signal.
The signal strength may also be reduced by other solid structures, like
walls, or by radio or electrical equipment, such as TVs, computers,
cordless or mobile phones, fluorescent lights or dimmer switches.
Use of other 2.4GHz products, such as wireless networks (Wi-Fi
®
routers), Bluetooth
®
systems, or microwave ovens, may cause
interference with this product, so keep the baby monitor away at least 5ft
(1.5m) from these types of products, or turn them off if they appear to be
causing interference.
If the signal is weak, try moving the Parent and/or the Baby Unit to
different positions in the rooms.
1. Photo Sensor (Night Vision Mode) 6. Power Adapter Socket
2. Camera Lens 7. Pair Key
3. Infrared LEDs 8. Microphone
4. Power LED 9. Speaker
5. ON/OFF Switch
9
1
5
7
8
2
4
3
6
Table of contents 5
ENGLISH
Table of contents
1. Safety Instructions ......................................................................... 6
2. Getting Started ............................................................................... 8
2.1 Baby Unit Power Supply.................................................................8
2.2 Parent Unit Battery Installation .......................................................8
2.3 Parent Unit Power Supply ..............................................................9
2.4 Registration (Pairing)....................................................................11
3. Using the Baby Monitor ............................................................... 12
3.1 Setting up .....................................................................................12
3.2 Night Vision Mode ........................................................................12
3.3 Video ON/OFF..............................................................................12
3.4 Talk mode.....................................................................................12
4. Parent Unit Menu Options ........................................................... 13
4.1 Volume .........................................................................................13
4.2 Brightness.....................................................................................13
4.3 Digital Pan and Tilt ......................................................................13
4.4 Alarm ............................................................................................13
4.5 Camera Control ............................................................................13
4.5.1 Add (pair) a camera .......................................................13
4.5.2 View a camera ...............................................................14
4.5.3 Delete a camera .............................................................14
4.5.4 Scan the cameras ..........................................................15
5. Disposal of The Device (environment) ....................................... 16
6. Cleaning ........................................................................................ 17
7. Help................................................................................................ 18
8. General Information ..................................................................... 20
6 Safety Instructions
1. Safety Instructions
WARNING
This baby monitor is compliant with all relevant standards regarding
electromagnetic fields and is, when handled as described in the User's
Guide, safe to use. Therefore, always read the instructions in this User's
Guide carefully before using the device.
Adult assembly is required. Keep small parts away from children when
assembling.
This product is not a toy. Do not allow children to play with it.
This baby monitor is not a substitute for responsible adult supervision.
Keep this user's guide for future reference.
Keep the cords out of reach of children.
Do not cover the baby monitor with a towel or blanket.
WARNING:
CAMERA SET UP & USE:
Determine a location for the BABY UNIT that will provide the best
view of your baby in his crib.
Place the BABY UNIT on a flat surface, such as a dresser, bureau,
or shelf, or wall mount it securely using the keyhole slots under
NEVER place the baby unit or cords within the crib.
the stand.
STRANGULATION HAZARD - Keep the unit and adapter cord
NEVER place camera or cords within the crib.
Secure the cord away from baby's reach.
Never use extension cords with AC Adapters. Only use the AC
Adapters provided.
more than 3 feet from the crib and out of baby's reach.
more than 3 feet
the baby (the unit should be 3 feet away)and cords more than
Do not place the baby unit or cords in the crib or within reach of
Safety Instructions 7
ENGLISH
Test this monitor and all its functions so that you are familiar with it
prior to actual use.
Do not use the baby monitor in moist places or close to water.
Do not install the baby monitor in extreme cold or heat, or in direct
Only use the chargers and power adapters provided. Do not use other
chargers or power adapters as this may damage the device and
battery pack.
Only insert a battery pack of the same type.
Do not touch the plug contacts with sharp or metal objects.
CAUTION
Risk of explosion if battery is replaced by an incorrect type.
Dispose of used batteries according to their instructions.
sunlight, or close to a heat source.
Connect the power adapters to easily accessible mains sockets.
8 Getting Started
2. Getting Started
2.1 Baby Unit Power Supply
1. Connect the small plug of the power adapter to the baby unit (camera)
NOTE
Only use the enclosed power adapter (6V DC / 500mA) with the slightly
2. Slide the ON/OFF switch to the ON position. The power LED will
light up in orange.
3. Slide the ON/OFF switch to the OFF position to turn the Baby Unit off.
2.2 Parent Unit Battery Installation
Black
Red
1. Insert the plug of the rechargeable battery pack into the small socket
inside the battery compartment as shown above and fit the battery
pack into the compartment.
and the other end to the electrical outlet.
larger DC plug.
The supplied rechargeable battery pack should be fitted so the parent
unit can be moved without losing the link with the camera. Charge the
battery in parent unit before first time use or when the parent unit
indicates the battery is low.
Getting Started 9
ENGLISH
2
the screw in a clockwise direction using a Small cross head or Flat
end screwdriver.
Small cross head or
Flat end screw driver.
2.3 Parent Unit Power Supply
IMPORTANT
Installing the rechargeable battery pack and charging it fully before use is
recommended. This will allow the unit to operate on battery in the event
of a power
1. Connect the small plug of the power adapter to the parent unit and
the other end to the electrical outlet. Only use the enclosed power
adapter (6V DC/
2. Press and hold the
P POWER ON/OFF button for 1 second to
turn ON the parent unit.
3. Once the baby and parent units are switched on, the display on the
parent unit will show the video captured by the baby unit.
Place the battery cover over the compartment and gently tighten
failure, or when moving to a different room.
500mA) with the slightly smaller DC plug.
Getting Started
4. If there is no connection or you are out of range, the video display
will go off and the symbol will flash on the LCD display, and
the unit will beep every 9 seconds. (If the unit is on scan
until the link is re-established.
5. Press and hold the
P POWER ON/OFF button, until the progress
bar scrolls fully across , to turn OFF the parent unit.
NOTE
The battery icon turns RED and flashes to indicate that the battery
for 60 sec. The
0
symbol displays.) Move the parent unit closer to the baby
When charging
1.
10 Getting Started
1 ?
the
is low, and it gives a beep every 16 seconds. The battery needs to be
recharged. battery pack takes about 16 hours to charge fully.
If the parent unit is turned OFF, when the adapter is plugged in, it
displays a "mains plug" icon briefly, then a large battery icon with
internal segments cycling for 60 seconds, before the display goes
blank, but the unit continues to charge. The Blue LED at top left
corner lights up to indicate adapter is plugged in.
If the parent unit is turned ON, when the adapter is plugged in, the
battery icon in the screen's top right corner will show that the battery
corner lights up to indicate adapter is plugged in.
is charging by cycling the internal segments. The segments stop
cycling when the battery is fully charge. The Blue LED at top left
2.
2.4 Registration (Pairing)
The Baby monitor camera is pre-registered to your Parent Unit. You do
To re-register your Baby Unit, or register a new Baby Unit, follow the
procedure below:
1. Press the button of the parent unit and then press the
- DOWN
button to select the ADD CAMERA icon , and press the button
2.
1
/
2
/
3
/
4
will pop up, press the + UP button or - DOWN button to
select the desired Camera identification number and press the
button to start searching for a camera unit. The unit ON/OFF LED
turns on while searching.
3. Press and hold the PAIR button under the bottom left edge of the
NOTE
If a particular Baby Unit was registered previously, registering this current
Baby Unit again will overwrite the old registration.
Parent Unit.
Getting Started 11
ENGLISH
not need to register it again unless the Baby Unit loses its link with the
to confirm.
camera unit until the parent unit finds the camera, beeps and the video
from the camera appears.
If no camera unit is found within about 3333330 seconds, the search will end
and the parent unit will return to its previous mode.
3. Using the Baby Monitor
3.1 Setting up
Place the baby unit in a convenient location (e.g. on a table) and point
the camera lens towards the area you want to monitor.
Adjust the baby unit's head angle by rotating the camera up, down, left
and right until you are satisfied with the image in the parent unit.
NOTE
Do not place the baby unit within the baby's reach! If there is interference
ensure they are not close to other electrical equipment.
3.2 Night Vision Mode
The baby unit has 8 high-intensity infrared LEDs for picking up clear images
in the dark. When the built-in photo sensor on the top of the unit detects a
on the parent unit will display in black and white. The icon will be displayed
N
at the top of the screen.
3.3 Video ON/OFF
Press the VIDEO ON/OFF button V turn the LCD
3.4 Talk Mode
Press and hold the TALK button on the parent unit to talk to your baby
through the baby unit’s loudspeaker. The icon will be displayed at the
top of the LCD screen.
low level of ambient light, the LEDs will automatically activate and the screen
12 Using the Basby Monitor
with the picture or sound, try moving the units to different locations, and
on the parent unit to
display on or off, but still leave the audio monitor on.
4.
4.1 Volume
1. While in monitor mode, press the + UP button or - DOWN button to
4.2 Brightness
1. Press the button and the first menu option will appear.
2. To select the BRIGHTNESS icon press the button.
3. Press the
+ UP button or - DOWN button to select the desired
brightness level from level 1 ~ 8. (The default brightness level setting
is level
4.)
4.3 Digital Pan and Tilt
1. button.
4.4 Alarm
1. Press the button and the first
2. the ALARM icon and press
3. Press the
+ UP button or - DOWN button to select the alarm time
(
6h
,
4h
,
2h
). (The default setting is Alarm OFF (X).
Parent Unit Menu Options
level setting is level
4.)
2. Press the
+ UP button or - DOWN buttons to move the display and
buttons to pan the display
-
button to confirm.
4.5 Camera Control
4.5.1 Add (pair) a camera
1. Press the button and the first menu option will appear.
2. Press the
- DOWN button to select the ADD CAMERA icon and
press the button to confirm.
Using the Baby Monitor 13
ENGLISH
select the desired volume level from level 1 ~ 8. (The default volume
Press the PAN & &TILT
view up or down, or press the and
view left and right.
menu option will appe.a r.
Press the DOWN button to show
If an alarm time is selected, the parent unit will beep at the end of the
selected 6, 4 or 2 hour period, and the alarm icon will flash red. The
alarm is cancelled after about 60 seconds or by pressing any button
on the parent unit.
Set the alarm again if you want another alarm call.
3.
1
/
2
/
3
/
4
will pop up, press the + UP button or - DOWN button to
select the desired Camera identification number , and press the
4. Press and hold the PAIR button underneath the baby unit until the
A camera can only be registered to one parent unit at any one time.
4.5.2 View a camera
1. Press the button and the first menu option will appear.
2. Press the
- DOWN button to select the VIEW CAMERA icon
3.
1
/
2
/
3
/
4
will pop up, press the + UP button or - DOWN button
to select the desired Camera unit, and press the button to view
the picture from that camera.
TIP
Quick Method to View Cameras instead of using the menu.
Directly press repeatedly to select
Camera 1 - 4
or .
4.5.3 Delete a camera
1. Press the button and the first menu option will appear.
2. Press the
- DOWN button to select the DELETE CAMERA icon
press the button to confirm.
3.
1
/
2
/
3
/
4
will pop up, press the + UP button or - DOWN button to
select the desired Camera unit, press the button then press the
-
DOWN button to select the DELETE CAM icon .
4. Press the button to confirm the deletion or RETURN button
NOTE
You cannot delete the camera if it is the only camera paired in
the
parent unit finds the camera, beeps and the picture from the camera
appears.
NOTE
to exit.
system.
14 Using the Baby Monitor
button to start searching for a camera unit. The Green Audio Level
LED turns on while searching.
and press the button to confirm.
1
.)
and
4.5.4 Scan the cameras
1. Press the button and the first menu option will appear.
2. Press the
- DOWN button to select the VIEW CAMERA icon
button to confirm. Choose the symbol
3. The screen will then display images from each registered
camera in a loop, changing about every 10 seconds.
TIP
Quick Method to View Cameras instead of using the menu.
Directly press repeatedly to select
Camera 1 - 4
or .
NOTE
WARNING
Parent Unit Menu Options 15
ENGLISH
for scan selection.
3 ?
and press the
If the parent unit is in scan mode and one of the registered cameras
is turned off or out of range, the scan will stop at the missing camera
(e.g. camera 3) and display the icon while emitting a warning
beep every 8 88
seconds.
If you want to continue in camera scan mode without that camera,
Check the camera and correct the fault immediately if you are using
that camera to monitor your baby.
delete the camera (see 4
4.5.3 Delete a camera) and start the scan
again.
16 Disposal of The Device (environment)
5. Disposal of The Device
(environment)
At the end of the product lifecycle, you should not dispose
of this product with normal household waste. Take this
product to a collection point for the recycling of electrical
and electronic equipment. The symbol on the product,
user's guide and/or box indicates this.
Some of the product materials can be reused if you take
them to a recycling point. By reusing some parts or raw materials from
used products you make an important contribution to the protection of the
environment.
Please contact your local authorities in case you need more information
on the collection points in your area.
Dispose of the battery pack in an environmentally-friendly manner
according to your local regulations.
Cleaning 17
ENGLISH
6. Cleaning
Clean the MBP26, MBP26/2, MBP26/3, MBP26/4 with a slightly damp
Cleaning and care
Do not clean any part of the product with thinners or other solvents
and chemicals –- this may cause permanent damage to the product
which is not covered by the warranty.
Keep your MBP26, MBP26/2, MBP26/3, MBP26/4 away from hot,
Every effort has been made to ensure high standards of reliability for
your MBP26, MBP26/2, MBP26/3, MBP26/4.. However, if something
Never use cleaning agents or abrasive solvents.
Customer Service for assistance.
cloth or with an anti-static cloth.
humid areas or strong sunlight, and don't let it get wet.
does go wrong, please do not try to repair it yourself –- contact
18 Help
7. Help
Display
No display
Try recharging or replacing the battery pack.
Reset the units. Disconnect the battery pack of the parent unit and
unplug both the units' electrical power, then plug them back in.
Is the unit turned on?
Press and hold the ON/OFF button
P on the parent unit to turn it
ON.
Is the correct camera selected?
Change the camera number, if necessary.
Is the video display turned on?
Press the VIDEO ON/OFF button
V to turn it on.
When operating using batteries only, the Display will go blank after 4
minutes to save power. The unit is still active and will give you audio
alerts. You can reactivate the screen by pressing any button.
Registration
If the Baby Unit has lost its link with the Parent Unit
Try recharging or replacing the battery pack.
If the Baby Unit is too far away it may be going out of range, so move
the Baby Unit closer to the Parent Unit.
Reset the units by disconnecting them from the battery and electrical
power. Wait about 15 seconds before reconnecting. Allow up to one
minute for the Baby Unit and the Parent Unit to synchronise
See 2.4 Registration (Pairing), if there is a need to re-register the
units.
Help 19
ENGLISH
Interference
Noise interference on your parent unit
Your baby and parent units may be too close. Move them farther apart.
Make sure there is at least 3 to 6 feet (1 to 2 metres) between the
lf the baby unit is too far away it may be out of range, so move the
baby unit closer to the parent unit.
Make sure the baby and parent units are not near other electrical
equipment, such as a television, computer or cordless/mobile telephone.
Use of other 2.4GHz products, such as wireless networks (Wi-Fi
®
routers), Bluetooth
®
systems, or microwave ovens, may cause
interference with this product, so keep the baby monitor away at least
5ft (1.5m) from these types of products, or turn them off if they appear
to be causing interference.
If the signal is weak, try moving the Parent and/or Baby Unit to
different positions in the rooms.
2 units to avoid audio feedback.
20 General Information
8. General Information
lf your product is not working properly....
1. Read this User's Guide or the Quick Start Guide.
2.
Contact Customer Service:
To order a replacement battery pack, contact customer service.
Consumer Products and Accessories Limited
Warranty ("Warranty")
Thank you for purchasing this Motorola branded product manufactured
under license by Binatone Electronics International LTD ("BINATONE").
What Does this Warranty Cover?
Subject to the exclusions contained below, BINATONE warrants that this
Motorola branded product ("Product") or certified accessory
("Accessory") sold for use with this product that it manufactured to be
free from defects in materials and workmanship under normal consumer
usage for the period outlined below. This Warranty is your exclusive
warranty and is not transferable.
Who is covered?
This Warranty extends only to the first consumer purchaser, and is not
transferable.
What will BINATONE do?
BINATONE or its authorized distributor at its option and within a
commercially reasonable time, will at no charge repair or replace any
Products or Accessories that does not conform to this Warranty. We may
use functionally equivalent reconditioned/ refurbished/ pre-owned or new
Products, Accessories or parts.
US and Canada 1-888-331-3383
On the Web: www.motorola.com
  • Page 1 1
  • Page 2 2
  • Page 3 3
  • Page 4 4
  • Page 5 5
  • Page 6 6
  • Page 7 7
  • Page 8 8
  • Page 9 9
  • Page 10 10
  • Page 11 11
  • Page 12 12
  • Page 13 13
  • Page 14 14
  • Page 15 15
  • Page 16 16
  • Page 17 17
  • Page 18 18
  • Page 19 19
  • Page 20 20
  • Page 21 21
  • Page 22 22
  • Page 23 23
  • Page 24 24
  • Page 25 25
  • Page 26 26
  • Page 27 27

Motorola MBP26/4 User manual

Category
Baby video monitors
Type
User manual
This manual is also suitable for

Ask a question and I''ll find the answer in the document

Finding information in a document is now easier with AI