2. Install the Urinal
CAUTION: Risk of personal injury. Handle with care.
Vitreous china can break or chip if the product is handled
carelessly.
IMPORTANT! Do not overtighten the bolts.
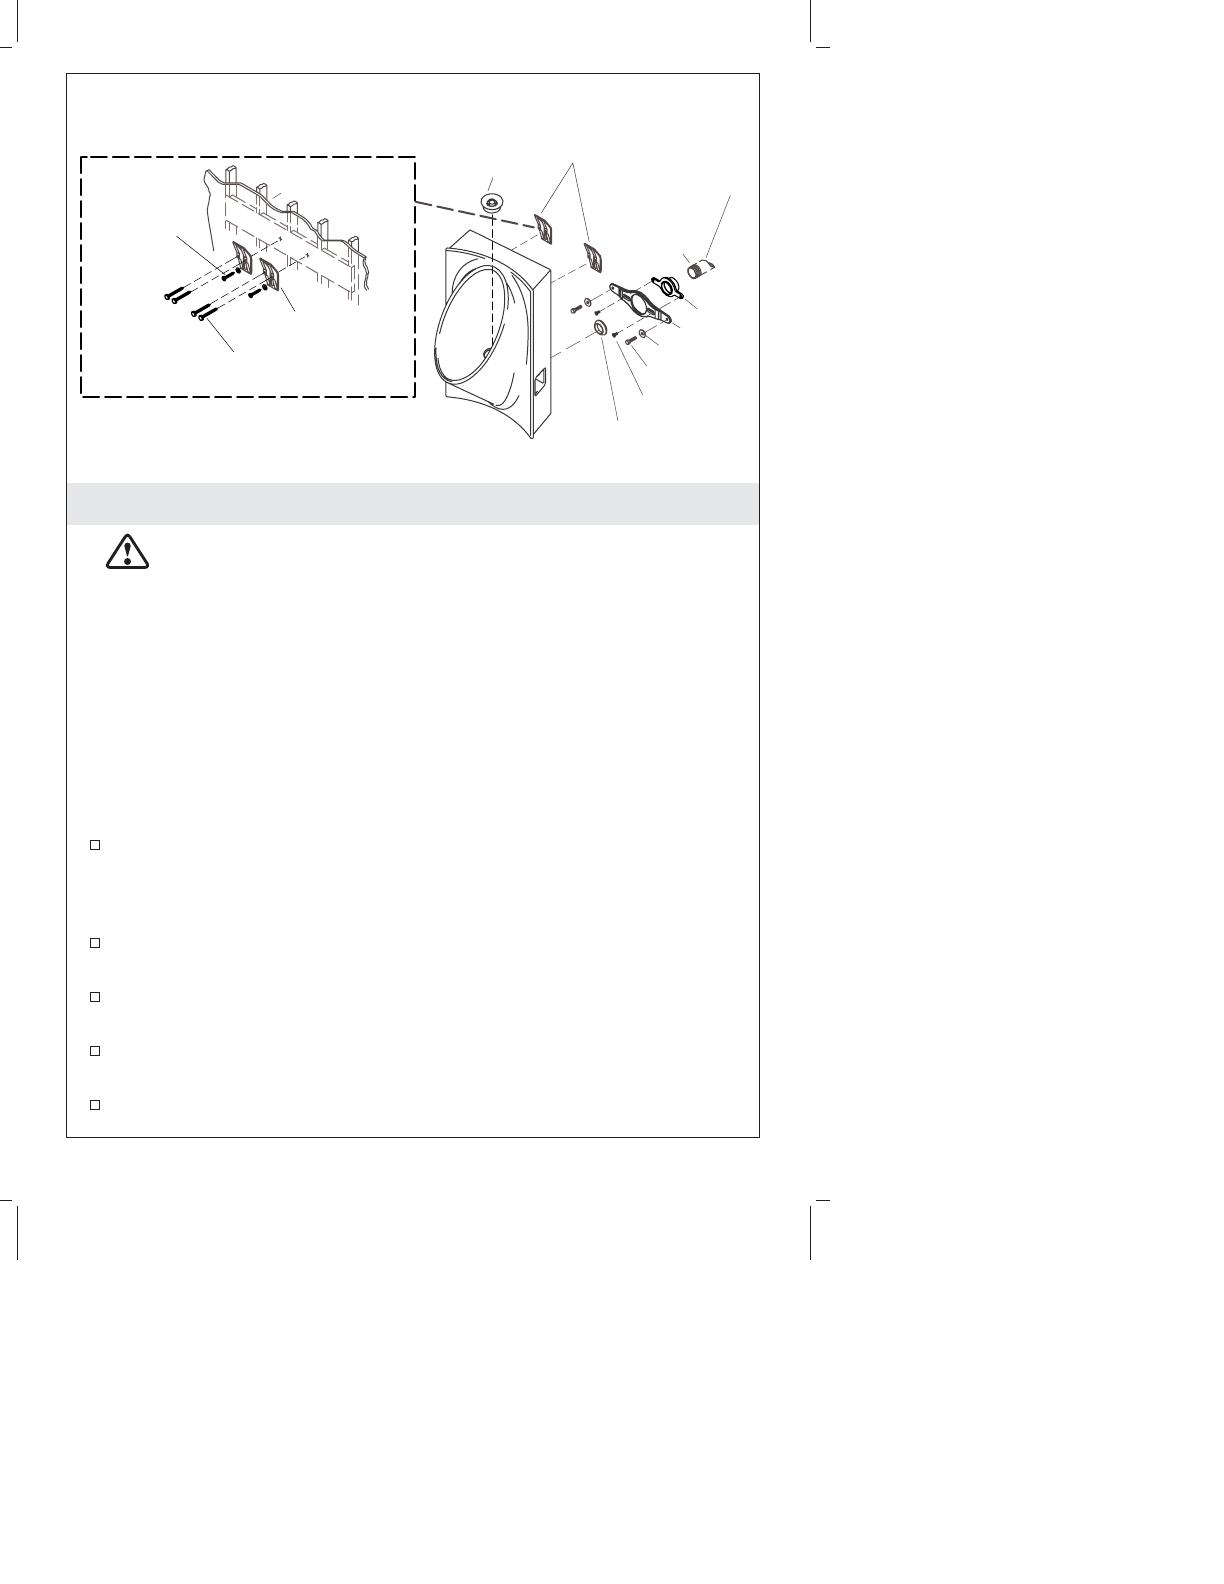
For Retrofit Installations
NOTE: The lip height of the urinal will be 6″ (152 mm) above the
center of the outlet location. If this lip height is not acceptable,
relocate the outlet to achieve an acceptable lip height. The existing
collar may be used with the bracket.
For All Installations
Reference the installation template and position each wall hanger
at the vertical dimension above the outlet hole shown on the
template. To allow for vertical adjustment, place initial screws
through the center of the slots on the wall hangers.
Apply thread sealant tape to the threads on the waste pipe, then
install the collar to the waste pipe.
Center the bracket on top of the collar. Secure two screws through
the slots on the bracket and into the threaded holes on the collar.
With the beveled surface of the gasket facing away from the
collar, seat the gasket firmly against the collar.
Carefully position the urinal on the wall hangers.
Wall
Wall Hangers
Lag Bolts
2" Drywall
Screws
Strainer
Collar
Bracket
Washer
Bolt
Screw
Installed Wall
Hangers
Apply
sealant
tape.
Waste Pipe
Gasket
1048745-2-F 4 Kohler Co.


