15
Loading the Dishwasher
Before placing the dishes in the dishwasher, remove the larger food scraps to prevent the lter from
becoming clogged.If the pots and pans have baked-on food that is extremely hard to remove,we
recommend they are soaked before washing. This will eliminate the need for extra wash cycles.
Pull out the rack to load the dishwasher.
The lower rack
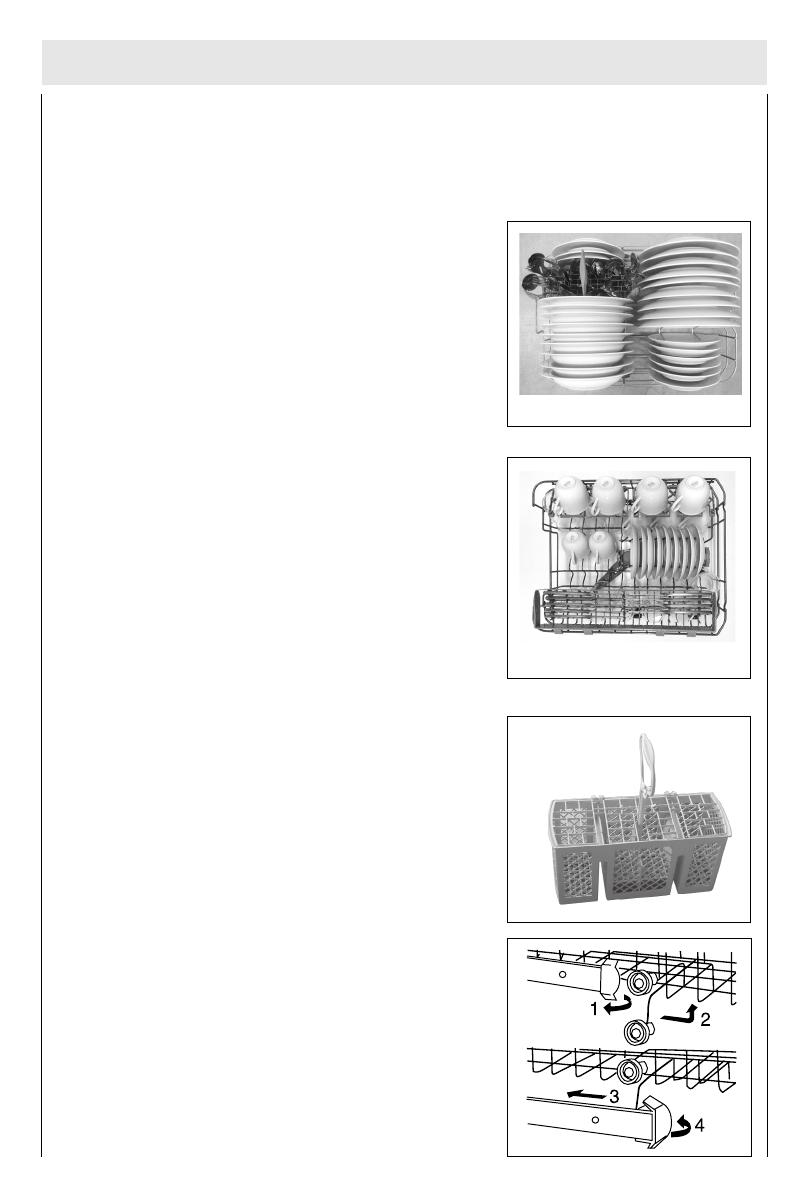
The upper rack
Information on comparability tests imple-
mented in compliance with AS/NZS 2007
Place the most difcult to clean items on the bottom rack: pots,
pans,lids, serving dishes and bowls.
It is preferable to place serving dishes and lids on the sides of the
racksin order to avoid blocking the rotation of the top spray arm.
- Pots, serving bowls, etc. must always be placed face down.
- Deep pots should be tilted to allow the water to ow out.
The upper rack is designed to hold more delicate and lighter
dishes,such as glasses, cups and saucers, plates and small
bowls.
- Stand glass or cups so they do not fall down during wash cycle.
To adjust the height of the upper rack, rotate the caps located
on the end of the rack guide rails to the side, remove the rack-
completely and ret using the alternate set of wheels (see g.G).
Adjust the upper basket to the higher level to allow more
height inthe bottom basket for large items.
Appliance loaded in accordance with standard specications.
Example of loaded dishwasher: See g. E1 and E2.
Capacity: 9 place settings
Comparability programme: NORMAL
Rinse-aid setting: 5
Detergent: 22+4.25g
Height-adjustable top-basket must be inserted in the
uppermost position.If the comparability tests do not comply
fully with AS/NZS 2007, e.g.,degree of soiling, type of
dishesand cutlery, etc., contact the appliance manufacturer
before starting the test.
Lower Rack
Upper Rack
Load for 9 Standard Settings
Fig.F
Fig.E1
Fig.E2
en
g.G


