Page is loading ...

1
1467681-W2-A
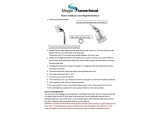
Mira Minimal Single & Dual Outlet
Thermostatic Mixing Valve
Installation and User Guide
For SPARES,
ADVICE or REPAIRS
please call us free
on 0800 001 4040
(UK only)
These instructions must be left with the user
Affix Sticker Here
Model Name:
Product Code:
Date of Manufacture:
(Please keep these details safe as you will need them when registering your
product guarantee. Your guarantee information is included in this guide.)

2
1467681-W2-A
Thank you for choosing a Mira shower. To enjoy the full potential of your new shower,
please take time to read this guide thoroughly, and keep it handy for future reference.
Products manufactured by Kohler Mira Ltd are designed to be safe, provided that
they are installed, used and maintained in good working order, in accordance with
our instructions and recommendations.
Follow all warnings, cautions and instructions contained in this guide, and on, or
inside the shower. This guide is also available in digital format from our website or by
contacting customer services.
Mira Mixer Showers covered by this guide:
Introduction
Product Code Model Number Colour
B10A Mira Minimal Single
Chrome
B10B Mira Minimal Dual
For domestic installations, Mira Showers guarantee the product against any defect
in materials or workmanship for a period of ve years from the date of purchase
(shower ttings for one year).
For non-domestic installations, Mira Showers guarantee the product against any
defect in materials or workmanship for a period of one year from the date of purchase.
Failure to follow the instructions provided with the shower will invalidate the
guarantee.
For Terms and Conditions refer to the 'Activating Your Free Guarantee and Customer
Service' pages.
Guarantee
Design Registration: GB 007749684-0001-0018
Design Registration and Patents
Domestic
Heavy Commercial
Light Commercial
Healthcare
Recommended Usage

3
1467681-W2-A
Pack Contents
Mira Minimal EV & ERD Thermostatic Mixing Valve
For SPARES,
ADVICE or REPAIRS
please call us free
on 0800 001 4040
(UK only)
These instructions must be left with the user
Affix Sticker Here
Model Name:
Product Code:
Date of Manufacture:
Installation and User Guide
(Please keep these details safe as you will need them when registering your
product guarantee. Your guarantee information is included in this guide.)
1428947-W2-A
X1 q
X1 q X1 q
X1 q
Minimal Single Outlet
X1 q
X1 q
X1 q
X1 q
X1 q
X2 q
X1 q
X1 q
Component Pack
X2 q
X2 q X2 q X2 q X4 q X1 q
Installation AidOutlet Pack
X1 q
X1 q
X2 q
X2 q
X2 q
X2 q
X2 q

4
1467681-W2-A
Minimal Dual Outlet
Mira Minimal EV & ERD Thermostatic Mixing Valve
For SPARES,
ADVICE or REPAIRS
please call us free
on 0800 001 4040
(UK only)
These instructions must be left with the user
Affix Sticker Here
Model Name:
Product Code:
Date of Manufacture:
Installation and User Guide
(Please keep these details safe as you will need them when registering your
product guarantee. Your guarantee information is included in this guide.)
1428947-W2-A
X1 q
X1 q
X1 q X1 qX1 q
X1 q
X1 q
X1 q
X1 q
X1 qX2 qX2 q
X1 q
X1 q
X1 q
X1 q
X1 q
Installation Aid
X2 q
X1 q
Outlet Pack
X1 q
X1 q
Component Pack
X2 q
X2 q X2 q X2 q X4 q X1 q

5
1467681-W2-A
PLEASE OBSERVE THE FOLLOWING TO REDUCE THE RISK
OF INJURY:
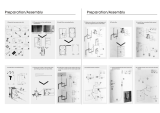
Installing the Shower
1. Installation of the shower must be carried out in accordance with
these instructions by qualied, competent personnel. Read all
instructions before installing the shower.
2. DO NOT install the shower where it may be exposed to freezing
conditions. Ensure that any pipework that could become frozen
is properly insulated.
3. DO NOT perform any unspecied modications to the shower
or its accessories. When servicing only use genuine Kohler Mira
replacement parts.
4. If the shower is dismantled during installation or servicing then,
upon completion, an inspection must be made to ensure all
connections are tight and that there are no leaks.
Using the Shower
5. The shower must be operated and maintained in accordance with
the requirements of this guide. Make sure you fully understand
how to operate the shower before use, read all instructions and
retain this guide for future reference.
Safety Information
WARNING ! This shower can deliver scalding temperatures. For
continued safe operation, follow all instructions, warnings and
cautions contained in this guide and on or inside the shower.
Periodic maintenance may be required to keep the product in
good working order.
The function of a thermostatic mixing valve is to deliver water
consistently at a safe temperature. In keeping with every other
mechanism, it cannot be considered as functionally infallible and
as such, cannot totally replace a supervisor’s vigilance where that
is necessary. Provided it is installed, commissioned, operated
and maintained within manufacturers recommendations, the
risk of failure, if not eliminated, is reduced to the minimum
achievable.

6
1467681-W2-A
6. DO NOT switch the shower on if there is a possibility that the water
in the shower unit or ttings is frozen.
7. The shower can be used by children aged from 8 years and above
and persons with reduced physical, sensory or mental capabilities
or lack of experience and knowledge if they have been given
supervision or instruction concerning use of the appliance in a safe
way and understand the hazards involved. Children must not be
allowed to play with the shower.
8. Anyone who may have diculty understanding or operating the
controls of any shower should be attended whilst showering.
Particular consideration should be given to the young, the elderly,
the inrm or anyone inexperienced in the correct operation of the
controls.
9. DO NOT allow children to clean or perform any user maintenance
to the shower unit without supervision.
10. Always check the water temperature is safe before entering the
shower.
11. DO NOT adjust the temperature control rapidly while using the
shower.
12. Use caution when altering the water temperature while in use,
always check the temperature before continuing to shower.
13. DO NOT switch the shower o and back on while standing in the
water ow.
14. DO NOT t any form of outlet ow control. Only Mira recommended
outlet ttings should be used.
15. The showerhead must be descaled regularly. Any blockage of the
showerhead or hose may aect showering performance.
16. The water supplies to this product must be isolated if the product is
not to be used for a long period of time. If the product or pipework
is at risk of freezing during this period they should also be drained
of water.
17. When this product has reached the end of its serviceable life, it
should be disposed of in a safe manner, in accordance with current
local authority recycling, or waste disposal policy.

7
1467681-W2-A
• Important! This product is not suitable to use with any other pipe sizes.
• Warning! This product does not allow for reversed inlets and will deliver
dangerously unstable temperatures if tted incorrectly.
Thermostatic Shut-down
• For safety and comfort the thermostat will shut o the mixing valve within
2 Seconds if either supply fails (achieved only if the blend temperature has
a minimum dierential of 12°C from either supply temperature).
Specications
Pressures
Maximum Static Pressure 1000 kPa (10 bar)
Maximum Maintained Pressure 500 kPa (5 bar)
Minimum Maintained Pressure
(Gas Water Heater)
100 kPa (1 bar)
(for optimum performance supplies should be
nominally equal)
Minimum Maintained Pressure
(Gravity System)
10 kPa (0.1 bar)
(0.1 bar = 1 Metre head from cold tank base to shower
handset outlet)
Temperatures
Close temperature control 20°C - 50°C
Optimum Thermostatic Control
Range
35°C to 45°C
(achieved with supplies of 15°C cold, 65°C hot and
nominally equal pressures)
Recommended Hot Supply 60°C to 65°C
Minimum Hot Water Supply Tem-
perature
55°C
(Note: The mixing valve can operate at temperatures
up to 85°C for short periods without damage.
However for safety reasons it is recommended that
the maximum hot water temperature is limited to
65°C).
Minimum Recommended
Dierential between Hot Supply
and Outlet Temperature
12°C at desired ow rates
Cold Water Range 1 - 25°C
Plumbing Connections
Hot: Left 15mm copper pipework
Cold: Right 15mm copper pipework
Outlet: Single Outlet = 1/2” BSP Male to exible house
Dual Outlet = 1/2” BSP Male to exible hose and
push t to Riser bar.

8
1467681-W2-A
Warning! This product does not allow for reversed inlets and will deliver
unstable temperatures if tted incorrectly.
Installation
General
1. Installation of the shower must be carried out in accordance with these
instructions by qualied, competent personnel.
2. The plumbing installation must comply with all national or local water regulations
and all relevant building regulations, or any particular regulation or practice
specied by the local water supply company.
3. Make sure all pressures and temperatures comply with the requirements of the
shower. See ‘Specications’.
4. Full bore/non restrictive servicing valves must be tted in a readily accessible
position adjacent to the shower to facilitate maintenance of the shower.
DO NOT use a valve with a loose washer plate (jumper) as this can lead to a
build up of static pressure.
5. DO NOT apply excessive force to plumbing connections; always provide
mechanical support when making plumbing connections. Any soldered joints
should be made before connecting the shower.
6. Pipework dead-legs should be kept to a minimum.
7. DO NOT install the shower unit in a position where access for maintenance is
restricted.
8. The shower must be tted to a waterproof, at and even wall surface. The
two screws and wall plugs supplied are suitable for most solid wall installations.
Alternative xing screws for panel structures are not supplied. Use both xing
points to secure the shower, be sure to use xings appropriate for the chosen
wall structure.
9. When pipework enters the product from the rear through a hole in the wall,
provision must be made to prevent water ingress back into the wall structure.
10. Position the shower unit where the controls are at a convenient height for the
user. Position the showerhead so that the water sprays in line with the bath or
across the opening of a shower cubicle. The installation must not cause the
shower hose to be kinked during normal use.
Suitable Plumbing Installations
The Thermostatic Mixer can be installed with all systems with balanced pressures.
Mixed gravity and mains supplies are not recommended.

9
1467681-W2-A
11. The water supplies to this product should be isolated if the product is not to be
used for a long period of time. If the product or pipework is at risk of freezing
during this period they should also be drained of water.
12. The position of the shower and shower ttings must provide a minimum air
gap of 25 mm between the showerhead and the spill over level of any bath,
shower tray or basin. There must be a minimum distance of 30 mm between
the showerhead and the spill over lever of any toilet, bidet or other appliance
with a Fluid Category 5 backow risk.
Zone of
Backflow
Risk
30 mm
Minimum
Toilet or Bidet
FC5
Hand Basin
FC3
Bath or Shower
Tray FC3
Shower
Unit
25 mm
Minimum
25 mm Minimum
Note : There will be occasions when the hose retaining ring will not provide
a suitable solution for Fluid Category 3 installations. In these instances an
outlet double checkvalve must be tted, this will increase the required
supply pressure typically by 10 kPa (0.1 bar). Double checkvalves tted in
the inlet supply to the appliance cause a pressure build up, which aects
the maximum static inlet pressure for the appliance and must not be tted.
For Fluid Category 5, double checkvalves are not suitable.

10
1467681-W2-A
Note: This product DOES NOT allow for reversed inlets and will deliver
dangerously unstable temperatures if tted incorrectly. If the tile cutting
area exceeds the boundaries, the wall plate may not conceal drilled holes.
Critical! The installation area must be carefully prepared and all tiles
cut or drilled accurately for a successful installation.
The shower ttings should be positioned at a convenient height for all the family.
Position the ttings to spray across rather then towards the opening of the cubicle
and also away from the shower control. Avoid layouts where the shower hose will
be sharply kinked. This may reduce the life of the hose.
Allow a minimum of 50 mm
from the ceiling in order to t
the Riser Bar
Minimal Dual
Shower Positioning
Note: If installing in a restricted height area a short bar can be ordered as
a spare part.

11
1467681-W2-A
Installation
General
Make sure
that the
pipework is
level
Solid Wall Solid Wall
Pipe work installation viewed from above.
50 mm
50 mm
Pipe Centres
(50 mm)
Pipework must be at 50 mm centres, level
and perpendicular to the finished wall
surface.
It is recommended that the pipework is
secure but not rigidly xed at this stage,
in case of further adjustment when the
retaining wall plate is tted.
Only use Ø15 mm copper pipe for
connection to the valve.
DO NOT use any other pipe sizes.
Ensure you have enough pipework through
the wall to allow it to be cut to the specied
length when wall is nished (A minimum of
150 mm is recommended).
The drill holes for the central tting of the
wall plate screws must be into brick, wooden
noggin or similar sound wall structure. We
recommend the sound wall structure should
extend to an area approximately 50 mm
around the pipe centres.
a
b
c
e
g
f
h
d
a
b
c
e
g
f
h
d
COLD
HOT

12
1467681-W2-A
For Stud Partition Walls
For stud partition wall installations, make
sure that a wooden noggin is in place
directly behind the nal valve position.
The supplied First Fix Pipe Guide MUST
be used to mark the pipework centres,
check that the pipe guide is level and mark
the pipework centres.
DO NOT drill through the pipe guide.
Mark these two Holes
First Fix
Pipe Guide
Make sure the holes drilled through
the noggin are square and level to the
mounting surface.
TOP VIEW
50 mm
SIDE VIEW
Min: 19 mm Dia.
Max: 25 mm Dia.
a
b
c
e
g
f
h
d
a
b
c
e
g
f
h
d

13
1467681-W2-A
LEVEL
LEVEL
* Pipework that is not level will make nal assembly of
the valve very dicult
Plumb supplies using 15 mm copper
pipework, make sure a minimum
150 mm of pipe extends from the front
surface of the noggin (to ensure the
required minimum length to t the product).
We recommend the use of a pipe clip to
secure the pipework within the wall, this
MUST be placed a minimum of 150 mm
from the elbow joint.
Once the pipework is in place, slide the
First Fix Pipe Guide over the protruding
pipework.
Mark and drill the pipe guide xing holes
then attach directly to the noggin. This can
remain within the wall.
150 mm
150 mm
Pipe Clip
a
b
c
e
g
f
h
d
a
b
c
e
g
f
h
d
Important! At this stage re-check the
pipework is square and level*.
Pipe work installation viewed from above.
COLD
HOT

14
1467681-W2-A
1
5
m
m
1
5
m
m
Hacksaw Pipe Slice Service &
Installation Aid
Apply silicone sealant according to the
manufacturers instructions to the pipework
where it comes through the wall.
Ensure silicone is applied carefully to avoid
any further movement of pipes.
Allow the silicone sealant to cure for few
hours before further installation.
Installation of Mixing Valve
19mm +/- 2mm
from finished
wall surface
Mark pipework length
through here.
Plasterboard
Tiles
Service & Installation Aid
Place the service & installation aid over
each pipe and using the cut out, mark the
pipe for optimal length and cut pipe using
a pipe slice.
DO NOT use a hacksaw as the sharp
edges may damage the seals in the mixer
valve.
Note: De-burr the pipework if
necessary.
Note: Ensure installation aid is
against the nished wall surface.

15
1467681-W2-A
Fit the wall plate over the pipes ensuring
they do not push back into the wall.
Wall Plate
Drill the two 8mm holes and insert the wall
plugs.
Using the xing screws provided, secure
the wall plate to the wall. The use of
incorrect screws may cause leaking when
the mixer valve tted.
Note: Identication on the wall plate
shows the orientation that the plate
must be xed to the wall.
Note: Use the provided screws only.
Caution! DO NOT drill into cables or
pipes in the wall.
DO NOT drill through the wall plate
on the wall.
Note: There are three positions to
screw the plate to the wall, only
two should be used. The most ideal
installation is to use the top and
bottom holes but depending on the
installation the centre hole can be
used.
Pick and mark two of the most suitable
holes and remove the wall plate from the
pipes.
Spirit Level
Pipe
8 mm

16
1467681-W2-A
12.5 +/- 2 mm
Flush the water supplies thoroughly
before connecting the valve.
In retrofit installations (where you are
replacing an old AGILE valve), If lters
are present in the pipework, then please
remove them.
Place the retaining rings and nuts over the
pipes in the orientation shown and tighten
in place using the installation aid.
Note: Make sure the pipes are
protruding through the wall plate to
the correct length (12.5 +/- 2 mm).
Note: Only hand tighten the nuts
using the installation aid.
Retaining
Ring
Retaining
Nut
Important! The retaining ring and
nut MUST be fitted to ensure the
pipework is secure and that the
product doesn't leak.
Installation Aid

17
1467681-W2-A
Mixing Valve
Note: The Valve is colour coded in the
area shown below. RED for HOT and
BLUE for COLD. These must match
the H and the C that are marked on
the wall plate.
Note: Make sure the arrows on the
valve body are pointing in upward
direction.
Check pipes are de-burred correctly.
Install the valve on the wall plate using the
four bolts (supplied).
If installing the single showerhead product, continue steps 9 to 12.
If installing the dual showerhead product, continue to step 13.
Important! Check cleanliness of inlet
seals.
Inlet Seal
Inlet Seal
Colour Code Identication -
Red (Hot)
Colour Code Identication -
Blue (Cold)
Arrow (Pointing Upward)
Apply a small amount of grease from the
pack supplied to the two inlet seals. You
will need the remaining grease at later
stage.

18
1467681-W2-A
Shroud
Place the shroud over the valve with the outlet hole facing down and ensuring the top
cutout on the inside of the shroud matches up with clip on the top of the wall plate.
Push the shroud onto the backplate, and clip into place.
Top Clip
Wall Plate
Spring Clip
Fits into
Top Clip
Fits into Spring Clip
Internal View of Shroud
Internal View of Shroud
Single Outlet Fittings
Shroud
Mixing Valve
Align the splines in order to t the shroud.
Front View of Shroud
installed on Valve

19
1467681-W2-A
Internal View of Handle
Push fit the handle ensuring that the
override button is set at 12 O’clock position
and the lug on the inside of the handle
matches up with the slot available on the
valve.
Note: Position of "TOP" area on the
valve may not be facing upwards and
needs to be manually rotated into the
position shown.
Front View of Valve
Lug ts into Slot on the
Valve (Highlighted for
reference)
Handle
Override Button
Place the seal onto the outlet connector.
Fit the outlet connector with the seal
into the bottom of the valve using the
installation aid provided.
Note: DO NOT overtighten as this can
lead to damage to outlet connector.
Outlet
Connector
Seal
Installation
Aid

20
1467681-W2-A
Installation Centre Distance is 520 mm for 550 mm Slide Bar
Mounting Bracket (x2)
Wall Plugs (x2)
Wall Screws (x2)
Locking Peg
Mark the wall xing positions and drill two holes to suit the wall xings.
Installation of Single Outlet Shower Fitting
Caution! Do not drill into cables or pipes in the wall.
Note: Installation xing centres are 520 mm for the 550 mm slide bar.
Install the wall plugs and the mounting brackets and secure with the wall screws.
Note: Check for vertical alignment before tightening. The mounting brackets
are slotted to aid this alignment. Then fully tighten.
Install the clamp bracket, the hose retaining ring (smallest hole) and the slide bar
supports to the slide bar.
Note: Ensure locking peg orientated correctly.
Note: Orientate hole in line with locking peg on mounting bracket.
a
b
c
e
g
f
h
d
Locking peg on
underside
/