3
Virtual Instruments
Follow the instructions on the software download card for installing the included virtual instrument plugins.
After installation, most DAWs will not load virtual instrument plugins automatically. In order to access the
virtual instrument plugins with Pro Tools | First M-Audio Edition, you will need to choose the plugin folder for
the software to scan:
Pro Tools | First M-Audio Edition AAX plugin folders:
Windows (32-bit): C:\Program Files (x86)\Common Files\Avid\Audio\Plug-Ins
Windows (64-bit): C:\Program Files\Common Files\Avid\Audio\Plug-Ins
macOS: Macintosh HD/Library/Application Support/Avid/Audio/Plug-Ins
Once you have finished the installation, you will need to configure your music software for use with Keystation
Mini 32 MK3. Connect Keystation Mini 32 MK3 to your computer and then open your software. In your software’s
Preferences, Options, or Device Setup menu, select Keystation Mini 32 MK3. (In Windows XP, Keystation
Mini 32 MK3 will appear in your software under the name USB Audio Device.)
Setting Up Keystation Mini 32 MK3 with Pro Tools | First M-Audio Edition:
1. Connect Keystation Mini 32 MK3 to an available USB port on your computer using the supplied USB
cable, and launch Pro Tools | First M-Audio Edition.
2. Open or Create a Project.
3. Select the Setup pulldown menu and open MIDI Input Devices. Enable MIDI Input from the Keystation
Mini 32 MK3 by clicking the box next to the Keystation Mini 32 MK3.
4. Select the Setup pulldown menu and open Playback Engine. Choose your audio device from the
Playback Engine pulldown menu.
5. To create a new Instrument track, select the Track pulldown menu and select New.
6. In the New pulldown menu, select Stereo, and then Instrument Track.
7. In the newly created track, add an Insert to your track by clicking in your track's Inserts A-E and selecting
Multichannel Plugin > Instrument and select the instrument you would like to use, such as Xpand!2
(Stereo). The plugin can now be triggered with Keystation Mini 32 MK3.
Note: Windows users will need either an external soundcard (such as the M-Track 2X2) or a low-latency
ASIO driver.
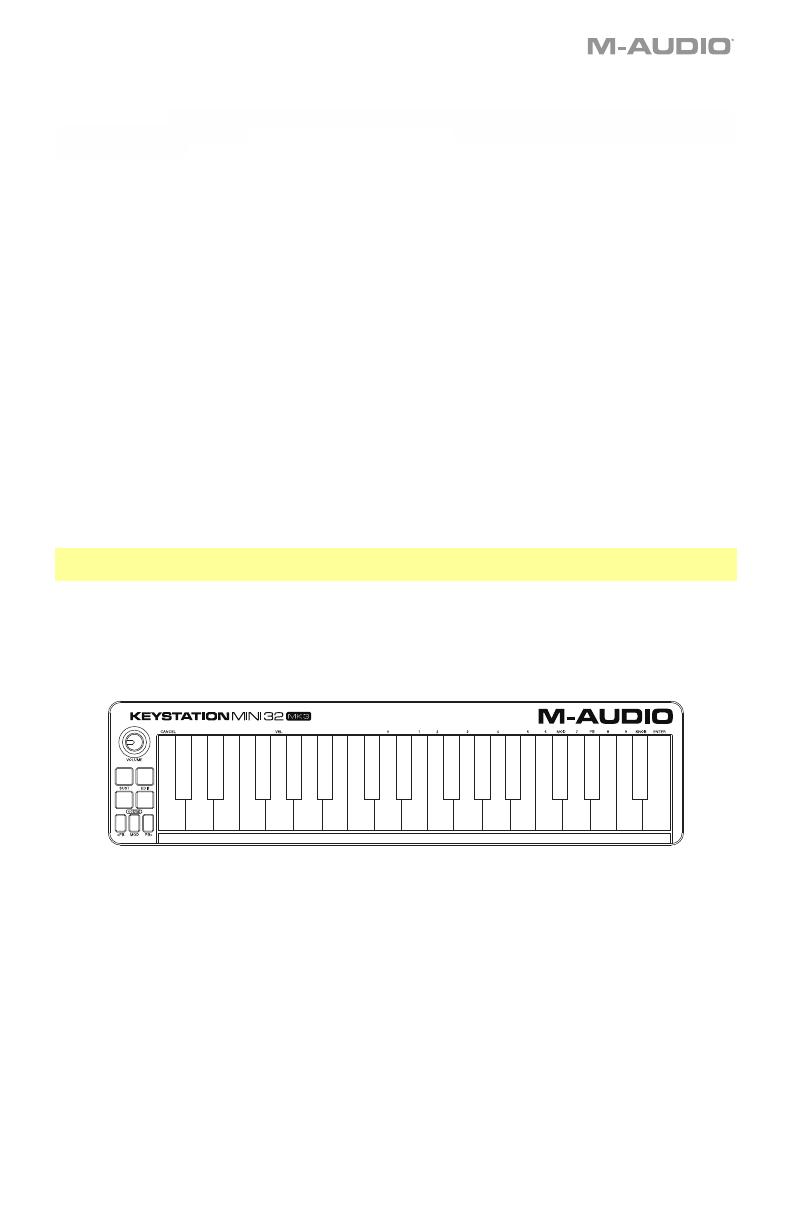
Keybed
The Keystation Mini 32 MK3 keybed has 2 1/2 playable octaves. The range of the keyboard is approximately
in the middle of an 88 note keyboard. Using the Octave “+” or “-” buttons, you can access the full 88
keyboard range of a large piano keyboard.
Octave Buttons (Octave)
The assignable Octave buttons are used to shift the keyboard up or down in one-octave increments (12
semitones at a time). This extends the range of the keyboard up to four Octaves in either direction, which
lets you play notes that lie outside of the 32 keys.
In their default state, such as when you first switch on your Keystation keyboard, the buttons are backlit in
red. However, when you press either of them the color of that button turns green indicating that the octave
change is active.
If you press the octave “+” button once, the button will turn green indicating the keyboard’s octave is now
shifted up. If you press the octave “+” key again, you will shift one more octave up, and so on.
To shift the octave down, press the octave “-” button and notice that the button turns green. If only the
octave “-” key is lit green, the octave is shifted down and, if only the octave “+” key is lit in green, the
octave is shifted up.
To return the octave shift to 0, press both the octave “+” and “-” buttons together. Both LEDs will return to
their normal red color at half brightness, indicating that the octave shift has returned to 0.
You can assign other functions to these buttons in Edit Mode.
Cancel
MIDI Panic
Data: Octave
Data: Transpose
Data: Program
Data: Bank LSB
Data: Bank MSB
Data: Channel
Data: Tuning
Program
Bank LSB
Bank MSB
Modulation Assign
Knob Assign
Pitch Bend Assign
Pitch Bend Rate
Modulation Rate
Velocity
Sustain Mode
Default
0
1
2
3
4
5
6
7
8
9
Enter


