Page is loading ...

© 2011 Phoenix Gold • www.phoenixgold.com
Ti Series Tweeter
Instruction Manual - TiCS1T
LIMITED WARRANTY:
Phoenix Gold warrants this product to be free of defects in materials and workmanship for a period of one (1) year from the original date of purchase. This warranty is not transferable and applies only to the
original purchaser from an authorized Phoenix Gold dealer in the United States of America only. Should service be necessary under this warranty for any reason due to manufacturing defect or malfunction,
Phoenix Gold will (at its discretion), repair or replace the defective product with new or remanufactured product at no charge. Damage caused by the following is not covered under warranty: accident,
misuse, abuse, product modification or neglect, failure to follow installation instructions, unauthorized repair attempts, misrepresentations by the seller. This warranty does not cover incidental or
consequential damages and does not cover the cost of removing or reinstalling the unit(s). Cosmetic damage due to accident or normal wear and tear is not covered under warranty.
INTERNATIONAL WARRANTIES:
Products purchased outside the United States of America are covered only by that country’s Authorized Phoenix Gold reseller and not by Phoenix Gold. Consumers needing service or warranty information
for these products must contact that country’s reseller for information.
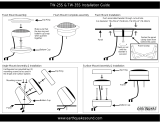
FLUSH MOUNT
Each Ti Series component set comes with a flush mount and surface mount
installation kit. The Flush mount requires 3⁄4” depth and a 2-1/16” hole in the
mounting surface. (figure 5)
SURFACE MOUNT
Screws are provided for use when cutting a hole in the door panel or
other mounting surface is not an option. Make sure that the surface
mount location is free of passenger movement that might damage the
tweeter. (figure 6)
- 75w RMS / 150w PEAK Power Handling
- Pivoting Silk Dome Tweeter
- Inline 6dB High Pass Crossover Filter
- Neodymium Motor Structure
- Ferrofluid Cooling Technology
- Surface and Flush Mounting Hardware Included
Important Note: Each tweeter features an inline (capacitor) high pass crossover filter, using the tweeter without this will
damage the tweeter. Each tweeter comes pre-assembled in the flush mount housing, to install the surface mount housing you
will need to temporarily remove the crossover (capacitor). Do not remove this crossover (capacitor) permanently. The one
exception is if the Ti Series Component crossover is being used instead. For example, if a damaged tweeter from the Ti65CS
component system is being replaced then the inline crossover should be removed permanently.
TWEETER ASSEMBLY - FLUSH MOUNT TWEETER ASSEMBLY - SURFACE MOUNT
FLUSH MOUNT RETAINING RING
Slide the retainer ring over the tweeter
housing onto the inner cup. Rotate the
retainer ring to lock all three pieces into
place.
SURFACE MOUNT RETAINING RING
Slide the retainer ring over the tweeter
housing onto the outer cup. Rotate the
retainer ring to lock all three pieces
into place.
TWEETER HOUSING
TWEETER HOUSING
INNER CUP
Once you have the inner portion assembled
slide it into the outer cup and twist to lock
into place.
OUTER CUP
OUTER HOUSING
SPRING RETAINER
The spring retainer is what holds the
tweeter in place. Its ngers clamp against
the inside of the wall you are mounting the
tweeter to.
/


