Page is loading ...

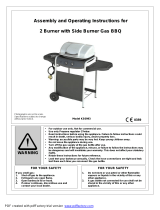
GRAND GOURMET PORTABLE LP GAS GRILL
MODEL: BG0651 8
OWNER'S MANUAL
ASSEMBLY AND OPERATING INSTRUCTIONS
SAVE THIS
MANUAL FOR FUTURE REFERENCE
CONSUMER/USER
READ
ALL
THESE
INSTRUCTIONS
AND
SAVE
THEM
IN
A SAFE PLACE
FOR
FUTURE REFERENCE
DANGER
If
you smell gas:
1.
Shut
off
gas
to
the
appliance.
2. Extinguish
any
open flame.
3.
Open lid
4.
If
odor
continues, keep
away
from
the
appliance and
immediately
call
your
gas
supplier
or
fire
department.
WARNING
1.
Do
not
store
or
use gasoline
or
other
flammable
liquids
or
vapors in
the
vicinity
of
this
or
any
other
appliance.
2.
A;l
LP
cylinder
not
connected
for
use
shall
not
be
stored
in
the
vicinity
of
t.his
or
any
other
appliance.
For
customer service please
calll-866-475-5180

Table
of
Contents
Page
1.
Exploded drawing
3
2.
Hardware list & Illustrated parts list 4
3.
Assembly instructions
5-7
4.
Installation
8-9
4.1
Choose a safe location
5.
User Guide 9-10
5.1
Special Instructions for
the
use of Regulator
and
LP
(Propane)
Cylinders
6.
Assembly Instructions
10-11
6.1
Getting Started
6.2 Installing the gas supply cylinder
7.
LeakTest
11-12
8.
Flash back (fire
in
burner tube)
12
9.
Operating your barbecue
12
9.1
Lighting instruction
9.2 How
to
shut off the barbecue
10.
Match Lighting
13
11.
Using the Barbecue 13-14
11.1
Prep a new barbecue before using it for the first time
11.2 Burner flame
11.3
In
case of grease fire follow these steps
11.4 Storing a
LP
barbecue
12.
Care and maintenance
14-1.5
12.1
Care
12.2 Cleaning the venturi tube
12.3 Annual cleaning and maintenance
13. Warranty
15
2

I
i
I
\
4
No.
I
2
3
4
5
6
7
8
9
10
II
1:!
~
14
15
ORG
No.
QTY'
Wheel
Bolt
2
Wheel
Cover
2
Wheel
-
2
Short
Leg
Assembly
I
Leg
Bolt
2
Leg
Inset
6
Grease
Cup
1
Leg
Left
Support
2
Grill
Body
Assembly
1
Lower
Gemel
2
Burner Support
2
Punch Cooking
Grid
Assembly
2
Hood
Bolt
2
Upper
Gemel
2
Hood
1
15
No.
DRG
No.
QTY
16
Agraffe Pothook
I
17
Lid
Handle
I
18
Electrode
I
19
Burner
Assembly
I
20
Grill
Body
Handle
I
21
Knob
I
22
Control Panel Assembly
1
23
Tool
Hook
3
24
Valve
And
Regulator
Assembly
I
25
Leg
Right
Support
Assembly
1
26
Leg
Fix
Clip
1
27
Agraffe
Assembly
I
28
Long
Leg
Assembly
I
29
Leg
Boll
2
30
Leg
Spacer
2
3

Hardware
List
A.
2PCS
B.
2PCS
C.
4PCS
D.
2PCS
w
([j
@
a
Bolt-
M6X!6
And
Fiber
Washer
Lock Nut
M6
Flat
Washer<!>
8
Lock
Washer
<!>
8
Illustrated
Parts
List
L
LONG
LEG
ASSEMBLY
2.
SHORT
LEG
ASSEl.ffiLY
3.
LEG
SPACER
(2PCS) 4.
LEG
BOLT
(2PCS)
-~
~
Q
48
OJ
~
5.JIOOD/BODY
(JpC)
6.
LEG
BOLT
(2PCS)
7.
\\'HEEL {
2PCS)
8.
\\'HEEL
BOLT
(2PCS)
(;
!Jat
8
~
~
J
if
~
51 4
9.
\\'HEEL
COVER
{2PCS) 10.
LID
HANDLE
11.
GREASE
CUP
0
J
/®~
4

Assembly Instructions
Step
1.
Attach long
leg
assembly to short leg assembly using Leg
Bolts #4
(2
pes),
Leg
Spacers
#3
(2
pes) and Flat Washer "C"(2 pes).
i=j
I
2(X
1 )
v
3(X2)
C(X2)
.
u
1
(X
1)
v
4(X
2)
~
rc~~)
u
Step
2.
Attach long leg assembly to grill bottom using Leg Bolts #6 (2
pes) and
M6
Lock Nuts "B"
(2
pes).
When the legs are unfolded, the
safety
latch will automatically slide over the pin
in
the leg to prevent
the
grill from accidentally collapsing. Before folding the legs, lift the
safety
latch to allow the legs to fold. The safety latch bracket can
be
adjusted if it does not fit over the pin correctly.
5

Step
3.
Attach the wheels
(2)
to the short leg assembly using the
Wheel Bolts #8
(2
pes), Flat Washer "C"
(2
pes), Lock Washer
"0"
(2
pes) and then attach wheel covers #9 (2pcs) by pressing them into
the
wheel.
7(X2)
9(X2)
\~
Step
4.
Attach lid handle using M6 x 16 "A"
(2
pes) with fiber washer
between
bolt head and lid.
6

Step 5
..
Install grease cup.
7

4.Installation
If
these
instructions
are
ignored,
there
is
a
possibility
of
a
hazardous
fire
or
explosion
which
could
result
in physical
injury
or
property
damage'
It
is
your
responsibility
to
assemble,
operate
and
maintain
your
gas
barbecue
properly.
4.1
Choose
a
safe
location.
Once you
have
assembled
your
new
barbecue,
find
a
suitable
location
for
use.
1.
This
barbecue is
for
outdoor
cooking
use only. Do
not
operate
in
garages,
breezeways,
sheds
or
any
enclosed area.
Never
operate
the
barbecue in enclosed
areas as
this
could lead to· a carbon
monoxide
build-up
which
could
result
in
injury
or
death.
The
LP
gas
supply
cylinder(s)
to
be used
must
be:
(a)
Constructed
and
marked
in accordance
with
the
Specifications
for
LP-Gas
Cylinders
of
the
U.S
Department
of
Transportation(D.O.T)
or
the
National
Standard
of
Canada,
CAN/CSA-8339,
Cylinders,
Spheres and
Tubes
for
Transportation
of
Dangerous
Goods; and
commission,
as
applicable;
and
(b)
Provided
with
a
listed
overfilling
prevention
device.
(c) Provided
with
a
cylinder
connection device
compatible
with
the
connection
for
outdoor
cooking
appliances.
2.
Installation
must
conform
to
local codes
or,
in
the
absence
of
local codes, use
one
of
the
following:
*
National
Fuel
Gas
Code
ANSI
2.223.1
NFPA
54
*
National
Gas
and
Propane
Installation
Code:
CAN/CGA
6149.1
To check
your
local codes,
contact
your
local
LP
gas
dealer
or
Natural
Gas
Company.
This Barbecue was
not
intended
to
be
connected
to
a
Natural
Gas
supply
line,
or
be installed in
or
on a
recreational
vehicle
and/or
a
boat.
3. Locate
the
barbecue
away
from
any
combustible
and
non-combustible
construction
by
at
least
36
inches
from
back
and 36 inches
from
side. Do
not
locate
the
barbecue
under
a ceiling
or
cover.
Heat
from
the
barbecue
could cause
damage.
A
clogged
tube
can lead a
fired
beneath
the
grill.
Place
the
barbecue
on a level surface.
The
barbecue will
operate
best
if it
is
not
facing
directly
into
the
wind.
Avoid
moving
the
barbecue
while
it
is in use.
4.
The
barbecue
area
must
be
clear
and
free
from
combustible
materials,
spare
LP
cylinders,
gasoline
and
other
flammable
liquids
or
vapors.
Do
not
use
lighter
fluid
or
charcoal
briquettes
in a gas barbecue. Keep
the
ventilation
openings
of
the
cylinder
enclosure
free
and
clear
from
other
debris.
The
flow
of
combustion
and
ventilation
air
is
not
to
be
obstructed.
5. Do
not
leave
the
barbecue
unattended
while
it
is in use. Place
your
barbecue
in a
location
away
from
children and pets. Keep children and
pets
away
from
the
hot
barbecue.
Not
for
use
by
children.
WARNING:
Never
use
Natural
Gas in a
unit
designed
for
Liquid Propane (LP) Gas.
LP
gas is
not
Natural
Gas.
The
conversion
or
attempted
use
of
Natural
Gas in
an
LP
unit
is
dangerous
and
voids
your
wan·anty.

i
l
l
i
j
l
l
'
WARNING:
The
outside
of
the
barbecue body will become
hot
during
use. To avoid
burns;
do
not
touch any
hot
barbecue surface.
If
necessary, use a
protective
glove
when
operating
control
knobs,
tank
shut-off
valve
or
lid handle.
Do
not
lean
over
barbecue
or
place
hands
or
fingers
on
the
hot
parts
of
the
barbecue.
5.User
Guide
5.1
Special
Instructions
for
the
use
of
Regulator
and
LP
(Propane)
Cvlinders
Use
a
16.4
oz
j
465
g
Propane
Cylinder
• The
propane
grill is equipped
with
a
regulator
having a
CGA
No.
600
cylinder
connection
device
which
is
for
connecting
to
a one pound
PROPANE
cylinder
ONLY.
See
Illustration.
• Grill
installation
must
conform
with
local codes,
or
in
the
absence
of
local codes,
to
the
National
Fuel Gas
Code, ANSI Z223.1/NFPA 54, Storage
and Handling
of
Liquefied Petroleum Gases,
ANSI/NFPA 58
or
CSA
6149.1, Natural Gas and
Propane
Installation
Code.
CGA
No.
600
• Use grill
only
with
LP
(propane)
gas. Use grill
only
with
the
regulator/valve
assembly
supplied.
•
Never
use charcoal
briquettes
or
lighter
fluid in a gas grill.
•
Discard used and
empty
fuel
cylinder
in a safe place.
•
Store
spare
fuel canisters in a
well-ventilated
area
away
from
the
grill.
• Do
not
puncture
or
burn fuel canister.
• Do
not
operate
the
grill
if
there
is a gas leak present.
• Do
not
enlarge
orifice
or
burner
ports when cleaning
the
regulator
and burner.
•
If
you
smell
gas,
turn
Temperature Control Knob
to
OFF
to
shut
off
gas
to
the
grill.
Extinguish
any
open
flame
and open Lid.
If
odor
continues,
immediately
call
your
gas
supplier
or
your
fire
department.
• Do
not
store
or
use gasoline
or
other
flammable
vapors and liquids in
the
vicinity
of
this
or
any
other
grill.
•
An
LP
cylinder
not
connected
for
use shall
not
be
stored
in
the
vicinity
of
this
or
any
other
appliance.
• The LP-gas
supply
cylinder
to
be
used
must
be
constructed
and
marked
in
accordance
with
tl1e specifications
for
LP-gas
cylinders
of
the
U.S.
•
If
the
grill
is
not
in use,
the
Temperature Control Knob
must
be
turned
to
OFF
to
shut
off
the
gas cylinder. Storage
of
a
grill
indoors
is
permissible
only
if
the
cylinder
is disconnected and t·emoved
from
the
grill. Cylinders
must
be
stored
outdoors
out
of
the
reach
of
children and
must
not
be
stored
in
a
building,
garage
or
any
other
enclosed area.
• Do
not
store
a spare
LP
gas
cylinder
under
or
near
this
appliance.
If
the
instructions
are
not
followed exactly, a
fire
causing
death
or
serious
injury
may
occur.
9

u
LP
Gas
Cy~~de•
1
P<mnd
The
Fuel
Su11pfy
System
consisting
of
fuel
control
volvo
'Oith
hose
and
regulator
assembly
• The
regulator
may
make a
humming
or
whistling noise during operation. This >'lill
not
affect
safety
or
use
of
grill.
•
Save
the
cylinder
cap and reinstall when
not
in use.
•
Cylinder
supply
system
must
be arranged
for
vapor
withdrawal.
Do
not
block
the
pressure
relief
valve
during
use
or
storage.
• Always remove one pound
cylinder
from
grill when
transporting
and when
not
in
use.
6.Assembly
Instructions
6.1
Getting
Started
• Please
follow
the
assembly steps in
the
order
that
they
are presented on
the
enclosed
drawings
• Assemble
the
barbecue
at
the
location
that
you
intend
to
use
it
• You
may
want
to
place an old
towel
or
cloth
at
the
assembly
site
to
prevent
scratches
to
your
deck
and/or
to
prevent
loss
of
loose parts
• Have a
friend
help.
An
assistant can
make
the
assembly easier, by holding
the
parts
in place while fastening
the
nuts
and bolts
Assembly
1. Unpack Barbecue Parts, inspect carton and barbecue
for
any
visible signs
of
damage.
Any damage noted should
be reported to
your
dealer.
2. Remove and set
aside all
inner
boxes and parts
from
the
master
carton.
3. Remove and set aside
all wrapping
paper
and additional
packaging
from
the
parts.
4. Do
not
destroy
carton
or
packaging
until
your
grill
is
completely
assembled and operating
to
your
6.2
Installing
the
gas
supplv
cvlinder
(The gas
cylinder
is
not
provided
with
this
unit)
A gas
cylinder
complying
with
the
requirements
must
be
obtained
before
the
LP
unit
can
operate.
10

1
I
I
I
I
l
t
l
'i
,,
. !
Connect
the
LP
cylinder
to
the
barbecue outdoors only.
Read and
follow all directions
on
the
cylinder
and fuel hose safety tags.
1. Check
that
the
barbecue
burner
knob
is
turned
to
«OFF»
2. Remove
the
protective
caps from
the
cylinder
valve and coupling nut,
if
present.
3. Hold
the
regulator
in one hand and
insert
the
nipple into
the
gas supply
cylinder
outlet.
Be
sure
the
nipple
is
centred in
the
gas supply cylinder. The coupling
nut
connects
to
the
large outside threads on
the
gas supply cylinder.
Use
the
gas
supply
cylinder
not
to
cross-thread
the
connection.
4.
Hand-tighten
the
coupling
nut
clockwise and
tighten
until
it
comes to a full stop.
Tighten by hand only. Do
Not
use tools.
5. CAUTION:
In
the
connection process,
the
grill side
of
the
connection will seal
on
the
back-
check
in
the
valve,
resulting
in
a slight resistance. The connection requires
about
one-half
to
three
quarters
additional
turn
to
complete
the
connection.
6.
NOTE:
If
you
cannot
complete
the
final connection, disconnect
the
regulator
and
repeat
steps 4
through
6.
If
you are still unable
to
complete the connection, do
not
use
this
valve and
regulator.
7. Make sure
the
hose has no kinks
or
sharp bends and clears any areas
that
will
become
hot
during
use. Never
put
strain
on
the
hose where
it
joins
a
fitting.
The
rubber
fuel
supply
hose
must
not
touch
the
bottom
grill casting during use.
8. For
all Natural Gas and
LP
operated barbecues: Before lighting
the
barbecue,
check
all connections
for
leaks using a mild soapy
water
solution.
(Please
refer
to
specific instructions which
pertain
to
your
grill
type).
7.Leak
Test
DANGER!
To
Prevent Fire
or
Explosion Hazard:
NO
SMOKING!
WARNING:
Do
not
use
or
permit
sources
of
ignition in
the
area while doing
the
leak
test-
this includes
smoking!
Never
test
for
gas leaks with a lighted match
or
open
flame!
Always check
for
leaks outdoors.
How
to
check
the
fuel
supply
system
for
gas leaks:
1. Mix a solution
of
equal parts mild
detergent
or
liquid soap and water.
2. Turn
off
the
burner
control knob.
3.
Apply
the
soap solution
to
connections
of
fuel supply assembly.
If
no soap
bubbles appear,
the
barbecue
is
okay
for
use.
4.
If
bubbles
for
at
the
connections, a leak
is
detected.
5. Turn on
the
burner
control knob
for
a
moment
to
release pressure
in
hose,
then
turn
the
control knobs back
to
off.
6.
Wash
off
soapy solution
with
cold
water
and towel
dry.
In
case
of
a leak; often
tightening
the
joint
will
stop
a leak.
If
necessary replace
the
faulty
part
with a
replacement
part
recommended
by
the
manufacturer
.
WARNING!
Do
not
attempt
to
repair
the
cylinder
valve
if
it
should become damaged,
the
cylinder
must
be replaced.
II

If
you
are
unable
to
stop
a
leak
remove
the
cylinder
from
the
barbecue and call a
gas
appliance
serviceman
or
LP
gas dealer. Do
not
use appliance until
the
leak
is
corrected.
Perform a
leak
test
each
time
the
gas
supply
cylinder
is connected
to
the
regulator.
Leak
test
any
time
a
part
of
the
gas
system
is replaced.
Perform
a
leak
test
at
least
once each
year
whether
the
LP
gas
supply
cylinder
has been disconnected
or
not.
B.Fiash
back
(fire
in
burner
tube)
In
the
event
of
a flash back
occurring
in
the
burner
tube
(i.e.
when
flame
burns
inside
the
tube
instea<:l
of
outside)
•
Turn
the
BBQ
itself
off
at
the
switch controls.
•
Disconnect
the
regulator
and
wait
for
the
BBQ
to
cool
down
(±
30
minutes).
• Once cooled, check
burner
tube
for
blockages and
follow
cleaning
procedures
as
described
under
"Maintenance".
•
If
on
relighting,
the
problem
reoccurs,
get
the
unit
checked by an
authorized
service
dealer.
9.0peratinq
Your
Grill
9.1
lighting
Instruction
(Read
all
the
steps
before
beginning.)
1. Ensure
that
the
gas
regulator
and all
other
connections
are
tightened.
Please
refer
to
the
instructions
given
under
<<Leak Test>>.
2. Open
the
lid.
CAUTION:
Never
ignite
the
barbecue
with
the
lid
closed.
3. Push
the
gas
control
knob
and
turn
counter
clockwise
to
the
High
position.
The
ignitor
will click
and
light
the
burner
once
the
gas
control
knob
reaches
the
High
position.
4.
If
the
unit
fails
to
light,
turn
gas control
knob
to
«OFF>>,
wait
two
minutes
so
that
the
non-burned
gas can
evaporate.
Then
repeat
step
4.
Operating
the
gas
control
knob
Adjust
the
heat
in
the
barbecue by
turning
the
burner
control
knob
to
the
desired
position.
9.2
How
to
Shut
Off
the
Barbecue
Turn
the
burner
control-knob
to
OFF. The
burner
flame
will go
out.
CAUTION:
Do
not
stand
with
head
or
arms
over
the
barbecue.
12

I
I
10.Match
Lighting
IMPORTANT!
A
match
lighting hole
is
located
on
the
left
side
of
the
bottom
bowl.
1 To match
light:
Push down and
turn
the
burner
control knob counter-clockwise
to
the
high
setting.
2 IMMEDIATELY-
Strike
a long wooden match and position
the
burning match
through
the
match lighting hole
in
the
barbecue
bottom.
Place
the
flame
near a
burner
port
in
the
bottom
edge
of
the
burner. The
burner
should light. The
flame
will carry around
the
burner. Allow barbecue
to
pre-heat
with
the
barbecue lid
closed
for
2-3
minutes before cooking.
CAUTION:
Do
not
touch
any
hot
barbecue parts. The outside
of
the
barbecue
bottom
especially
becomes
very
hot
during
use.
Use
protective
gloves
to
handle
any
parts
that
might
become
hot
during
use.
-:.I
,.;;:::~-
•'---~~"""'
11.Using
the
Barbecue
11.1
Preo
a
new
barbecue
before
using
it
for
the
first
time.
Wash all parts
that
will come
into
contact with food.
Light
the
barbecue and
heat
on HIGH
for
approx.
15
minutes
with
lid closed. Check
the
burner
flame.
11.2
Burner
Flame
Inspect
the
burner
flame
by
looking
through
the
match
lighting
holes.
A good flame should be blue
with
some
yellow
tip
coming
from
the
burner
holes.
Some yellow
tips
on
flames up
to
1/4"
length are acceptable
as
long
as
no carbon
or
soot
deposits appear.
13

Checking
the
burner
flame
the
left
drawing shows
what
a good
flame
will look like.
The
right
drawing
is
an example
of
a bad flame.
If
flames are excessively
yellow
and irregular,
the
oil residue may
not
be
completely
burnt
off.
After
a barbecue has been in use
for
a while
it
may begin
to
have a
more
yellow
flame. Check
for
clogged
burner
holes
or
blocked
venturi
tubes.
Regular use
of
your
barbecue will actually help keep
it
operating
more
smoothly.
It
is
not
unusual
for
similar
units
to
heat
a
little
differently.
During
operation,
stand
to
side
of
barbecue when opening
the
barbecue lid.
Do
not
expose any
part
of
your
body directly above
the
cooking area.
11.3
In
case
of
grease
fire
follow
these
steos:
1.
Turn
the
burner
control knob
to
off.
2. Stay
away
from
barbecue.
3. Allow
the
fire
to
burn
itself
out.
4.
After
the
fire
is
out
and
the
grill
is
cool.
5.
Clean all parts.
6.
Check
for
damage
on
the
LP
Cylinder,
LP
Cylinder Valve, Regulator,
Gas
Supply
Hose,
Burner
Valve and Burner.
If
any
of
these parts are damaged, replace
them
with
factory
authorized parts before operating
the
appliance again.
11.4
Storing
an
LP
barbecue
WARNING!
Store
the
LP
gas supply
cylinder
outdoors in a cool area,
out
of
direct
sunlight
away
from
people
or
pets and
out
of
the
reach
of
children.
To avoid
the
possibility
of
an explosion
never
store a spare
LP
gas
supply
cylinder
under
a barbecue body
nor
inside a barbecue enclosure.
Indoor
storage
of
a barbecue
is
only
permissible
if
the
fuel
cylinder
is disconnected
and
removed
from
the
appliance.
Gas
cylinder
must
never
be inside a building, garage
or
any
other
enclosed area.
12.CARE
and
MAINTENANCE
12.1
Care
Regular care
of
your
barbecue will help keep
it
operating properly. All
maintenance
should be done
only
when
the
barbecue
is
cool and
with
the
fuel supply
turned
off.
Occasionally inspect and
tighten
hardware
that
may
become loose. Clean when
warm
and gloves on.
12.2
Cleaning
the
venturi
tube
Spiders are
very
active in
the
late
summer
and fall
just
before frost.
Unfortunately
the
venturi
tube
located on
your
barbecue
burner
can be an inviting
home
for
them.
This can be a serious problem
if
they
build a home inside. A spider's nest
or
wasp's
mud
inside
the
venturi
can block gas flow and can even cause a
fire
at
the
gas
14

control valve. Such a fire can cause
operator
injury
and serious damage
to
your
barbecue.
To
prevent
insect related problems, inspect
the
venturi
tube
regularly and clean
out
any
dirt.
Insure
that
orifice spuds are relocated correctly
into
venturi
following any
disassembly.
WARNING!
Never
attempt
to
operate
your
barbecue
without
orifices in
the
valve.
A serious and
immediate
fire hazard would result.
12.3
Annual
cleaning
and
maintenance
Once a
year
is
a good practice
to
clean
the
whole barbecue.
As
always, be certain
the
barbecue
is
cool enough
to
touch and fuel supply
is
turned
off. Wear gloves.
Cleaning should be done where
detergent
won't
harm the
work
surface
or
lawn.
Disconnect
the
fuel supply and remove the fuel supply cylinder. Tighten any loose
hard ware.
13.
Warranty
This
warranty
covers defects in parts and workmanship
for
a period
of
12 months
from
the
original purchase date. Any damage claim regarding
the
enameling
must
be
submitted
within 30 days
of
purchase
to
be
covered by the
warranty.
The
following
conditions
are
NOT
covered
by
this
warranty:
• Unevenness and color
variations
in
the
enamelling
•
Damage caused
by
improper
assembly
or
disregard
of
the
manual.
• Spare parts
not
supplied
by
manufacturer.
•
In
the
event
of
modifications,
of
an
inappropriate use
or
a damage caused
by
bad
intention.
• Damage caused
by
improper
maintenance
or
repairs by
an
unauthorized person.
Limitations
and
Exclusions:
1.
This
warranty
applies only
to
the
original purchaser and
may
not
be
transferred.
2.
If
you can
not
verify
the
purchase
date
of
the
barbecue
the
warranty
period
will
begin on
the
date the barbecue was manufactured.
3.
Replacement
or
repair
parts are warranted
for
the
remaining period
of
the
original
part
warranty.
Your
Obligations:
This barbecue
must
be assembled, installed, operated and maintained in accordance
with
all applicable codes and
the
instruction manual furnished with this barbecue.
You
must
keep an invoice, cancelled check
or
payment
record
to
verify
the
purchase
date
of
the
barbecue.
For
customer
service, please call
1-866-475-5180
between
the
hours
of
8:30am
and
4:30pm,
Central Time, Monday
through
Friday.
Manufacturer:
GUANDONG CHANT
GROUP
CO.,
LTD
XIAOLAN TOWN, ZHONGSHAN, GUANGDONG
528415
CHINA
15
/