
o_
LCE462L _

Record in the space provided below the Model No. and Serial No of this
appliance These numbers are found on the serial plate located on inside of the
dryer door
Model No
Serial No.
Retain these numbers for future reference
IMPORTANT: Keep a copy of your bill of sale Ihe date on the bill
establishes the wauanty period should service be required. If service is per-
formed, it is in your best interest to obtain and keep all receipts
PLEASE DO THIS NOW!
The self-addressed PRODUCT REGISrRAIION CARD should be filled in
completely, signed, and returned
Ihis information will register your pioduct and help us to serve you quickly in
the future if' necessary
Important Safety Instructions ......................................................... 3-4
Washer Opeiating Steps .................................................................... 5-6
Washer Cycle Selection .......................................................... 67
Washer Peatures ...................................................................................... 8
Dryer Operating Steps ............................................................................ 9
Dryer Cycle Selection ............................................................ 10-11
Dryer Control Settings Chart ................................................................. 12-13
Care and Cleaning ............................................................... 14-15
Avoid Service Checklist ....................................................................... 16-21
If You Need Service ....................................................................... 22
Wall aiaty ........................................................................................................ 24
This Owner's Guide provides specific operating instructions for your model.
Use the Laundry Center only as instructed in this Owner's Guide and the Total
Laundry Care book included with your Laundry Center
© 1989 White Consolidated Industries Inc
All rights reserved 2

Read all instructions before using this Laundry Center.
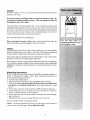
I_WARNING 1 1-Oreduce the risk of fire, electric shock, or injury to persons when
using your washer and dryer, follow basic precautions, including the following:
Prevent Fire
I_WARNINGI Do not 'crash oI dIy articles that have been previously cleaned in,
soaked in, or spotted with gasoline, cleaning solvents, kerosene, cooking oils,
waxes, etc lhese substances give off vapors that could ignite or explode.
_tkWARNING] Do not add gasoline, cleaning solvents, or other flammable or
explosive substances to the wash water. These substances give off vapors that
could ignite or explode.
_WARNING 1 Io pievent fire, do not use heat to dry articles containing plastic,
foam rubber oi similarly textured rubber-like materials o_ pillows and clothing
with featheis/down. Use the NO HEAT setting only
i,_WARNiNG t Under certain conditions, hydrogen gas may be produced in a hot
water' system that has not been used for 2 weeks or more HYDROGEN GAS
IS EXPLOSIVE. If the hot water system has not been used for such a period,
before using the washer, turn on all hot water faucets and let the water flow from
each for several minutes. Ibis wii1 ielease any accumulated hydrogen gas. As
the gas is flammable, do not smoke oi use an open flame during this time
I_WARNING] Clean lint screen before or after each load. Ihe interior of the
machine, lint scleen housing and exhaust duct should be cleaned approximately
every 18 months by qualified seivice personnel. An excessive amount of lint
build-up in these areas could result in inefficient drying and possible fire See
the "Care and Cleaning" section in this manual.
[_WARNING]Keep area around the exhaust opening and adjacent surmnnding
areas free from the accumulation of lint, dust and dirt
[_WARNINGI Pluorocarbon aerosol spray fabric softeners are not recommended
for use in this dryer Damage resulting from use of' this type of softener can be
considered as misuse of the dryer
Failme m comply with these warnings could result in fire, explosion,
serious bodily iniury and/or damage to tlre rubber oi plastic parts of the washer
or drye_
i ii ! iiiiiiiiiiii!iiiiiii!i ii iiiiiiiiiii i!ii!!! i!ii!iiiiiiii!ii i i!!ili
Protect Children
I_WARNINGIDo not allow children to play on or in the Laundry Center unit
Close supervision of' children is necessary when the unit is used near children
As chi!&en grow, teach them the proper, safe use of al! appliances
[&WARN_NGIDestroy the carton, plastic bags and metat band after Laundry
Center unit is unpacked. Children might use them for play Cartons covered
with rugs, bedspreads or plastic sheets can become affright chambers
I-_WARNING_ Keep taundly products out of children's reach Io plevent pelsonal
injury, obserx, e aI1 warnings on product Iabels

FOR YOUR SAFETY
Do not obstruct the flow
ventilating aiI flora the &yeI,
Before the Laundry Center unit is removed from service or dis-
carded, remove the lid to the washing and dlying compartments to prevent
accidental entrapment,
[] Failure to comply with these warnings could result in serious personal
injmies
Prevent Injury
I&WARN_IG]The Laundly Cente_ must be installed and electrically grounded in
accordance with local codes by a qualified service person to prevent shock
hazaxd and assure stability during operation Installation instructions are
packed in the Laundry Center for installer's reference Refer to INSIALLA-
TION INSTRUCTIONS for detailed grounding procedures If the appliance
is moved to a new location, have the Laundry Center checked and reinstalled by
a qualified selvice person,
I_kWARNINGITo prevent personal injury or damage to the Laundly Center unit,
the electrical co_d must be plugged into a properly grounded and polarized 3-
prong outlet The third grounding prong must never be remove& Never
ground the unit to a gas pipe. Do not use an extension cord.
[_kWARNINGt Follow package directions when using laundly products Incor,ect
usage can produce poisonous gas - resulting in serious injury oI death.
• Do not combine laundry products for use in one load unless specified on the
label
• DO NOT mix chiorine bleach with ammonia or acids such as vinegar
[*_,WARNtNGI TO prevent irljury and damage to the Laun&y Center unit:
• Do not repair or replace any part of the washer or dryer or' attempt any servicing
unless specificNly iecommended in this Owner's Guide Use only genuine
WCI Factory Parts
• Do not tamper with controls
• Do not instal! or store this unit where it will be exposed to the weather.
[_kWARNING I ALWAYS disconnect the Laundry Centei unit flom the electJrical
supply before attempting any service or cleaning, Failure to do so can result in
electrical shock oi injury
Ia_-WARNINGITO prevent injury, nevel reach into the washeI while parts are
moving, Before loading, unloading oI adding items, push in the timer knob and
allow the tub to coast to a complete stop before Ieaching inside.
[_(_WARNINGl I0 prevent injury, do not Ieach into the dryer if the dlum is moving
Wait until the machine has stopped completely before leaching into the drum
Failme to comply with these warnings could iesult in serious personal
in.juries
SAVE THESE INSTRUCTIONS

ro reduce the risk of fke, electric shock, or injmy to persons, read
the IMPORTANT SAFE'[ Y INS FRUCIIONS before operating this appliance.
For detailed information on laundry preparation, sorting, factois affecting per-
formance and laun&y products, see the Total Laundry Care book
1 Prepare laundry according to directions in Total Laundry Care book..
3
4
Estimate the size of the wash load.
Add measured detergent to empty tub,, Accurately measure detergent
before adding it to the washer. For best results, follow package directions.:
If the water is hard or the load is heavily soiled or larger than usual, more
detergent may be needed. If the watei is soft o_ the load is lightly soiled or
smallei than usual, less deteigent may be needed
If excess sudsing occuis when using the suggested amount of detergent,
change to a low-sudsing detergem Excess suds are not necessary to get
clothes clean and can hamper wash action.
Add liquid bleach, if desired, to the wash tub as directed in the section,
"Bleach Dispense1",
Load clothes loosely,, Dry load level should be no higher than the top row
of circular holes in the wash tub Do not load aIticles on top of the agitator
or wind them around it,, For best results, mix large items with small ones
When washing a single heavy item, such as a shag mg or bedspread, add one
or two smaller articles to balance the toad Large items should be no moIe
than half the total load
7_
Set the controls. Choose the control settings according to the type of load
and the amount of soil Refer to the Control Settings Chart in this Owner's
Guide for suggested cycles, wash times and water' temperatures,
• Water Temperature Control - Turn the Water Temperature control
knob to select the desired wash!rinse tempeatme
• Water, Level Control - l_or best economy and wdshing results, set the
Water Level control so water coveis top of wash load
Push in timer' knob and turn clockwise to the desired wash cycle and
wash time FoI best washing results, follow the fabric care labels in clothes
for washing instructions If in doubt, check the "Cycle Selection Guide" in
this Owner's Guide and the Total Laundry Care book for suggested wash
cycle and time.. See "Cycle Selection" for wash cycle descriptions.
Start the washer by closing the lid and pulling out timer knob The washer
will operate with the lid open However, it wilI not go into the spin cycle
unless the lid is closed, 'To stop the washer, push in timer knob Fo change
the cycle, push in timer knob and turn it clockwise to the desked function
(continued on next page)
:i

9_ If desired, add fabric softener during final rinse cycle,, See manufac-
turer's directions on fabliC soffeneI label,
10 Remove clothes when the cycle is completed,, SAFETY LID LOCK: As
a safety measule, the lid will AUt_OMAFICALLY LOCK during the spin
poltion of each cycle The lid will unlock apploximately 1 minute after the
end of the spin cycle
To open the lid during the spin cycle, push in the timer knob and wait
foI the lid !ock to _etease
IZoi best results, follow fabric cale label ditections on articles to be washed
Check the "Cycle Selection Guide" and the Total Laundry Care book if the
cale label is not available
Locate fablic type and read across for wash and _inse temperature, suggested
wash cycle and wash time
This is only a general guide,, For best results, follow label directions on
specific items to be washed,_
SELECT
i,,, , ,,,,,,,,,,,,,, i,i,
Fabric Type Temp. Wash Wash Time
Wash Rinse Cycle (rain°)
i ii i1,11 .............................
REGULAR
Heavily Soiled
Colorfast & White
Cotton & Linen Hot Cold Regular 15
Lightly Soiled
Colorfast & White
Cotton & Linen Warm Cold Regular' 10
Non-Color fast
Bright Colors
All Fabrics Cold Cold Regular t0
Plastic
Shower Curtain Warm Warm Regular 5
PERMANE_'[ PRESS
White or
Heavily Soiled Hot Cold Per'm, Press 12
Colored or
Lightly Soiled Warm Cold Per m,, Press 8
KNH SiDI_LICATES
Special Items
Knitted Fabrics Warm Cold Knits/Delicate 3-6
Washable Woolens Warm Cold Knits/Delicate 6

m m
m
m
m
m
m
m
m
m
m
m
Regular Wash Cycle
The Regular wash cycle plovides up to 15 minutes of wash agitation followed
by a splay iinse during the fii st spin,, a deep watei iinse and a 12 minute final spin
to remove water
Permanent Press Cycle
The Perm Press wash cycle provides up to t2 minutes of wash agitation
followed by a 1 minute cool down rinse to ieduce wlinkling in the first spin, a
deep water rinse and 8 minutes of slow spin to minimize wrinkling as water is
removed in the final spin,
Knits/Delicate Cycle
1he Knits_elicate wash cycle provides 6 minutes of slow agitation f0I the
gentle care of delicate articles, [here is a splay rinse during the first spin,
followed by a deep water rinse and 6 minutes of slow spin to minimize wrinkling
as ware1 is removed in the final spin
i_I"_

Water Temperature Control
Water tempeiamres foi washing and rinsing are set by using the Water
Temperature control. Turn the knob to the desired water temperature
combination
Several wash!rinse water temperature combinations are available
Coi_ect watei temperature is necessary lot good washing results, To help
determine the best wash tempetature for particular loads, refer to the
information on wate_ temperature in the Total Laundry Care book under
"Factors Affecting Performance"
Water Level Control
Ihe Water Level control can be set to provide the proper amount of wash and
rinse water for specific wash load sizes. This control allows you to conserve
water and achieve the best washing results
Ihe bulkiness of wash loads is important when determining a water level
Articles such as pillows, blankets and rags a_e more absorbent and require larger
amounts of water. For best results when washing bulky items, set the Water
Level control at "Large"
Bleach Dispenser
IJkCAUTIONt I_ailure to follow these bleaching directions can cause bleach
damage to your wash load
When using bleach, add it to the wash tub before clothes are added Io add
bleach, use the Bleach Dispenser located in the left fiont corner of the machine
under the lid Always use the LARGE Water Level setting when using bleach
Measure liquid bleach in a measuring cup. Use 1/4 to 1/3 cup bleach for normal
size loads Pour the bleach directly into the dispenser, then pour in one cup
of water to flush dispenser and assure that no bleach remains in the dispenser
to carry over to the next wash load Ihe bleach dispenser automatically
dispenses the diluted liquid bleach into the wash water.
Powdered bleach must not be used in the Bleach Dispenser. Before adding
articles, add powdered bleach to the wash water following directions on
the package,,

]I_kWARNING]--IO reduce the risk of fire, electric shock, or injury to persons, read
the IIvIPOR IANI SALVErY INS IRUCTIONS before operating this appliance
For detailed information on laundIy preparation, sorting, factors affecting per-
formance and laundry products, see the Total Laundry Care book
1 Check to be sure the lint screen is clean and in place before each load.
2, Place clothes in the dryer. See the Total Laundry Care book for specific
guidelines on sorting and loading Add a sheet of dryer fabric softenei if
desired,
3 Close the dryer door,, The dtyeI will not operate unless the door is closed
4 Set the Fabric Temperature control to the desired temperature,.
5 Turn the Timer Knob clockwise to the desired time,, (See "Contlol
Settings Chalt".) The setting can be changed any time during the cycle,
6 To start the dryer, push and hold the Start button for two seconds [he
dryer will always stop when the dooi is opened If the door is opened duling
the cycle, the Start button must be pushed in to iestalt the dryer If the timei
knob is in the OFF position _vhen you push the Start button, a cycle signal
will sound and the dryer will not strut
7 A cycle signal will sound at the end of' the cycle,, Remove items imme-
diately to help prevent wliokling If the load is removed before time has
elapsed, turn timei knob to OFF,
8 Clean lint screen after' each load,.
For best results, follow fabric care label dilections on specific articles to be
dried Check the "Control Settings Chart" and the Total Laundry Care book
if the care label is not available

Fabric Temperature Control
Before selecting the &ying cycle, turn the Fabric Iemperature control knob to
the desired temperature HIGH, MEDIUM or LOW temperature settings may
be used with any cycle setting, ]lm NO HEAT setting should be used only in
the'rimed Dry cycle Refei to the "Control Setfitgs Chart" for suggested settings
according to fabric type
Ihe NO HEAT setting tumbles the load without heat, Use NO HEAT to fluff
or freshen pillows and blankets and dust draperies and clothing.. Use only NO
HEAT setting for heat-sensitive items such as plastics, foam rubber or similarly
textmed, rubber-lille materials To absorb excess moisture, add severa! dry bath
towels to the load.
After selecting the temperature setting, turn the timer knob clockwise to the
desired time
The Timed Dry cycle provides up to 100 minutes of timed drying at the selected
high, medium, low or no heat settings
Automatic dry cycle provides drying at the heated temperature selection of
your choice The Automatic &y cycle determines diying time automatically
Select either HIGH, MEDIUM or LOW temperatme setting according to fabric
type When the items are dry, the heat automatically shuts off and the load is
tumbled foi approximately 5 minutes without heat. Ihis cool-down period
helps ieduce wrinkling
• When using the Automatic dry cycle for' the first time, set the timer knob
about halfway between MORE DRY and LESS DRY. Experience will
determine if adjustments are needed for future loads, Ihis cycle works best
with items of similar fabric, weight and construction
• MEDIUM heat is recommended for drying permanent press items and LOW
heat is suggested for delicates and synthetics. A coot-down period during the
last 5 minutes of the cycie prevents wrinkles and makes the clothing easier to
handle during unloading
10

Adding or Removing Articles
To add or remove articles when the dsyei is running, simply open the door
Allow the dryer drum to stop completely before reaching inside
Io restart the dryer, close the door and push the Start button for about two
seconds 1-he dryer will stop if the button is released too soon If this happens,
push and hold the Start button again
Special Safety Features
• A safety door switch stops the dIyer automatically if the door is opened while
the dryer is operating The drying cycle may be resumed by simply closing
the door and pushing the start button again,
• A safety door latch a!lows the dryer to be opened from the inside in case a
small chiId should accidentally become trapped inside the drying compart-
ment,
• Ihe dryer heating element automatically shuts off when the motor stops to
plevent overheating of clothes
• A Thermal Limiter Switch automatically shuts down the drye_ motor in the
unlikely event of an overheated situation, !
i:!<!!!
11

Control Settings
Chart
Always consult fabiic care labels before drying. For items without labels,
follow the suggested settings below q-he suggested drying times are approxi-
mate. Actual time needed wilt vary depending on size of load, weight and type
of fabrics
If the dryer is operated on a 208 volt circuit instead of a 240 vott circuit, drying
times shown on the chart below wit! increase by approximately 20 percent. For
more information, see the Total Laundry Care book
Type of Load Temperature Setting Time
= = mii= =m 11 = HiliMmmHili=
Alticles containing elastic Low Automatic
Articles to be fluffed, No Heat Iimed Dry 15-20 Minutes
freshened or dusted
Bedspreads, chenille High 2imed Dry 50-60 Minutes
Blankets
Synthetic
Electric
Wool
High limed Dry 30 Minutes; check
frequently
See manufacturer's care label Eor more instruction, see Total Laundry Care.
See manufacturer's care label For more instruction, see Total Laundry Care.
Cottons, linens
Colorfast/White High Automatic
Non-colorfast High Automatic
Curtains
Cotton or cotton blends Medium or Low Automatic
Sheer synthetic Low Automatic
Heavy synthetic Low Automatic
Io freshen all types No Heat Iimed Dry 15-20 Minutes
Delicate sheer lingerie, Low Iimed Dry 15-20 Minutes; check
blouses, silk, rayon and nylon frequently.
12

Type of Load Temperature Setting Cycle Setting/Time
Knits
Cotton or cotton blends
Synthetics
Wool
Medium or Low
Low
If machine diyable, Low
Automatic
Automatic
Iimed Dly 20 Minutes to damp dry,
then air dry on flat smface
Glass Fiber
Do not dry glass fiber items in dryer unless recommended by the manufacturer
Small glass particles left in the tub can be picked up by the next load, Ihese
articles may cause skin irritation,
Pelmanent Press
100% cotton Medium Automatic
Blends Medium or Low Automatic
Pillows
Plastics
[AWt_RUtNC]Fo prevent fire and serious personal injury, do not use heat to dry
foam or feather pillows and c!othing made of feathels or down
[_WARNING]go prevent fire, nevei use heat to dry plastics, foam rubbei or
similarly textured, rubber-like materials Use the NO HEAI temperatute
setting only
Slipcovels Select temperature and time according to fabric Remove when slightly damp
Table linens
Cotton High limed Dry 20-30 Minutes
Synthetic Low limed Dry 10-20 Minutes
tennis shoes Always consult care labels befme drying tennis shoes Improper care can
permanently damage some shoes
Wrinkled, but not soiled pei- Medium or Low rimed Dry 15-20 Minutes
manent press or knit galments
13

Inside
Remove clothes from the washer as soon as the cycle is completed to prevent
the development of mildew
With the lid open, dry the entire top and the inside lid. 1-his area should always
be dry before the lid is closed This washer has a self-cleaning lint filter the
lint is collected during the wash and rinse cycles and is automatically flushed
down the drain
If the washer dlains into a sink or wash tub, remove the lint that may collect in
the sink drain oI strainei Occasionally clean the tub bottom
To clean the tub bottom:
l, Raise the agitator by ruining the cap counterclockwise
2, Remove the agitator cap
3 Grasp the agitator with both harads and pull up
4, Wipe the tub bottom
5, Check for any objects such as pins or coins that may have collected beneath
the agitator If heavily soiled clothes have left a deposit on the tub, clean it
thoroughly using a liquid household detergent Rinse well
6, Replace the agitator and be sure to firmly tighten the cap,_
Clean the dryer lint screen after each load. Lint build-up in the scleen
restricts air flow which causes longer dlying times Ihe scleen is located at the
bottom of the door opening, Remove by pulling up Brush the tint fiom the
screen and replace Occasionally a waxy build-up may [orm on the lint scleen
from the use of dryer-added fabric softener sheets. To remove this build-up,
wash the lint screen in warm, soapy water and dry thoroughly Replace the lint
screen,
I_WARNIN_i Befole cleaning diyeI interior, unplug power cold to avoid elec-
trical shock hazards
If the dtum is stained from non-colorfast fabrics, clean with a damp cloth and
mild liquid household cleanser Wipe away the cleansel residue before drying
the next load of clothes
[_WARNING_ Do not use any type spray cleanser when cleaning dryer intelioi
Hazardous fumes or electrical shock can occur
I_b,WARNINGI Ihe interior of the dryei cabinet and exhaust duct can gather lint
and dust over time depending on the type of articles dried and amount of use,_
An excessive amount of lint build-up could result in inefficient d_ying and
possible file hazaldr l'ihese areas should be cleaned approximately every 18
months by qualified selvice pelsonnel
14

Outside
When the washer is not in use, turn the wate_ faucets off to prevent pressure
build-up in the hoses
Do not store items or cleaning products on top of the Laundry Center. Be
careful when handling laundry products, They can damage the finish on
the appliance and control panel.
Clean the cabinet with mild soap and water If top or lid become stained, clean
with diluted chlorine bleach (1/2 cup in 1qualt water) Rinse several times with
cleat water Any adhesive residue left flgm the packing tape oi energy label can
be removed with a mixture of warm water and mild detergent Or, touch the
residue with the sticky side of tape already Iemoved
Do not obstluct the flow of ventilating aii
Before moving the Laundry Center, place a hald-Sulfaced strip under the
front leveling legs to prevent damage to the floor coveling
Tinting
If tints and dyes ale used in the washet, some washer paris, such as the agitator
and tub, will take on the coloi of the dye Ihe coloi will not harm the pai_s and
wiI1 not transfer to future loads if the washel is cleaned as directed
After tinting, wipe any splashings from the cabinet and lid _hen run the washer
thlough a hot wash cycle using detergent and bleach
When using tints oi dyes, always follow package directions Be SUle that items
to be dyed ale machine washable Please note that tinted clothes will not be
colorfast and should be washed separately to avoid transferring color to other
garments,
Winterizing Instructions
If your I.,aundry CenteI is stored in an area susceptible to freezing conditions or
moved in fleezing cold weather, follow these winterizing instructions to
plevent possible damage to the unit:
! Turn off water supply faucets
2 Plug the electlicaI cord into a properly grounded electrical outlet
3 Add 1 gallon of non-toxic Recreationa! Vehicle antifreeze (available from
a hardware or recreational vehicle store) to the empty washer tub Close
the lid
4 Push in timei knob, turn knob clockwise to SPIN and pull the knob out,
5 Let the washer spin for 1 or 2 minutes to let all wateI drain out Some, but
not all, of the RV antifleeze wiI1 be expelled
6 Push in the timer knob, dry the tub interior, disconnect the electricaI plug,
and close the lid
7, Disconnect hoses from water supply and drain water from hoses
Store the Laundry Center in an upright position
NOTE: Fo clean out antifreeze after Stolage, run the empty washei through a
complete cycle using detergent, Do not add clothes load.
15

Avoid Service
Checklist
Before you call for seivice, review this tisL It may save you time and expense
rfhe list includes common occurrences that ate not the result of defective
wmkmanship or materials in this appliance
FIND YOUR PROBLEM
HERE
POSSIBLE CAUSE
HOW TO FIX IT
OPERATING PROBLEMS IN THE WASHER
mill liHim 'lmmlllllllllmmmmliii i rllmum
Washer does not start, Laundry Center may not be plugged in
or connection may be loose
if iiiii
Make sure the plug is tightly pushed
into wail outlet
House fuse blown or circuit breaker
tripped
Check!reset circuit breaker and/or
replace fuse Do not increase fuse
capacity tf the problem is a circuit
overload, have corrected by a
qualified electrician
Power outage Check house lights Call local electric company
Iimer knob not in correct position. Turn timer knob slightly past desired
position and pull knob out
the wash cycle is in a pause stage This is normal A pause occurs
between each wash and spin.
there is a brief pause in the finaI spin Ibis is normal
of each cycle
Motor is overheated Fhe washer motor will stop if it
becomes oveiheated. It will
automatically restart after a
cooldown period of up to 30 minutes
if the timer has not been manually
turned off during this time
Washer won't enter spin cycle. Lid is not securely closed Close lid secuxely.
WATER PROBLEMS
Water does not 'enter'ihe
washer, or' it enters slowly.
i ii ii
Water supply is not adequate in the
area
Check another faucet in"""ihe'home
Wait until water supply and pressure
increase
Hot and cold water supply faucets are Fully open hot and cold faucets_
not completely open
Water is being used elsewhere in the Water pressure must be at least 30 psi.
house. Iry not to run water elsewhere in the
home while the washer is filling.
Water inlet hoses are kinked Straighten hoses
16

FIND YOUR PROBLEM POSSIBLE CAUSE HOW TO FIX IT
HERE
i
Water level is not sufficient
for load size or does not cover
clothes.
IH IIIIIIIIIIII IIIIIIIIIIIIIIIIIIIII IIIIIIIIIIIIIII
Improper water level selection
Hot water is not hot enough.
iiiiiiiiiiiiiiiiiiiiir i
Hot water heater is set too low
Reselect water level by turning water
level control to next higher position,
When water level control is set on
LARGE, dry clothes level should be
no higher than top row of circular
holes in wash tub
i , ,,,,,,,,,,,,,,,,,,,,,,,,,
Measure hot water temperature at the
laundry tub or sink with a candy or
meat thermometer and be sure that
the water temperature is at least
L30°F Adjust the water heater as
necessary
Water heater is a distance from the
washer and water cools as it runs
through the pipes to the washer
Check the temperature of the hot
water heater at the washer or faucet
nearby Adjust water heater if
necessary
Open hot water faucet at nearby sink
to drain cool water from pipes,
Hot water is being used elsewhere in
the home
Iry not to use hot water elsewhere in
the home before, or while the washer
is running q-here may not be enough
hot water available for proper
cleaning If problem persists, your
hot water system may be unable to
support more than one use at a time
u ,i
Water in washer does not
drain, or drains slowly
I'IIHI I ,,,,,,, II
Diain hose is kinked oi clogged Straighten hose and/or clean the
drain,
Iub is oveisudsed
See "Oversudsing", next page
Water leaks.
Fill hose connections at faucets and/ Check and tighten hose connections
or washer are loose
Drain pipes in the house are clogged Contact plumber
Use of a high-sudsing detetgent in
soft water can cause a suds overflow
inside the washer Thismayappear as
a leak if suds flow or drip onto the
floor,
Use a low-sudsing detergent See
"Oversudsing" (next page) for
instructions on how to :remove
excessive suds
i-i,, H,Ul I
Clothes too wet after spin,
,,11
Washer is overloaded
u,,,,,,ul
Do not overload the washer See
Total Laundry Care book
Load is out of balance
Rearrange load to allow spinning at
top speed
17

FIND YOUR PROBLEM POSSIBLE CAUSE HOW TO FIX IT
HERE
i iiii iiiii i HIIIII
Clothes too wet after spin,,
Drain hose is kinked
Straighten drain hose:
Wash and rinse water temper-
atures are incorrect,,
Cold rinse water used.
iii iiiiii i iii HIIIIIIIIIIIII
The hot wate[ hose and cold water
hose are connected to the wrong
supply faucets
ii ill
Standpipe for the drain hose is not the
correct height.
i llllll l lll
];his is nolmal. Cold rinses save
energy and reduce wrinkling, but the
clothes tend to feel wetter.
Water is entering washer' but
tub does not fill.
Over'sudsing,.
Too much detergent.
Connect the hot water hose to the hot
water faucet and the cold water hose
to the cold water faucet
Standpipe must be a minimum of 33"
high to prevent siphoning
Follow package directions for
recommended amounts of detergent,
To remove the suds, stop machine and
advance the timer to last iinse which
should flush out the extra suds. See
"Io Recondition Clothes" in Total
Laundry Care book
Detergent is not compatible with A low-sudsing detergent may be
water conditions necessary in special soft water
conditions
Items were pretreated befme When pretreating, laundry aids will
washing remain in items Use less detergent
than recommended
iiii iiii iiiiii
Permanent press items become
wrinkled in the washer',,
Laun_hy products such as oxygen
bleach may cause additional sudsing.
Washer is overloaded
Reduce the amount of deter gent when
additional laundry aids are used
H
Do not overload the washer See
Total Laundry Care book
Insufficient water level Wash small loads with maximum
water setting.
Incoirect rinse watei tempelatme. Use cold wateI rinse only Make sure
water hoses are connected to proper
faucets.
Items left in the washer too long after Remove items when cycle is
cycle is completed completed.
NOISE PROBLEMS
lllllll
"Clunking" sound,,
A certain amount of "clunking" or this is no_maI
gem sounds are normal in a heavy-
duty washer
t8

FIND YOUR PROBLEM
HERE
POSSIBLE CAUSE
HOW TO FIX IT
==
Rattling and clanking noise.
== m
Foreign objects such as coins or Stop washer and check the tub See
safety pins may be in the tub "Ca_e and Cleaning".
Foreign obiects may be in the pump Call your authmized service agency.
Vibrating noise
BeIt buckles and metal fasteners are
hitting the washer tub during the
washing cycle
ro prevent unnecessary noise and
damage to the tub, fasten fasteners
and turn garments inside out Refer to
"Laundry Preparation" in Total
Laundry Care book
Laundry Centei is not resting firmly
on floor' or rear leveling legs extended
too far from the base
= ,,, ,,,,,,,,,,,, ,,,
Reposition unit so it rests firmly on
floor. Adjust rear Ieveling legs
Leveling legs should not extend more
than requhed for proper leveling See
Installation Instructions.
Wash load is not evenly distributed in Stop washer and redistribute toad
tub
Thumping sound,
OPERATING PROBLEMS
IN THE DRYER
, = = mi=
Dryer does not start
Laundry Center is not resting on a
solid, firm floor
Heavy wash loads may produce a
thumping sound at the beginning of
the spin cycle
Additional floor bracing may be
needed Contact carpenter to correct
sagging oi sloping floor.
mH]H Hi =
This is normal, If sound continues,
stop machine by pushing in timer
"knob and open lid. Redistribute wash
load.
..... I r = = == =
Unit may not be plugged in or plug Make sine the plug is tightly pushed
may be loose into wall outlet
House fuse blown or circuit breaker
tripped.
Check/reset circuit breaker and/or
replace fuse Do nor mc[ease fuse
capacity If the problem is a circuit
oveiload, have corrected by a
qualified electrician.
Power outage Check house lights Call local electric company
Iimer knob not in collect position Turn time1 knob clockwise until the
indicatol is advanced a little further
into the cycle, push the Start button
and hold it in for two seconds.
Start button has not been pushed long Push Start button and holditin fortwo
enough, seconds
Dryer door not closed Close dryer door
_Ihe_mat I.imite_ tripped Call authorized service person for
replacement
19

FIND YOUR PROBLEM POSSIBLE CAUSE HOW TO FIX IT
HERE
Dryer does not start
Motor overheats due to Overloading,
==i=1 ==m
Allow motor to cool down for about
30 minutes Reduce clothes loadr
Push Start button to restart If prob-
lem persists, call for service
Dryer runs, but won't heat.
House fuse blown Ol circuit breaker
nipped
Electrical line is overloaded
Contact an electrician Laundry
Center must be on a separate circuit
Reset ciicuit breaker or replace fuse
Dryer runs, but takes an excessive Unit is connected to a 208 volt circuit
amount of time to dry elothes._
Drying time will be 20 percent longer
than when diied on a 208 volt circuit
Exhaust duct is too long
Refer to Installation Instructions for
maximum length and specifications
of rigid and metal flexible ducts
Install the unit accordingly
Exhaust duct is too small Minimum required exhaust diameter
is 4 inches Do not use a smaller duct
Exhaust duct has more than two The maximum number Of 90 ° bends
bends allowed in the exhaust duct is two
Relocate the Laundry Center to
comply to these requirements
Exhaust duct and/or lint screen Have duct and/or lint screen housing
housing is clogged or restricted cleaned by qualified service
personnel
Lint screen is clogged with lint Cleanlint screen Lint screen must be
cleaned after each load
Dlyet is overloaded Refer to Total Laundry Care book
for load size,
Heavy items were not sorted from Refer to Total Laundry Care book
lightweight items, for sorting recommendations
Low heat selected Ihe Low Heat setting, which is safe
for delicate and knit items, requires
longer drying periods.
Dryer runs, but is not heating See "Drye_ runs but won't heat"
above
High humidity Drying times will be longer in areas
where humidity is high,
Washer
ctothes
Use a dehumidifier near the dryer
location to help reduce the humidity
not spinning water out of See washer operating insUuctions
2O
Page is loading ...
Page is loading ...
Page is loading ...
Page is loading ...
-
 1
1
-
 2
2
-
 3
3
-
 4
4
-
 5
5
-
 6
6
-
 7
7
-
 8
8
-
 9
9
-
 10
10
-
 11
11
-
 12
12
-
 13
13
-
 14
14
-
 15
15
-
 16
16
-
 17
17
-
 18
18
-
 19
19
-
 20
20
-
 21
21
-
 22
22
-
 23
23
-
 24
24


Frigidaire LCE462LL2 Owner's manual
- Category
- Washing machines
- Type
- Owner's manual
Ask a question and I''ll find the answer in the document
Finding information in a document is now easier with AI
Related papers
-
Frigidaire 131883500A User manual
-
-
-
-
-
-
-
-
-
Other documents
-
GE Spacemaker Laundry WSM27TH User manual
-
Whirlpool Thin Twin User and Care Manual
-
Yes WKE100HWA Owner's manual
-
Kenmore 41761732810 Owner's manual
-
LG WKE100HWA Owner's manual
-
-
LG WKGX201HWA Owner's manual
-
Splendide WD802M User manual
-
Sears 64291 User manual
-
LG STUDIO WSEX200HNA Owner's manual