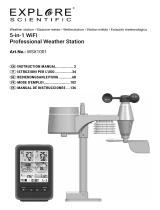
Page is loading ...

Manuel d’utilisation P 1 à 28
Description P 3
Pratique P 14
Lecture P 20
Technique P 25
Instruction manual P 29 to 56
Description P 31
Practice P 42
Reading P 48
Technical P 53
Bedienunganleitung S. 57 bis 84
Beschreibung S. 59
Prakt. Anleitung S. 70
Ablesen S. 76
Techn. Anleitung S. 81
Manual de uso P 85 a 112
Descripción P 87
Practica P 98
Lectura P 104
Technica P 109
Gebruiksaanwijzing P 113 a 140
Omschrijving P 115
Practijk P 126
Uitlezing P 132
Techniek P 137
FR
GB
D
E
NL

29
TECHNICAL
READING PRACTICE
DESCRIPTION
GB
Security p 31
General description p 32
Interpretation p 48
Start-up p 42
Changing batteries p 52
Specifications p 53
Warranty and notes p 55

30
Founded in 1830, VION has always developed navigation equipment, in particu-
lar compasses and marine instruments.
On the strength of their renowned quality, VION instruments were very soon
present on every ocean. In particular, they equipped many great cargo ships of
the XIXth and early XXth centuries.
VION accompanied the pioneers of the heroic years and later those of the
“modern” long-distance flights such as Paris-Saigon and the 1930 Atlantic cros-
sing.
Since 1945,many military programmes were also equipped by VION.
VION is, today, one of the world’s leaders for marine instruments.
A success, a longevity that originate from the respect of fundamental values
shared by our whole team: reliability and innovation.
>> VION METEO CONCEPT : MARINE TECHNOLOGY FOR ACTIVE LIFE
Derived from marine technology, the METEO CONCEPT range of weather ins-
truments has been designed for everyone…
…everyone who, for their daily activities, demand subtle, reliable forecasts.
>> AT THE HEIGHT OF TECHNOLOGICAL PROGRESS
From the very beginning, being geared towards innovation, VION has
registered a great number of patents. VION’s electronics R & D Department is,
today, specialized in radio transmission protocol and the integration and minia-
turization of meteorological measuring equipment.
>> EXCEPTIONAL STYLE
The METEO CONCEPT range of instruments has been created and stylized
by VION’s Design department. Easy-to-use keyboards, regular forms,
harmonious colours, inclined display, graded information… great attention has
been paid to every detail. Being serious-minded does not exclude
pleasure and refinement!
>> www.vion-marine.com
A FABULOUS ADVENTURE
THROUGH THE CENTURIES
A FABULOUS ADVENTURE
THROUGH THE CENTURIES

Thank you for purchasing this instrument, we hope you will be
entirely satisfied with it.
Please read the following instructions carefully
before you start using the device.
The following symbols are used throughout these instructions to
signal important information:
: Warning
Precaution for use
Please be sure to read all paragraphs marked with such symbols.
WARNINGS
For your safety, please conform to the following
instructions when using your EASY METEO.
Do not dismantle the device
Do not dismantle the device, as this would invalidate the
warranty. Never insert any blade, rod, screwdriver or any other
tool inside air inlets as this might damage the device’s inside
workings and is not covered by the warranty.
Never try to open the radio sensor body, as this will damage the
seal and is not covered by the warranty.
Always put the cap on all radio sensors exposed to
bad weather.
Handle batteries with care
• We advise you to use LR6 (AA) batteries for the main unit and
LR03 (AAA) batteries for sensors.
• When replacing batteries, match polarities as indicated.
• Do not expose batteries to a flame or excessive heat.
• Batteries may leak when fully discharged. Be sure to remove
batteries as soon as they are discharged to avoid damaging the
device.
• When batteries are not in use, put the battery housing cover
on (on both main unit and sensors) and store batteries in a cool
place.
• Only use new batteries; do not mix discharged and new
batteries, as discharged batteries may leak.
Keep the device out of the reach of children
Keep batteries and other small components of the device away
from children, as they may put them in their mouth.
■ Descriptions and features given in this document are for
information only and imply no commitment on our part. Due to
constant improvement in our product quality, this information
may be changed without prior notice.
■ Every effort has been made to supply error-free instructions.
However, please inform us if you find any error in this manual.
■ The manufacturer and the distributors decline all
responsibility for any damage of any kind resulting from the use
of this device by yourself or any other third party.
■ The contents of this manual may not be reproduced without
the prior consent of the manufacturer.
31
TECHNICAL
Security
READING PRACTICE
DESCRIPTION

PRECAUTIONS OF USE
To ensure lasting service of your Vion Meteo Concept product, please
follow the additional instructions below.
Keep the device in a dry place
The main unit or base of EASY METEO is not water-tight and will no
longer operate if immersed in water or exposed to a stream of water.
Keep it in a clean dry place. Wipe it immediately with a soft cloth if wet.
Remove salt, sand and dust
If you use your EASY METEO on the coast, clean it with a damp cloth to
remove sand or salt, then dry it carefully.
Never touch LCD displays with fingers or any other object.
Clean LCD displays using a damp cloth, and without exerting pressure on
them. Do not use chemicals or detergents.
Perform cleaning with care.
Clean your main unit and sensors using a soft cloth, damp if necessary.
Do not use chemicals or detergents.
Handle the device with care during transport.
For transport, remove the detachable foot, replace the cover, using the
product delivery packaging and wedging it inside the packaging to
protect it against shocks.
Store the device at normal temperatures and avoid sudden
temperature changes.
Use and store your main unit at normal temperatures (0 to +50°C).
Sudden temperature changes (such as those occurring when you enter a
heated room coming from outside on a very cold winter day) are likely to
produce condensation inside the device. To prevent it from occurring,
place the device inside a bag before exposing it to such sudden
temperature change.
Do not drop the device.
Handle the main unit and sensors with care and avoid violent shocks or
vibrations, as these are likely to damage the device.
Keep the device away from high magnetic fields.
Do not use and store your EASY METEO near equipment such as radio
transmitter, television set, microwave oven, computer or portable
telephone, since they produce strong electromagnetic radiations or
magnetic fields that are likely to disturb the device’s display, damage the
data stored in memory, damage the device’s inside circuitry, or reduce the
reception of sensors and DCF 77signal.
Batteries.
When switching on the device, check the battery level. Replace if the
charge level indicator requires it.
In cold weather, the batteries tend to discharge more quickly.
If the battery terminals get dirty, clean them using a dry clean cloth
before replacing the battery in its housing.
32

This device was designed by engineers of our R&D Department,
based on the study of needs of informed consumers.
EASY METEO is an electronic weather station specially designed
for all users needing atmospheric or weather forecast
information.
CONTENTS OF PACKAGING
• 1 main unit
• 1 foot
• 1 cover
• 1 wall fixing kit
• 1 sensor
• 1 cap
• 1 wall fixing kit for the sensor
• 4 batteries R6 (AA) for the base and 3 batteries R03 (AAA)
for the sensor
• 1 User’s Manual
33
TECHNICAL
READING PRACTICE
DESCRIPTION
General

MAIN FEATURES OF MAIN UNIT
• "Intelligent" weather forecast with confidence index *
• Strong winds alarm *
• 6-hour frost forecast *
• Permanent or intermittent display of all information from sensors and
main unit
• Drop-down user-friendly menu
• Indication of moon phases with 8 positions
• Atmospheric pressure in absolute value or sea-level value, with
+/- 1hPa precision level.
• Arrow of pressure variation forecast
• 24-hour pressure graph
• Inside temperature and hygrometry, with indication of comfort level
• Outside temperature and hygrometry
• Professional quality humidity sensor
• New professional digital humidity sensor, with very high accuracy
• 3 sensors possible, reception index *
• “Blue” flashing LED on front panel indicating reception of one sensor *
• Mini/Maxi for all data
• Automatic search feature of all sensors *
• Indication of low battery level for the main unit and all sensors
• Time and date alternating display
• Automatic search of time on the DCF 77 on start-up of the device and
in normal operation
• Audible beep each time a valid key is pressed
• Choice of display: °C or °F, hPa or inHg, time 12/24
• Power supply by four AA type batteries
• Approximate battery lifetime in average use: 10 to 12 months, with
LR6 (AA) batteries.
* Exclusive feature of VION Meteo Concept products
34

MAIN UNIT LIQUID CRYSTAL
DISPLAY (LCD)
Refer to pages 48 to 51 for further details.
35
TECHNICAL
General
READING PRACTICE
DESCRIPTION
Automatic time
reception
indicator
1
Alternate display
of information
from sensors and
main unit
15
Radio sensor n°
14
Pressure history
graph
13
Pressure forecast
arrow
12
Atmospheric
pressure
11
Reception index
10
Temperature and
hygrometry
9
Comfort index
8
Weather forecast
confidence index
7
Frost forecast
6
Weather forecast
5
Strong winds
alarm
4
Moon phase
3
Hour or date
alternately
2

CAPTEUR / SENSOR
36
LCD display
Antenna
2
1
Detachable foot
Cap
4
3
Reset
9
Air vents
5
Sensor N°
7
Battery housing
8
Temperature
switch °C or °F
6

MAIN FEATURES OF THE SENSOR
The sensor supplied can be coded as sensor no. 1, no. 2 or
no. 3. *
• Protected, water-resistant casing
• Long range radio transmission: 100m (in the absence of
electromagnetic disturbance) *
• Wall fixing kit
• Power supply by 3 batteries of type AAA.
• LCD display with alternate display of temperature, humidity
and sensor number.
• Low level of battery display
• Display of HF transmission (with symbol) *
* Exclusive feature of VION Meteo Concept Products
Radio transmission information
A radio transmission range can only be measured in an
open field free from disturbance.
Please keep in mind that in home or office use, due to the
effect of computers, microwave ovens, remote controls,
alarms, cellular phones and wooden, metal, or concrete
partitions, this range can be slightly or greatly reduced.
The manufacturer and the distributor may not be held
liable of such drop in performance due to the device’s
environmental conditions.
37
TECHNICAL
General
READING PRACTICE
DESCRIPTION
The low battery indicator
display appears on the top-
left of the LCD.
The sensor’s LCD displays
intermittently the following
information every 5 seconds:
the local temperature
or
the percentage local
hygrometry
The transmission indicator
light: appears every minute
on bottom left of the LCD. It
means that the sensor is
transmitting
4
3
2
1

MAIN UNIT
38
Key accessing
setting-up menu
Key accessing
calendar setting
Reset
Battery housing
4
3
2
1
LCD (Liquid
crystal display)
1
«Blue» flashing LED
indicating reception
of sensor
2
Foot
3
Keyboard
4

SCROLL MENUS
NAVIGATION KEYS
(On device's front face)
Key accessing sensor menu
Keys for browsing the various options of the
different menus –those that are permanently lit –
the selected option flickers
Key for confirming and validating the selected
flickering option, or the keyed- in-data
Key accessing mini/maxi menu
NAVIGATION KEYS
(on device’s rear panel)
Key accessing the setting-up menu
Key accessing calendar setting
39
TECHNICAL
General
READING PRACTICE
DESCRIPTION

Please take a few moments to discover the various features of controls,
displays and menus.
Under normal operating conditions, the default display will appear
if no control is entered on the keyboard for more than 20 seconds. You
will then need to start your operations all over again.
MENU SETTING KEY
This key is used to set up the main unit when starting up your EASY
METEO (See page 46)
This key is also used later on to modify a setting:
E.g.: changing the temperature unit
Synchro Thermo Altitude Baro Sens 1
Move arrows or until "thermo" flickers
Validate by
Then use the arrows move to the desired °C or °F position and press
You should then wait a few seconds before the default display reappears.
SENSOR MENU KEY
This key is used to select the sensor, which data you want to display
(sensor 1, 2 or 3 or all three alternately).
Move arrows until you reach the desired setting:
for main unit
for sensor No. 1
for sensor No. 2
for sensor No. 3
To have the main unit display all information of sensors and
main unit, automatically, in sequence and on a continuous basis.
Then press
40

MINI/MAXI MENU KEY
This key gives access to mini/maxi
stored pressure data of the main unit and to the temperature
and hygrometry of the main unit or of each sensor.
Min Max Reset
Select Min (minimum data) or Max (maximum data) using the
arrows then press .
E.g.: If you selected Min
Min
Using arrows display minimum data of main unit or
sensors 1 or 2 or 3
If you select reset, all mini/maxi values previously stored are
cleared and a reset is carried out.
The device returns automatically to the default display after a
few seconds.
KEY ACCESSING MANUAL
ADJUSTMENT OF CALENDAR
This key is for manually adjusting the calendar (12 or 24h mode,
time, minute, year, day, month, hemisphere).
Settings can then be changed.
E.g.: change of time zone.
Move to time using the arrows
Press
Change the time using the arrows
Then press
The default display reappears after a few seconds.
Note: if reception DCF 77 was activated, the icon of DCF
correct reception switches off until a new automatic search of
time is performed.
MEM
41
TECHNICAL
General
READING PRACTICE
DESCRIPTION

START-UP
Follow carefully the following 3 steps to start up the device:
• Start-up of main unit
• Start-up of radio sensors and search of sensors by the main unit
• Setup of central unit
Since the device takes into account the altitude of the place of use,
it is advisable to carry out this setting at the place where the device is to
be used. Otherwise, the pressure measurement will not be accurate.
Before starting, inquire about the altitude and current pressure of
the locality where you are with the local weather forecast phone service,
port or airport.
STEP No. 1 – START-UP OF MAIN UNIT
Pull and remove the cover of the battery compartment located at the
back of the device.
Remove the insulating strip. The device uses 4 batteries AA.
Put the cover back in place and check that it is correctly fitted.
Your Easy Meteo can be installed in two ways : standing on its foot or
fixed on the wall.
Free standing :
Remove the cover fixed at the lower end of the tube at rear of device and
fit the foot to the device using the notch provided.
Wall fixing:
Fix the wall fixing support (black plastic part) onto the wall.
Whilst holding the device on each side with the index finger holding the
top of it. Slide the tube of the device from top to bottom into the wall
support using notches provided.
The wall fixing piece offers 7 different positions for directing the device.
If you wish to change the device’s direction, gently release the device from
its wall fixing support, sliding upwards and perform the same handling
as described previously to put it back in the position of your choice.
Perform the above operations with caution avoiding
scratching the paint of the device’s tube.
Never try changing the device’s direction without first
releasing it from its support.
On power on, the main unit produces a long ‘beep’ with a bluish-lighted
line appearing simultaneously on the front panel. Then the LCD display
switches on and the following indications are displayed from top to
bottom:
• Date 31.01 or time 0.00 alternately
• The moon phase
• A weather pictogram
• Inside temperature and hygrometry
• Absolute pressure measured at the local altitude where the product is
used
The right-hand column of the graphic area is lit and will represent the first
pressure average over a 1/2 h.
42

STEP 2 – STARTING UP RADIO SENSORS
AND STARTING SEARCH OF SENSORS BY
MAIN UNIT.
Note : The radio sensor installed outside must
always be named as sensor no 1.
Unscrew the battery compartment cover and remove it.
Before inserting batteries, select the number that will be used
for this sensor (remember No. 1 is for outside sensor) by moving
the button to the right for No. 1, to the centre for No. 2, to the
left for No. 3.
These radio sensors use 3 batteries of AAA type. Insert them by
strictly conforming to the polarity indicated at the bottom of the
compartment; do not close the cover at this stage.
Do not change the No. of a sensor after bringing it into
service. If so desired, start the operation all over again.
Press the key of the main unit, then select Synchro by
pressing the keys, then press
.
The device then starts a specific search of all radio sensor
transmission received for 2min 10s.
It is recommended to reset the sensor immediately
after starting the synchronization since the sensor then
transmits 12 times during 60s, which facilitates its
detection by the main unit during the synchronization
operation.
This procedure can thus be used to check if the location of a
sensor allows it to be received by the main unit.
When a sensor is powered on (or after a reset), it issues a special
indication of its identification number. This in turn “locks” the
main unit on the received sensor(s).
Make sure the seal is carefully put back in the slot provided
before screwing up the battery compartment cover of the
sensor. Do the same when you change batteries later on.
Put the cap on the sensor. Carefully fix the wall fixing kit on wall.
It is essential to name the radio sensor you want to
install outside as No. 1 and put it northward or under
"shelter" so that it will never receive direct sunlight (as
this would completely distort the relative humidity and
temperature measurements and distort the result of the
multicriterion weather forecasts, the world exclusive
feature of your EASY METEO).
43
TECHNICAL
READING
Start-up
PRACTICE
DESCRIPTION

If you live in an area of electromagnetic disturbances (as this is very
frequently the case due to numerous domestic appliances in use) and if
the main unit would "lose" one of its sensors as a result at one time, an
automatic search would be launched for 2 min and 10s. If the sensor(s)
was(were) not found at the end of this procedure, an automatic search
would then be started every hour for a 24h period. During these
automatic search operations, the word Synchro is displayed. This
automatic search procedure is a world exclusive feature of your EASY
METEO.
To display the temperature and humidity of the selected sensor (in for
main unit, 1, 2 or 3 or alternately, refer to page 40 - Sensor menu key.
STEP 3 - MAIN UNIT SETUP
If all the following settings are not carried out, your device
will not operate under normal conditions and might not provide
full satisfaction. Since the device is calculating a moving average,
it is advisable to carry out the setting after a few minutes of
operation.
AUTOMATIC CALENDAR SETUP
This device was designed with time set automatically to DCF 77
(Frankfurt) with a high level of sensitivity.
15 seconds after LCD display switched on (See page 42), DCF 77 icon
starts flickering slowly indicating that automatic search of time by your
EASY METEO has started and will last for 4 min and 16s. The full and
correct reception of time results in automatic time reset of main unit: the
new time and date are then displayed and icon DCF 77 starts flashing.
Putting time forward or back
It is possible to put time forward/back by one hour compared to the time
given by the automatic reception (for example, United Kingdom or
Poland).
To put time forward by one hour, press the key for 5 seconds. The
time displayed will be + one hour earlier than the time received by the DCF,
and the precision given by the signal DCF 77 will thus be maintained.
Operate in the same way to put time back by one hour
Activating/Deactivating the automatic time search
To activate or deactivate the automatic time, press
To activate it, hold key pressed down until the DCF symbol is
displayed; to deactivate it, hold key pressed down until the three full
lines are displayed.
44

Note :
• The transmitter located in Frankfurt uses the time given by the
atomic clock with an accuracy greater than 1s/year
• The distances of reception for signal DCF 77 are as follows:
• Between 0 and 600 km from Frankfurt, the reception is at a
maximum.
• Between 600 and 2000 km, interference may occur and
lower signal reception quality; it may then be necessary to
switch over to manual setup.
MANUAL ADJUSTMENT OF CALENDAR
Press
The drop-down menu appears on the top part of the device
Step 1
Mode - confirm by pressing
12 H - 24 H
Select the time format 12h (AM/PM) or 24h using
the keys then press
Step 2
Time – confirm by pressing
Set the time using the keys
then press
Step 3
Minute – confirm by pressing
Set the min using the keys
then press
Step 4
Year – confirm by pressing
Set the year using the keys
then press
Step 5
Month – confirm by pressing
Set the month using the keys
then press
45
TECHNICAL
READING
Start-up
PRACTICE
DESCRIPTION

Step 6
Day – confirm by pressing
Set the day using the keys
then press
Step 7
Hemisph North South – confirm by pressing
Indicate the hemisphere
in which you are using the keys
then press
SETUP
Press
The drop-down menu appears in the centre of the display
Step 1
Thermo - confirm by pressing
°C °F
Select the temperature unit: °C or °F using the keys
then press
The setup of altitude and pressure are important to ensure
forecast quality; please refer to the page 42. "Bringing the device
into service".
Step 2
Altitude – confirm by pressing
M or Feet
Select the altitude unit: metres or feet using the keys
then press
Carry out the setting – confirm by pressing
Set the altitude of the place where your main unit will be used. Select the
altitude using the keys
Each pressure of the key increases or decreases the unit by 5-metre
increments, then by 50-meter increments after 11 strokes of the same
key.
Next confirm by pressing
.
46

Step 3
Baro – confirm by pressing
HPa
InHg
Select the pressure unit : hPa or InHg using the keys
then press
Carry out the setting – confirm by pressing
Carry out the precision setting of the pressure
using the keys
then press
Step 4
Sensor 1 – confirm by pressing
Select ext. or int
Then confirm by pressing
If the No.1 sensor is not installed outside, the
weather forecast will operate under a degraded mode
and you will not enjoy the full benefits of the device, such
as the "multicriterion weather forecast" with index of
confidence.
47
TECHNICAL
READING PRACTICE
Interpretation
DESCRIPTION
/