Page is loading ...

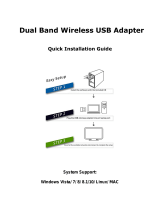
Dual Band Wireless USB Adapter
Quick Installation Guide
System Support:
Windows Vista/ 7/ 8/ 8.1/10/MAC

Windows OS Operating Instructions
Driver Installation
Please follow the following instructions to install your new
wireless USB Adapter:
1.
Insert the USB wireless network card into an empty USB 2.0/3.0
port of your computer
when computer is switched on. Never
use
force to insert the card, if y
ou feel it’s stuck, flip the card over
and
try ag
ain.
2.
The following message will appear on your computer, click
‘Cancel / C
lose
’.
Under Windows Vista and Windows 7

Tips:
The adapter is built-in driver software. Generally, the driver will be
installed automatically in win7 / 8 / 10 / XP, just plug and play,
and enable your pc to connect to the WiFi.
If you find it doesn't install automatically,
we also offer three ways to get the installation driver:
① You can install the driver from the mini disc(Just as demonstrated in
the steps above)
② If you don't have a CD player to read the driver. What can you do?
The driver will install automatically in Windows 7/8/8.1/10/XP. If you
plug it on and it looks like a disc drive and does not install it
automatically, you can open it in Windows Explorer, select proper file
for your system “Windows/Mac”
Double left-click on the "setup.exe" file and follow the direction to
finish the installation, after that it will work perfectly.
③Or download the driver via an online link
Online driver link:https://bit.ly/2YA01yM
No matter you load the driver from CD-ROM, open the driver through
the built-in file of the dongle, or download the driver online, after
obtaining the driver, The following installation process is the same.

3.
Insert the driver CD into your CD-ROM, open the “D” drive.
Select proper file for your system “Windows/Mac”
4.
Double left-click on the setup.exe file and follow the direction to
finish the installation

5.
Once the installation is finished the computer will be asked to reboot.
you can click ‘Finish’ and reboot the computer to finish the installation
of driver files
6.
Insert the USB wireless network card into an USB 2.0/3.0 port of
your computer, the system will find the new hardware and will install
the drivers automatically.
A new icon will appear near the clock of system tray:
Connect to the Internet:

7.
After finishing driver installation, click adapter utility from your
taskbar or programs folder. Click “available networks”, select the
wireless access point you would like to connect and press “Add to
Profile” button.
8.
Fill in the security information if any requirement, and then
click “OK” to connect the wireless network.

9.
Connected successfully. It will show the status screen.
Left-click the icon will launch wireless network configuration utility, and you can
right-click the icon to show the quick menu of configuration utility. This icon also uses
different color to show the status of wireless connection:

3.APmodeforWin8.1/8/7/vista/xp/2000
Right-click Client configuration utility icon, and click
Open Config Utility
It requires few seconds to switch to AP mode, please be patient
Select Mode and then select Access Point.

Client mode icon
AP mode icon
Configure SSID and Channel
Please note that Ad-Hoc mode is not available when network card is in AP
mode

Mac OS Operating Instructions
1.
Please copy all file of CD to the desktop .(If is compressed
package,please decompression through windows system first, then
copy to the MAC system), open the folder and find the Driver - as
below picture:
2.
Select the corresponding folder for the system - as below picture:

3.
Select the corresponding version - as below picture
(my
computer version:10.10.5):
4.
Please double-click to open Installer.pkg:

5.
Please choose “Continue “ to enter the next step.
6.
Please choose “Continue “ to enter the next step.

7.
Please choose “Continue “ to enter the next step.
8.
Please choose “Agree“ to enter the next step.

9.
Please choose “Install “ to enter the next step.
10.
Please input your power-on password here, then cleck
“Install Software”. If no password please click
“Install
Software” directly to enter the next step.

11.
Please choose “Continue Installation“ to enter the next step.
12.
It show “Installing Wireless USB Adapter Driver”, please waiting
a few minutes.

13.
Installaton successful, please choose “Restart”.
14.
You can see installed the wireless card here after you restart
the computer .
/