Page is loading ...

MANUAL - LEDBAR3/6/12-RC
2
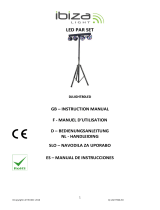
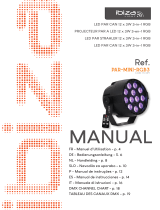
LEDBAR RGBW 4-IN-1
WITH DMX & REMOTE CONTROL
INSTRUCTION MANUAL
IMPORTANT SAFETY INSTRUCTIONS AND DANGER WARNINGS
• Please read these instructions carefully, they include important information about the installation, usage and
maintenance of this product.
• Please keep this User Guide for future reference. If you sell the unit to another user, be sure that he also
receives this instruction booklet.
• Always make sure that you are connecting to the proper voltage, and that the line voltage you are connec-
ting to is not higher than that stated on the decal or rear panel of the xture.
• This product is intended for indoor use only!
• It is essential that the device is earthed. A qualied person must carry out the electric connection.
• To prevent risk of re or shock, do not expose xture to rain or moisture. Make sure there are no ammable
materials close to the unit while operating.
• The unit must be installed in a location with adequate ventilation, at least 20in (50cm) from adjacent sur-
faces. Be sure that no ventilation slots are blocked.
• Always disconnect from power source before servicing or replacing fuse and be sure to replace with same
fuse size and type.
• Secure xture to fastening device using a safety chain. Never carry the xture solely by its head. Use its
carrying handles.
• Maximum ambient temperature (Ta) is 104° F (40°C). Do not operate the xture at temperatures higher than
this.
• In the event of a serious operating problem, stop using the unit immediately. Never try to repair the unit
by yourself. Repairs carried out by unskilled people can lead to damage or malfunction. Please contact the
nearest authorized technical assistance center. Always use the same type of spare parts.
• Don’t connect the device to a dimmer pack.
• Make sure the power cord is never crimped or damaged.
• Never disconnect the power cord by pulling or tugging on the cord.
• Avoid direct eye exposure to the light source while it is on.
• The product is for decorative purposes only and not suitable as a household room illumination.
• DISCONNECT DEVICE: Where the MAINS plug or an appliance coupler is used as the disconnect device, the
disconnect device shall remain readily operable.
SPECIFICATIONS:
Ref. LEDBAR3-RC LEDBAR6-RC LEDBAR12-RC
Input voltage AC100~240V 50/60Hz
Consumption 24W 48W 96W
LED source 3 x 8W RGBW 4-in-1 6 x 8W RGBW 4-in-1 12 x 8W RGBW 4-in-1
Beam angle 25°
Flash rate 0-20Hz
Fuse 0.5A 0.5A 1A
Control Signal DMX signal
Channel 8 / 4-1 / 4 / 3 / 2 Channels
Dimensions 265×87×129mm 605 x 145 x 120 mm 1150 x 145 x 120mm
Weight 1.2kg 2.5kg 3.5kg
EN

3
MANUAL - LEDBAR3/6/12-RC
SETUP
Disconnect the power cord before replacing a fuse and always replace with the same type fuse.
FUSE REPLACEMENT
• With a at head screwdriver wedge the fuse holder out of its housing.
• Remove the damaged fuse from its holder and replace with exactly the same type of fuse.
• Insert the fuse holder back in its place and reconnect power.
• The fuse is located inside this compartment. Remove using a at head screwdriver.
FIXTURE LINKING
You will need a serial data link to run light shows of one or more xtures using a DMX-512 controller or to run
synchronized shows on two or more xtures set to a master/slave operating mode. The combined number of
channels required by all xtures on a serial data link determines the number of xtures that the data link can
support.
Important: Fixtures on a serial/data link must be daisy chained in one single line. Maximum recommended
serial data link distance: 100 meters (1640 ft.) Maximum recommended number of xtures on a serial data link:
32 xtures
DATA CABLING
To link xtures together you must use data cables. If you choose to create your own cable, please use da-
ta-grade cables that can carry a high quality signal and are less prone to electromagnetic interference.
CABLE CONNECTORS
Cabling must have a male XLR connector on one end and a female XLR connector on the other end.
DMX connector conguration
Termination reduces signal errors. To avoid signal transmission problems and interference, it is always advisable
to connect a DMX signal terminator.
CAUTION
Do not allow contact between the common and the xture’s chassis ground. Grounding the common can cause
a ground loop, and your xture may perform erratically. Test cables with an ohm meter to check correct polarity
and to make sure the pins are not grounded or shorted to the shield or each other.
SETTING UP A DMX SERIAL DATA LINK
1. Connect the (male) 3 pin connector side of the DMX cable to the output (female) 3 pin connector of the
controller.
2. Connect the end of the cable coming from the controller which will have a (female) 3 pin connector to the
input connector of the next fixture consisting of a (male) 3 pin connector.
3. Then, proceed to connect from the output as stated above to the input of the following fixture and so on.
MASTER/SLAVE FIXTURE LINKING
1. Connect the (male) 3 pin connecter side of the DMX cable to the output (female) 3 pin connecter of the first
fixture.
2. Connect the end of the cable coming from the first fixture which will have a (female) 3 pin connecter to the
input connecter of the next fixture consisting of a (male) 3 pin connecter. Then, proceed to connect from
the output as stated above to the input of the following fixture and so on
3. Often, the set up for Master-Slave and Stand-alone operation requires that the first fixture in the chain be
initialized for this purpose via either settings in the control panel or DIP-switches. Secondarily, the fixtures
that follow may also require a slave setting. Please consult the '' Operating Instructions» section in this
manual for complete instructions for this type of setup and configuration.
INPUT
COMMON
DMX +
DMX-
Resistance 120 ohm
1/ 4w between pin 2
(DMX-) and pin 3
(DMX+) of the last
fixture.

MANUAL - LEDBAR3/6/12-RC
4
HOW TO CONTROL THE UNIT
Access control panel functions using the four panel buttons located directly un-
derneath the LCD Display.
Button Function
MENU Used to access the menu or to return to a previous menu option
UP Scrolls through menu options in ascending order
DOWN Scrolls through menu options in descending order
ENTER Used to select and store the current menu or option within a menu
When a menu function is selected, the display will show immediately the rst available option for the selected
menu function. To select a menu item, press <ENTER>.
Master mode: any unit cans work for master xture,
Slave mode: must be setting DMX address value for Slave.
DMX code setting: d1~d512
MANUAL SETTING MODE ON LED DISPLAY
Mode Programming Description
DMX mode Addr
8CH
d001-d512
4-1CH
4CH
3CH
2CH
Static colors Stat S 01-17 Static colors
Auto Auto Au 1-2 Auto program
Sound Mode Soun So 1-2 Sound Program
Speed SPEE SP 1-9 Speed
Mic Sensitivity SEnS SE 1-9 MIC sensitivity
Edit color Colo
r000-255 Red (0-100%)
g000-255 Green (0-100%)
b000-255 Blue (0-100%)
U000-255 White (0-100%)
Dimming dIMM dI1-dI 9 Master dimming
Silent scene SILE on/oFF Silent scene in Sound controlled program
Slave SLAV Slave Slave
Infrared InFr on/oFF Enable or Disable IR remote
DMX CHANNEL MODES
8-CH mode
CH1 0-255 Master dimming (0-100%)
CH2 0-255 Stroboscope (Rate 0-100%)
CH3 0-255 Red (0-100%)
CH4 0-255 Green (0-100%)
CH5 0-255 Blue (0-100%)
CH6 0-255 White (0-100%)
CH7
0-9 No function
10-19 Red
20-29 Green
30-39 Blue

5
MANUAL - LEDBAR3/6/12-RC
CH7
40-49 White
50-59 Yellow
60-69 Magenta
70-79 Cyan
80-89 Dark orange
90-99 Green yellow
100-109 Salmon
110-119 Turquoise
120-129 Light Green
130-139 Orange
140-149 Lavender
150-159 Light blue
160-169 Dark blue
170-255 Pink
CH8
0-9 No function
10-69 Color blending (rate)
70-129 Color change (rate)
130-189 Sound color blending (rate)
190-255 Sound color change (rate)
4-1 CH Mode
CH1 0-255 Master dimming (0-100%)
CH2 0-255 Stroboscope (Rate 0-100%)
CH3
0-9 No function
10-19 Red
20-29 Green
30-39 Blue
40-49 White
50-59 Yellow
60-69 Magenta
70-79 Cyan
80-89 Dark orange
90-99 Green yellow
100-109 Salmon
110-119 Turquoise
120-129 Light Green
130-139 Orange
140-149 Lavender
150-159 Light blue
160-169 Dark blue
170-255 Pink
CH4
0-9 No function
10-69w Color blending (rate)
70-129 Color change (rate)
130-189 Sound color blending (rate)
190-255 Sound color change (rate)

MANUAL - LEDBAR3/6/12-RC
6
4-CH Mode
CH1 0-255 Red (0-100%)
CH2 0-255 Green (0-100%)
CH3 0-255 Blue (0-100%)
CH4 0-255 White (0-100%)
3-CH Mode
CH1 0-255 Red (0-100%)
CH2 0-255 Green (0-100%)
CH3 0-255 Blue (0-100%)
2-CH Mode
CH1 0-255 Master dimming (0-100%)
CH2
0-9 No function
10-19 Red
20-29 Green
30-39 Blue
40-49 White
50-59 Yellow
60-69 Magenta
70-79 Cyan
80-89 Dark orange
90-99 Green yellow
100-109 Salmon
110-119 Turquoise
120-129 Light Green
130-139 Orange
140-149 Lavender
150-159 Light blue
160-169 Dark blue
170-255 Pink
IR REMOTE CONTROLLER
BLACK OUT Mode
1. Press BLACK OUT o existing modes, Press BLACK OUT to return the last modes.
AUTO Mode
1. Press <AUTO> on the IRC.
2. Press <+> or <–> to choose between the dierent AUTO programs.
SOUND Mode
1. Press <SOUND> on the IRC.
2. Press <+> or <–> to choose between the dierent SOUND programs.
STROBE Mode
1. Press <STROBE> on the IRC.
2. Press <+> or <–> to adjust the strobe rate.
3. Press <STROBE> again to turn o the strobe.

7
MANUAL - LEDBAR3/6/12-RC
MANUEL D'UTILISATION
SPEED Mode
1. Press <SPEED> on the IRC.
2. Press <+> or <–> to adjust the auto/sound program speed.
SENSITIVITY Mode
1. Press <SENSITIVITY> on the IRC.
2. Press <+> or <–> to adjust the microphone sensitivity value on the light.
DMX/% Mode
To enable DMX or disallow DMX on the product
Manual Mode
1. Press <MANUAL> on the IRC.
2. Press <R>, <G>, <B>and <W> to choose your color.
3. Press <+> or <–> to choose static colors.
FADE Mode
1. Press <FADE> on the IRC.
2. Press < FADE > again to turn o the FADE.
Number 1-9
1. Press digit <1> to <9> to change dierent brightness on the light.
Electric products must not be put into household waste. Please bring them to a recycling
centre. Ask your local authorities or your dealer about the way to proceed.
BARRE A LED RGBW 4-EN-1
AVEC DMX & TELECOMMANDE
CONSIGNES DE SECURITE
• Lisez attentivement ce manuel qui contient des informations importantes sur l’installation, l’utilisation et
l’entretien de cet appareil.
• Conservez le manuel pour référence ultérieure. Si l’appareil change un jour de propriétaire, assurez-vous que
le nouvel utilisateur est en possession du manuel.
• Assurez-vous que la tension secteur convient à cet appareil et qu’elle ne dépasse pas la tension d’alimenta-
tion indiqué sur la plaque signalétique de l’appareil.
• Uniquement pour utilisation à l’intérieur!
• L’appareil doit être impérativement relié à la terre.
• An d’éviter tout risque d’incendie ou de choc électrique, ne pas exposer cet appareil à la pluie ou à l’humi-
dité. Assurez-vous qu’aucun objet inammable ne se trouve à proximité de l’appareil pendant son fonction-
nement.
• Installez l’appareil à un endroit bien ventilé à une distance minimum de 50cm de toute surface. Assurez-vous
que les fentes de ventilation ne sont pas bloquées.
• Débranchez l’appareil du secteur avant toute manipulation ou entretien. Lorsque vous remplacez le fusible,
utilisez uniquement un fusible qui présente exactement les mêmes caractéristiques que l’ancien.
• Sécurisez l’appareil sur le dispositif de xation au moyen d’une chaîne. Ne portez jamais l’appareil en le te-
nant par le boîtier. Tenez-le par l’étrier.
• La température ambiante ne doit pas dépasser 40°C. Ne pas faire fonctionner l’appareil à des températures
supérieures.
• En cas de dysfonctionnement, arrêtez immédiatement l’appareil. N’essayez jamais de réparer l’appareil par
vous-même. Une réparation mal faite peut entraîner des dommages et des dysfonctionnements. Contactez
un service technique agréé. Utilisez uniquement des pièces détachées identiques aux pièces d’origine.
• Ne pas brancher l’appareil sur un variateur.
FR

21
HANDLEIDING - LEDBAR3/6/12-RC
CH4 0-255 Groen (0-100%)
CH5 0-255 Blauw (0-100%)
CH6 0-255 Wit (0-100%)
CH7
0-9 Geen functie
10-19 Rood
20-29 Groen
30-39 Blauw
CH7
40-49 Wite
50-59 Geel
60-69 Magenta
70-79 Cyan
80-89 Donker oranje
90-99 Geel-groen
100-109 Salmon
110-119 Turquoise
120-129 Licht Groen
130-139 Oranje
140-149 Lavender
150-159 Licht blauw
160-169 Donker blauw
170-255 Pink
CH8
0-9 Geen functie
10-69 Color blending (snelheid)
70-129 Color change (snelheid)
130-189 Sound color blending (snelheid)
190-255 Sound color change (snelheid)
4-1 kanaals modus
CH1 0-255 Master dimming (0-100%)
CH2 0-255 Stroboscoop (snelheid 0-100%)
CH3
0-9 Geen functie
10-19 Rood
20-29 Groen
30-39 Blauw
40-49 Wite
50-59 Geel
60-69 Magenta
70-79 Cyan
80-89 Donker oranje
90-99 Geel-groen
100-109 Salmon
110-119 Turquoise
120-129 Licht Groen
130-139 Oranje
140-149 Lavender
150-159 Licht blauw
160-169 Donker blauw
170-255 Pink

HANDLEIDING - LEDBAR3/6/12-RC
22
CH4
0-9 Geen functie
10-69w Color blending (snelheid)
70-129 Color change (snelheid)
130-189 Sound color blending (snelheid)
190-255 Sound color change (snelheid)
4-kanaals modus
CH1 0-255 Rood (0-100%)
CH2 0-255 Groen (0-100%)
CH3 0-255 Blauw (0-100%)
CH4 0-255 Wit (0-100%)
3-kanaals modus
CH1 0-255 Rood (0-100%)
CH2 0-255 Groen (0-100%)
CH3 0-255 Blauw (0-100%)
2-kanaals modus
CH1 0-255 Master dimming (0-100%)
CH2
0-9 Geen functie
10-19 Rood
20-29 Groen
30-39 Blauw
40-49 Wite
50-59 Geel
60-69 Magenta
70-79 Cyan
80-89 Donker oranje
90-99 Geel-groen
100-109 Salmon
110-119 Turquoise
120-129 Licht Groen
130-139 Oranje
140-149 Lavender
150-159 Licht blauw
160-169 Donker blauw
170-255 Pink

www.ibiza-light.com
42
Imported from China by LOTRONIC S.A.
Avenue Zénobe Gramme 9
B-1480 Saintes
LEDBAR3-RC
LEDBAR6-RC
LEDBAR12-RC
/