Philips SOUNDMACHINE AZ1836 User manual
- Category
- CD players
- Type
- User manual
This manual is also suitable for
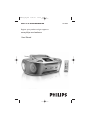
Philips SOUNDMACHINE AZ1836 allows you to play MP3-CDs, CDs, DVDs, use it as a radio to listen to FM or MW broadcasts, or connect any external USB mass storage device to enjoy your favourite music or media files. It offers a variety of playback functions including track search, forward and backward playback, play and pause, stop, program, repeat and shuffle, option to use headphones and control the volume, multiple EQ modes, ability to create programs of your favourite tracks, and possibility to copy one or all files from a disc to an external USB storage device.
Philips SOUNDMACHINE AZ1836 allows you to play MP3-CDs, CDs, DVDs, use it as a radio to listen to FM or MW broadcasts, or connect any external USB mass storage device to enjoy your favourite music or media files. It offers a variety of playback functions including track search, forward and backward playback, play and pause, stop, program, repeat and shuffle, option to use headphones and control the volume, multiple EQ modes, ability to create programs of your favourite tracks, and possibility to copy one or all files from a disc to an external USB storage device.


-
 1
1
-
 2
2
-
 3
3
-
 4
4
-
 5
5
-
 6
6
-
 7
7
-
 8
8
-
 9
9
-
 10
10
-
 11
11
-
 12
12
-
 13
13
-
 14
14
-
 15
15


Philips SOUNDMACHINE AZ1836 User manual
- Category
- CD players
- Type
- User manual
- This manual is also suitable for
Philips SOUNDMACHINE AZ1836 allows you to play MP3-CDs, CDs, DVDs, use it as a radio to listen to FM or MW broadcasts, or connect any external USB mass storage device to enjoy your favourite music or media files. It offers a variety of playback functions including track search, forward and backward playback, play and pause, stop, program, repeat and shuffle, option to use headphones and control the volume, multiple EQ modes, ability to create programs of your favourite tracks, and possibility to copy one or all files from a disc to an external USB storage device.
Ask a question and I''ll find the answer in the document
Finding information in a document is now easier with AI
Related papers
-
Philips AZ1836 User manual
-
Philips AZ1133/12 User manual
-
Philips AZ1130/12 Quick start guide
-
-
Philips AZ1130 MP3 CD Soundmachine User manual
-
-
-
-
Philips AZ1836/37B User manual
-
Philips AZ1840 User manual