This appliance is equipped with the "Multi-Tab
function", that allows the use of the "Multi-Tab
" combi detergent tablets.
These products are detergents with a combined
cleaning, rinsing and salt functions. They can
also contain other different agents depending
on which kind of tablets you choose ("3 in 1",
"4 in 1", "5 in 1" etc...)
Check whether these detergents are suitable
for your water hardness. See the manufactur-
ers instructions.
Once this function is selected it will remain ac-
tive also for the following washing programmes.
With the selection of this function the inflow of
rinse aid and salt from each respective supply
container is automatically deactivated and also
the indicator lights for salt and rinse aid are de-
activated.
Select the "Multi-Tab function" before the start
of a washing programme.
With the use of the "Multi-Tab function", the cy-
cle durations may change.
Once the programme is running, the "Multi-Tab
function" can NO longer be changed.
If you want to exclude the "Multi-Tab function"
you have to cancel the programme setting and
then deactivate the "Multi-Tab function". In this
case you have to set a washing programme
(and desired options) again.
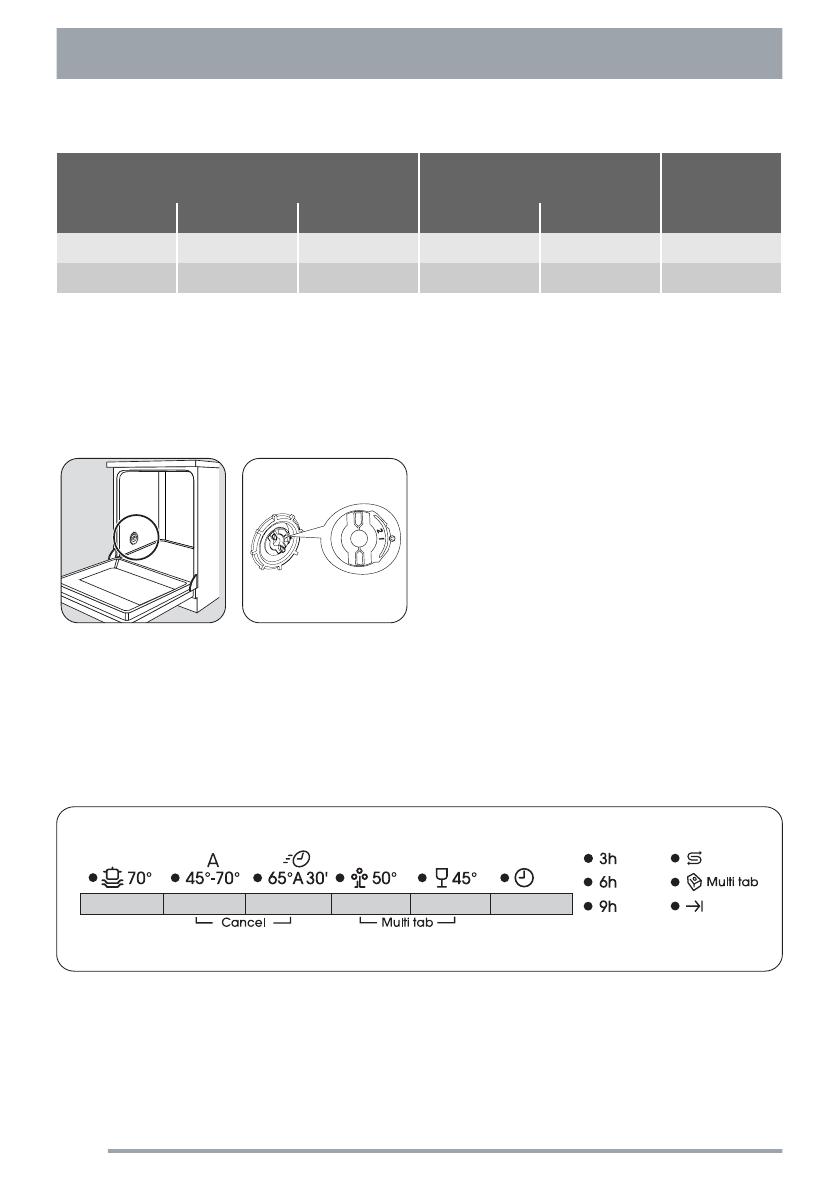
Activation/deactivation of the Multi-Tab
function
Press simultaneously the two buttons posi-
tioned over the Multi-Tab symbol, until the
"Multi-Tab function "indicator light illuminates.
This means that the function is active.
To deactivate the function press the same but-
tons again until the indicator light correspond-
ing to the "Multi-Tab function" symbol turns off.
IMPORTANT!
If the drying results are not satisfactory we sug-
gest that you:
1. Fill up the rinse aid dispenser with rinse aid.
2. Activate the rinse aid dispenser.
3. Set the rinse aid dosage to position 2.
• The activation/deactivation of the rinse aid
dispenser can only be possible with the
"Multi-Tab function" active.
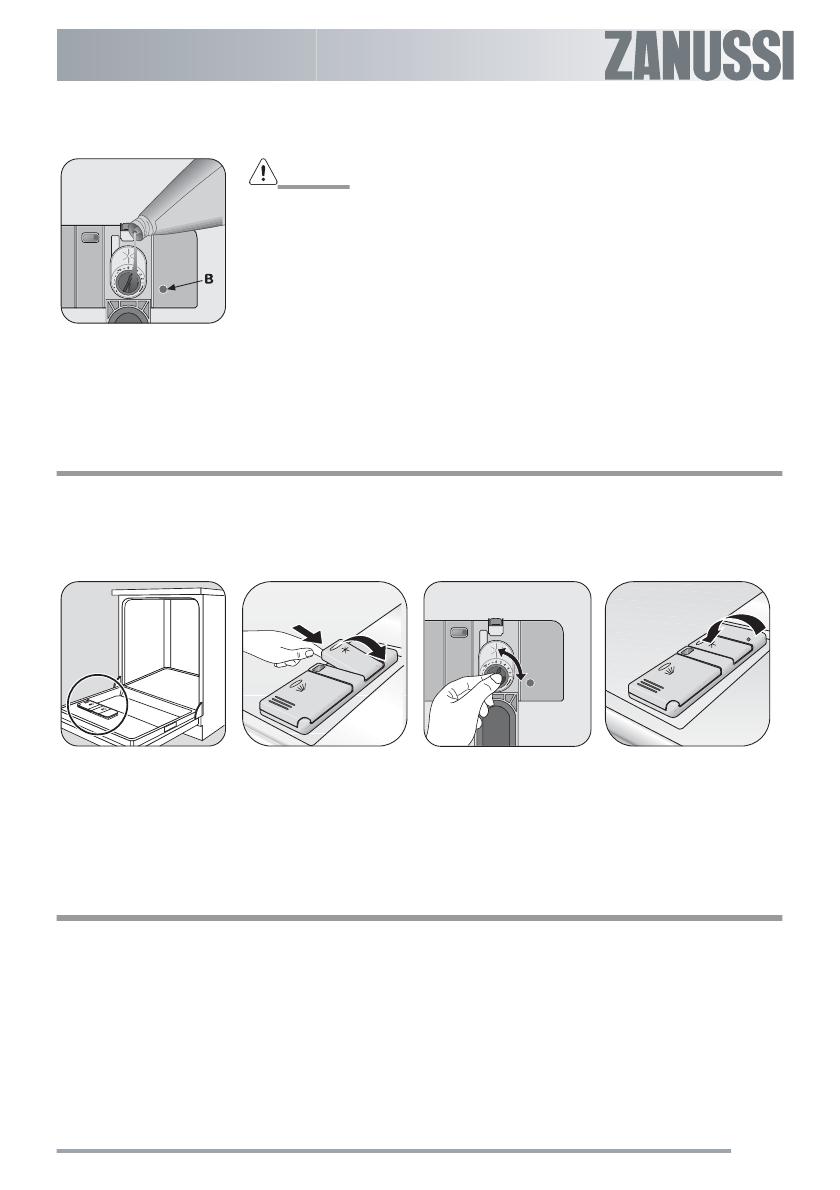
Activation/deactivation of the
rinse aid dispenser
1. Press the On/Off button. The dishwasher
must be in setting mode.
2.
Press simultaneously buttons B and C, un-
til the indicator lights of buttons A, B, and
C start flashing.
3.
Press button B, the indicator lights of but-
tons A and C turn off while the indicator
light of button B goes on flashing.
4. To activate the rinse aid dispenser, press
button B again, the end of programme in-
dicator light illuminates, indicating that the
rinse aid dispenser has been activated.
5. To memorise the operation, switch off the
dishwasher by pressing the On/Off button.
6. To deactivate the rinse aid dispenser
again, follow the above instructions until
the end of programme indicator light turns
off.
18