Page is loading ...

Commercial Series
CM360
User Guide
6866545D06 - O
Issue: October 2003

1
2
5
10
8
9
6
7
P2
P1 P3 P4
3
4
10
11
11
CHAN 34

1
English
CONTENTS
CONTENTS
RadioOverview .................... 3
Radio Controls . . . . . . . . . . . . . . . . . . . . . . 3
Microphone Controls . . . . . . . . . . . . . . . . . 3
Programmable Buttons . . . . . . . . . . . . . . . 4
Keypad Keys . . . . . . . . . . . . . . . . . . . . . . . 7
Menu Keys . . . . . . . . . . . . . . . . . . . . . . . . . 8
Menu Navigation Chart . . . . . . . . . . . . . . . 9
LCD Display and Icons. . . . . . . . . . . . . . . 10
Audio Signal Tones . . . . . . . . . . . . . . . . . 11
LED Indicators . . . . . . . . . . . . . . . . . . . . . 12
GettingStarted.................... 13
Turning the Radio On-Off. . . . . . . . . . . . . 13
Adjusting the Radio’s Volume . . . . . . . . . 13
Radio On Message . . . . . . . . . . . . . . . . . 13
Selecting a Radio Channel. . . . . . . . . . . . 14
Memory Channel . . . . . . . . . . . . . . . . . . . 15
Sending a Call . . . . . . . . . . . . . . . . . . . . . 15
Receiving a Call . . . . . . . . . . . . . . . . . . . . 16
Cancelling a Call . . . . . . . . . . . . . . . . . . . 16
Ending a Call . . . . . . . . . . . . . . . . . . . . . . 16
RadioCalls........................17
Selective Calls . . . . . . . . . . . . . . . . . . . . . .17
Making a Selective Call . . . . . . . . . . . . . . .17
Receiving a Selective Call . . . . . . . . . . . . .17
Contact List . . . . . . . . . . . . . . . . . . . . . . . .18
Missed Calls . . . . . . . . . . . . . . . . . . . . . . .24
Status Calls . . . . . . . . . . . . . . . . . . . . . . . .26
Sending a Status Call . . . . . . . . . . . . . .30
Receiving a Status Call . . . . . . . . . . . .30
Emergency Calls . . . . . . . . . . . . . . . . . . . .31
DTMF. . . . . . . . . . . . . . . . . . . . . . . . . . . . .32
Features..........................35
Voice Storage . . . . . . . . . . . . . . . . . . . . . .35
Voice Recorder. . . . . . . . . . . . . . . . . . .35
Emergency Message . . . . . . . . . . . . . .37
Public Address Mode. . . . . . . . . . . . . . . . .38
Car Radio Mute . . . . . . . . . . . . . . . . . . . . .38
Utilities . . . . . . . . . . . . . ..............39
Scan . . . . . . . . . . . . . . . . . . . . . . . . . . . . .39
Call Forward . . . . . . . . . . . . . . . . . . . . . . .42
Talkaround. . . . . . . . . . . . . . . . . . . . . . . . .43
External Alarm . . . . . . . . . . . . . . . . . . . . . .44
Lone Worker . . . . . . . . . . . . . . . . . . . . . . .45
Power Level. . . . . . . . . . . . . . . . . . . . . . . .46

2
English
CONTENTS
Companding. . . . . . . . . . . . . . . . . . . . . . . 47
Backlight. . . . . . . . . . . . . . . . . . . . . . . . . . 48
Brightness . . . . . . . . . . . . . . . . . . . . . . . . 49
Local/Distance . . . . . . . . . . . . . . . . . . . . . 50
Option Board . . . . . . . . . . . . . . . . . . . . . . 51
Voice Operated Transmit (VOX) . . . . . . . 52
Stun/Unstun . . . . . . . . . . . . . . . . . . . . . . . 52
RadioInformation ................. 53
Computer Software Copyright
The products described in this manual may include copyrighted
computer programmes stored in semiconductor memories or other
media. Laws in the United States of America and other countries
preserve for Motorola Europe and Motorola Inc. certain exclusive
rights for copyrighted computer programmes, including the right to
copy or reproduce in any form the copyrighted computer
programme. Accordingly, any copyrighted computer programmes
contained in the products described in this manual may not be
copied or reproduced in any manner without the express written
permission of the holders of the rights. Furthermore, the purchase
of these products shall not be deemed to grant either directly or by
implication, estoppel, or otherwise, any licence under the
copyrights, patents, or patent applications of the holders of the
rights, except for the normal non-exclusive royalty free licence to
use that arises by operation of the law in the sale of the product.

3
English
RADIO OVERVIEW
RADIO OVERVIEW
This user guide covers the operation of the CM360
Mobile Radio.
ATTENTION!
This radio is restricted to occupational use only to
satisfy ICNIRP RF energy exposure requirements.
Before using this product, read the RF energy
awareness information and operating instructions in
the Product Safety and RF Exposure booklet
(Motorola Publication part number 6866537D37_) to
ensure compliance with RF energy exposure limits.
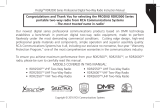
RADIO CONTROLS
The numbers below refer to the illustrations on the
inside front cover.
1. On-Off / Volume Knob
Used to turn the radio on or off, and to adjust
the radio’s volume.
2. LED Indicators
Indicates channel, scan, and monitor status, as
well as receipt of a selective call.
3. Mic Jack
4. LCD Display
An 8 character single line display with up to 8
radio status icons.
5. Navigation up or down
Used for channel scrolling, menu
navigation or, in menu mode, used
for scrolling Address or Status lists.
6. Menu Button
C
Used to access and select the menu options.
7. Programmable Buttons
D E F
Dual function programmble buttons. Short
press selects function 1; long press selects
function 2.
MICROPHONE CONTROLS
(Keypad Microphone)
Hold the microphone 2.5 to 5 cm (1-2 inches) from
your mouth, and speak clearly into it.
8. Keypad
9. Programmable Keys { } |
10. Push-to-talk (PTT)
Press and hold down this button to talk;
release it to listen.
11. Microphone
Before using this product, read the
operating instructions for safe usage
contained in the Product Safety and
RF Exposure booklet 6866537D37_
enclosed with your radio.
!
Caution

4
English
RADIO OVERVIEW
PROGRAMMABLE BUTTONS
Several of your radios keys and buttons can be
programmed, by Customer Programming Software
(CPS), as short -cut buttons for many of the radio’s
features. Programmable buttons include:
CM360
D E F
Keypad microphone { } |
Each button is dual function; a short press may
select one function, a long press may select the
second.
Check with your dealer for a complete list of the
functions your radio supports.
Feature Description Selection
Monitor 1/Cancel Monitor 1 allows you to select between signalling squelch,
carrier squelch and unsquelch, and to suspend scan when
landed on a channel in scan mode.
Cancel allows you to cancel an incoming or outgoing call.
Short or Long
Monitor 2/Cancel Monitor 2 opens squelch regardless of signalling or carrier
present.
Cancel allows you to cancel an incoming or outgoing call.
Long
Call 1, 2, 3 and 4 Allows you to transmit assigned calls. Two calls may be
allocated to one button, using the short/long press for
selection.
Short or Long
Missed Calls List Provides direct access to the Missed Call List feature. Short or Long
Contact List Provides direct access to the Contact List menu feature and
direct keypad entry if programmed to a microphone button.
The up/down keys scroll the list.
Short or Long
Contact Multicall Provides direct access to the Contact Multicall menu feature.
(Not available on the keypad microphone).
Short or Long
Status List Provides direct access to the Status List menu feature and
direct keypad entry if programmed to a microphone button.
The up/down keys scroll the list.
Short or Long

5
English
RADIO OVERVIEW
Status Multicall Provides direct access to the Status Multicall menu feature.
(Not available on the keypad microphone).
Short or Long
Channel Provides direct access into the Channel mode. The up/down
keys are set to increment/decrement the channel number in
Menu mode.
Short or Long
Memory Channel
(1 & 2)
Provides direct channel access on a single button press. Short or Long
Store Memory
Channel (1 & 2)
Programs a button to provide direct channel access. Long
Scan (On/Off) Toggles between start and stop of the scan operation. Short or Long
Nuisance
Delete/Cancel
(Voice Storage)
To delete a nuisance (unwanted) channel when scanning,
with exception of priority channel, last channel in scan list and
home channel.
Cancel, deletes messages being played back from the Voice
Storage feature.
Short or Long
Nuisance Delete To delete a nuisance (unwanted) channel when scanning,
with exception of priority channel, last channel in scan list and
home channel.
Short or Long
Cancel
(Voice Storage)
Cancel, deletes messages being played back from the Voice
Storage feature.
Short or Long
Record/Play-back
(Voice Recorder)
To record/play-back incoming calls, emergency messages or
memos using voice recorder feature.
Short or Long
Emergency Activates emergency alarm sequence. A pre-recorded
message (using the voice storage feature) may be sent to
enable the user’s location or status to be determined.
Long: On
Off: depending on
Programme
Feature Description Selection

6
English
RADIO OVERVIEW
Lone Worker
(On/Off)
To identify user as a lone worker. Radio enters emergency
sequence unless user responds, when prompted, by pressing
any radio button.
Short or Long
Power Level
(Hi/Low)
Toggles the radio’s transmit power level between High and
Low.
Short or Long
Talkaround
(On/Off)
Sets the transmit channel frequency to the same as the
receive channel frequency to talk directly with another radio
without going through a system or despatcher.
Short or Long
Call Forward
(On/Off)
Transfers calls automatically to another radio if you are
unable to take the call.
Short or Long
Xpand
(On/Off)
Toggles between compression/expansion of audio signal and
normal audio signal.
Short or Long
Option Board
(On/Off)
Toggles the option board between on and off. Short or Long
DTMF Keypad
(On/Off)
To place the keypad microphone into permanent DTMF live
dial mode.
Short or Long
External Alarm
(On/Off)
Toggles the External Alarm feature on and off.
Note: May be programmed as permanently On.
Short or Long
Backlight
(On/Off)
Toggles the display backlight between On and Off or between
“timed On” and Off.
Short or Long
Basestation/Local/
Distance
Toggles between local and distance. Local reduces
interference from other radios in close proximity and is used
for basestations. Distance improves the radio range.
Short or Long
Feature Description Selection

7
English
RADIO OVERVIEW
KEYPAD KEYS
(Keypad Microphone)
Your radio may be operated with a DTMF (Dual-
Tone Multi-Frequency) microphone that has a direct
entry keypad. The keypad is used when dialling a
phone number, making a radio call, or for numeric
channel selection.
The keypad microphone has three programmable
buttons ({, }, and |) below the keypad that
can be programmed to conveniently activate
selected radio features. Each button is dual
function; a short press may select one function, a
long press may select the second.
The # button can be programmed to send a call.
123
456
789
*0#
{}|

8
English
RADIO OVERVIEW
MENU KEYS
Menu Select Key C
The C button is dedicated to Menu access and
menu option selections.
• Short press
C
Used to enter the Menu Mode. When in Menu
Mode, this key is also used to make menu
selections.
• Long press
C
Normally used to move up to the next higher
Menu level. When the top level menu is
selected, this key is used to exit the Menu Mode.
• However when in the bottom level menu
(e.g.contact list, status multicall entry), this key
selects the entry.
• The radio also exits the Menu Mode after an
“Inactivity Time” timeout
Up /Down Navigation Keys G/H
Used to scroll when in Menu Mode.
Increment/decrement channel number or scroll
contact and status lists.
Refer to the menu navigation chart for menu
selectable features.
Using the Menu
You enter the menu at the “Missed Calls” feature
only if there are missed calls in the stack. If there are
no missed calls in the stack, the menu is entered at
the “Contact List” feature.
Use the Up/Down navigation keys to scroll through
the menu options. If you scroll past the end option
the selection wraps around and starts again.
When you reach the required option, a short press
on the
C button selects that option and enters
the Sub-menu.
Use the Up/Down Navigation keys to scroll through
the sub-menu options and select the option with a
short press on the C button.
Exiting the Menu
You may exit the menu by a long press on
C from
the top level of the menu hierarchy.
The radio also exits the menus if there has been no
inputs via the navigation buttons for the “Inactivity
Time” or after a selection has been made.

9
English
RADIO OVERVIEW
Menu Navigation
C
short press C to enter Menu Mode.
or to scroll through the
Menu options.
short press C to select Menu option
long press C return to previous
menu level
or to scroll through the
Menu sub-list.
long press C to select bottom level
menu entry and return to default display.
MENU NAVIGATION CHART
(Refer to Menu Navigation guidelines—
lower, left-hand corner of this page)
SW Version
SW Part No.
CP Version
CP Part No.
Select
Missed
calls
List
Multicall
Voice
Storage
Utilities
Channel
Call Forward
Missed
Calls
Voice
Recorder
select/
record/
play/
delete
Select
Channel
Number
Contacts
List
Multicall
Status
Emergency
Msg.
select/
record/
play/
delete
Backlight
Brightness
Companding
Scan
Talkaround
Option Board
Lone Worker
Power Level
Radio
Information
DTMF
External Alarm

10
English
RADIO OVERVIEW
LCD DISPLAY AND ICONS
Displays radio Status, Addresses or Channel, on
one line of 8 characters. The top line of the display
shows radio status icons, explained in the table
below:
Note: At extremely low temperatures, you may
experience a slight delay in displaying new
information. This is normal and does not
affect the function of your radio.
Symbol Name and Description
Option Board Indicator
Indicates that an option board is fitted
in the radio.
Voice Recorder Indicator
Flashes to indicate that there are
stored messages or memos in the
voice recorder.
Power Level Indicator
“L” lights when your radio is configured
to transmit in Low Power. “H” lights
when your radio is configured to
transmit in High Power.
CHAN 34
Monitor Indicator
On indicates carrier squelch.
Off indicates signalling squelch.
Scan Indicator
Indicates that you are scanning. The
dot is lit during priority scan mode
when scan has landed on priority
channel.
DTMF Indicator
Indicates DTMF is enabled.
Missed Call Indicator
On indicates call in list.
Off indicates no calls in list.
Flashing, indicates new call in list.
Talkaround Indicator
Indicates talkaround enabled.
Symbol Name and Description

11
English
RADIO OVERVIEW
AUDIO SIGNAL TONES
High pitched tone Low pitched tone
Tone Signal Description
Power up OK Radio self-test OK.
Power up
Fail
Radio self-test fail.
Button/
Keypad Error
Button/keypad key/
menu key press not
permitted.
Engaged Channel busy or not
permitted to
transmit.
Call Failed Call failed to
connect.
Force
Monitor
Radio must monitor
channel before
transmission
permitted.
Button
Feature
Enable
Any option button
pressed to enable a
feature.
Button
Feature
Disable
Any option button
pressed to disable a
feature.
Group Call Radio receives a
Group Call.
Individual
Call
Radio receives an
Individual Call.
Call
Reminder
Reminder of
unanswered call.
TOT Pre-
Alert
Warns of expiry of
time out timer.
Monitor Alert Alerts to change of
squelch.
Voice
Storage
Voice Storage-
Recording.
Voice
Storage
Voice Storage-
Warning.
Voice
Storage
Voice Storage-
Full.
Scan Start Radio starts
scanning.
Scan Stop Radio stops
scanning.
Priority Call
Decode
Radio detects a
priority call.
Priority
Channel
Radio landed on the
priority channel.
Lone Worker Reminds lone
worker to respond.
Tone Signal Description

12
English
RADIO OVERVIEW
LED INDICATORS
Three LEDs show radio status as follows:
Hardware
Error
Hardware error,
tone continues until
valid operation.
Cancel
Message
Previous message
or message
currently being
played from Voice
Storage has been
deleted.
Channel
Free Beep
Indicates current
channel is free.
Incoming
Emergency
Alert
Indicates an
emergency
situation.
Keypad
Acknowledg
e
Confidence tone
when any key
pressed.
Call Stacked Indicates that call
has been stacked.
Sounded on calling
radio.
Ringtones English/French/
General
Incoming calls (high
tones), outgoing
calls (low tones).
Tone Signal Description
LED State Indication
Green Solid Successful power up
Green Off After successful power
up.
Green Flashing Radio is scanning
Red Solid Radio transmitting
Red Flashing Channel busy - when
receiving
Yellow Solid Radio selectively called -
until answer timer expires
Yellow Flashing Group call reminder -
after answer timer
expires
Yellow Double
Flash
Individual call reminder -
after answer timer
expires

13
English
GETTING STARTED
GETTING STARTED
TURNING THE RADIO ON / OFF
Adjusting the Volume
Turn the On/Off/Volume Control knob clockwise to
increase the volume, or counterclockwise to
decrease the volume.
RadioOnMessage
At power up the radio may display a message
customised by your dealer, e.g.:
After this text has been displayed, the radio
performs a self test routine. During the routine the
Green LED lights. On completion of a successful
self test the radio produces the Self-Test pass Tone,
the Green LED indicator goes out and the display
shows the screen that was in use at power down,
typically:
This may be a number or an alias and will be the
current channel.
Note: If your radio fails the self test routine the
display will show the failure number. Record
the number and consult your dealer
ON OFF
Rotate the On/Off/
Volume Control knob
clockwise until you
hear a click.
Rotate the On/Off/
Volume Control knob
counterclockwise until
you hear a click. The
display clears and the
LED indicators turn off .
P2
P1
CHA
N
Volume Control Knob
ON
OFF
RADIO ON
CHAN 35

14
English
GETTING STARTED
SELECTING A RADIO CHANNEL
Your radio offers up to 100 channels, however some
may not be programmed. Check with your dealer for
more information.
Your radio will power up on a preprogrammed
designated channel or the channel that it was on
when it was powered down.
Change Channels
Method 1
Method 2.0
(Keypad Microphone)
If the default mode for the keypad microphone is
Channel entry then:
Method 2.1
(Keypad Microphone)
If the default mode for the keypad microphone is not
channel entry, then enter the channel mode.
Method 2.2
Press the channel mode direct access button, if
programmed by your dealer.
Enter and select the channel number according to
Method 2.0
Method 2.3
:
Note: The keypad microphone cannot be used to
enter the channel number during a call or
whilst the radio is in a scan.
1
In the idle state use
G
or
H to change
channel e.g.:
1 Enter the desired
channel number from
the keypad, e.g. 05:
2 Either Long press on
C or press #
on the keypad (if
programmed) to
select the channel.
CHAN 34
CHAN 5
CHAN 5
3 Display shows:
(for 2 seconds)
4 Display shows
channel selected
1 Short press on C To enter Menu
2
G
or
H until:
3 Short press on C To select
4 Display shows e.g.:
5 Enter and select the channel number
according to
Method 2.0
SELECTED
CHAN 5
CHANNEL
CHAN 11

15
English
GETTING STARTED
MEMORY CHANNEL
Up to two programmable buttons (P2, P3 or P4) can
be programmed as Memory Channel buttons which
allow you quick access to frequently used channels.
The buttons may be pre-programmed by your dealer
or are programmable by yourself.
If pre-programmed by your dealer, an appropriate
press of the button will take you to the assigned
channel.
To program a Memory Channel button yourself,
select the desired channel in the normal way and
long press the button. The button is then
programmed to the selected channel; a short press
on the button will take you to that channel.
Note: The programming is retained when you turn
off the radio.
SENDING A CALL
1. Select the desired radio channel.
2. Press the PTT button and speak clearly into the
microphone.Your mouth should be 2.5 to 5 cm
away from the microphone.
3. When transmitting, the red indicator will light
continuously.
4. Release the PTT button to listen.
Your radio may be configured for ‘Transmit Inhibit’
under certain conditions (e.g. when the channel is in
use by others) in which case, the channel busy tone
will sound when you press the PTT or call button to
indicate that transmission is inhibited.
When the channel is free, the Channel Free beep
will sound, and you can make a call.
If your radio is equipped with a transmit time out
timer (TOT), a warning tone will
sound a few seconds before the transmission is cut
off. Your radio may be programmed to inhibit
retransmission within a preset time.

16
English
GETTING STARTED
RECEIVING A CALL
1. Turn your radio on and adjust the volume level.
2. Switch to the desired radio channel.
3. If, at any time, a call is received you will hear
the call at the volume level you have set.
Note: The system may have a limited call time and
the call may be terminated automatically if
this call time is exceeded.
CANCELLING A CALL
At any time while setting up a call, it may be cancelled
by pressing the Monitor/Call Cancel button, or
replacing the microphone in its holder (referred to as
going “on hook”) .
The call timer can also cancel a call.
ENDING A CALL
A call should always be ended by pressing the
Monitor/Call Cancel button, or replacing the
microphone in its holder.

17
English
RADIO CALLS
RADIO CALLS
SELECTIVE CALLS
Making a Selective Call
You can make a selective call to a particular radio,
known as an individual call, or a group of radios,
known as a group call.
You can make calls by using the Contact List, the
Missed Calls List or Manual Dialling (using the
keypad microphone).
Receiving a Selective Call
When you receive a selective call, you will hear
either,
an individual call alert tone ,
or a group call alert tone .
The LED Indicator will light (yellow) and the display
will show the alias (name) or number (address) of
the calling radio e.g.
To answer the call:
1. Press the PTT button or Call button.
2. The call will terminate automatically when the
conversation has ended or press the Monitor/
Call Cancel button.
Alias
or Address
DEREK
2345

18
English
RADIO CALLS
CONTACT LIST
When the radio is in the “idle” state or during a call,
the contact list may be used to access up to 255
preprogrammed numbers via the menu.
Depending on the way your radio is programmed,
the radio will display either the alpha alias (name) or
the number to be dialled.
The Contacts menu has two sub-menus:
List
: which accesses the list of preprogrammed
names and numbers;
Multicall
: which allows any address digits to be
entered.
Note: There are two forms of Multicall,
Basic
Multicall,
where the user selects the person
or number to be called, and
Advanced
Multicall,
where the user first selects the
telegram to be sent and then selects the
person or number to be called.
There are two methods to enter the Contacts menu:
Method 1
Press the Contact List or Contact Multicall direct
access button, if programmed by your dealer.
Method 2
1 Short press on C to enter the menu
2
G
or
H until:
3 Short press on C to select
4
G
or
H to toggle
between
and
5 Short press on C to select
CONTACTS
LIST
MULTICAL
/