Page is loading ...

Space Force Quick Start Guide V1. 14 Space Force Quick Start Guide V1.14 PN: 650-0900
Approvals & Disclaimer
The information contained herein is offered in good faith and is believed to be accurate. However,
because conditions and methods of use of our products are beyond our control, this information should
not be used in substitution for customer's tests to ensure that Chroma-Q products are safe, effective,
and fully satisfactory for the intended end use. Suggestions of use shall not be taken as inducements to
infringe any patent. Chroma-Q sole warranty is that the product will meet the Chroma-Q sales
specifications in effect at the time of shipment. Your exclusive remedy for breach of such warranty is
limited to refund of purchase price or replacement of any product shown to be other than as warranted.
Chroma-Q reserves the right to change or make alteration to devices and their functionality without notice
due to ongoing research and development.
The Chroma-Q Space Force range has been designed specifically for the lighting industry. Regular
maintenance should be performed to ensure that the products perform well in the entertainment
environment.
If you experience any difficulties with any Chroma-Q products please contact your selling dealer. If your
selling dealer is unable to help please contact suppo[email protected]. If the selling dealer is unable to
satisfy your servicing needs, please contact the following for full factory service:
Outside North America: North America:
Tel: +44 (0)1494 446000 Tel: +1 416-255-9494
Fax: +44 (0)1494 461024 Fax: +1 416-255-3514
[email protected] support@chroma-q.com
For further information please visit the Chroma-Q website at www.chroma-q.com.
Chroma-Q and Space Force are trademarks, for more information on this visit
www.chroma-q.com/trademarks.
The rights and ownership of all trademarks are recognised.
Quick Start Guide
Chroma-Q
®
Space Force™
For a full product manual please visit http://www.chroma-q.com/support/downloads.asp
Software Version 1.6

Space Force Quick Start Guide V1.14 Space Force Quick Start Guide V1.14
1. Overview
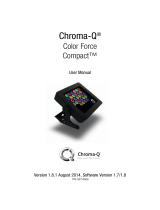
The new Chroma-Q® Space Force™ is a cutting-edge white LED space light fixture that is a true replacement for equivalent
conventional light sources commonly used in Film and TV studios around the world. For a complete list of accessories please
visit www.chroma-q.com
Caution
1. This product is for professional use only. It is NOT intended for domestic or outdoor
use.
2. The bright flash of light during power-up.
3. This product must be used with safety cable.
2. Cabling
The Space Force is built with chassis mount powerCON TRUE1 connectors for power input/through and chassis mount XLR
5-pin for DMX input/through. The chassis is ground bonded.
3. Mounting
The Space Force is built with dual purpose brackets for stacking and hanging. Secure the fixture with a safety bond. A
provision for the fixing hold is built into the enclosure. Standard and low profile yokes are available as optional accessory
items.
4. Optics
The Space Force is built with a high efficiency diffuser that provides a fully homogenised beam spread.
5. Control
The Space Force can be controlled through:
Manual Operation rear control panel
INPUT CABLE via remote DMX console through XLR-5 pin cable
INPUT RF via wireless DMX transmission
Rear Control Panel with LCD display:
Manual Control in Standalone Operation:
LEFT-HAND KNOB RIGHT-HAND KNOB
Clockwise to increase Intensity Level
Counter-clockwise to decrease Intensity Level
Press to decrement intensity by 10%
Clockwise to increase the Color Temperature
Counter-clockwise to decrease Color Temperature
Press to step down through preset Color Temp values
Control Buttons
1. Press once to activate, recall, unlink or play back
2. Press and hold for 2 – 5 seconds to store/save
M1 stores and plays back a loo
k
M2 stores and plays back a loo
k
Focus Switches the fixture ON to a preset output level for 30 seconds for a quick focus check or manual re-focus
Lin
k
Unlinks from previous wireless connections
A
dd
r
Sets the DMX start address (see the following section on DMX Operation)
DMX Operation:
To set the DMX Start Address,
On the Control Panel, press the Addr button once, “Adr” on the top left of the display flashes
Use either the Left-hand or Right-hand Knobs to set the DMX start address:
LEFT-HAND KNOB RIGHT-HAND KNOB
Clockwise to increase the value by 1’s
Counter-clockwise to decrease the value by 1’s
Clockwise to increase the value by 10’s
Counter-clockwise to decrease the value by 10’s
Press and hold the Addr button for 2 seconds to save the new DMX setting, “Done” and “SAVED” appears on the display.
DMX Control Channels: 2
1. 1st DMX Channel controls the Intensity Level adjustment
2. 2nd DMX Channel controls the Color Temperature adjustment
Main Menu
1. Press both LEFT-HAND and RIGHT-HAND KNOBS to access the Main Menu
2. Press the LEFT-HAND KNOB once to Enter the menu
3. Rotate the LEFT-HAND KNOB to scroll through the menu items
4. Press the RIGHT-HAND KNOB once to exit back to the previous menu item or the main display
5. Press both LEFT-HAND and RIGHT-HAND KNOBS for 2 seconds to save and display shows “SAVED”
1 –
A
ddress Sets the DMX start address
2 – FMW Name & Version Displays the model name and the software version of the fixture
3 – No DMX Presen
t
If DMX control data is not detected, various standalone output options can be selected:
1 – OFF Fixture has no outpu
t
2 – Hold Las
t
Fixture hold the last valid DMX state
3 – M1 Fixture snaps to the saved look in M1
4 – M2 Fixture snaps to the saved look in M2
4 – Technical
1 – DMX Data DMX values of the control channels are displayed
2 – Temperature Internal temperature is displayed
3 – PWM Frequenc
y
The fixture can be set to various frequency options - the LED scan rate can
be synchronised with the video camera to avoid a flickering effect: 750Hz,
1.5kHz, 3kHz, 6kHz, 12kHz, 24kHz, 48kHz, 96kHz
Note: smoothest fades
are achieved at lower PWM frequencies.
4 – DMX Inpu
t
Enables the input connection:
INPUT CABLE DMX from console via cable
INPUT RF Wireless DMX from the console
5 – Engine LOAD Set this mode to upload LED engine software updates
5 – Reset Setting Reset all the control settings to the factory default
Remote Wireless DMX Operation
The Link Indicator light on the control panel shows if an RF signal link from a remote DMX source is present or not. To
activate a link,
1. Enable the INPUT RF from the Technical menu
2. From the external transmitter, initiate the link process
3. The Link Indicator flashes fast to indicate the link in progress
4. The Link Indicator flashes slowly to indicate that the link is active
Space Force has a robust feature set available via RDM. Consult the Operator’s Manual for details and operation.
6. Further Information
Please refer to the Chroma-Q Space Force manual for more detailed information. A copy of the manual can be found at the
Chroma-Q website – http://www.chroma-q.com/support/downloads.asp.
/