Page is loading ...

Owner/Operator's Manual
Part Number 3179


Packaging Materials
Thank you for choosing Trace Engineering products to meet your alternative-energy power needs.
We make every effort to ensure that your inverter/charger packaging includes the following materials:
Owner’s Manual;
Red\Black\Green battery terminal covers (with hardware);
AC terminal cover (with hardware);
Trace bumper sticker;
If any of the above listed materials are missing from your package, or if it is unsatisfactory in any
manner, please call Customer Service at (360) 435-8826 or fax this page with your comments to
(360) 435-2229.
Model Number: _____________________________________
Serial Number: _____________________________________
Purchase Date: _____________________________________
Comments: _____________________________________________________________________
_______________________________________________________________________________
_______________________________________________________________________________
_______________________________________________________________________________
_______________________________________________________________________________
_______________________________________________________________________________
Thank you for choosing Trace Engineering to meet your independent power needs. Check out our
web site at www.traceengineering.com for more information and answers to your FAQ’s.


Table of Contents
INTRODUCING THE LEGEND SERIES II.............................................................1
IMPORTANT SAFETY INSTRUCTIONS...............................................................2
GENERAL PRECAUTIONS........................................................................................2
PERSONAL PRECAUTIONS......................................................................................4
FEATURES ............................................................................................................7
PROTECTION CIRCUITRY........................................................................................7
Automatic Low Battery Cut Out.......................................................................7
Automatic High Battery Cut Out......................................................................7
High Temperature Cut Out..............................................................................7
Over Current Cut Out......................................................................................8
Battery Type Optimization...............................................................................8
Charge Rate Regulation..................................................................................8
Shore Power Amps Monitoring........................................................................9
VAC Dropout ...................................................................................................9
SEARCH MODE CIRCUITRY ....................................................................................9
IMPULSE PHASE CORRECTION .............................................................................10
TRUE RMS VOLTAGE REGULATION......................................................................10
CRYSTAL CONTROLLED TIME BASE......................................................................11
STAND-BY BATTERY CHARGER ............................................................................11
TRANSFER SWITCHING SPEED.............................................................................11
AUTOMATIC INVERTER TO CHARGER TRANSITION..................................................11
UNIT IDENTIFICATION .......................................................................................12
MODEL IDENTIFICATION .......................................................................................12
SERIAL NUMBER..................................................................................................13
CONTROLS & INDICATORS ..............................................................................15
QUICK INSTALL..................................................................................................19
INSTALLATION ...................................................................................................23
LOCATING THE INVERTER.....................................................................................23
VENTILATION.......................................................................................................23
MOUNTING..........................................................................................................24
DC WIRING.........................................................................................................25
Safety Instructions.........................................................................................25
DC Cabling Connections...............................................................................25
Ground Cable Connection.............................................................................27
Battery Cable Sizing......................................................................................28
DC Over Current Protection..........................................................................28

AC WIRING ........................................................................................................31
AC and DC Wiring Separation......................................................................31
AC Wire Connections....................................................................................31
Ground Fault Interrupting Outlets (GFCI’s)...................................................33
Neutral-to-Ground Switching.........................................................................35
Disabling Neutral Ground Switching.............................................................37
OPERATION........................................................................................................38
BATTERIES.........................................................................................................41
TERMINOLOGY....................................................................................................41
TYPES................................................................................................................42
Starting Batteries ..........................................................................................42
Deep-Cycle Batteries....................................................................................42
Sealed Gel Cell.............................................................................................42
ENVIRONMENT....................................................................................................43
Location.........................................................................................................43
Enclosures ....................................................................................................43
Temperature..................................................................................................43
BATTERY BANK SIZING........................................................................................44
Estimating Battery Requirements .................................................................44
Battery Bank Sizing Example & Worksheet..................................................45
MONTHLY MAINTENANCE.....................................................................................47
Preparation....................................................................................................47
Attire..............................................................................................................47
Tools .............................................................................................................47
Equipment.....................................................................................................48
Supplies ........................................................................................................48
Procedure......................................................................................................48
Battery Enclosure and Batteries ...................................................................48
Terminals & Lugs..........................................................................................48
Cables...........................................................................................................49
CABLING & HOOK-UP CONFIGURATIONS...............................................................49
Parallel Connection.......................................................................................50
Series Connection.........................................................................................50
Series – Parallel Connection.........................................................................51
THREE-STAGE BATTERY CHARGER..............................................................52
CHARGING PROFILE............................................................................................52
GENERATOR REQUIREMENTS ..............................................................................54
THEORY OF INVERTER OPERATION...............................................................55
WAVEFORM........................................................................................................55
REGULATION.......................................................................................................56

APPLICATIONS...................................................................................................57
RESISTIVE LOADS................................................................................................57
INDUCTIVE LOADS ...............................................................................................57
PROBLEM LOADS.................................................................................................58
OPTIONS..............................................................................................................61
THE RC6 REMOTE CONTROL ..............................................................................61
THE RC7 REMOTE CONTROL ..............................................................................62
BATTERY TEMPERATURE SENSOR (BTS) .............................................................63
BATTERY CABLES................................................................................................63
APPENDIX A: TROUBLESHOOTING.................................................................65
APPENDIX B: OTHER PRODUCTS FROM TRACE ENGINEERING................67
APPENDIX C: REFERENCE TABLES & GRAPHS............................................69
TYPICAL POWER CONSUMPTION OF COMMON APPLIANCES ...................................69
ENGLISH TO METRIC WIRE CONVERSION CHART ..................................................70
MINIMUM RECOMMENDED BATTERY CABLE SIZE (IN FREE AIR)..............................70
RECOMMENDED MINIMUM AC WIRE SIZES...........................................................71
COMMON BATTERY CHARGING RATES..................................................................71
LEGEND SERIES II CHARGING GRAPH ..................................................................72
LEGEND SERIES II EFFICIENCY CURVE.................................................................73
LEGEND PERFORMANCE GRAPH ..........................................................................74
APPENDIX D: SPECIFICATIONS.......................................................................75
APPENDIX E: DIMENSIONS...............................................................................77
APPENDIX F: LIMITED WARRANTY .................................................................79
APPENDIX G: LIFE SUPPORT POLICY ............................................................82
INDEX...................................................................................................................83

TABLE OF FIGURES
Figure 1, Power Output Versus Temperature...................................................................24
Figure 2, Battery to Inverter Cable Connection..............................................................26
Figure 3, DC Wiring Diagram..........................................................................................30
Figure 4, AC Terminal Block............................................................................................31
Figure 5, AC Wiring Diagram..........................................................................................32
Figure 6, Typical Mobile Installation Diagram................................................................34
Figure 7, Neutral-to-Ground Switching without external AC source...............................35
Figure 8, Neutral-to-Ground Switching with External AC...............................................36
Figure 9, Disabling Neutral-to-Ground Switching...........................................................37
Figure 10, Three-Stage Charging Profile.........................................................................52
Figure 11, RC6 Remote Control Faceplate Display.........................................................61
Figure 12 , RC7 Remote Control ......................................................................................62
TABLE OF TABLES
Table 1, Minimum Recommended Battery Cable Size (In free air)...................................28
Table 2, Current Carrying Ability of Wire In Free Air at 75°C.......................................29
Table 3, Recommended Minimum AC Wire Sizes .............................................................33
Table 4, Typical Appliance Watts .....................................................................................46
Table 5, Bulk and Float Setpoints.....................................................................................54

INTRODUCING THE LEGEND SERIES II
Trace Engineering Co. Inc. Tel (360) 435-8826 Part Number 3179
5916 195
th
Street, NE Fax (360) 435-2229 Effective August 6, 1998
Arlington, WA 98223 USA www.traceengineering.com Page
1
Introducing the Legend Series II
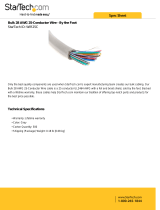
The Legend Series II inverter/chargers are specially designed for after market installation in
recreational vehicles.
The Legend Series II inverter/chargers feature:
ü Easy installation
ü 2000, 2500, or 3000 watt continuous power output
ü Automatic three-stage battery charging
ü Over-current, over-temperature, and high/low battery voltage protection
ü UL listed to UL 458 standards
ü 5-year limited warranty
ü Front-panel wiring terminals for maximum accessibility
ü Optional RC6 remote On/Off, voltmeter, ammeter, charge status and error indicator
ü Optional full-function, programmable RC7 remote control provides digital metering and user
configuration
ü Adjustable charging rate and battery type selection
ü Adjustable power-saving search mode
ü Automatic battery temperature compensation (with battery temperature sensor [BTS]
option).

IMPORTANT SAFETY INSTRUCTIONS
Trace Engineering Co. Inc. Tel (360) 435-8826 Part Number 3179
5916 195
th
Street, NE Fax (360) 435-2229 Effective August 6, 1998
Arlington, WA 98223 USA www.traceengineering.com
Page
2
Important Safety Instructions
SAVE THESE INSTRUCTIONS
This manual contains important safety and operating instructions as prescribed by UL specifications
for inverters used in land vehicle applications. This manual covers inverters and inverter/chargers
models: L2012, L2512, and L3012 Legend Series II inverter/chargers.
The entire Legend series of inverters is UL listed to the general UL specification #458 covering power
inverters for land vehicle applications.
General Precautions
1. Before using the inverter/charger, read all instructions and cautionary markings on (1) the
inverter/charger, (2) the batteries, and (3) all appropriate sections of this instruction manual.
2. CAUTION - To reduce risk of injury, charge only deep-cycle lead acid, lead antimony, lead
calcium, gel cell, or absorbed mat type rechargeable batteries. Other types of batteries may
burst, causing personal injury and damage.
3. Do not expose inverter/charger to rain, snow or liquids of any type. The inverter is designed
for interior mounting only. Protect the inverter from splashing when used in vehicle
applications.
4. Do not disassemble the inverter/charger; take it to a qualified Trace Engineering Service
Center when service or repair is required. Incorrect re-assembly may result in a risk of
electric shock or fire.
5. To reduce risk of electric shock, disconnect all wiring before attempting any maintenance or
cleaning. Turning off the inverter will not reduce this risk.
6. WARNING - RISK OF EXPLOSIVE GASES
WORKING IN VICINITY OF A LEAD ACID BATTERY MAY BE DANGEROUS.
BATTERIES GENERATE EXPLOSIVE GASES DURING NORMAL OPERATION. FOR
THIS REASON, IT IS OF UTMOST IMPORTANCE THAT EACH TIME BEFORE
SERVICING EQUIPMENT IN THE VINCINTITY OF THE BATTERY, YOU READ THIS
MANUAL AND FOLLOW THE INSTRUCTIONS EXACTLY. Provide ventilation to outdoors
from the battery compartment. The battery enclosure should be designed to prevent
accumulation and concentration of hydrogen gas in “pockets” at the top of the compartment.
Vent the battery compartment from the highest point. A sloped lid can also be used to direct
the flow to the vent opening location.
To reduce the risk of battery explosion, follow these instructions and those published by
battery manufacturer and any manufacturer of any equipment you intend to use in the

IMPORTANT SAFETY INSTRUCTIONS
Trace Engineering Co. Inc. Tel (360) 435-8826 Part Number 3179
5916 195
th
Street, NE Fax (360) 435-2229 Effective August 6, 1998
Arlington, WA 98223 USA www.traceengineering.com Page
3
vicinity of batteries. Review cautionary markings on these products and all other products
being used.
7. No terminals or lugs are required for hook-up of the AC wiring. AC wiring must be no less than
10 AWG (5.3 mm
2
) copper wire and rated for 75°C or higher. Battery cables must be rated for
75°C or higher and should be no less than the minimum wire size recommended by this manual.
Crimped and sealed copper ring terminal lugs with a 5/16” hole should be used to connect the
battery cables to the DC terminals of the inverter/charger. Soldered cable lugs are also
acceptable. See section Batteries and Chargers for correct battery cable size and length for your
application.
8. Torque all AC wiring connections to 15-20 inch-pounds. Torque all DC cable connections to 10-
12 foot-pounds.
9. CAUTION: To reduce the risk of fire, use only input circuits provided with the correct ampere
branch circuit protection in accordance with the National Electric Code, ANSI/ NFPA70
10. Use the correct tools to make AC/DC wiring connections: wire strippers, ½” (13mm) open-end
wrench or socket, Phillips screw driver #2, and ¼” flat blade screwdriver (6mm).
11. This inverter/charger should be used with a battery supply of 12-volts DC nominal voltage.
12. Do not install this inverter/charger on or near flammable materials (plywood, chemicals, gasoline,
etc.)
13. The unit is designed for mounting on a flat surface only. Do not mount on a wall or hang
inverted.
14. No AC or DC disconnects are provided as an integral part of this inverter. Both AC and DC
disconnects must be provided as part of the system installation. See Installation section on Page
23 of this manual.
15. No overcurrent protection for the battery supply is provided as an integral part of this inverter.
Overcurrent protection of the battery cables must be provided as part of the system installation.
See Installation section of this manual.
16. No overcurrent protection for the AC output wiring is provided as an integral part of this inverter.
Over-current protection of the AC output wiring must be provided as part of the system
installation. See the Installation section of this manual.
17. GROUNDING INSTRUCTIONS - This inverter/charger should be connected to a grounded,
permanent wiring system. For most installations, the negative battery conductor should not be
bonded to the vehicle chassis ground. Connection of the large green chassis ground terminal on
the side of the inverter will create the battery negative to vehicle chassis ground. All installations
should comply with all national and local codes and ordinances.
18. AC Grounding Instructions – The inverter/charger includes neutral to ground switching for the AC
electrical system. The AC system in mobile installations must have the neutral physically
isolated from the ground throughout the load distribution powered by the inverter.

IMPORTANT SAFETY INSTRUCTIONS
Trace Engineering Co. Inc. Tel (360) 435-8826 Part Number 3179
5916 195
th
Street, NE Fax (360) 435-2229 Effective August 6, 1998
Arlington, WA 98223 USA www.traceengineering.com
Page
4
Personal Precautions
1. Someone should be within range of your voice to come to your aid when you work near
batteries.
2. Have plenty of fresh water and soap nearby in the event that battery acid contacts skin,
clothing, or eyes.
3. Wear complete eye protection and clothing protection. Avoid touching eyes while working
near batteries. Wash your hands when done.
4. If battery acid contacts skin or clothing, wash immediately with soap and water. If acid
enters eyes, immediately flood eyes with running cool water for at least 15 minutes and get
medical attention immediately.
5. Baking soda neutralizes lead acid battery electrolyte. Vinegar neutralizes spilled NiCad and
NiFe battery electrolyte. Keep a supply on hand in the area of the batteries.
6. NEVER smoke or allow a spark or flame in vicinity of a battery or generator.
7. Be extra cautious when working with metal tools on and around batteries. It could short-
circuit the batteries or other electrical parts, producing a spark that could cause an
explosion.
8. Remove personal metal items such as rings, bracelets, necklaces and watches when
working with a battery. A battery can produce a short-circuit current high enough to weld a
ring, or the like, to metal causing severe burns.
9. Never attempt to charge a frozen battery.
10. If a remote or automatic generator-start system is used, disable the automatic starting
circuit, and/or disconnect the generator from its stating battery while servicing to prevent
accidental starting during servicing.
11. If necessary to remove any batteries, always remove the grounded terminal from the
battery first. Make sure all accessories are off, so as not to cause an arc.
12. Be sure area around battery is well ventilated.
13. Clean battery terminals. Be careful to keep corrosion from coming in contact with eyes.
14. Study all battery manufacturer's specific precautions (such as removing or not removing
cell caps while charging) and recommended rates of charge.

IMPORTANT SAFETY INSTRUCTIONS
Trace Engineering Co. Inc. Tel (360) 435-8826 Part Number 3179
5916 195
th
Street, NE Fax (360) 435-2229 Effective August 6, 1998
Arlington, WA 98223 USA www.traceengineering.com Page
5
15. Add ONLY distilled water in each cell until battery acid reaches level specified by battery
manufacturer. This helps purge excessive gas from cells. Do not overfill. For a battery
without cell caps, carefully follow manufacturer's recharging instructions.


FEATURES
Trace Engineering Co. Inc. Tel (360) 435-8826 Part Number 3179
5916 195
th
Street, NE Fax (360) 435-2229 Effective August 6, 1998
Arlington, WA 98223 USA www.traceengineering.com Page
7
Features
All Legend Series II inverters include extensive protection circuitry, Search Sense Mode, Impulse
Phase Correction, true RMS voltage regulation, crystal-controlled timing, three-stage battery
charging, and an internal AC transfer relay.
Protection Circuitry
The inverter is protected from high-battery voltage, low-battery voltage, over-heating, and over-
current conditions. When the inverter senses one of these situations, it will protect itself by
disconnecting from the loads, and will signal an error condition by a red flashing of the LED indicator.
The low-battery cutout, high-battery shut down, and over-temperature protection circuitry resets
automatically. If an over-current condition continues for more than 20 seconds, the inverter will
shutdown and must be reset with the power button. If the error condition is remedied before the 20-
second period has elapsed, the inverter will automatically reset.
Automatic Low Battery Cut Out
The Legend inverter/charger protects your batteries from damage caused by over-discharging by
automatically shutting itself off when battery voltage falls to a preset level. This feature is called the
Low Battery Cut Out (Auto LBCO). Your Legend inverter/charger comes from the factory with the
Auto LBCO enabled; LBCO voltage is set at 11.1 volts. You can adjust the cutoff voltage to 8.5 volts
(Auto LBCO disabled) using the optional RC7 remote control. See The RC7 Remote Control section
on Page 62 for more information about the configuring LBCO.
Automatic High Battery Cut Out
When battery voltage rises above 15.6 volts, the inverter shuts down to protect electronics that may
be operating off of it (high battery voltage results in high AC peak voltage). The inverter automatically
resumes operating when battery voltage drops below 15.6 volts. High battery voltage can occur only
through using an unregulated charging source, such as an unregulated solar or other DC generator
or alternator. To remedy this problem, disconnect any external charging sources.
High Temperature Cut Out
The inverter is protected from overheating due to excessive loading or charging. When the internal
temperature of the inverter exceeds its design limits, the inverter will disconnect itself and shut down.
After a sufficient cooling period, the inverter will automatically reset and resume operation. Some
causes of high internal temperatures include excessive loading, high ambient temperatures,
inadequate ventilation, and an inoperative cooling fan. To remedy, reduce loads or reduce ambient
temperatures by relocating, insulating, and/or ventilating the inverter enclosure (See the Installation
section on Page 23 for more information).

FEATURES
Trace Engineering Co. Inc. Tel (360) 435-8826 Part Number 3179
5916 195
th
Street, NE Fax (360) 435-2229 Effective August 6, 1998
Arlington, WA 98223 USA www.traceengineering.com
Page
8
Over Current Cut Out
Series II inverter/chargers are protected from over-current conditions. When the load being run
demands more current than the inverter can safely supply, the inverter will momentarily shutdown,
turn off if it encounters an over-current condition for approximately 20 seconds (a prolonged short-
circuit) or if the AC output is connected to another AC power source (shorepower or generator).
Battery Type Optimization
Series II inverter/chargers are designed to prevent damage to and extend the useful life of your
batteries by regulating the charging voltage and duration. To do this, the inverter/charger must be
configured for the type of batteries in the system. The Series II is pre-configured for optimum
charging of gel cell type batteries at 14.1 volts in bulk charging mode, and 13.5 volts in float charging
mode. For liquid lead-acid batteries, you can reset the Series II using the RC7 remote control to bulk
charge at 14.5 volts and float charge at 13.4 volts. For a complete discussion of batteries and battery
charging techniques, see the Batteries and the Three-Stage Battery Charger sections of this manual.
Charge Rate Regulation
Batteries can overheat if the charge rate is too high. The Series II inverter/charger protects your
batteries by enabling you to limit the charge rate using the RC7 remote control. The charge rate is
set at the factory to 100% of maximum, which may be up to 140 amps depending upon the model
you have purchased (see Appendix D: Specifications to determine the maximum possible charge
rate for your model). For smaller battery banks, this may be too high.
The highest charge rate recommended is determined by dividing the battery bank’s amp hour
capacity by a factor of three or five (3 for gel cell - 5 for lead acid).
Battery Bank Capacity in Amp Hours Recommended Charge Rate in Amps
gel cell liquid lead-acid
125 40 25
250 80 50
500 140 100
Setting the charge rate at the highest recommended level is best when the objective is to charge the
batteries as quickly as possible. A much lower setting can be used in installations where AC power is
typically available for periods of several hours. There is more than sufficient time for a 400-amphour
battery bank to be recharged in 24 hours at a 25-amp setting.
Example: 25 amps X 24 hours = 600 amp/hrs.
Caution: Excessively high charge rates can overheat a battery. If battery bank capacity is low, set
the battery charge rate to the minimum setting.

FEATURES
Trace Engineering Co. Inc. Tel (360) 435-8826 Part Number 3179
5916 195
th
Street, NE Fax (360) 435-2229 Effective August 6, 1998
Arlington, WA 98223 USA www.traceengineering.com Page
9
Shore Power Amps Monitoring
Series II models monitor the current drawn by the built-in charger and any AC loads. These current
requirements may exceed the amperage rating of the shore power circuit breaker. To prevent
unnecessary tripping of this circuit breaker, the inverter limits the current draw to a maximum
between five and 30 amps, set by using the RC7 remote control. Shore power amps is pre-set at the
factory to a maximum of 25 amps.
VAC Dropout
Series II model inverter/chargers monitor the voltage of the AC power passing through to the charger
and AC loads. When AC voltage falls below a pre-set level, the inverter automatically transfers from
AC power to DC power. This dropout voltage is factory pre-set to 40 volts. You can re-set this
voltage from 40 to 100 volts using the RC7 remote control. Using a lower voltage results in less
frequent transfers from AC to DC power, but may cause undesirable operation of some AC loads,
including brown-outs and damage.
Search Mode Circuitry
The Legend Series II inverters feature circuitry that minimizes power drain by reducing the inverter’s
output to small test pulses when there is no load connected to the inverter. These pulses are used to
detect the presence of a load. When a load is detected the inverter’s output goes to full voltage. The
sensitivity of the detection threshold is adjustable from about five watts to 40 watts using the RC7
remote control. This feature is defeated (turned Off) at the factory and can only be activated using
the RC7 remote control.
Example: With the threshold set to detect a 40 watt load, a 50 watt load will bring the unit to full
output voltage. However, a 30-watt load will leave the inverter in its energy saving search mode
state. If the sensitivity is increased by setting the control to 10, a 20 watt load will bring the inverter
out of the search mode, while a five-watt load will not.
When in the search mode, the green Power LED will blink. At full output voltage, the LED will remain
lit. When the inverter is used as an un-interruptable power supply, the search mode function should
be defeated. A neon type nightlight can also be used as a good indicator to determine if the inverter
is in search mode. Simply plug the light into any AC outlet that is connected to the inverter’s output.
When the inverter is in the search mode the light will blink. If the inverter is running a load, the light
will be on continuously.
Exceptions: (Murphy’s Law) Unfortunately, things don’t always work the way the manual says they
will.
Example A: If the threshold is set to detect a 40-watt load and a 30-watt incandescent light is turned
on, the inverter will detect the light. The light is a bigger load than 40 watts when its filaments are
cold. When the light gets hot it becomes a 30-watt load. Since this is below threshold of 40-watts, the
inverter will not detect it and the light will go out. This will cause the light to cycle repeatedly.

FEATURES
Trace Engineering Co. Inc. Tel (360) 435-8826 Part Number 3179
5916 195
th
Street, NE Fax (360) 435-2229 Effective August 6, 1998
Arlington, WA 98223 USA www.traceengineering.com
Page
10
Example B: If the threshold is set to detect a 30-watt load and a 40-watt fluorescent light is turned
on, the inverter will not detect the light. The light presents a smaller load than 30 watts until the gas in
the fluorescent tube ionizes.
Example C: There are some appliances that draw power even though they are turned off. TVs with
instant on circuitry microwave ovens with digital displays and VCRs are examples. These loads
present a dilemma. If the sensitivity is set higher than the combination of these loads, then an
auxiliary load must be used to bring the inverter out of the search mode before the appliances can be
turned on. If the sensitivity is set lower than this combination of loads, the loads will be left on and will
put an additional drain on the batteries. Three such 15-watt loads would amount to an additional 90
amp/hours per 24 hours in a 12 VDC system.
One solution is to turn these items off at the wall. Use an extension cord with a rocker switch, a
switch at the outlet, or the appropriate circuit breaker. Another solution might be to place all these
phantom loads on a separate circuit with its own disconnect.
This circuit determines how much power the inverter draws when there are no loads. The inverter’s
transition from the no load state to full output voltage is fast, eliminating delays when operating
devices such as hand tools. Additionally, the threshold sensitivity of the search mode is user
adjustable (with the optional RC7 remote control), and it may be disabled.
Impulse Phase Correction
This circuitry improves the shape of the output waveform while the inverter is running reactive loads.
It allows the inverter to closely duplicate the characteristics of standard public power. With this
design approach, the limitations of the modified sine wave format are largely overcome. The primary
benefit is realized when the inverter is running induction motors and fluorescent lights. Induction
motors are commonly used to run drill presses, fans, and bandsaws.
When an inductive load is driven, it tries to return a large portion of the energy that it has received.
This returned energy can be thought of as going ‘backwards’ through the household wiring to the
motor, giving the motor an extra push and making it run smoothly. Impulse phase correction
provides a similar path for this ‘backwards’ energy. The Legend line of inverter/chargers will run
small motors at full speed, start larger ones, and run both efficiently.
True RMS Voltage Regulation
With battery voltages from 11 to 15 VDC and power levels up to the continuous power rating, the
inverter will deliver true RMS regulated power. This insures that while battery voltages and power
levels change, the inverter will deliver the correct output voltage.

FEATURES
Trace Engineering Co. Inc. Tel (360) 435-8826 Part Number 3179
5916 195
th
Street, NE Fax (360) 435-2229 Effective August 6, 1998
Arlington, WA 98223 USA www.traceengineering.com Page
11
Crystal Controlled Time Base
Proper frequency regulation is assured with the use of a crystal. Battery voltage and power have no
effect on the inverter’s operating frequency.
Stand-by Battery Charger
The Stand-by feature includes an internal battery charger and automatic transfer relay. This allows
the unit to operate as a battery charger or an inverter (but not at the same time). An external source
of AC power (i.e. shore power or generator) must be supplied to the inverter’s AC input to allow it to
operate as a battery charger. When the unit is operating as a charger its AC output is powered by
the external AC source. See the Three-Stage Battery Charger section beginning on Page 52 for an
in-depth description of this charger.
Transfer Switching Speed
While this inverter is not designed specifically to operate as an un-interruptable power supply (UPS)
system, its transfer time is normally fast enough to hold up computers in the event of a power outage.
The transfer time is a maximum of 32 milliseconds (two 60Hz AC cycles). Success as UPS will vary
with computer models, and cannot be guaranteed. If this is an issue, buy a small, dedicated UPS for
the specific application.
Automatic Inverter to Charger Transition
The inverter automatically becomes a battery charger whenever AC power is supplied to its AC
inputs. There is a minimum 20-second time delay from the time the inverter senses that AC is
present at its input to when the transfer is made. This delay is built in to provide time for a generator
to spin-up to a stable voltage and avoid relay chattering. The inverter’s AC input is internally
connected to the inverter’s AC output while in the battery charger mode. The maximum power that
can be handled by the inverter’s internal wiring and transfer relay is 30 amps.

UNIT IDENTIFICATION
Trace Engineering Co. Inc. Tel (360) 435-8826 Part Number 3179
5916 195
th
Street, NE Fax (360) 435-2229 Effective August 6, 1998
Arlington, WA 98223 USA www.traceengineering.com
Page
12
Unit Identification
This section describes the marking and location of the model and serial number for Legend Series II
inverter/chargers. Use this section to determine the type and model of your inverter/charger.
Model Identification
Trace Engineering inverters are specifically designed to meet the growing demand for high-reliability,
high-quality inverters and chargers for alternative energy systems and vehicle applications. This
manual covers the Legend Series II inverters with various options and configurations. To determine
the model and features of your inverter, check the model number found on the identification placard
on the right side of the inverter.
Consider the following unit with a L2012
model number:
L 20 12
Model Power Input Voltage
Model: The first letter indicates the model, in this case the Legend Series. Legend Series II
inverters are designed for after-market installations in recreational and other mobile vehicles. They
are housed in a white enclosure and employ neutral-to-ground switching.
Power: The first and second positions in the model number indicate the continuous AC power
output in hundreds of watts. Power levels available include 2000, 2500, and 3000 watts. In the
example above, 20 would stand for a 2000-watt (two kilowatt), continuous-output inverter.
Input Voltage: The number (12) following the power rating indicates an inverter/charger that is
designed to convert 12VDC input to 120VAC
output, and charge 12VDC batteries when powered by
120VAC.
/