Sony BRAVIA KDL-52Z5500 Operating instructions

Category
LCD TVs
Type
Operating instructions
© 2009 Sony Corporation 4-151-686-13(1)
LCD Digital Colour TV
Operating Instructions
KDL-52Z5500
KDL-46Z5500
KDL-40Z5500/40Z5710
2
GB
NOTICE FOR
CUSTOMERS IN
THE UNITED
KINGDOM
A moulded plug complying with BS1363
is fitted to this equipment for your safety
and convenience.
Should the fuse in the plug supplied need
to be replaced with the same rating of fuse
approved by ASTA or BSI to BS 1362 (i.e.,
marked with or ) must be used.
When an alternative type of plug is used it
should be fitted with the same rating of
fuse, otherwise the circuit should be
protected by a 10 AMP FUSE at the
distribution board.
If the plug supplied with this equipment
has a detachable fuse cover, be sure to
attach the fuse cover after you change the
fuse. Never use the plug without the fuse
cover. If you should lose the fuse cover,
please contact your nearest Sony service
station.
How to replace the fuse
Open the fuse compartment with a blade
screwdriver, and replace the fuse.
Please refer to the illustration that actually
equipped with the product.
Introduction
Thank you for choosing this Sony product.
Before operating the TV, please read this
manual thoroughly and retain it for future
reference.
Notes on Digital TV
function
Any functions related to Digital TV
( ) will only work in countries or
areas where DVB-T (MPEG-2 and
H.264/MPEG-4 AVC) digital terrestrial
signals are broadcast or where you have
access to a compatible DVB-C (MPEG-
2 and H.264/MPEG-4 AVC) cable
service. Please confirm with your local
dealer if you can receive a DVB-T signal
where you live or ask your cable
provider if their DVB-C cable service is
suitable for integrated operation with this
TV.
Your cable provider may charge a fee for
their services, or require you to agree to
its terms and conditions of business.
This TV set complies with DVB-T and
DVB-C specifications, but compatibility
with future DVB-T digital terrestrial and
DVB-C digital cable broadcasts are not
guaranteed.
Some Digital TV functions may not be
available in some countries/areas and
DVB-C cable may not operate correctly
with some providers.
For a list of compatible cable providers,
refer to the support web site:
http://support.sony-europe.com/TV/
DVBC/
~
The illustrations used in this manual are
of the KDL-40Z5500 unless otherwise
state.
Trademark information
is a registered trademark of the DVB
Project.
HDMI, the HDMI logo and High-
Definition Multimedia Interface are
trademarks or registered trademarks of
HDMI Licensing LLC.
DLNA and DLNA CERTIFIED are
trademarks and/or service marks of Digital
Living Network Alliance.
GUIDE Plus+™ is (1) a registered
trademark or trademark of, (2)
manufactured under license from and (3)
subject of various international patents and
patent applications owned by, or licensed
to, Gemstar-TV Guide International, Inc.
and/or its related affiliates.
GEMSTAR-TV GUIDE
INTERNATIONAL, INC. AND/OR ITS
RELATED AFFILIATES ARE NOT IN
ANY WAY LIABLE FOR THE
ACCURACY OF THE PROGRAM
SCHEDULE INFORMATION
PROVIDED BY THE GUIDE PLUS+
SYSTEM. IN NO EVENT SHALL
GEMSTAR-TV GUIDE
INTERNATIONAL, INC. AND /OR ITS
RELATED AFFILIATES BE LIABLE
FOR ANY AMOUNTS REPRESENTING
LOSS OF PROFITS, LOSS OF
BUSINESS, OR INDIRECT, SPECIAL,
OR CONSEQUENTIAL DAMAGES IN
CONNECTION WITH THE PROVISION
OR USE OF ANY INFORMATION,
EQUIPMENT, OR SERVICES
RELATING TO THE GUIDE Plus+™
SYSTEM.
Manufactured under license from Dolby
Laboratories. Dolby and the double-D
symbol are trademarks of Dolby
Laboratories.
“BRAVIA” and are
trademarks of Sony Corporation.
“XMB™” and “XrossMediaBar” are
trademarks of Sony Corporation and Sony
Computer Entertainment Inc.
The manufacturer of this product is
Sony Corporation, 1-7-1 Konan
Minato-ku Tokyo, 108-0075 Japan.
The Authorized Representative for
EMC and product safety is Sony
Deutschland GmbH, Hedelfinger
Strasse 61, 70327 Stuttgart,
Germany. For any service or
guarantee matters please refer to the
addresses given in separate service
or guarantee documents.
FUSE
FUSE
3
GB
Table of Contents
Start-up Guide 4
Safety Information............................................................................................................................ 8
Precautions....................................................................................................................................... 9
Remote and TV Controls/Indicators ............................................................................................. 10
Watching TV
Watching TV.................................................................................................................................... 15
Instruction Manual
Instruction Manual.......................................................................................................................... 16
Navigating through the Instruction Manual ................................................................................. 16
Additional Information
Installing the Accessories (Wall-Mount Bracket) ........................................................................ 17
Specifications ................................................................................................................................. 19
Troubleshooting ............................................................................................................................. 22
Before operating the TV, please read “Safety Information” (page 8). Retain this manual for future reference.
4
GB
Start-up Guide
Before Use
To check the accessories
Mains lead/AC power cord (1)
Cable holder (1)
Stand (1) and screws (4)
RM-ED019 Remote (1)
Size AA batteries (R6 type) (2)
To insert batteries into the remote
1: Attaching the stand
1 Open the carton box and take out the stand
and the screws.
2 Place the TV set on the stand.
3 Fix the TV to the stand according to the
arrow marks that guide the screw holes
using the supplied screws.
~
If using an electric screwdriver, set the tightening
torque at approximately 1.5 N·m {15 kgf·cm}.
Push and lift the cover to open.
5
GB
Start-up Guide
2: Connecting an aerial/
antenna/Set Top Box/
recorder (e.g. DVD recorder)
Connecting a Set Top Box/recorder (e.g.
DVD recorder) with SCART
Connecting a Set Top Box/recorder (e.g.
DVD recorder) with HDMI
3: Preventing the TV from
toppling over
1 Install a wood screw (4 mm in diameter,
not supplied) in the TV stand.
2 Install a machine screw (M4 × 20, not
supplied) into the screw hole of the TV.
3 Tie the wood screw and the machine
screw with a strong cord.
Set Top Box/recorder (e.g. DVD recorder)
6
GB
4: Bundling the cables
~
Do not bundle the mains lead/AC power cord
together with other cables.
5: Performing the initial
Set-up
~
You can also tune channels manually.
To Set-up GUIDE Plus+™ System
(only when GUIDE Plus+™ System is
available)*
* Conditions for setting up this feature:
when you set your country to UK, Germany, or
Spain.
you can receive digital broadcasting.
when “Antenna” is selected in “5: Performing
the initial Set-up”.
1 Enter postal code of region you live using
F/f/G/g/.
~
Enter from the left, when the postal code is
fewer than seven digits.
1 Connect the TV to your mains socket/AC
power outlet.
2 Switch ENERGY SAVING SWITCH on
(page 10).
3 Press 1 on the TV.
When you switch on the TV for the first
time, the Language menu appears on the
screen.
You can also
install the cable
holder here. (After
installation, you
will not be able to
remove it.)
4
Follow the instructions on the screen.
Digital Auto Tuning: When you select
“Cable”, we recommend that you select
“Quick Scan” for quick tuning. Set
“Frequency” and “Network ID” according
to the information supplied from your
cable provider. If no channel is found
using “Quick Scan”, try “Full Scan”
(though it may take some time).
For a list of compatible cable providers,
refer to the support web site:
http://support.sony-europe.com/TV/
DVBC/
Programme Sorting: Changes the order
of analogue channels stored in the TV.
1 Press F/f to select the channel you
want to move to a new position, then
press .
2 Press F/f to select the new position
for the channel, then press .
Eco Preset: When you select “Yes”, the
“Eco” settings are changed into
recommended values to reduce power
consumption.
7
GB
Start-up Guide
2 Select language for GUIDE Plus+.
This step will be skipped if any one of the
following languages is selected in “5:
Performing the initial Set-up”: “English”,
“Deutsch”, “Español”, “Italiano”,
“Français” or “Nederlands”.
3 GUIDE Plus+ Data Download.
The initial download may take some time,
so do not press any buttons on the TV or
remote while proceeding. Once you have
received the first download of TV listings
data, all future downloads will be done
automatically.
Adjusting the viewing angle
of the TV
This TV can be adjusted within the angles
shown below.
Adjust the angle left and right (swivel)
Detaching the Table-Top
Stand from the TV
~
Remove the screws guided by the arrow marks
of the TV.
Do not remove the Table-Top Stand for any reason
other than to install corresponding accessories on
the TV.
Top view
Front
20º
20º
20º
20º
8
GB
Safety
Information
Installation/Set-up
Install and use the TV set in accordance
with the instructions below in order to
avoid any risk of fire, electrical shock or
damage and/or injuries.
Installation
The TV set should be installed near an
easily accessible mains socket.
Place the TV set on a stable, level
surface.
Only qualified service personnel should
carry out wall installations.
For safety reasons, it is strongly
recommended that you use Sony
accessories, including:
Wall-mount bracket SU-WL500
Be sure to use the screws supplied with
the Wall-mount bracket when attaching
the mounting hooks to the TV set. The
supplied screws are designed so that they
are 8 mm to 12 mm in length when
measured from the attaching surface of
the mounting hook.
The diameter and length of the screws
differ depending on the Wall-mount
bracket model.
Use of screws other than those supplied
may result in internal damage to the TV
set or cause it to fall, etc.
Transporting
Before
transporting the
TV set, disconnect
all cables.
Two or three
people are needed
to transport a large
TV set.
When transporting
the TV set by
hand, hold it as
shown on the
right. Do not put
stress on the LCD
panel and the
frame around the
screen.
When lifting or
moving the TV
set, hold it firmly
from the bottom.
When transporting the TV set, do not
subject it to jolts or excessive vibration.
When transporting the TV set for repairs
or when moving, pack it using the
original carton and packing material.
Ventilation
Never cover the ventilation holes or
insert anything in the cabinet.
Leave space around the TV set as shown
below.
It is strongly recommended that you use
a Sony wall-mount bracket in order to
provide adequate air-circulation.
Installed on the wall
Installed with stand
To ensure proper ventilation and prevent
the collection of dirt or dust:
Do not lay the TV set flat, install
upside down, backwards, or
sideways.
Do not place the TV set on a shelf,
rug, bed or in a closet.
Do not cover the TV set with a cloth,
such as curtains, or items such as
newspapers, etc.
Do not install the TV set as shown
below.
Mains lead
Handle the mains lead and socket as
follows in order to avoid any risk of fire,
electrical shock or damage and/or injuries:
Use only mains leads supplied by
Sony, not other suppliers.
Insert the plug fully into the mains
socket.
Operate the TV set on a 220-240 V AC
supply only.
When wiring cables, be sure to unplug
the mains lead for your safety and take
care not to catch your feet on the
cables.
Disconnect the mains lead from the
mains socket before working on or
moving the TV set.
Keep the mains lead away from heat
sources.
Unplug the mains plug and clean it
regularly. If the plug is covered with
dust and it picks up moisture, its
insulation may deteriorate, which
could result in a fire.
Notes
Do not use the supplied mains lead on
any other equipment.
Do not pinch, bend, or twist the mains
lead excessively. The core conductors
may be exposed or broken.
Do not modify the mains lead.
Do not put anything heavy on the mains
lead.
Do not pull on the mains lead itself when
disconnecting the mains lead.
Do not connect too many appliances to
the same mains socket.
Do not use a poor fitting mains socket.
Prohibited Usage
Do not install/use the TV set in locations,
environments or situations such as those
listed below, or the TV set may
malfunction and cause a fire, electrical
shock, damage and/or injuries.
Location:
Outdoors (in direct sunlight), at the
seashore, on a ship or other vessel, inside a
vehicle, in medical institutions, unstable
locations, near water, rain, moisture or
smoke.
Environment:
Places that are hot, humid, or excessively
dusty; where insects may enter; where it
might be exposed to mechanical vibration,
near flammable objects (candles, etc). The
TV set shall not be exposed to dripping or
splashing and no objects filled with
liquids, such as vases, shall be placed on
the TV.
Situation:
Do not use when your hands are wet, with
the cabinet removed, or with attachments
not recommended by the manufacturer.
Disconnect the TV set from mains socket
and aerial during lightning storms.
Broken pieces:
Do not throw anything at the TV set. The
screen glass may break by the impact and
cause serious injury.
If the surface of the TV set cracks, do not
touch it until you have unplugged the
mains lead. Otherwise electric shock
may result.
When not in use
If you will not be using the TV set for
several days, the TV set should be
disconnected from the mains for
environmental and safety reasons.
As the TV set is not disconnected from
the mains when the TV set is just turned
off, pull the plug from the mains to
disconnect the TV set completely.
However, some TV sets may have
features that require the TV set to be left
in standby to work correctly.
Mounting Hook
Hook attachment on rear
of TV set
Screw (supplied with the
Wall-mount bracket)
8 mm - 12 mm
30 cm
10 cm 10 cm
10 cm
Leave at least this space around
the set.
30 cm
10 cm
10 cm
6 cm
Leave at least this space around
the set.
Air circulation is blocked.
Wall Wall
9
GB
For children
Do not allow children to climb on the TV
set.
Keep small accessories out of the reach
of children, so that they are not
mistakenly swallowed.
If the following problems
occur...
Turn off the TV set and unplug the mains
lead immediately if any of the following
problems occur.
Ask your dealer or Sony service centre to
have it checked by qualified service
personnel.
When:
Mains lead is damaged.
Poor fitting of mains socket.
TV set is damaged by being dropped,
hit or having something thrown at it.
Any liquid or solid object falls through
openings in the cabinet.
Precautions
Viewing the TV
View the TV in moderate light, as
viewing the TV in poor light or during
long period of time, strains your eyes.
When using headphones, adjust the
volume so as to avoid excessive levels,
as hearing damage may result.
LCD Screen
Although the LCD screen is made with
high-precision technology and 99.99%
or more of the pixels are effective, black
dots may appear or bright points of light
(red, blue, or green) may appear
constantly on the LCD screen. This is a
structural property of the LCD screen
and is not a malfunction.
Do not push or scratch the front filter, or
place objects on top of this TV set. The
image may be uneven or the LCD screen
may be damaged.
If this TV set is used in a cold place, a
smear may occur in the picture or the
picture may become dark. This does not
indicate a failure. These phenomena
disappear as the temperature rises.
Ghosting may occur when still pictures
are displayed continuously. It may
disappear after a few moments.
The screen and cabinet get warm when
this TV set is in use. This is not a
malfunction.
The LCD screen contains a small amount
of liquid crystal. Some fluorescent tubes
used in this TV set also contain mercury.
Follow your local ordinances and
regulations for disposal.
Handling and cleaning the
screen surface/cabinet of
the TV set
Be sure to unplug the mains lead connected
to the TV set from mains socket before
cleaning.
To avoid material degradation or screen
coating degradation, observe the following
precautions.
To remove dust from the screen surface/
cabinet, wipe gently with a soft cloth. If
dust is persistent, wipe with a soft cloth
slightly moistened with a diluted mild
detergent solution.
Never use any type of abrasive pad,
alkaline/acid cleaner, scouring powder,
or volatile solvent, such as alcohol,
benzene, thinner or insecticide. Using
such materials or maintaining prolonged
contact with rubber or vinyl materials
may result in damage to the screen
surface and cabinet material.
Periodic vacuuming of the ventilation
openings is recommended to ensure to
proper ventilation.
When adjusting the angle of the TV set,
move it slowly so as to prevent the TV
set from moving or slipping off from its
table stand.
Optional Equipment
Keep optional components or any
equipment emitting electromagnetic
radiation away from the TV set.
Otherwise picture distortion and/or noisy
sound may occur.
This equipment has been tested and
found to comply with the limits set out in
the EMC Directive using a connection
signal cable shorter than 3 meters.
Batteries
Observe the correct polarity when
inserting batteries.
Do not use different types of batteries
together or mix old and new batteries.
Dispose of batteries in an
environmentally friendly way. Certain
regions may regulate the disposal of
batteries. Please consult your local
authority.
Handle the remote with care. Do not
drop or step on it, or spill liquid of any
kind onto it.
Do not place the remote in a location
near a heat source, a place subject to
direct sunlight, or a damp room.
Disposal of the TV set
Disposal of Old
Electrical &
Electronic
Equipment
(Applicable in
the European
Union and other European
countries with separate
collection systems)
This symbol on the product or on its
packaging indicates that this product shall
not be treated as household waste. Instead
it shall be handed over to the applicable
collection point for the recycling of
electrical and electronic equipment. By
ensuring this product is disposed of
correctly, you will help prevent potential
negative consequences for the
environment and human health, which
could otherwise be caused by
inappropriate waste handling of this
product. The recycling of materials will
help to conserve natural resources. For
more detailed information about recycling
of this product, please contact your local
Civic Office, your household waste
disposal service or the shop where you
purchased the product.
Disposal of
waste batteries
(applicable in the
European Union
and other
European
countries with separate
collection systems)
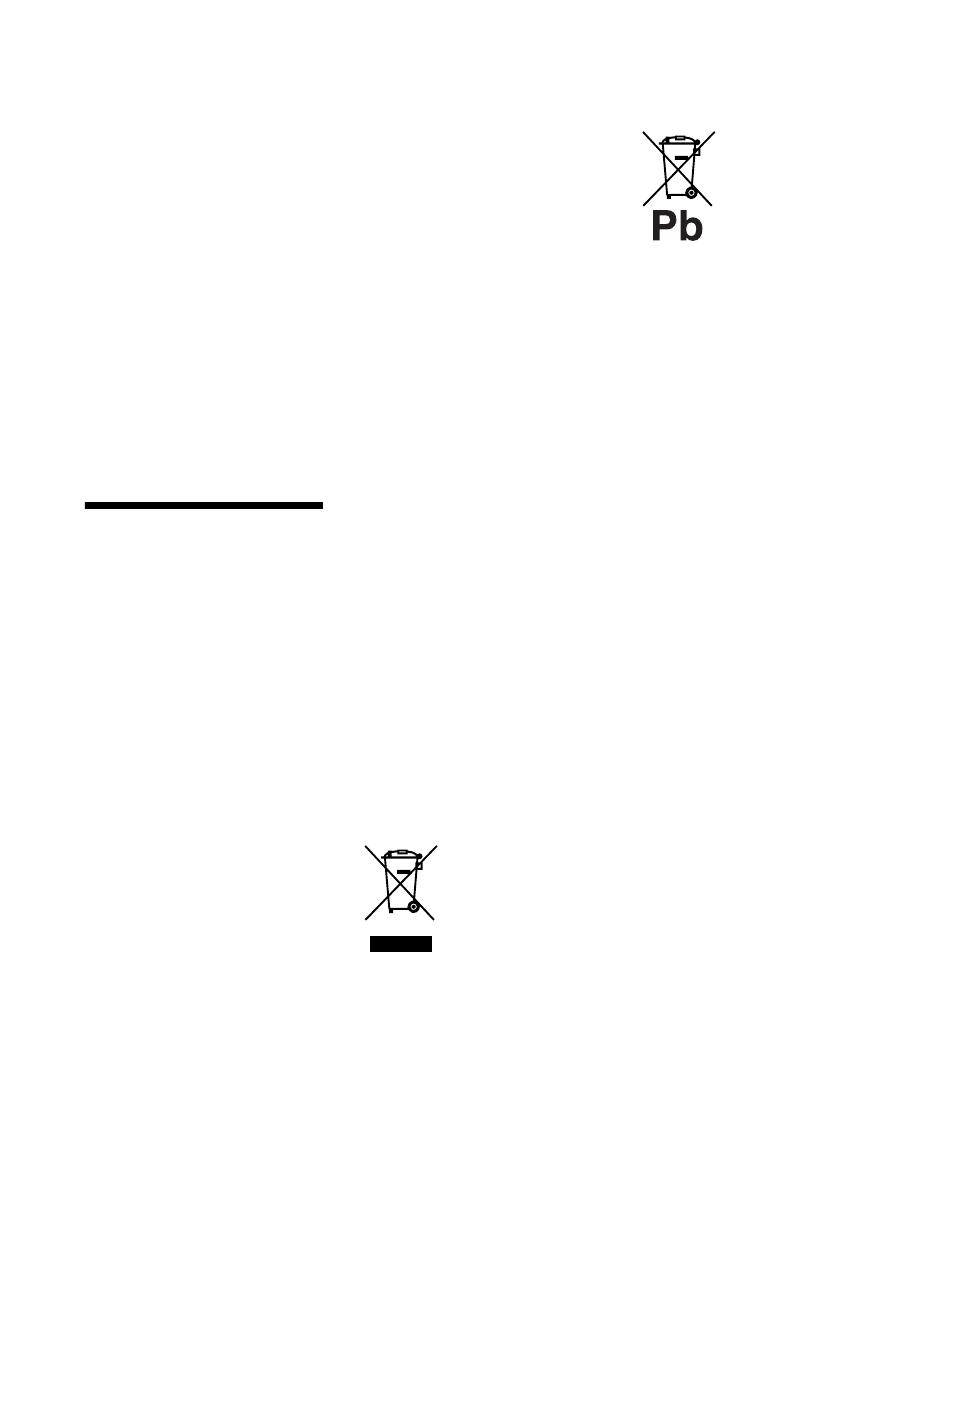
This symbol on the battery or on the
packaging indicates that the battery
provided with this product shall not be
treated as household waste. On certain
batteries this symbol might be used in
combination with a chemical symbol. The
chemical symbols for mercury (Hg) or lead
(Pb) are added if the battery contains more
than 0.0005% mercury or 0.004% lead. By
ensuring these batteries are disposed of
correctly, you will help prevent potentially
negative consequences for the
environment and human health which
could otherwise be caused by
inappropriate waste handling of the
battery. The recycling of the materials will
help to conserve natural resources. In case
of products that for safety, performance or
data integrity reasons require a permanent
connection with an incorporated battery,
this battery should be replaced by qualified
service staff only. To ensure that the
battery will be treated properly, hand over
the product at end-of-life to the applicable
collection point for the recycling of
electrical and electronic equipment. For all
other batteries, please view the section on
how to remove the battery from the product
safely. Hand the battery over to the
applicable collection point for the
recycling of waste batteries. For more
detailed information about recycling of
this product or battery, please contact your
local Civic Office, your household waste
disposal service or the shop where you
purchased the product.
10
GB
Remote and TV Controls/Indicators
Remote and TV controls
Buttons on the TV will work the same as those on the remote.
* In the TV menu, these buttons will work as F/f/G/g/.
z
•The number 5, N, PROG + and AUDIO buttons on the remote have
a tactile dot. Use the tactile dots as a reference when operating the
TV.
Button/Switch Description
1 TV "/1 (TV
standby)
Press to turn the TV on and off from standby
mode.
2 1 (Power) Press to turn the TV on or off.
~
•When ENERGY SAVING SWITCH is off,
the TV cannot be turned on.
To disconnect the TV, turn off the TV, then
unplug the mains lead/AC power cord from
the mains/AC power.
3 ENERGY
SAVING
SWITCH
Press to turn the TV on or off. When
ENERGY SAVING SWITCH is switched off,
power consumption is reduced. If the TV is in
standby mode when ENERGY SAVING
SWITCH is switched off, switching ENERGY
SAVING SWITCH on puts the TV back into
standby mode only.
~
•When ENERGY SAVING SWITCH is
switched off, you will not be able to perform
such functions as saving clock settings,
downloading EPGs, or updating software.
HOME
2
ql
qh
9
3
qs
11
GB
Button/Switch Description
4 SCENE Press to display the “Scene Select” menu.
When you select the desired scene option, the
optimum sound quality and picture quality for
the selected scene are automatically set.
Press F/f/G/g to select the scene option, then
press .
Cinema: Delivers picture scenes just like those
in a theatre-like atmosphere with dynamic
sound.
Photo: Delivers picture scenes that
authentically reproduce the texture and colour
of a printed photo.
Sports: Delivers picture scenes that let you
experience realistic picture and sound like those
in a stadium.
Music: Delivers sound effects that let you
experience dynamic and clear sound like that at
a concert.
Game: Delivers picture scenes that let you
enjoy your game-playing experience to the
fullest with superb picture and sound quality.
Graphics: Delivers picture scenes that ease
your prolonged monitor viewing experience and
reduce fatigue by displaying clearer detailed
pictures.
General: Use this setting when you do not
optimise the sound quality and picture quality
for any scene.
Auto: The optimum sound quality and picture
quality are automatically set according to the
input source, though there may not be any effect
depending on the connected devices.
~
The options you can adjust vary depending on
the situation.
Unavailable options are greyed out or not
displayed.
When you set Theatre Mode (page 13) to on,
the “Scene Select” setting switches to
“Cinema” automatically.
5 (Screen
mode)
Press to change the screen format.
6 AUDIO In analogue mode: Press to change the dual
sound mode.
In digital mode: Press to change the language
to be used for the programme currently being
viewed.
7 (Subtitle
setting)
Press to change the subtitle language (in digital
mode only).
8 / (Info/
Text reveal)
Each time you press the button, the display
changes as follows:
In digital mode: Details of the current
programme
t Details of the next programme
(only for Sony Guide)
In analogue mode: Current channel number
and screen mode
t Clock information
In Text mode: Reveals hidden information
(e.g. answers to a quiz).
(Continued)
12
GB
Button/Switch Description
9 / (Input
select/Text
hold)
In TV mode: Press to display a list of inputs.
In Text mode: Press to hold the current page.
q;
F/f/G/g/ Press F/f/G/g to move the on-screen cursor.
Press to select/confirm the highlighted item.
When playing a photo file: Press to pause/
start a slideshow. Press F/G to select the
previous file. Press f/g to select the next file.
When playing a music/video file: Press to
pause/start the playback. Press and hold G/g to
fast forward/fast reverse, then release the
button at the point where you want to resume
playback. Press F to start playback from the
beginning of the current file. Press f to go to
the next file.
qa OPTIONS Press to display a list that contains “Device
Control” or shortcuts to some setting menus.
Use the “Device Control” menu to operate
equipment that is compatible with Control for
HDMI.
The listed options vary depending on the input
source.
qs HOME Press to display the TV Home Menu.
qd Coloured
buttons
When the coloured buttons are available, an
operation guide appears on the screen.
qf Number
buttons
In TV mode: Press to select channels. For
channel numbers 10 and above, press the next
digit quickly.
In Text mode: Press to enter a page number.
qg
(Favourite)
Press to display the Favourite List that you
have specified.
qh PROG +/–/
/
In TV mode: Press to select the next (+) or
previous (–) channel.
In Text mode: Press to select the next ( ) or
previous ( ) page.
qj (Previous
channel)
Press to return to the channel that was last
viewed (for more than five seconds).
qk % (Mute) Press to mute the sound. Press again to restore
the sound.
z
In standby mode, if you want to turn on the
TV without sound, press this button.
ql 2 +/–
(Volume)
Press to adjust the volume.
w; / (Text) Press to display text information.
13
GB
Button/Switch Description
wa RETURN Press to return to the previous screen of the
displayed menu.
When playing a photo/music/video file: Press
to stop the playback. (The display returns to the
file or folder list.)
ws GUIDE
(EPG)
Press to display the Digital Electronic
Programme Guide (EPG).
wd ANALOG Press to display the analogue channel that was
last viewed.
When viewing pictures from connected
equipment: Press to return to normal TV mode.
wf DIGITAL Press to display the digital channel that was
last viewed.
When viewing pictures from connected
equipment: Press to return to normal TV mode.
wg THEATRE You can set Theatre Mode to on or off. When
Theatre Mode is set to on, the optimum sound
quality (if the TV is connected with an audio
system using an HDMI cable) and picture
quality for film-based contents are
automatically set.
~
• If you turn the TV off, Theatre Mode is also
turned off.
When you change the “Scene Select” setting,
Theatre Mode turns off automatically.
“Control for HDMI” (BRAVIA Sync) is only
available with the connected Sony equipment
that has the BRAVIA Sync or BRAVIA
Theatre Sync logo or is compatible with
Control for HDMI.
wh SYNC MENU Displays the menu of connected HDMI
equipment. While viewing other input screens
or TV programmes, “HDMI Device Selection
is displayed when the button is pressed.
~
“Control for HDMI” (BRAVIA Sync) is only
available with the connected Sony equipment
that has the BRAVIA Sync or BRAVIA
Theatre Sync logo or is compatible with
Control for HDMI.
wj (Light) Press to illuminate the buttons on the remote so
that you can see them easily even if the room is
dark.
wk Buttons for
using
optional
equipment
You can operate the equipment connected to
the TV by programming the remote.
(Continued)
14
GB
Operation Guide
Example: Press or
RETURN (see q; (page 12) or wa (page 13)).
The operation guide provides help on how to operate the TV using the remote, and is displayed at
the bottom of the screen. Use the remote buttons shown on the operation guide.
Indicators
Indicator Description
1 (Picture Off /
Timer)
Lights up in green when you select “Picture Off”.
Lights up in orange when you set the timer.
2 1 (Standby) Lights up in red when the TV is in standby mode.
3 " (Power) Lights up in green when the TV is on.
4 Light sensor Do not put anything over the sensor, doing so may affect its function.
5 Remote control
sensor
Receives signals from the remote.
Do not put anything over the sensor. The sensor may not work properly.
About the operation guide on the TV screen
1 2 3
4
,
5
15
GB
Watching TV
Watching TV
Watching TV
1 Press 1 on the TV to turn on the TV.
When the TV cannot be turned on, switch
ENERGY SAVING SWITCH on (page 10).
When the TV is in standby mode (the 1
(standby) indicator on the TV front panel
is red), press TV "/1 on the remote to
turn on the TV.
2 Press DIGITAL to switch to digital mode,
or press ANALOG to switch to analogue
mode.
The available channels vary depending on
the mode.
3 Press the number buttons or PROG +/– to
select a TV channel.
In digital mode, an information banner
appears briefly. Each time you press ,
the banner changes cyclically as follows:
Current programme information t Next
programme information t No banner
When GUIDE Plus+ is used, Next
programme information cannot be
available.
The following icons may be indicated on
the banner.
: Interactive service is available
(MHEG Digital Text)
: Interactive service (MHEG Digital
Text) is currently disabled
:Radio service
: Scrambled/Subscription service
: Multiple audio languages available
: Subtitles available
: Subtitles available for the hearing
impaired
c:Reminder
: Recommended minimum age for
current programme (ages from 4 to
18) (For Spain only: ages from 4 to
18 and X)
: Parental lock
2
3
3
16
GB
Instruction Manual
Instruction Manual
Displays the instruction manual on the screen.
Navigating through the Instruction Manual
1 Press HOME to display the XMB™.
2 Press G/g to select “Settings”.
3 Press F/f to select “Instruction Manual”, then press .
4 Press F/f to select topic from the Table of Contents, then press .
Use the corresponding coloured button to go to next or previous page and to return to Table of
Contents.
If the explanation is linked to other topic, the symbol will appear. Press F/f/G/g to select
then press . Press RETURN to go back.
5 Press HOME to exit.
~
The XMB™ (XrossMediaBar) is a menu of BRAVIA features and input sources displayed on the TV screen.
Category Object Bar
Media Category Bar
17
GB
Additional Information
Installing the Accessories (Wall-Mount Bracket)
To Customers:
For product protection and safety reasons, Sony strongly recommends that installing of your TV be
performed by Sony dealers or licensed contractors. Do not attempt to install it yourself.
To Sony Dealers and Contractors:
Provide full attention to safety during the installation, periodic maintenance and examination of this
product.
Your TV can be installed using the SU-WL500 Wall-Mount Bracket (sold separately).
Refer to the Instructions supplied with the Wall-Mount Bracket to properly carry out the
installation.
Refer to “Detaching the Table-Top Stand from the TV” (page 7).
Refer to “TV installation dimensions table” (page 18).
Refer to “Screw and Hook locations diagram/table” (page 18).
~
Place the TV on the Table-Top Stand, when securing the Mounting Hook.
Sufficient expertise is required for installing this product, especially to determine the strength of
the wall for withstanding the TV’s weight. Be sure to entrust the attachment of this product to the
wall to Sony dealers or licensed contractors and pay adequate attention to safety during the
installation. Sony is not liable for any damage or injury caused by mishandling or improper
installation.
Mounting Hook
Square hole
Screw
(+PSW
6 × 16)
(Continued)
18
GB
Unit: cm
Figures in the above table may differ slightly depending on the installation.
The wall that the TV will be installed on should be capable of supporting a weight of at least four times that of
the TV. Refer to “Specifications” (page 19) for its weight.
TV installation dimensions table
Model Name
Display
dimensions
Screen
centre
dimension
Length for each mounting angle
Angle (0°) Angle (20°)
AB C DEFGH
KDL-52Z5500
124.0 76.7 4.6 44.5 13.5 36.9 72.9 47.6
KDL-46Z5500
109.1 67.2 8.7 43.6 13.5 34.0 63.2 46.7
KDL-40Z5500/
40Z5710
95.8 59.6 12.6 43.6 13.5 31.4 56.1 46.7
Screw and Hook locations diagram/table
Model Name Screw location Hook location
KDL-52Z5500/46Z5500/40Z5500/40Z5710 d, g b
Screen centre point
WARNING
Screw location
When installing the Mounting Hook on the TV.
Hook location
When installing the TV onto the Base Bracket.
b
a*
c*
Hook location “a” and “c” cannot be
used for the models.
19
GB
Additional Information
Specifications
System
Panel system
LCD (Liquid Crystal Display) Panel
TV system
Analogue: Depending on your country/area selection: B/G/H, D/K, L, I
Digital: DVB-T/DVB-C
Colour/video system
Analogue: PAL, PAL60 (only video input), SECAM, NTSC3.58, NTSC4.43 (only video input)
Digital: MPEG-2 MP@ML/HL, H.264/MPEG-4 AVC MP/HP@L4
Channel coverage
Analogue: VHF: E2–E12/UHF: E21–E69/CATV: S1–S20/HYPER: S21–S41
D/K: R1–R12, R21–R69/L: F2–F10, B–Q, F21–F69/I: UHF B21–B69
Digital: VHF/UHF
Sound output
10 W + 10 W
Input/Output jacks
Aerial/Antenna cable
75 ohm external terminal for VHF/UHF
/AV1
21-pin scart connector (CENELEC standard) including audio/video input, RGB input and TV audio/video
output.
// AV2
21-pin scart connector (CENELEC standard) including audio/video input, RGB input and selectable
audio/video output.
COMPONENT IN
Supported formats: 1080p, 1080i, 720p, 576p, 576i, 480p, 480i
Y: 1 Vp-p, 75 ohms, 0.3V negative sync/P
B/CB: 0.7 Vp-p, 75 ohms/
P
R/CR: 0.7 Vp-p, 75 ohms
COMPONENT IN
Audio input (phono jacks)
HDMI IN1, 2, 3, 4
Video: 1080/24p, 1080p, 1080i, 720p, 576p, 576i, 480p, 480i
Audio: Two channel linear PCM: 32, 44.1 and 48 kHz, 16, 20 and 24 bits, Dolby Digital
Analogue audio input (minijack) (HDMI IN1 only)
PC Input (page 21)
AV 3
Video input (phono jack)
AV 3
Audio input (phono jacks)
DIGITAL AUDIO
OUT (OPTICAL)
Digital optical jack (Two channel linear PCM, Dolby Digital)
Audio output (phono jacks)
PC IN
PC Input (D-sub 15-pin) (page 21)
G: 0.7 Vp-p, 75 ohms, non Sync on Green/B: 0.7 Vp-p, 75 ohms/
R: 0.7 Vp-p, 75 ohms/HD: 1-5 Vp-p/VD: 1-5 Vp-p
PC audio input (minijack)
USB port
i
Headphones jack
CAM (Conditional Access Module) slot
LAN
10BASE-T/100BASE-TX connector (Depending on the operating environment of the network, connection
speed may differ. 10BASE-T/100BASE-TX communication rate and communication quality are not
guaranteed for this TV.)
(Continued)
20
GB
*Specified standby power is reached after the TV finishes necessary internal processes.
Design and specifications are subject to change without notice.
Model name KDL-52Z5500 KDL-46Z5500 KDL-40Z5500 KDL-40Z5710
Power and others
Power requirements
220 V – 240 V AC, 50 Hz
Screen size (measured
diagonally)
52 inches/
Approx. 132.2 cm
46 inches/
Approx. 116.8 cm
40 inches/Approx. 101.6 cm
Display resolution
1,920 dots (horizontal) × 1,080 lines (vertical)
Power
consumption
in “Home”/
“Standard”
mode
194 W 166 W 154 W
in “Shop”/
“Vivid”
mode
330 W 241 W 210 W
Standby power
consumption*
0.19 W (16.5 W when “Quick Start” is set to “On”)
Supplied accessories
See “To check the accessories” (page 4).
Optional accessories
Wall-Mount Bracket: SU-WL500
Model
name
KDL-52Z5500 KDL-46Z5500 KDL-40Z5500 KDL-40Z5710
Dimensions (Approx.) (w × h × d)
with
Table -
Top
Stand
124.0 × 82.1 × 35.8 cm 109.1 × 72.5 × 33.0 cm 95.8 × 64.9 × 30.3 cm 95.8 × 64.9 × 30.2 cm
without
Table -
Top
Stand
124.0 × 76.7 × 8.6 cm 109.1 × 67.2 × 8.6 cm 95.8 × 59.6 × 8.6 cm
Mass (Approx.)
with
Table -
Top
Stand
31.3 kg 25.3 kg 20.8 kg
without
Table -
Top
Stand
27.2 kg 21.9 kg 17.9 kg
  • Page 1 1
  • Page 2 2
  • Page 3 3
  • Page 4 4
  • Page 5 5
  • Page 6 6
  • Page 7 7
  • Page 8 8
  • Page 9 9
  • Page 10 10
  • Page 11 11
  • Page 12 12
  • Page 13 13
  • Page 14 14
  • Page 15 15
  • Page 16 16
  • Page 17 17
  • Page 18 18
  • Page 19 19
  • Page 20 20
  • Page 21 21
  • Page 22 22
  • Page 23 23
  • Page 24 24
  • Page 25 25
  • Page 26 26
  • Page 27 27
  • Page 28 28

Sony BRAVIA KDL-52Z5500 Operating instructions

Category
LCD TVs
Type
Operating instructions

Ask a question and I''ll find the answer in the document

Finding information in a document is now easier with AI