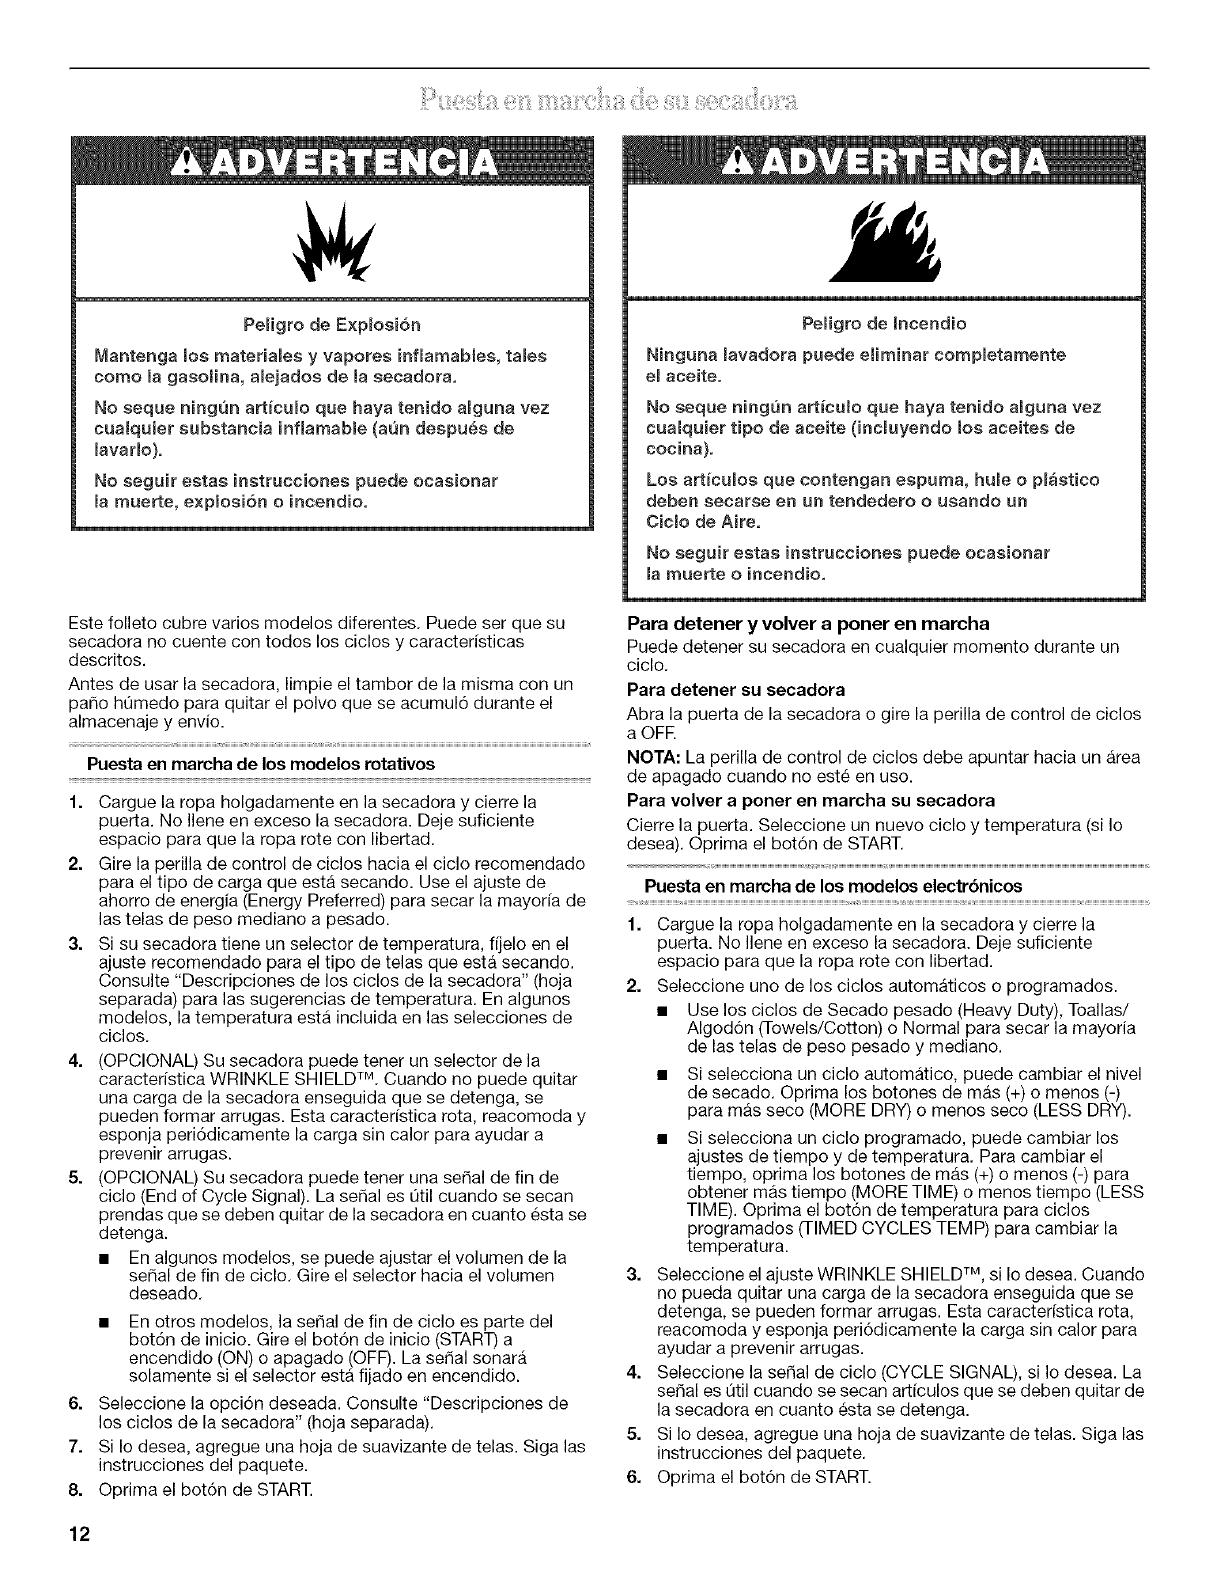
Whirlpool LGQ8611PW0 Owner's manual

Category
Tumble dryers
Type
Owner's manual

This manual is also suitable for

GoLd ®
DRYERUSERINSTRUCTIONS
INSTRUCCIONESPARAEL USUARIODELASECADORA
TableofContents/Indice
ASSISTANCE OR SERVICE ............................ 1
DRYER SAFETY ............................................... 2
DRYER USE ...................................................... 4
DRYER CARE ................................................... 5
TROUBLESHOOTING ...................................... 6
WARRANTY ...................................................... 8
AYUDA O SERVICIO TF:CNICO ....................... 9
SEGURIDAD DE LA SECADORA .................... 9
USO DE LA SECADORA ................................ 11
CUIDADO DE LA SECADORA ....................... 13
SOLUCION DE PROBLEMAS ........................ 14
GARANTiA ....................................................... 16
Assistance or Service
If you need assistance or service, first see the "Troubleshooting"
section. Additional help is available by calling our Customer
Interaction Center at 1-800-253-1301 from anywhere in the
U.S.A., or write:
Whirlpool Corporation
Customer Interaction Center
553 Benson Road
Benton Harbor, MI 49022-2692
Please include a daytime phone number in your correspondence.
To order parts and accessories, call 1-800-442-9991 or visit our
website at www.whirlpool.com.
Keep this book and your sales slip together for future
reference. You must provide proof of purchase or installation
date for in-warranty service.
Write down the following information about your appliance to help
you obtain assistance or service if you ever need it. You will need
to know your complete model number and serial number. You can
find this information on the model and serial number label, located
at the top inside dryer door well.
Dealer name
Serial number
Address
Phone number
Model number
Purchase date
8533772
1°
TO00 LO flUE _AGINA_
DRYERSAFETY
Your safety and the safety of others are very important.
We have provided many important safety messages in this manual and on your appliance. Always read and obey all safety
messages.
This is the safety alert symbol.
This symbol alerts you to potential hazards that can kill or hurt you and others.
All safety messages will follow the safety alert symbol and either the word "DANGER" or "WARNING."
These words mean:
You can be killed or seriously injured if you don't immediately
follow instructions.
You can be killed or seriously injured if you don't follow
instructions.
All safety messages will tell you what the potential hazard is, tell you how to reduce the chance of injury, and tell you what can
happen if the instructions are not followed.
iMPORTANT SAFETY iNSTRUCTiONS
WARNING: To reduce the risk of fire, electric shock, or injury to persons when using the dryer, follow basic precautions,
including the following:
m
m
Read all instructions before using the dryer.
Do not place items exposed to cooking oils in your dryer.
Items contaminated with cooking oils may contribute to
a chemical reaction that could cause a toad to catch fire.
Do not repair or replace any part of the dryer or attempt
any servicing unless specifically recommended in this
Use and Care Guide or in published user=repair instruc-
tions that you understand and have the skills to carry out.
m Do not dry articles that have been previously cleaned in,
washed in, soaked in, or spotted with gasoline, dry=
cleaning solvents, other flammable, or explosive
substances as they give off vapors that could ignite or
explode.
m Do not allow children to play on or in the dryer. Close
supervision of children is necessary when the dryer is
used near children.
m Before the dryer is removed from service or discarded,
remove the door to the drying compartment.
m Do not reach into the dryer if the drum is moving.
m Do not install or store the dryer where it will be exposed
to the weather.
m Do not tamper with controls.
m Do not use fabric softeners or products to eliminate static
unless recommended by the manufacturer of the fabric
softener or product.
m Do not use heat to dry articles containing foam rubber or
similarly textured rubber-like materials.
m Clean lint screen before or after each load.
m Keep area around the exhaust opening and adjacent sur=
rounding areas free from the accumulation of lint, dust,
and dirt,
The interior of the dryer and exhaust vent should be
cleaned periodica!ly by qualified service personnel.
See installation instructions for grounding requirements.
SAVE THESE INSTRUCTIONS
WARNING: For your safety, the information in this manual must be followed to minimize
the risk of fire or explosion, or to prevent property damage, personal injury, or death.
- Do not store or use gasoline or other flammable vapors and liquids in the vicinity of this
or any other appliance.
- WHAT TO DO IF YOU SMELL GAS:
Do not try to light any appliance.
Do not touch any electrical switch; do not use any phone in your building.
Clear the room, building, or area of all occupants.
Immediately call your gas supplier from a neighbor's phone. Follow the gas supplier's
instructions.
If you cannot reach your gas supplier, call the fire department.
- Installation and service must be performed by a qualified installer, service agency, or
the gas supplier.
Your dryer must be properly installed and vented to achieve
maximum drying efficiency and shorten drying times. Use the
minimum recommended installation clearances found in your
Installation Instructions. See the Installation Instructions for more
information.
Fire Hazard
Use a heavy metal vent.
Do not use a plastic vent.
Do not use a metal foil vent.
Failure to folow these instructions can result in death
or fire.
If the dryer is not properly installed and vented, it will not be
covered under the warranty.
NOTE: Service calls caused by improper venting will be paid for
by the customer, whether it was a paid installation or self-
installed.
1. Do not use plastic vent or metal foil vent. Use 4" (10.2 cm)
metal or flexible metal vent. Do not kink or crush flexible metal
vent. It must be completely extended to allow adequate
exhaust air to flow. Check vent after installation. Refer to your
Installation Instructions for proper length requirements of vent.
2. Use a 4" (10.2 cm) exhaust hood.
3. Use the straightest path possible when routing the vent.
4=
5.
Use clamps to seal all joints. Do not use duct tape, screws or
other fastening devices that extend into the interior of the vent
to secure vent.
Clean exhaust vent periodically, depending on use, but at
least every 2 years, or when installing your dryer in a new
location. When cleaning is complete, be sure to follow the
Installation Instructions supplied with your dryer for final
product check.
DRYERUSE
Load clothes loosely into the dryer. Do not pack the dryer. Allow space for clothes to tumble freely. The following charts show examples
of balanced loads that would allow for proper tumbling.
ULTRA CAPACITY, SUPER CAPACITY and SUPER CAPACITY PLUS DRYERS
Heavy Work Clothes Mixed Load Towels Delicates
4 pair of pants 3 sheets (1 king, 2 twin) 10 bath towels 3 camisoles
4 pair of jeans 4 pillowcases 10 hand towels 1 robe
2 sweatshirts 9T-shirts 14 washcloths 4 slips
2 sweatpants 9 pair of shorts 1 bath mat 8 undergarments
4 shirts 3 blouses 2 sets of sleepwear
10 handkerchiefs 1 child's outfit
3 shirts
Explosion Hazard
Keep flarnrnable materials and vapors, such as
gasoline, away from dryer.
Do not dry anything that has ever had anything
flarnrnabme on it (even after washing).
Failure to follow these instructions can resumt in death,
explosion, or fire.
This booklet covers several different models. Your dryer may not
have all of the cycles and features described.
Before using your dryer, wipe the dryer drum with a damp cloth to
remove dust from storing and shipping.
Starting Rotary Models
1. Load clothes loosely into the dryer and close the door. Do not
pack the dryer. Allow space for clothes to tumble freely.
2. Turn the Cycle Control knob to the recommended cycle for the
type of load being dried. Use the Energy Preferred setting to
dry most heavy to medium weight fabrics.
3. If your dryer has aTemperature selector, set it to the
recommended setting for the type of fabric being dried. See
"Dryer Cycle Descriptions" (separate sheet) for temperature
suggestions. On some models, temperature is included in the
cycle selections.
4. (OPTIONAL) Your dryer may have a WRINKLE SHIELD TM
feature selector. When you are unable to remove a load from
the dryer as soon as it stops, wrinkles can form. This feature
periodically tumbles, rearranges and fluffs the load without
heat to help avoid wrinkling.
Fire Hazard
No washer can completely remove oil.
Do not dry anything that has ever had any type of oH on
it (including cooking oils).
_terns containing foam, rubber, or p_astic must be dried
on a c_othes_ine or by using an Air Cycle.
Failure to follow these instructions can result in death
or fire.
5. (OPTIONAL) Your dryer may have an End of Cycle Signal. The
signal is helpful when drying items that should be removed
from the dryer as soon as it stops.
On some models, the volume of the End of Cycle signal
can be adjusted. Turn the selector to the desired volume.
On other models, the End of Cycle signal is part of the
Start button and is selectable. Turn the START button to
ON or OFR The signal will sound only if the selector is set
to On.
6. Select the desired Option. See "Dryer Cycle Descriptions"
(separate sheet).
7. If desired, add fabric softener sheet. Follow package
instructions.
8. Push the START button.
Stopping and Restarting
You can stop your dryer anytime during a cycle.
To stop your dryer
Open the dryer door or turn the Cycle Control knob to OFF.
NOTE: The Cycle Control knob should point to an Off area when
the dryer is not in use.
To restart your dryer
Close the door. Select a new cycle and temperature (if desired).
Push the START button.
StartingElectronic Models
1. Load clothes loosely into the dryer and close the door. Do not
pack the dryer. Allow space for clothes to tumble freely.
2. Select one of the Automatic or Timed Cycles.
Use the Heavy Duty, Towels/Cotton or Normal cycles to
dry most heavyweight and medium weight fabrics.
Ifyou select an Automatic Cycle, you may change the
dryness level. Press the plus (+) or minus (-) pads for
MORE DRY or LESS DRY.
Ifyou select a Timed Cycle, you may change the time and
temperature settings. To change the time, press the plus
(+) or minus (-) pads to get MORE TIME or LESS TIME. To
change the temperature press the TIMED CYCLES TEMP
pad.
3. Select the WRINKLE SHIELD TM setting, if desired. When you
are unable to remove a load from the dryer as soon as it stops,
wrinkles can form. This feature periodically tumbles,
rearranges and fluffs the load without heat to help avoid
wrinkling.
4. Select the CYCLE SIGNAL, if desired. The signal is helpful
when drying items that should be removed from the dryer as
soon as it stops.
5. If desired, add fabric softener sheet. Follow package
instructions.
6. Push the START pad.
Stopping, Pausing and Restarting
You can stop your dryer anytime during a cycle.
To stop your dryer
Press PAUSE/CANCEL twice.
To restart your dryer
Close the door. Select a new cycle and temperature (if desired).
Push the START pad.
To pause your dryer
Open the door or press PAUSE/CANCEL once. Close the door
and press START to resume the cycle.
NOTE: Drying will continue from where the cycle was interrupted
if you close the door and press START within 5 minutes. If the
cycle is interrupted for more than 5 minutes, the dryer will shut off.
You will need to select new cycle settings before restarting the
dryer.
Use the Drying Rack to dry items such as sweaters and pillows
without tumbling. The drum turns, but the rack does not move.
NOTE: The rack must be removed for normal tumbling. Do not
use the automatic cycle with the drying rack.
To use the drying rack
1. Place drying rack in dryer.
Style 1: Your drying rack has front legs. Slide rear pegs into
the dimples on the back wall of the dryer. Lower the front legs
to rest on the dryer opening.
Style 2: Your drying rack does not have front legs. Do not
remove the lint screen. Slide drying rack over the bottom of
the dryer door opening. Push down to secure rack on frame.
2. Put wet items on top of rack, leaving space between items.
Do not allow items to hang over the edge of the rack. Close
the door.
3. Select a timed drying cycle and temperature, or an air cycle.
Items containing foam, rubber, or plastic must be dried on a
clothesline or by using an air cycle. Refer to the following
table.
4. Start the dryer. Reset cycle to complete drying, if needed.
Rack Dry Cycle Temp Time
Washable wool items (block Timed Low 60 min.
to shape, lay flat on rack) Drying
Stuffed toys/pillows (cotton Timed Low 60 min.
or polyester filled) Drying
Stuffed toys/pillows Air N/A 90 min.
Foam rubber filled (no heat)
DRYERCARE
Keep dryer area clear and free from items that would obstruct the
flow of combustion and ventilation air.
Explosion Hazard
Keep flammable materials and vapors, such as
gasoline, away from dryer.
Place dryer at least 18 inches (46 era) above the floor
for a garage installation.
Failure to do so can result in death, explosion, or fire.
Clean the lint screen before each load. A screen blocked by lint
can increase drying time.
IMPORTANT:
Do not run the dryer with the lint screen loose, damaged,
blocked, or missing. Doing so can cause overheating and
damage to both the dryer and fabrics.
If lint falls off the screen into the dryer during removal, check
the exhaust hood and remove the lint.
Every Load Cleaning
Style 1:
1. The lint screen is located on top of the dryer. Pull the lint
screen toward you. Roll lint off the screen with your fingers.
Do not rinse or wash screen to remove lint. Wet lint is hard to
remove.
2. Push the lint screen firmly back into place.
Style2:
1. Thelintscreenislocatedinthedoorofthedryer.Pullthelint
screenstraightup.Rolllintoffthescreenwithyourfingers.Do
notrinseorwashscreentoremovelint.Wetlintishardto
remove.
2. Pushthelintscreenfirmlybackintoplace.
As Needed Cleaning
1. Roll lint off the screen with your fingers.
2. Wet both sides of lint screen with hot water.
3. Wet a nylon brush with hot water and liquid detergent. Scrub
lint screen with the brush to remove residue buildup.
4. Rinse screen with hot water.
5. Thoroughly dry lint screen with a clean towel. Replace screen
in dryer.
1. Apply a nonflammable household cleaner to the stained area
of the drum and rub with asoft cloth until stain is removed.
2. Wipe drum thoroughly with a damp cloth.
3. Tumble a load of clean cloths or towels to dry the drum.
NOTE: Garments which contain unstable dyes, such as denim
blue jeans or brightly colored cotton items, may discolor the dryer
interior. These stains are not harmful to your dryer and will not
stain future loads of clothes. Dry unstable dye items inside-out to
prevent dye transfer.
From Inside the Dryer Cabinet
Lint should be removed every 2 years, or more often, depending
on dryer usage. Cleaning should be done by a qualified person.
From Inside the Exhaust Vent
Lint should be removed every 2 years, or more often, depending
on dryer usage.
1. Unplug dryer or disconnect power.
2. Open the dryer door. Locate the light bulb cover on the back
wall of the dryer. Remove the screw located in the lower right-
hand corner of the cover. Remove the cover.
3. Turn bulb counterclockwise. Replace the bulb with a 10-watt
appliance bulb only. Replace the cover and secure with the
screw.
4. Plug in dryer or reconnect power.
TROUBLESHOOTING
First try the solutions suggested here and possibly avoid the cost of a service call...
No heat
Has a fuse blown, or has a circuit breaker tripped? Electric
Message Codes - Electronic models only
For error message "PF" (power failure), check the
following:
Is the dryer connected to the power supply?
Was the dryer connected to a power supply during installation
or a power failure?
Press START to resume operation or press PAUSE/CANCEL
to cancel the cycle.
Was the drying cycle interrupted by a power failure?
Press START to resume operation or press PAUSE/CANCEL
to cancel the cycle.
For error message "El" or "E2" (service codes):
Service is required. Call for service.
dryers use 2 household fuses or breakers. The drum may be
turning, but you may not have heat.
Has an air dry cycle been selected? Select the right cycle
for the types of garments being dried.
For gas dryers, is the valve open on the supply line?
Unusual sounds
Has the dryer had a period of non-use? If the dryer hasn't
been used for a while, there may be a thumping sound during
the first few minutes of operation.
Is it a gas dryer? The gas valve clicking is a normal operating
sound.
Dryer will not run
Checkthe following:
Is the power cord plugged in?
Has a fuse blown, or has a circuit breaker tripped? There
may be 2 fuses or circuit breakers for the dryer. Check to
make sure both fuses are intact and tight, or that both circuit
breakers have not tripped.
Was a regular fuse used? Use a time-delay fuse.
Is the dryer door firmly closed?
Was the START pad firmly pressed?
Is a cycle selected?
Clothesarenot drying satisfactorily
Checkthe following:
Is the lint screen clogged with lint?
Is the exhaust vent or outside exhaust hood clogged with lint,
restricting air movement? Run the dryer for 5-10 minutes.
Hold your hand under the outside exhaust hood to check air
movement. If you do not feel air movement, clean exhaust
system of lint or replace exhaust vent with heavy metal or
flexible metal vent. See your Installation Instructions.
Is the exhaust vent crushed or kinked? Replace with heavy
metal or flexible metal vent. See your Installation Instructions.
Are fabric softener sheets blocking the grille? Use only one
fabric softener sheet, and use it only once.
Is the dryer located in a room with temperature below
45°F (7°C)? Proper operation of dryer cycles requires
temperatures above 45°F (7°C).
Was a cold rinse water used? Was the load very wet?
Expect longer drying times with items rinsed in cold water and
with items that hold moisture (cottons).
Is the load too large and heavy to dry quickly? Separate the
load to tumble freely.
Lint on load
Is the lint screen clogged? Clean lint screen. Check for air
movement.
Is the load properly sorted? Sort lint givers (towels, chenille)
from lint takers (corduroy, synthetics). Also sort by color.
Is the load too big or too heavy? Dry smaller loads so lint
can be carried to the lint screen.
Was the load overdried? Use correct dryer settings for load
type. Overdrying can cause lint-attracting static electricity.
See "Dryer Cycle Descriptions" (separate sheet).
Was paper or tissue left in pockets?
Is pilling being mistaken for lint? Pilling (surface fuzz) is
caused by normal wear and laundering.
Stains on load or color change
Was dryer fabric softener properly used? Add dryer fabric
softener sheets at the beginning of the cycle. Fabric softener
sheets added to a partially-dried load can stain your
garments.
Were items soiled when placed in the dryer? Items should
be clean before being dried.
Were items properly sorted? Sort light colors from dark
colors. Sort colorfast items from noncelorfast items.
Items shrinking
Was the dryer overloaded? Dry smaller loads that will tumble
freely.
Did the load overdry? Check the manufacturer's care label.
Match dryer setting to load type.
Loads are wrinkled
Was the load removed from dryer at the end of the cycle?
Was the dryer overloaded? Dry smaller loads that can
tumble freely.
Did the load overdry? Check the manufacturer's care label.
Match dryer setting to load type.
Odors
Have you recently been painting, staining or varnishing in
the area where your dryer is located? Ifso, ventilate the
area. When the odors or fumes are gone from the area, rewash
and dry the clothing.
If the dryer is electric, is it being used for the first time?
The new electric heating element may have an odor. The odor
will be gone after the first cycle.
Garment damage
Checkthe following:
Were zippers, snaps, and hooks left open?
Were strings and sashes tied to prevent tangling?
Were care label instructions followed?
Were items damaged before drying?
WHIRLPOOLGOLD®DRYERWARRANTY
ONE-YEAR FULL WARRANTY
For one year from the date of purchase, when this dryer is operated and maintained according to instructions attached to or furnished
with the product, Whirlpool Corporation will pay for FSP_replacement parts and repair labor costs to correct defects in materials or
workmanship. Service must be provided by a Whirlpool designated service company.
SECOND THROUGH FIFTH YEAR LIMITED WARRANTY ON ELECTRONIC CONTROL BOARDS
For second through fifth years from the date of purchase, when this dryer is operated and maintained according to instructions
attached to or furnished with the product, Whirlpool Corporation will pay for FSP° replacement parts to replace the electronic control
boards if defective in materials or workmanship.
Whirlpool Corporation will not pay for:
1. Service calls to correct the installation of your dryer, including venting. Heavy 4" (10.2 cm) metal exhaust vent must be used. Refer
to the venting section of this manual and your Installation Instructions.
2. Service calls to instruct you how to use your dryer, to replace house fuses or correct house wiring or reset circuit breakers, or to
replace owner accessible light bulbs.
3. Repairs when your dryer is used in other than normal, single-family household use.
4. Damage resulting from accident, alteration, misuse, abuse, fire, floods, acts of God, improper installation (including, but not limited
to, venting with plastic or flexible foil), installation not in accordance with local electrical and plumbing codes, or use of products not
approved by Whirlpool Corporation.
5. Replacement parts or repair labor costs for units operated outside the United States.
6. Pickup and delivery. This product is designed to be repaired in the home.
7. Repairs to parts or systems resulting from unauthorized modifications made to the appliance.
8. Any labor costs incurred during the Limited Warranty period.
WHIRLPOOL CORPORATION SHALL NOT BE LIABLE FOR INCIDENTAL OR CONSEQUENTIAL DAMAGES.
Some states do not allow the exclusion or limitation of incidental or consequential damages, so this exclusion or limitation may not
apply to you. This warranty gives you specific legal rights and you may also have other rights which vary from state to state.
Outside the 50 United States, this warranty does not apply. Contact your authorized Whirlpool dealer to determine if another
warranty applies. 7/03
Replacement parts
If you need to order replacement parts, we recommend that you
only use FSP° factory specified parts. These parts will fit right
and work right because they are made with the same precision
used to build every new WHIRLPOOL ®appliance.
To locate FSP replacement parts in your area:
Call the Customer Interaction Center at 1-800-253-1301, or your
nearest designated service center.
For information on how to contact Whirlpool Corporation, please
see front page of this document.
INSTRUCCIONESPARAELUSUARIODELASECADORA
Ayuda o serviciot cnico
Si necesita ayuda o servicio tecnico, vea primero la secci6n
"Soluci6n de Problemas". Puede obtener asistencia adicional
Ilamando a nuestro Centre de Interacci6n del Cliente al
1-800-253-1301 desde cualquier lugar de los EE.UU., o escriba a:
Whirlpool Corporation
Customer Interaction Center
553 Benson Road
Benton Harbor, MI 49022-2692
Favor de incluir un n_mero telef6nico de dia en su
correspondencia.
Para ordenar partes y accesorios, Ilame al 1-800-442-9991 o
visite nuestro sitio Web en www.whirlpool.com.
Guarde este libro y su comprobante de compra juntos para
referencia futura. Usted debera proporcionar evidencia de la
compra o una fecha de instalaci6n para obtener servicio bajo
la garantia.
Escriba la siguiente informacidn acerca de su electrodomestico
para ayudarle mejor a obtener ayuda o servicio tecnico si alguna
vez Ilegara a necesitarlo. Debera tenet a mane el nt]mero
completo del modelo y de la serie. Podra encontrar esta
informaci6n en la etiqueta con el nt]mero del modelo y de la serie,
en la cavidad interna superior de la puerta de la secadora.
Nombre del distribuidor
Nt_mero de serie
Direcci6n
Nt_mero de tel6fono
Nt_mero del modelo
Fecha de compra
SEGURIDADDELASECADORA
Su seguridad y la seguridad de los demas es muy importante.
Hemos incluido muchos mensajes importantes de seguridad en este manual y en su electrodomestico. Lea y obedezca siempre
todos los mensajes de seguridad=
Este es el sfmbolo de advertencia de seguridad.
Este sfmbolo le llama la atencion sobre peligros potenciales que pueden ocasionar la muerte o una lesion a
usted y a los demas.
Todos los mensajes de seguridad irAn a continuacidn del simbolo de advertencia de seguridad y de la palabra
"PELIGRO" o "ADVERTENClA". Estas palabras significan:
Si no sigue las instrucciones de inmediato, usted puede
morir o sufrir una lesion grave.
Si no sigue las instrucciones, usted puede morir o sufrir
una lesion grave.
Todos los mensajes de seguridad le diran el peligro potencial, le diran como reducir las posibilidades de sufrir una lesion y Io que
puede suceder si no se siguen las instrucciones.
iNSTRUCCiONES IMPORTANTES DE SEGURIDAD
ADVERTENCmA: A fin de reducir el riesgo de incendio, descarga electrica o de dado a las personas que usen
la secadora, deben seguirse las precauciones basicas, induidas las siguientes:
Lea todas las instrucciones antes de usar la secadora.
No coloque Ios objetos expuestos a aceite para cocinar
en su secadora. Los ob]etos expuestos a aceites para
cocinar pueden contribuir a una reacci6n quimica que
podrfa causar que una carga se inflame.
No seque articulos que ya se hayan Iimpiado, Iavado,
remo]ado o manchado con gasolina, disolventes de
limpieza en seco, u otras sustancias infiamables o
exptosivas ya que despiden vapores que pueden
encenderse o causar una explosi6n.
No permita que jueguen Ios ni_os sobre o dentro de Ia
secadora. Es necesaria la cuidadosa vigilancia de Ios
ni¢ios toda vez que se use la secadora cerca de ellos.
Quite la puerta de la secadora al compartimiento de secado
antes de ponerla fuera de funcionamiento o de descartarla.
No introduzca Ias manos en la secadora cuando el tambor
esta en movimiento.
No instale o almacene esta secadora donde estara
expuesta a agua o a Ia intemperie.
No trate de forzar los controles.
No repare o reemplace ninguna pieza de Ia secadora ni
trate de repararla a menos que esto se recomiende
especificamente en el Manual del propietario o en
instrucciones de reparaci6n publicadas para el usuario
que usted comprenda y s61osi cuenta con la experiencia
necesaria para Ilevar a cabo dicha reparaci6n.
No utilice suavizadores de teiidos o productos para eliminar
el estatico de prendas a menos que Io recomiende el
fabricante del suavizador de tejidoso Ias instrucciones del
producto en uso.
No utilice calor para secar prendas que contengan espuma
de caucho o materiales de caucho con textura similar.
Limpie el filtro de pelusa antes o depues de cada carga
de ropa.
Mantenga el area alrededor de Ia apertura de ventilaci6n
y Ias areas adyacentes a esta apertura sin pelusa, polvo
o tierra.
m La parte interior de la maquina y el conducto de
ventilaci6n se deben limpiar peri6dicamente. Esta Iimpieza
la debe Ilevar a cabo un reparador c alificado.
Vea la instrucciones de instalaci6n para los requisitos de
conexi6n a tierra.
GUARDE ESTAS INSTRUCCIONES
ADVERTENCIA" Para su seguridad, la informaci6n en este manual debe ser observada
para minimizar el riesgo de incendio o explosi6n, o para prevenir dahos a propiedades,
heridas o la muerte.
- No almacene o use gasolina u otros liquidos y vapores inflamables cerca de 6ste u otro
aparato electrodom6stico.
- PASOS QUE USTED DEBE SEGUIR SI HUELE A GAS:
No trate de encender ning0n aparato electrodom6stico.
No toque ning0n interruptor el6ctrico; no use ningOn tel6fono en su edificio.
Desaloje a todos los ocupantes del cuarto, edificio o area.
Llame inmediatamente a su proveedor de gas desde el tel6fono de un vecino.
Siga las instrucciones de su proveedor de gas.
Si usted no puede comunicarse con su proveedor de gas, Ilame al departamento
de bomberos.
- La instalaci6n y el servicio deben ser efectuados por un instalador calificado, una
agencia de servicio o por el proveedor de gas.
10
Su secadora debe de estar instalada y ventilada adecuadamente
para obtener una eficiencia maxima de secado y acortar el tiempo
de secado. Deje que los espacios de instalaci6n tengan las
medidas minimas recomendadas se encuentran en sus
Instrucciones de instalaci6n. Vea las Instrucciones de instalaci6n
)ara mas informaci6n.
Peiigro de Incendio
Use un ducto de escape de rnetai pesado.
No use un ducto de escape de pl,Sstico.
No use un ducto de escape de amuminioo
No seguir estas instrucciones puede ocasionar
marnuerte o incendioo
La secadora no estara bajo garantfa si no esta instalada y
ventilada adecuadamente.
NOTA: Las visitas de servicio que resulten necesarias debido a
una ventilaci6n inadecuada iran por cuenta del cliente, ya sea que
se trate de una instalaci6n pagada o una hecha por el cliente
mismo.
1. No utilice un ducto de escape de plastico o de aluminio.
Utilice un ducto de escape de metal pesado o de metal
flexible de 4" (10,2 cm). No tuerza o prense el ducto de
escape de metal flexible. El ducto de escape debe de estar
completamente extendido para permitir el flujo del aire de
ventilaci6n. Revise el ducto de escape despues de la
instalaci6n. Vea sus Instrucciones de instalaci6n para los
requerimientos necesarios para la Iongitud del ducto.
2. Utilice una capota de ventilaci6n de 4" (10,2 cm).
3. Utilice el camino mas directo posible al instalar el ducto.
4. Utilice abrazaderas para sellar todas las juntas. No use cinta
adhesiva para conductos, tornillos ni otros dispositivos de
fijaci6n que se extiendan dentro del ducto de escape, para
fijar el ducto.
5. Limpie el ducto de escape per Io menos cada 2 a_os o
peri6dicamente seg0n el uso que le de a la secadora o
cuando instale la secadora en un nuevo lugar. Cuando termine
la limpieza revise por 01tima vez el producto, asegurandose de
seguir las Instrucciones de instalaci6n que acompa_an a su
secadora.
USODE LASECADORA
Coloque la ropa en la secadora holgadamente. No la Ilene en exceso. Deje suficiente espacio para que la ropa rote con libertad. Los
cuadros a continuaci6n ilustran ejemplos de cargas balanceadas que permitiran el movimiento del tambor adecuado.
i ..........................i .......................................................1 1
SECADORAS DE CAPACIDAD ULTRA, CAPACIDAD SUPERIOR Y CAPACIDAD SUPERIOR PLUS
Ropa pesada de trabajo
4 pantalones
4 pantalones de mezclilla
2 sudaderas
2 pantalones de deporte
4 camisas
Charga mixta
3 sabanas (1 de cama
matrimonial, 2 de camas
gemelas)
4 fundas
9 camisetas
9 pantalones cortos
3 blusas
10 pa_uelos de mano
3 camisas
Toallas
10 toallas para baSo
10 toallas para mano
14 toallas faciales
1 tapete de bar_o
Articulos delicados
3 camisolas
1 bata de casa
4 fondos
8 prendas de ropa interior
2 juegos de ropa de dormir
1 vestido de ni_o
11
PeHgro de E×pmosi6n
Mantenga ruesmateriales y vapores inflamablee, tames
come magasomina, amejados de la secadera,
No eeque n}ngQn articulo que haya tenido alguna vez
cualqu}er eubstaneia }nflamable (aQn despues de
lavarlo),
No seguir estae instrucciones puede ecaeienar
la muerte, e×pies}6n e }ncend}e.
Pemigro de _ncendie
Ninguna mavadora puede eHminar compmetamente
et aceite.
No seque ningun articu{o que haya tenido amguna vez
cua_quier tipo de aceite (incmuyende los aceites de
cocina),
Los articuBes que contengan eepuma, humeo pmaetice
deben secaree en un tendedero o usando un
C}cmede A}re,
No eeguir estas instrucciones puede ecasienar
la muerte e incendio.
Este folleto cubre varies modelos diferentes. Puede ser que su
secadora no cuente con todos los ciclos y caracteristicas
descritos.
Antes de usar la secadora, limpie el tambor de la misma con un
paso hQmedo para quitar el polvo que se acumul6 durante el
almacenaje y envio.
Para detener y volver a poner en marcha
Puede detener su secadora en cualquier momento durante un
ciclo.
Para detener su secadora
Abra la puerta de la secadora o gire la perilla de control de ciclos
a OFR
Puesta en marcha de los modelos rotativos NOTA: La perilla de control de ciclos debe apuntar hacia un Area
de apagado cuando no este en uso.
1. Cargue la ropa holgadamente en la secadora y cierre la
puerta. No Ilene en exceso la secadora. Deje suficiente
espacio para que la ropa rote con libertad.
2. Gire la perilla de control de ciclos hacia el ciclo recomendado
para el tipo de carga que esta secando. Use el ajuste de
ahorro de energia (Energy Preferred) para secar la mayor[a de
las telas de peso mediano a pesado.
3. Si su secadora tiene un selector de temperatura, fijelo en el
ajuste recomendado para el tipo de telas que esta secando.
Consulte "Descripciones de los ciclos de la secadora" (hoja
separada) para las sugerencias de temperatura. En algunos
modelos, la temperatura esta incluida en las selecciones de
ciclos.
4. (OPCIONAL) Su secadora puede tener un selector de la
caracteristica WRINKLE SHIELD TM. Cuando no puede quitar
una carga de la secadora enseguida que se detenga, se
pueden formar arrugas. Esta caracter[stica rota, reacomoda y
esponja peri6dicamente la carga sin calor para ayudar a
prevenir arrugas.
5. (OPCIONAL) Su secadora puede tener una serial de fin de
ciclo (End of Cycle Signal). La sepal es Qtil cuando se secan
prendas que se deben quitar de la secadora en cuanto esta se
detenga.
En algunos modelos, se puede ajustar el volumen de la
seSal de fin de ciclo. Gire el selector hacia el volumen
deseado.
En otros modelos, la serial de fin de ciclo es parte del
bot6n de inicio. Gire el bot6n de inicio (START) a
encendido (ON) o apagado (OFF). La serial sonara
solamente si el selector esta fijado en encendido.
6. Seleccione la opci6n deseada. Consulte "Descripciones de
los ciclos de la secadora" (hoja separada).
7. Si Io desea, agregue una hoja de suavizante de telas. Siga las
instrucciones del paquete.
8. Oprima el bot6n de START.
Para volver a poner en marcha su secadora
Cierre la puerta. Seleccione un nuevo ciclo y temperatura (si Io
desea). Oprima el bot6n de START.
Puesta en marcha de los modelos electr6nicos
1. Cargue la ropa holgadamente en la secadora y cierre la
puerta. No Ilene en exceso la secadora. Deje suficiente
espacio para que la ropa rote con libertad.
2. Seleccione uno de los ciclos automaticos o programados.
Use los ciclos de Secado pesado (Heavy Duty), Toallas/
Algod6n (Towels/Cotton) o Normal para secar la mayoria
de las telas de peso pesado y mediano.
Si selecciona un ciclo automatico, puede cambiar el nivel
de secado. Oprima los botones de mas (+) o menos (-)
para mas seco (MORE DRY) o menos seco (LESS DRY).
Si selecciona un ciclo programado, puede cambiar los
ajustes de tiempo y de temperatura. Para cambiar el
tiempo, oprima los botones de mas (+) o menos (-) para
obtener mas tiempo (MORE TIME) o menos tiempo (LESS
TIME). Oprima el bot6n de temperatura para ciclos
programados (TIMED CYCLES TEMP) para cambiar la
temperatura.
3. Seleccione el ajuste WRINKLE SHIELD TM, si Io desea. Cuando
no pueda quitar una carga de la secadora enseguida que se
detenga, se pueden formar arrugas. Esta caracter[stica rota,
reacomoda y esponja peri6dicamente la carga sin calor para
ayudar a prevenir arrugas.
4. Seleccione la serial de ciclo (CYCLE SIGNAL), si Io desea. La
serial es Qtil cuando se secan articulos que se deben quitar de
la secadora en cuanto esta se detenga.
5. Si Io desea, agregue una hoja de suavizante de telas. Siga las
instrucciones del paquete.
6. Oprima el bot6n de START.
12
Para detener, hacer una pausa y volver a poner en marcha
Puede detener su secadora en cualquier memento durante un
ciclo.
Para detener su secadora
Oprima Pausa/Anulaci6n (PAUSE/CANCEL) dos veces.
Para volver a poner en marcha su secadora
Cierre la puerta. Seleccione un nuevo ciclo y temperatura (si Io
desea). Oprima el bot6n de START.
Para hacer una pausa en la secadora
Abra la puerta u oprima PAUSE/CANCEL una vez. Cierre la puerta
y oprima START para reanudar el ciclo.
NOTA: El secado continuara desde que se interrumpi6 el ciclo si
cierra la puerta y oprime START dentro de 5 minutes. Si se
interrumpe el ciclo por mas de 5 minutos, la secadora se apagara.
Necesitara seleccionar nuevos ajustes de ciclos antes de volver a
poner en marcha la secadora.
Use el estante de secado para secar articulos tales como sueters
y almohadas sin rotaci6n. El tambor gira, pero el estante no se
mueve.
NOTA: Usted debera quitar el estante para un secado normal con
rotaci6n. No use el ciclo automatico con el estante de secado.
Para usar el estante de secado
1. Coloque el estante de secado en la secadora.
Estilo 1: Su estante de secado tiene patas frontales. Deslice
las espigas traseras dentro de las hendiduras que estan en la
pared posterior de la secadora. Baje las patas frontales para
que descansen en la abertura de la secadora.
Estilo 2: Su estante de secado no tenene patas frontales. No
quite el filtro de pelusa. Deslice el estante de secado per
encima de la parte inferior de la abertura de la puerta de la
secadora. Empuje hacia abajo para asegurar el estante en el
marco.
2. Ponga los articulos mojados sobre el estante de secado,
dejando espacio entre ellos. No permita que los articulos
cuelguen del borde del estante de secado. Cierre la puerta.
3. Seleccione un ciclo programado de secado y de temperatura, o
un ciclo de mire.Los articulos que contengan espuma, hule o
plastico deben secarse en un tendedero o usando un ciclo de
mire.Consulte el cuadro acontinuaci6n.
4. Ponga la secadora en marcha. Si Io necesita, vuelva a fijar el
ciclo para completar el secado.
Secado con estante Ciclo Ternp Tiempo
Art[culos lavables de lana Secado Baja 60 min.
(deles forma y extiendalos progra-
en sentido plane en el made
estante)
Juguetes de peluche/ Secado Baja 60 min.
almohadas (con relleno de progra-
algod6n o fibra de poliester) made
Juguetes de peluche/ Aire N/A 90 min.
almohadas (sin calor)
Rellenos con hule espuma
CUIDADODELASECADORA
Mantenga el Area donde esta la secadora despejada y libre de
articulos que pudieran obstruir el flujo de mirepara la combusti6n
y la ventilaci6n.
Pemigro de E×pmosi6n
Mantenga Bos materiames y vapores inflamabies, corno
la gasolina, lejos de la secadora.
CoBoque la secadora a un m[nimo de 4{} crn sobre
empiso para Bainstalaci6n en un garajeo
No seguir estas instracciones puede ocasionar
la rnuerte, explosi6n o incendio.
Limpie el filtro de pelusa antes de cada carga. Un filtro obstruido
con pelusa puede aumentar el tiempo de secado.
IMPORTANTE:
No ponga a funcionar la secadora con el filtro de pelusa flojo,
da_ado, obstruido o sin el. El hacerlo puede causar un
sobrecalentamiento y daSar tanto la secadora come las
prendas.
Si al quitar la pelusa del filtro esta cae dentro de la secadora,
revise la capota de ventilaci6n y quite la pelusa.
Limpieza de cada carga
Estilo 1:
1. El filtro de pelusa esta ubicado en la parte superior de la
secadora. Jale el filtro de pelusa hacia usted. Quite la pelusa
enrollandola con los dedos. No enjuague o lave el filtro para
quitar la pelusa. La pelusa mojada es dificil de sacar.
2. Empuje el filtro firmemente hasta que quede en su lugar.
Estilo 2:
1. El filtro de pelusa esta Iocalizado en la puerta de la secadora.
Jale el filtro de pelusa directamente hacia arriba. Quite la
pelusa enrollandola con los dedos. No enjuague o lave el filtro
para quitar la pelusa. La pelusa mojada es dificil de sacar.
2. Empuje el filtro firmemente hasta que quede en su lugar.
13
Limpieza peri6dica
1. Quite la pelusa del filtro enrollandola con sus dedos,
2. Moje ambos lados del filtro de pelusa con agua caliente.
3. Moje un cepillo de nylon con agua caliente y detergente
liquido. Talle el filtro de pelusa con el cepillo para quitar la
acumulaci6n de residuos,
4. Enjuague el filtro con agua caliente.
5. Seque minuciosamente el filtro de pelusa con una toalla
limpia. Vuelva a colocar el filtro en la secadora.
ii!:_;i;ii;_ii!!_,_i_¸¸¸'iO_'_ill¸¸¸!_iii!!_,!_i_ii_i!;,?_ii_iii_!_i;ii!ii_ii!Oi!'_ii!_i
1. Aplique un limpiador domestico no inflammable al Area
manchada del tambor y frote con un paso suave hasta que
desaparezca la mancha.
2. Limpie el tambor minuciosamente con un paso hQmedo.
3. Seque una carga de ropa limpia o toallas para secar el tambor.
NOTA: Las prendas de colores que desti_en tales come
mezclillas o articulos de algod6n de colores vivos, pueden ter_ir el
interior de la secadora, Estas manchas no da_an su secadora ni
mancharan las cargas futuras de ropa. Seque los articulos de
colores que desti_en al reves para evitar la transferencia del tinte.
Del interior del gabinete de la secadora
Seg_n el use de la secadora, se debe quitar la pelusa cada
2 a_os, o con mas frecuencia. La limpieza debera efectuarla una
persona calificada.
Del interior del ducto de escape
Seg_n el use de la secadora, se debe quitar la pelusa cada
2 a_os, o con mas frecuencia.
1. Desenchufe la secadora o desconecte el suministro de
energia.
2. Abra la puerta de la secadora. Localice la cubierta del foco de
luz en la pared posterior de la secadora. Quite el tornillo
ubicado en la esquina inferior derecha de la cubierta. Quite la
cubierta.
3. Gire el foco en sentido contrario alas manecillas del reloj,
Reemplacelo Qnicamente con un foco para electrodomesticos
de 10 vatios, Vuelva a colocar la cubierta y asegQrela con el
tornillo.
4. Enchufe la secadora o reconecte el suministro de energfa.
SOLUCIONDEPROBLEMAS
En primer lugar, pruebe las soluciones sugeridas aqui y posiblemente se evite el gasto de una Ilamada de
servicio t_cnico...
Mensajes codificados - $61o en los modelos electr6nicos
Para el mensaje de error "PF" (corte de energia), revise Io
siguiente:
_,EstAla secadora conectada al suministro de energia?
_,Seha conectado la secadora a un suministro de energia
durante la instalaci6n o un corte de energia?
Presione Inicio (START) para reanudar la marcha de la
secadora o presione Pausa/Anulaci6n (PAUSE/CANCEL) para
cancelar el ciclo.
_,Seha interrumpido el ciclo de secado por un corte de
energ[a?
Presione START para reanudar la marcha de la secadora o
presione PAUSE/CANCEL para cancelar el ciclo.
Para el mensaje de error "El" o "E2" (cbdigos de servicio
tecnico ):
Se requiere servicio. Solicite servicio tecnico.
La secadora no funciona
Verifique Io siguiente:
_,Seha enchufado el cable electrico?
_,Seha quemado un fusible o se ha disparado el
cortacircuitos? Puede ser que haya 2 fusibles o disyuntores
para la secadora, Verifique que ambos fusibles esten intactos
y ajustados, o que no se hayan disparado los cortacircuitos.
_,Seus6 un fusible regular? Use un fusible retardador.
_,EstAcerrada con firmeza la puerta de la secadora?
_,Seoprimi6 con firmeza el bot6n de START?
_,Seha seleccionado un ciclo?
No hay calor
&Se ha quemado un fusible o se ha disparado el
cortacircuitos? Las secadoras electricas utilizan 2 fusibles o
disyuntores domesticos. El tambor quizas rote pero sin calor.
&Se ha seleccionado un ciclo de secado al aire?
Seleccione el ciclo correcto para el tipo de prendas que se
esten secando.
En el caso de secadoras a gas, _,est_ la v_lvula abierta en
la via de abastecimiento?
Sonidos raros
&Ha estado la secadora en desuso durante un periodo?
Si la secadora ha estado en desuso per una temporada,
podra oirse un ruido pesado durante los primeros minutos de
funcionamiento,
z,Es una secadora a gas? El chasquido de la valvula de gas
es un sonido de funcionamiento normal.
14
La ropa no esta secandose de modo satisfactorio
Verifique Io siguiente:
_,Esta el filtro de pelusa obstruido con pelusa?
_,Esta obstruido con pelusa el ducto de escape o la capota de
ventilacidn, restringiendo el flujo del aire? Ponga a funcionar la
secadora unos 5 a 10 minutes. Ponga su mano debajo de la
capota de ventilaci6n para verificar el movimiento del aire. Si
no Io siente, limpie la pelusa del sistema de ventilacidn o
reemplace el ducto de escape con uno de metal pesado o de
metal flexible. Consulte las Instrucciones de instalaci6n.
_,Esta el ducto de escape aplastado o retorcido? Reemplacelo
con un ducto de escape de metal pesado o flexible. Consulte
las Instrucciones de instalaci6n.
_,Estan las hojas del suavizante de telas bloqueando la rejilla?
Use Onicamente una hoja del suavizante de telas y Osela una
sola vez.
&Esta la secadora ubicada en una habitacibn cuya
temperatura est_ debajo de 45°F (7°C)? El funcionamiento
apropiado de los ciclos de la secadora requiere temperaturas
superiores a 45°F (7°0).
&Se us6 un enjuague frio? _.Estaba la carga muy mojada?
Espere tiempos de secado mas prolongados para articulos
enjuagados en agua fria y para aquellos que retienen
humedad (fibras de algod6n).
&Esta la carga demasiado voluminosa y pesada para
secarse con rapidez? Separe la carga de mode que pueda
rotar libremente.
Pelusa en la carga
&Esta obstruido el filtro de pelusa? Limpie el filtro de
pelusa. Verifique si hay movimiento de aire.
&Se ha separado la carga de modo apropiado? Separe las
prendas que sueltan pelusa (toallas, felpilla) de las que atraen
pelusa (pana, art[culos sinteticos). Tambien separe per color.
z,Esta la carga demasiado voluminosa o demasiado
pesada? Seque cargas menos voluminosas para que la
pelusa pueda ser trasladada al filtro de pelusa.
&Se sec6 la carga en exceso? Fije el ajuste de la secadora
segOn el tipo de carga. Secar en exceso puede dar lugar a la
electricidad estatica que atrae pelusa. Vea "Descripci6n de los
ciclos de la secadera" (hoja aparte).
&Se dej6 papel o pafiuelo de papel en los bolsillos?
&Se estan confundiendo las motitas con la pelusa? Las
metitas (en la superficie de la ropa) sen causadas por el
desgaste normal y el lavado.
Manchas en la carga o cambio de color
&Se us6 de modo apropiado el suavizante de telas para
secadoras? Agregue las hojas del suavizante de telas para
secadora al comienzo del ciclo. Las hojas del suavizante de
telas que se agregan a una carga parcialmente seca pueden
manchar las prendas.
&Estaban sucios los articulos en el momento de ponerlos
en la secadora? Los articulos deberian estar limpios antes de
ponerlos a secar.
&Se separaron los articulos de modo apropiado? Separe
los celores claros de los celores oscuros. Separe los articulos
que no destiSen de los que destir_en.
Las prendas se encogen
&Se sobrecargb la secadora? Seque cargas menos
voluminosas que puedan rotar con libertad.
&Se sec6 la carga en exceso? Verifique la etiqueta de
cuidado del fabricante. Fije el ajuste de la secadera segOn el
tipo de carga.
Las cargas estan arrugadas
&Se quit6 la carga de la secadora al terminar el ciclo?
&Se sobrecargb la secadora? Seque cargas menos
voluminosas que puedan rotar con libertad.
&Se sec6 la carga en exceso? Verifique la etiqueta de
cuidado del fabricante. Fije el ajuste de la secadera segt_n el
tipo de carga.
Olores
&Pint6, tiff6 o barnizb recientemente en el area donde se
encuentra su secadora? Si es as[, ventile el area. Cuando los
olores y el humo se hayan ido del area, vuelva a lavar la ropa y
luego sequela.
Si la secadora es electrica, &se esta usando por primera
vez? El nuevo elemento calentador electrico puede emitir un
oler. El eler desaparecera despues del primer ciclo.
Prendas deterioradas
Verifique Io siguiente:
_,Sedejaron abiertos los zipers, broches de presi6n y
ganchos?
_,Seataron los cordones y fajas para evitar que se enreden?
_,Sesiguieron las instrucciones de la etiqueta de cuidado de la
prenda?
_,Sehan deteriorado los articulos antes del secado?
15
GARANTIADELASECADORAWHIRLPOOLGOLD®
GARANTIA TOTAL DE UN AI_IO
Durante un a_o a partir de la fecha de compra, siempre y cuando se de a la secadora un use y mantenimiento de conformidad con las
instrucciones adjuntas o provistas con el producto, Whirlpool Corporation se hara cargo del costo de las piezas de repuesto FSP®y del
gasto del trabajo de reparaciTn para corregir defectos en los materiales o en la mano de obra. El servicio debera ser suministrado per
una compaSfa de servicio designada por Whirlpool.
GARANTIA LIMITADA DEL SEGUNDO AL QUINTO AI_IO EN LOS TABLEROS DE CONTROL ELECTRONICO
Del segundo hasta el quinto a_o a partir de la fecha de compra, siempre y cuando se de a la secadora un uso y mantenimiento de
conformidad con las instrucciones adjuntas o provistas con el producto, Whirlpool Corporation se hara cargo del costo de las piezas de
repuesto FSP_ para reemplazar los tableros de control electr6nico si hubiera defectos en los materiales o en la mane de obra.
Whirlpool Corporation no pagara por:
1. Visitas de servicio tecnico para corregir la instalaci6n de su secadora, incluyendo la ventilaci6n. Se debe usar un ducto de escape
de metal pesado de 4" (10,2 cm). Refierase a la secci6n de ventilaciTn y alas Instrucciones de InstalaciTn de este manual.
2. Visitas de servicio tecnico para ense_arle a usar su secadora, para cambiar fusibles domesticos, para corregir la instalaci6n
electrica de la casa, para volver a fijar los disyuntores o para cambiar bombillas de luz que estan al alcance del propietario.
3. Reparaciones cuando su secadora se use de un modo diferente al domestico familiar.
4. Da_os causados per accidente, alteraciTn, uso indebido, abuse, incendio, inundaci6n, actos fortuitos, instalaci6n incorrecta
(incluyendo, pero no limitado al use de ductos de escape de plastico u hoja de aluminio flexible), instalaciTn que no sea de
conformidad con los c6digos de electricidad y plomerfa locales, o el empleo de productos no aprobados por Whirlpool
Corporation.
5. Piezas de repuesto o gastos de reparaciTn para electrodomesticos que se empleen fuera de los Estados Unidos.
6. Recogida y entrega. Este producto esta diseSado para set reparado en el hogar.
7. Reparaciones de piezas o sistemas como resultado de modificaciones no autorizadas que se hayan efectuado en el
electrodomestico.
8. Cualquier gasto de mano de obra durante los periodo de la garantia limitada.
WHIRLPOOL CORPORATION NO SE RESPONSABILIZARA POR DAI_IOS INCIDENTALES O CONSECUENTES.
AIgunos estados no permiten la exclusi6n o limitaci6n de da_os incidentales o consecuentes, de modo que esta exclusi6n o limitaci6n
quizas no le corresponda. Esta garantfa le da derechos legales especfficos y Ud. tambien puede tenet otros derechos que varian de un
estado a otro.
Esta garantia no tiene vigor fuera de los 50 Estados Unidos. Para determinar si se aplica otra garantia, sirvase ponerse en
contacto con su distribuidor autorizado de Whirlpool. 8/02
Refacciones
Si necesita pedir piezas de repuesto, recomendamos que use
Qnicamente piezas especificadas de fabrica FSP®.Estas piezas
encajaran bien y funcionaran bien ya que estan fabricadas con la
misma precisi6n empleada en la fabricaci6n de cada
electrodomestico nuevo de WHIRLPOOL ®.
Para conseguir las piezas de repuesto FSP en su Iocalidad:
Llame al Centre de Interacci6n del Cliente al 1-800-253-1301, o a
su centro de servicio designado mas cercano.
Para obtener informaci6n sobre c6mo ponerse en contacto con
Whirlpool Corporation, sirvase ver la portada de este documento.
8533772
® 2004 Whirlpool Corporation,
All rights reserved,
Todos los derechos reservados.
® Registered Trademark/TM Trademark of Whirlpool, U.S.A.
@Marca registrada/TM Marca de comercio de Whirlpool, EE.UU.
1/04
Printed in U.S.A.
Impreso en EE.UU.
  • Page 1 1
  • Page 2 2
  • Page 3 3
  • Page 4 4
  • Page 5 5
  • Page 6 6
  • Page 7 7
  • Page 8 8
  • Page 9 9
  • Page 10 10
  • Page 11 11
  • Page 12 12
  • Page 13 13
  • Page 14 14
  • Page 15 15
  • Page 16 16

Whirlpool LGQ8611PW0 Owner's manual

Category
Tumble dryers
Type
Owner's manual
This manual is also suitable for

Ask a question and I''ll find the answer in the document

Finding information in a document is now easier with AI

in other languages