Page is loading ...

Pacific
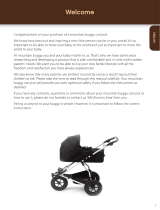
Pushchair and Carrycot

2
IMPORTANT:
READ THE INSTRUCTIONS CAREFULLY
BEFORE USE AND KEEP FOR FUTURE
REFERENCE
Your child’s safety may be aected if you
do not follow these instructions.
Your Pacic Pushchair is a high quality
Silver Cross product. It meets current
safety standards and care and regular light
maintenance will ensure long service.
This pushchair is suitable from birth up to
9kg with the Carrycot from 6 months, up
to 22kg or 4 years whichever comes rst,
using the Seat Unit. If somebody unfamiliar
is using your Pacic Pushchair always
ensure that they read these instructions
carefully so that they understand how the
product works best. The Pacic Pushchair
is designed and tested to be used with the
Pacic Carrycot and the Simplicity Car
Seat (sold separately).
THE SAFETY OF YOUR CHILD IS YOUR
RESPONSIBILITY.
Contents
First check all your parts have been
supplied. Your Pacic pushchair includes:
1.1 Seat unit with harness
1.2 Seat unit bumper bar
1.3 Carrycot bumper bar
1.4 Chassis including basket
1.5 Front wheels
1.6 Rain cover
1.7 Seat unit hood
1.8 Carrycot hood
1.9 Carrycot outer
1.10 Carrycot liner
1.11 Carrycot mattress
1.12 Chest pads and crotch pad
1.13 Seat unit seat liner
1.14 Carrycot apron
1.15 Cup holder
1.1 1.2
1.3
1.4
1.5
1.9 1.10 1.11
1.6 1.7 1.8
1.12
1.14
1.13
1.15

3
silvercrossbaby.com
Preparation for use
Remove all packaging material
from your Pacic pushchair. To use
your Pacic pushchair from birth
you must use the Pacic Carrycot
(included).
Pacic chassis
2.1 Attach the front wheels by
inserting the axles into the
Pacic frame until they ‘click’
into position.
2.2 Release the folding lock and
lift the handle upwards.
WARNING: CHECK THE WHEEL
IS SECURE BY PULLING GENTLY
DOWNWARDS.
WARNING: CHECK THAT THE
CARRYCOT OR SEAT UNIT OR
CAR SEAT ATTACHMENT DEVICES
ARE CORRECTLY ENGAGED
BEFORE USE.
2.1
2.2

4
Pacic chassis
2.3 Continue to lift the handle
upwards until the frame
‘clicks’ and locks into position.
Always check that the frame
is secure.
2.3
Using the brake
WARNING: ALWAYS APPLY THE
PARKING BRAKE WHEN YOU ARE
STANDING STILL.
WARNING: ALWAYS APPLY THE
BRAKE WHEN PLACING AND
REMOVING THE CHILD.
3.1 To engage the brake, press
down on the red brake pedal.
Listen for the ‘click’.
NOTE: Always check that
your brake is fully engaged by
gently rocking the pushchair.
To disengage the brake, gently
press down on the green
brake release button. Rock the
pushchair backwards before
moving forward.
3.1

5
silvercrossbaby.com
Operating the swivel wheels
Your Pacic chassis has lockable
front swivel wheels. We advise
locking the front wheels if pushing
the pushchair straight ahead for a
long period.
4.1 Rotate the swivel release lever
sideways to lock the wheels
into the xed position.
Always apply brake when
placing and removing the
child.
4.1
1
2
3
4
Operating the height adjustable
handle
Your Pacic has a 4-position
handle height.
5.1 Press and hold the handle
height adjustment /folding
button.
5.2 Slide the handle up or down
to required height and release
the adjustment button.
The handle will lock and ‘click’
into place.
5.2
5.1

6
Folding your Pacic chassis
NOTE: To ensure your Pacic
chassis folds correctly remove all
items from the shopping basket
before attempting to fold.
NOTE: If using as a travel system
(with a car seat) or pram (with
Pacic carrycot) please ensure
each part has been removed
before folding.
Your Pacic chassis can be folded
with the seat unit attached and
in a forward-facing, upright
position. In all other positions it is
recommended to remove the seat
unit.
6.1 Ensure the swivel wheels are
locked
6.2 Engage the brake pedal
6.1
6.2

7
silvercrossbaby.com
Folding your Pacic chassis
6.3 Press and hold the fold release
button. Pull the fold release
triggers towards you. Push the
handle downwards gently and
lower the handle downwards
until the fold lock engages.
Lift the handle upwards gently
to ensure that the chassis is
folded correctly.
WARNING: TO AVOID POSSIBLE
INJURY OR DAMAGE, ALWAYS
ENSURE THE STORAGE LATCH
HAS BEEN ENGAGED BEFORE
LIFTING THE PRAM/STROLLER.
CARRY THE PRAM USING THE
MAIN HANDLE, ONCE STORAGE
LATCH HAS BEEN ENGAGED.
WARNING: DUE CARE SHOULD
BE TAKEN WHEN FOLDING AND
UNFOLDING THIS PUSHCHAIR.
PLEASE ENSURE FOLDING
MECHANISMS ARE KEPT CLEAR
TO AVOID POSSIBLE FINGER
ENTRAPMENTS OR INJURIES TO
PARTS OF THE BODY.
6.3

8
Using your Pacic from birth
with the carrycot
Preparing the carrycot for use
Remove all packaging material
from your Pacic carrycot.
7.1 First erect the carrycot outer.
Lay the carrycot outer down
onto its base. Press the 2x
metal bars into the locators
on internal base of carrycot.
A small groove in the locator
holds the frame in position.
7.2 Attach the carrycot liner to
the carrycot outer. Fasten
each inner zip. There is one at
each end of the liner.
7.3 Pass the two D-shaped parts
of the liner between the liner
and the outer and fasten the
Velcro patches to secure the
liner in place.
7.4 Place the mattress into the
base of the liner.
WARNING: DO NOT LEAVE YOUR
CHILD UNATTENDED.
WARNING: NEVER USE THE
CARRYCOT ON A STAND.
WARNING: DO NOT LET OTHER
CHILDREN PLAY UNATTENDED
NEAR THE CARRYCOT.
CAUTION: Do not force the zip
7.1
7.2
7.3
7.4

9
silvercrossbaby.com
Attaching the apron to the
carrycot
8.1 Place the apron over the top
of the carrycot and secure in
place using the velcro tabs.
8.2 Slide the apron ap clips over
the attachment points inside
the carrycot frame.
THIS CARRYCOT IS SUITABLE
FOR A CHILD WHO CANNOT SIT
UP UNAIDED, ROLL OVER AND
CANNOT PUSH ITSELF UP ON ITS
HANDS AND KNEES. MAXIMUM
WEIGHT OF CHILD: 9KG
WARNING: USE A HARNESS AS
SOON AS YOUR CHILD CAN SIT
UNAIDED.
WARNING: ONLY USE ON A FIRM,
HORIZONTAL LEVEL AND DRY
SURFACE.
CAUTION: The head of the child
in the carrycot should never be
lower than the body of the child.
8.1
8.2

10
Attaching the carrycot hood to
the carrycot
9.1 Attach the hood by pressing
the hood clips onto the slots
on either side of the carrycot
frame.
Slide the back of the Pacic
hood over the rear edge of the
carrycot.
9.2 Your Pacic hood can be used
in 3 positions. Fully open,
semi-open and fully covered.
9.1
9.2

11
silvercrossbaby.com
Attaching the bumper bar to
the carrycot or seat unit
10.1 Attach the bumper bar
by pressing the ends of
the bumper bar into the
attachment points of the
carrycot/seat unit frame.
Wait to hear them ‘click’ into
place. Lift gently to ensure the
bumper bar is locked in place.
10.2 To detach, press the bumper
bar release button on the
carrycot/seat unit frame with
one hand and pull the bumper
bar away from the connector
point with the other hand.
The bumper bar will rotate.
To detach both sides repeat
point (
10.2) above. With
one side of the bumper bar
removed the carrycot/seat
unit is easily accessible.
WARNING: THE BUMPER BAR
MUST BE SECURELY CONNECTED
AT ALL TIMES WHEN IN USE. THE
SAFETY OF YOUR CHILD IS YOUR
RESPONSIBILITY.
WARNING: ALWAYS REMOVE
YOUR CHILD FROM THE SEAT
UNIT BEFORE ATTEMPTING
TO LIFT AND REMOVE THE
SEAT UNIT.
WARNING: THE BUMPER BAR IS
NOT A HANDLE.
10.1
10.2

12
Attaching the carrycot to your
chassis
11.1 To attach your Pacic carrycot
to the Pacic chassis hold
the carrycot above the
chassis. Locate the carrycot
chassis connector posts into
the attachment slots on
the chassis. Ensure that the
carrycot ‘clicks’ into place.
The carrycot should be tted
rearward facing. Lift the
carrycot gently by the bumper
bar to check the carrycot has
locked into place.
WARNING: NEVER USE THIS
CARRYCOT ON A STAND.
Detaching the carrycot from
your chassis
11.2 With the Pacic carrycot
facing you, pull both carrycot
release handles outwards and
lift the carrycot clear of the
chassis.
Always ensure your bumper bar
is attached when your child is in
the carrycot.
This product is suitable for a
child who cannot sit up by itself,
roll over and cannot push its self
up on its hands and knees. Max
weight of child: 9kg.
CAUTION: Only use replacement
parts supplied and approved by
the manufacturer.
11.1
11.2

13
silvercrossbaby.com
12.1
Using your liner and mattress
12.1 Your Pacic Carrycot mattress
is removable. Simply lift it out
of the liner. The mattress cover
can be hand washed. Remove
the foam mattress insert
prior to washing by opening
the ap on the back of the
mattress cover and removing
the foam mattress.
12.2 The Pacic Carrycot has a
removable liner. Simply unzip
each end and release the
Velcro fastenings to remove it.
To t the liner and mattress
see preparation for use (see
7.1
- 7.4
)
WARNING: DO NOT ADD A
MATTRESS OTHER THAN THE
ONE PROVIDED.
CAUTION: Do not force the zip
12.2

14
13.1
13.2
Using your Pacic as a
pushchair
Your Pacic seat unit can
be tted to the chassis in
rearward-facing position
(infant facing you) or
forward-facing position
(infant facing away from
you). Follow (
17.1) to attach the
seat unit to the chassis.
Attaching the seat unit hood to
the seat unit
13.1 First, slide the back of the
hood over the back of the seat
unit. Locate the slot in the
fabric at the back of the hood
and slide over the seat recline
adjustment lever.
13.2 Attach the hood by pressing
the hood clips onto the slots
on either side of the seat
unit frame. Note your Pacic
pushchair has a function
where you have the option to
raise or lower the height of
the hood provided. The height
position can be adjusted by
connecting the hood to one
of the two height locations
provided. Velcro the lower
front corners of the hood onto
the seat unit.

15
silvercrossbaby.com
Using your hood
14.1 Your Pacic hood can be used
in 3 positions. Fully open,
semi-open and fully covered.
14.1

16
Using your hood
Your Pacic hood features a
ventilation panel and pop-out
sunvisor.
14.2 To open the ventilation panel,
lift the ap and secure under
the viewing window ap using
the magnets either side of the
hood.
14.3 To use the sunvisor, pull out of
the hood. To store, push back
into the hood.
14.2
14.3

17
silvercrossbaby.com
Preparing the harness
15.1 The shoulder straps have 3
height positions. To adjust,
rst lift the ap on the back
of the seat unit. Thread the
harness buckle from the front
of the seat unit through to
the back of the seat unit and
allow the buckle to lay at
behind the seat securing the
shoulder strap in place.
Thread the harness through
the button hole in the seat
unit relative to the size of your
child, and secure the harness
buckle. (see
16.1).
WARNING: THE HARNESS CAN
FORM LOOPS WHICH MAY BE
A STRANGULATION HAZARD.
NEVER LEAVE THE HARNESS
CONNECTED WHEN NOT FITTED
TO A CHILD IN THE PUSHCHAIR.
15.1

18
Using the harness
WARNING: ALWAYS USE
THE CROTCH STRAP IN
COMBINATION WITH THE WAIST
AND SHOULDER STRAPS
16.1 To fasten the harness insert
both buckle clips into each
side of the buckle. Listen for
the ‘click’.
WARNING: ALWAYS USE THE
RESTRAINT SYSTEM.
16.2 To release the harness press
the button at the centre of
the buckle and pull apart.
The shoulder straps can be
unhooked from the buckle if
required.
16.3 Your harness is fully adjustable
by moving the slides (A), to
make tting easy. Your child
should always be harnessed
in and should never be left
unattended, even for short
periods of time.
Your Pacic harness can be
adjusted for the size of your
child.
‘D’ rings are provided for
tting a separate harness if
required (B).
A
B
A
B
16.1
16.2
16.3

19
silvercrossbaby.com
Attaching the seat unit to your
chassis
WARNING: ENSURE ALL
LOCKING DEVICES ARE
ENGAGED BEFORE USE.
17.1 To attach your Pacic seat
unit to the Pacic chassis
hold the seat unit above the
chassis. Locate the seat unit
chassis connector posts into
the seat attachment slots on
the chassis. Ensure that the
seat unit ‘clicks’ into place.
The seat unit can be tted
forward or rearward facing.
Lift the seat unit gently by the
bumper bar to check the seat
unit has locked into place.
To adjust the seat position
(see
18.1)
Detaching the seat unit from
your chassis
17. 2 With the seat unit facing you,
pull both seat release handles
outwards and lift the seat unit
clear of the chassis.
CAUTION: Remove the child from
the seat unit before detaching
from your chassis.
17. 2
17.1

20
Adjusting the seat position
Your Pacic has 3 forward-facing
and 3 rearward-facing seat
positions.
18.1 To adjust the seat position in
either forward or rearward
facing mode, lift and hold the
seat recline adjustment lever
on the back of the seat unit.
Move the seat unit upwards or
downwards to upright, semi-
recline or full recline.
Release the recline adjustment
lever and wait to hear a
‘click’ for each position to
lock into place.
18.2 Your Pacic has an adjustable
multi-position footrest.
To adjust the footrest, press
the adjuster buttons located
on each side of the footrest.
Once buttons are pressed
gently adjust the footrest to
its lowest position. Once in the
lowest position you can gently
lift the footrest up to a more
desired position if required.
18.1
18.2
/