9
Select a button mode:
• To set the button to activate with one touch, select
Normal.
• To set the button to activate only while touching the
button, select Momentary.
• To set the button to turn on and off repeatedly, select
Strobe, and select time intervals.
10
If applicable, use the slider to set the brightness of lights.
11
Select .
12
If necessary, select Add Action to add additional actions for
the button.
You can add one action for every switch on the Garmin
PowerSwitch device.
Arranging Buttons In a Custom Layout
1
From the Garmin PowerSwitch app, select a custom layout
tab.
2
Select Edit.
The app enters editing mode.
3
On the button you want to move, hold , and drag the button
to a new location.
Deleting a Custom Layout or Button
1
From the Garmin PowerSwitch app, select a custom layout
tab.
2
Select Edit.
The app enters editing mode.
3
Select an option:
• To delete a button, select on the button you want to
delete.
• To delete a layout tab, select on the layout tab.
Routines
Routines automate your Garmin PowerSwitch device. When you
define a routine on your compatible Garmin navigation device, it
turns switches on or off automatically when the conditions of the
routine are met. For example, you can set a routine to turn on a
switch at specific time each day or when your vehicle reaches a
specific speed. Routines are available only when using a
compatible Garmin navigation device.
Adding a Routine
1
From the Garmin PowerSwitch app, select > Routines.
2
If necessary, select Add Routine.
3
Select When.
4
Select a trigger:
• To set a switch to trigger when your vehicle reaches a
specific speed, select Speed > Next, and follow the on-
screen instructions to enter speed thresholds.
• To set a switch to trigger at a specific time each day,
select Time > Next, and enter a time.
• To set a switch to trigger at sunrise, select Sunrise.
• To set a switch to trigger at sunset, select Sunset.
5
Select Add Action.
6
Select a device, a switch, an action, and a button mode.
7
If necessary, use the slider to adjust the dimmer.
8
Select Save.
Editing a Routine
1
From the Garmin PowerSwitch app, select > Routines.
2
Select on the routine you want to edit.
3
Select an option:
• To change the trigger for the routine, select When, and
select a trigger.
• To change an action, select on the action you want to
change, and update the action.
• To add an action to the routine, select Add Action, and
enter information about the action.
4
Select Save.
Deleting a Routine
1
From the Garmin PowerSwitch app, select > Routines.
2
Select on the routine you want to delete.
Device Maintenance
Garmin Support Center
Go to support.garmin.com for help and information, such as
product manuals, frequently asked questions, videos, and
customer support.
Device Care
NOTICE
Avoid extreme shock and harsh treatment, because it can
degrade the life of the product.
Do not use a sharp object to clean the device.
Avoid chemical cleaners, solvents, and insect repellents that can
damage plastic components and finishes.
Do not store the device where prolonged exposure to extreme
temperatures can occur, because it can cause permanent
damage.
Cleaning the Outer Casing
NOTICE
Avoid chemical cleaners and solvents that can damage plastic
components.
1
Clean the outer casing of the device using a cloth dampened
with a mild detergent solution.
2
Wipe the device dry.
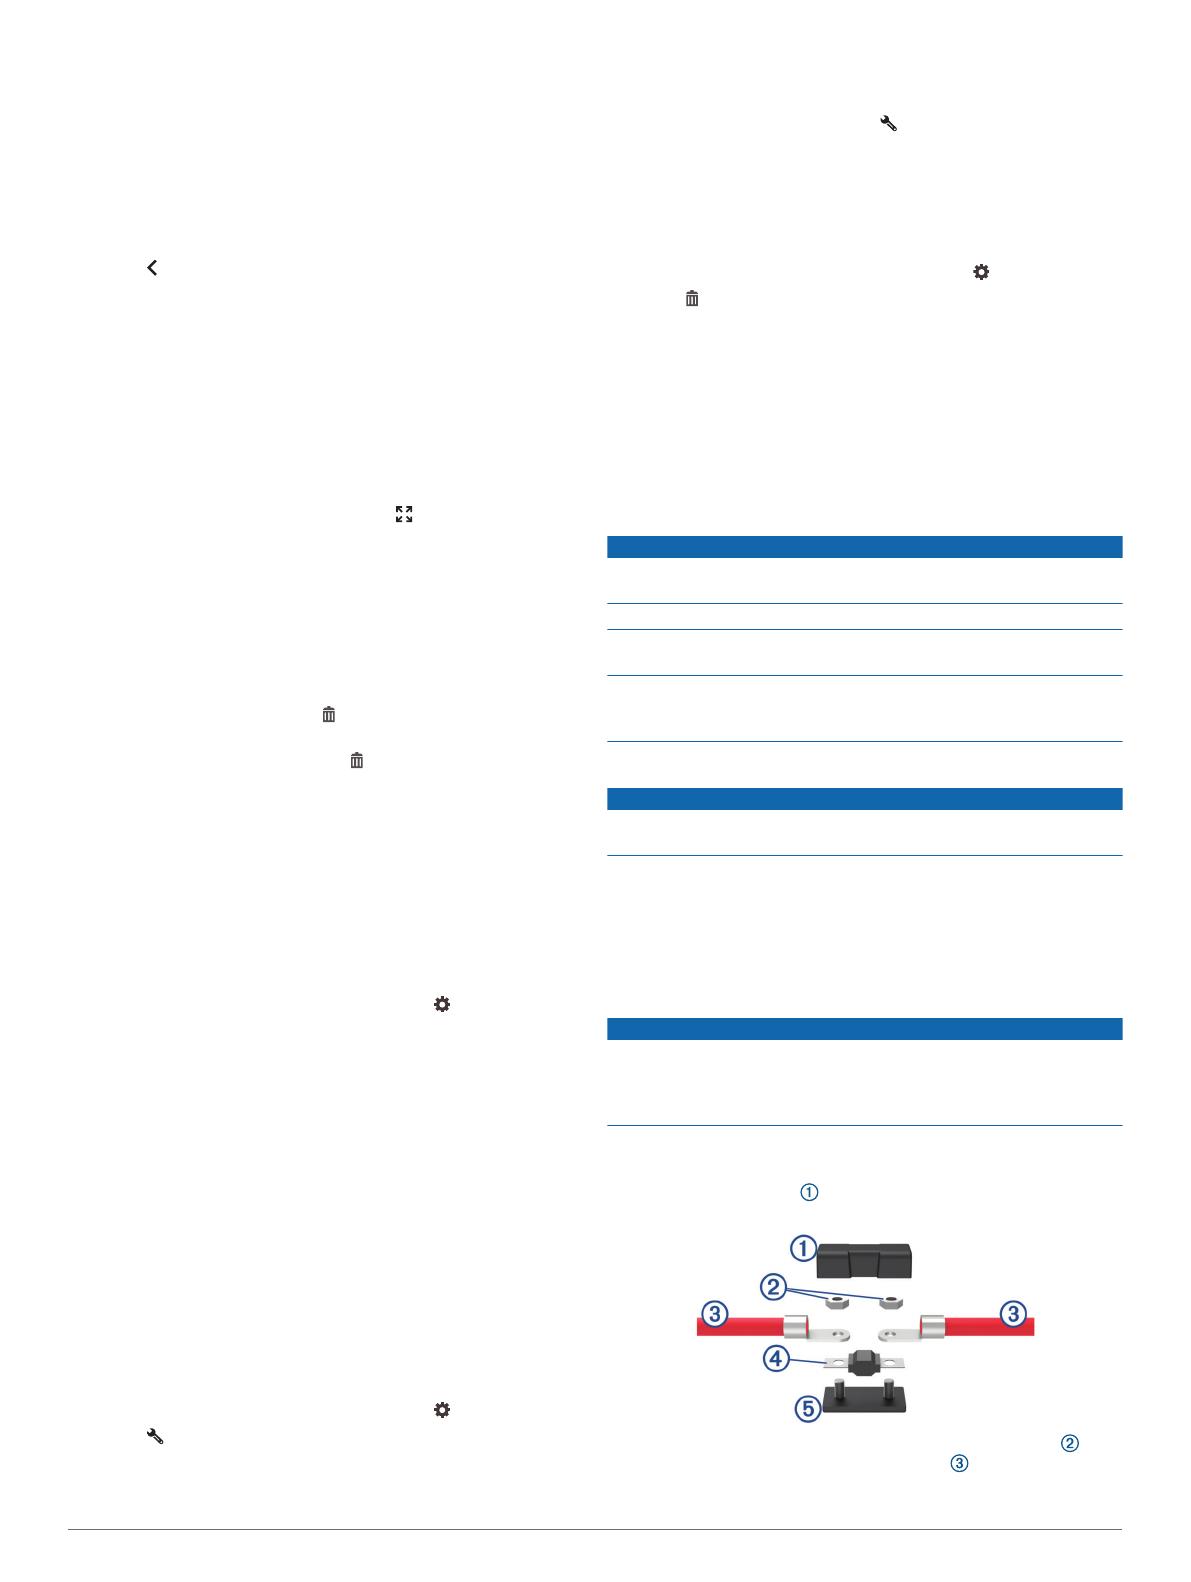
Changing the Fuse in the Vehicle Power
Cable
NOTICE
When replacing the fuse, do not lose any of the small pieces
and make sure they are put back in the proper position. The
vehicle power cable does not work unless it is assembled
correctly.
If your device does not receive power in your vehicle, you may
need to replace the fuse located on the red power cable.
1
Pull up the top cover from the top of the in-line fuse
assembly.
2
Using an 8 mm (
5
/
16
in.) wrench, remove the two nuts that
secure the two parts of the power cable to the in-line fuse
assembly.
4 Device Maintenance


