dynarex Bariatric Geri Chair Recliner Operating instructions
- Type
- Operating instructions
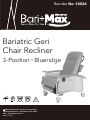
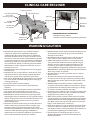
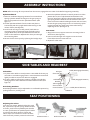
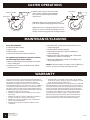
Dynarex Bariatric Geri Chair Recliner is a versatile and supportive seating solution designed to meet the needs of individuals requiring additional assistance. With its weight capacity of 300 lbs, this recliner provides ample support for larger users. The three-position recline feature allows for comfortable positioning, whether you're sitting upright, reclining for relaxation, or needing to achieve a shock position.
The upholstered back and seat offer a plush and comfortable experience, while the articulating headrest can be adjusted for optimal support. The padded push handle makes it easy to adjust the recline position, and the lockable rear casters ensure stability during transfers and while reclining.


-
 1
1
-
 2
2
-
 3
3
-
 4
4


dynarex Bariatric Geri Chair Recliner Operating instructions
- Type
- Operating instructions
Dynarex Bariatric Geri Chair Recliner is a versatile and supportive seating solution designed to meet the needs of individuals requiring additional assistance. With its weight capacity of 300 lbs, this recliner provides ample support for larger users. The three-position recline feature allows for comfortable positioning, whether you're sitting upright, reclining for relaxation, or needing to achieve a shock position.
The upholstered back and seat offer a plush and comfortable experience, while the articulating headrest can be adjusted for optimal support. The padded push handle makes it easy to adjust the recline position, and the lockable rear casters ensure stability during transfers and while reclining.
Ask a question and I''ll find the answer in the document
Finding information in a document is now easier with AI
Related papers
-
 dynarex Geri Chair Infinite Position Recliner Operating instructions
-
 dynarex Basic Quick-Release Head Immobilizer Operating instructions
-
 dynarex Bariatric Shower Chair Operating instructions
-
 dynarex Bariatric HD Mobile Shower Chair Operating instructions
-
 dynarex Bariatric HD Mobile Shower Chair Operating instructions
-
 dynarex Shower Chair Operating instructions
-
 dynarex Pedal Exerciser - Non-Folding Operating instructions
-
 dynarex Shower Stool Operating instructions
-
 dynarex Pedal Exerciser - Folding Operating instructions
-
 dynarex Toilet Safety Rail Operating instructions


Other documents
-
Drive Medical D577-J Owner's manual
-
 Lumex Syatems FR587WH User manual
-
Invacare IH6065WD/IH61 Operation and Maintenance Manual
-
 Lumex Syatems 566DG User manual
-
Lumex FR601P User manual
-
Graham Field FR566G User manual
-
-
Invacare 1073955 User manual
-
Invacare 9000 SL User manual
-

