1-14
Test Run
1
2
3
4
5
6
7
8
6. Meaning of Alarm Messages
6. Meaning of Alarm Messages
Table of Self-Diagnostics Functions and Description of Alarm Displays
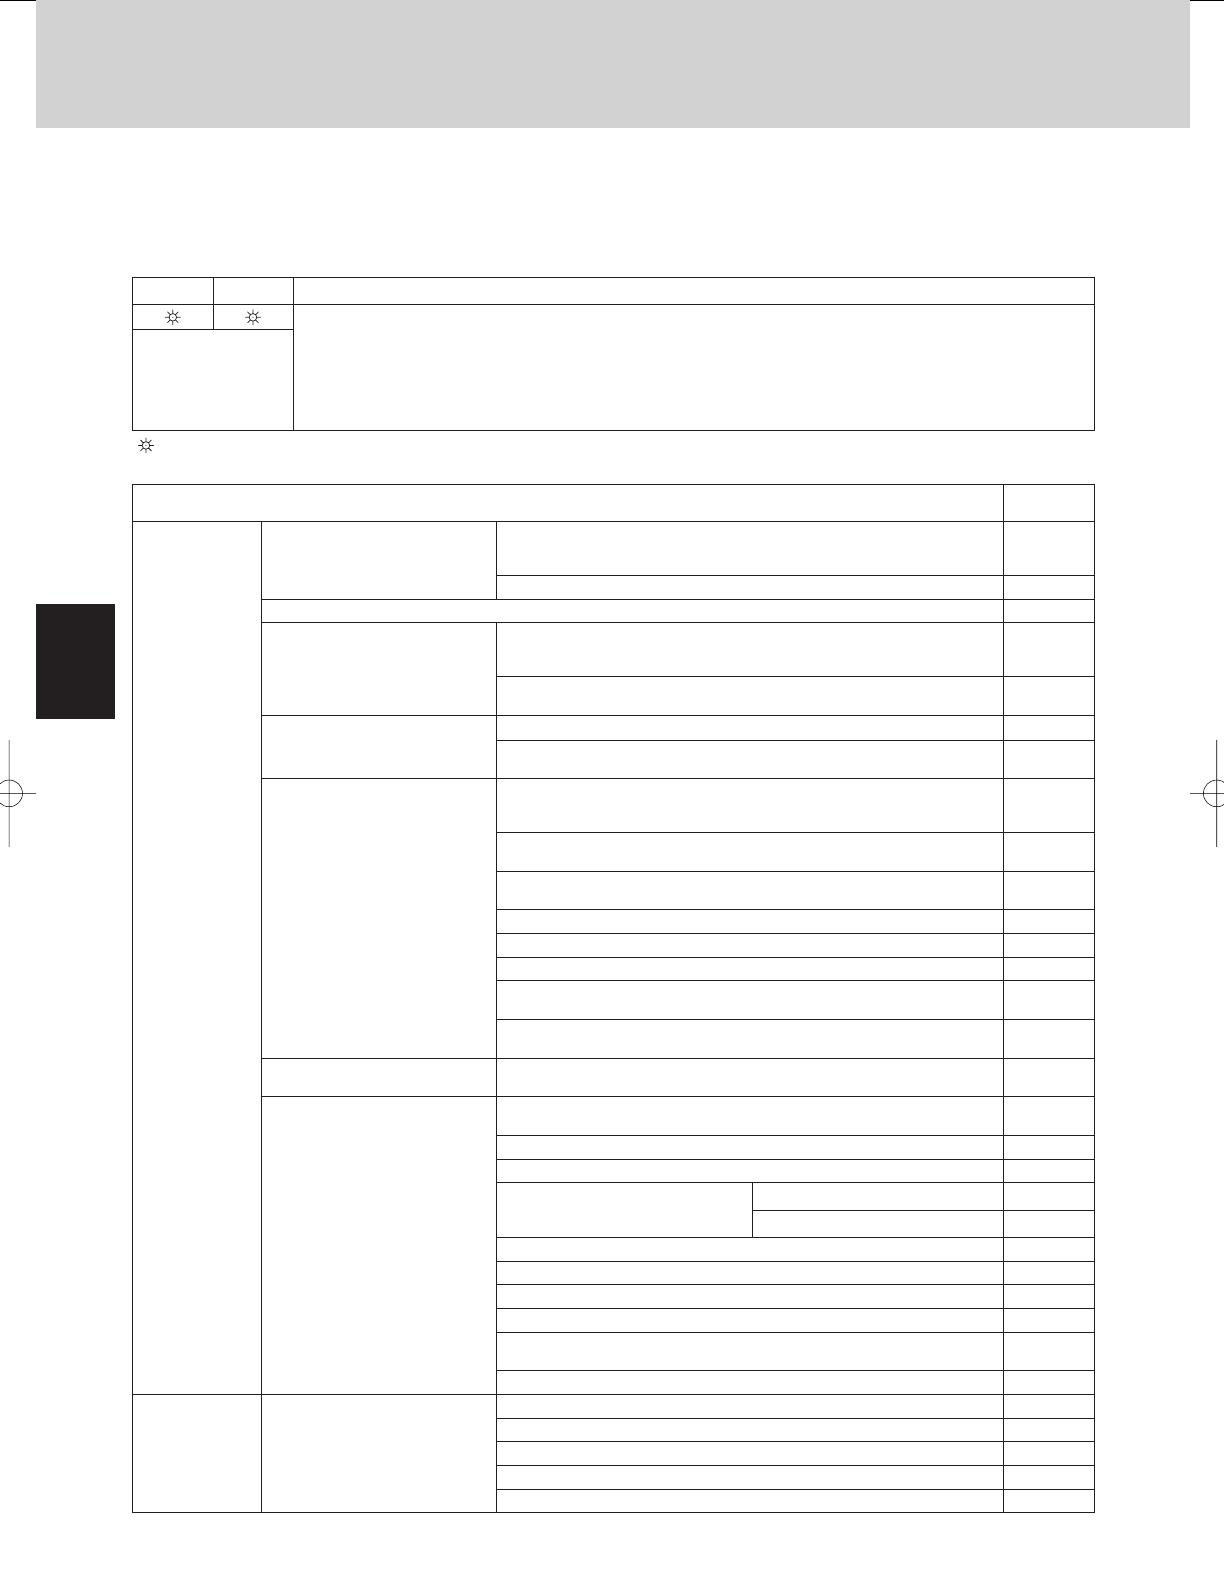
Alarm messages are indicated by the blinking of LED 1 and 2 (D72, D75) on the outdoor unit PCB. They are also displayed on
the wired remote controller.
Viewing the LED 1 and 2 (D72 and D75) alarm displays
LED1 LED2 Alarm contents
Alarm Display
LED 1 blinks M times, then LED 2 blinks N times. The cycle then repeats.
M = 2: P alarm 3: H alarm 4: E alarm 5: F alarm 6: L alarm
N = Alarm No.
Example: LED 1 blinks 2 times, then LED 2 blinks 17 times. The cycle then repeats.
Alarm is "P17".
Alternating
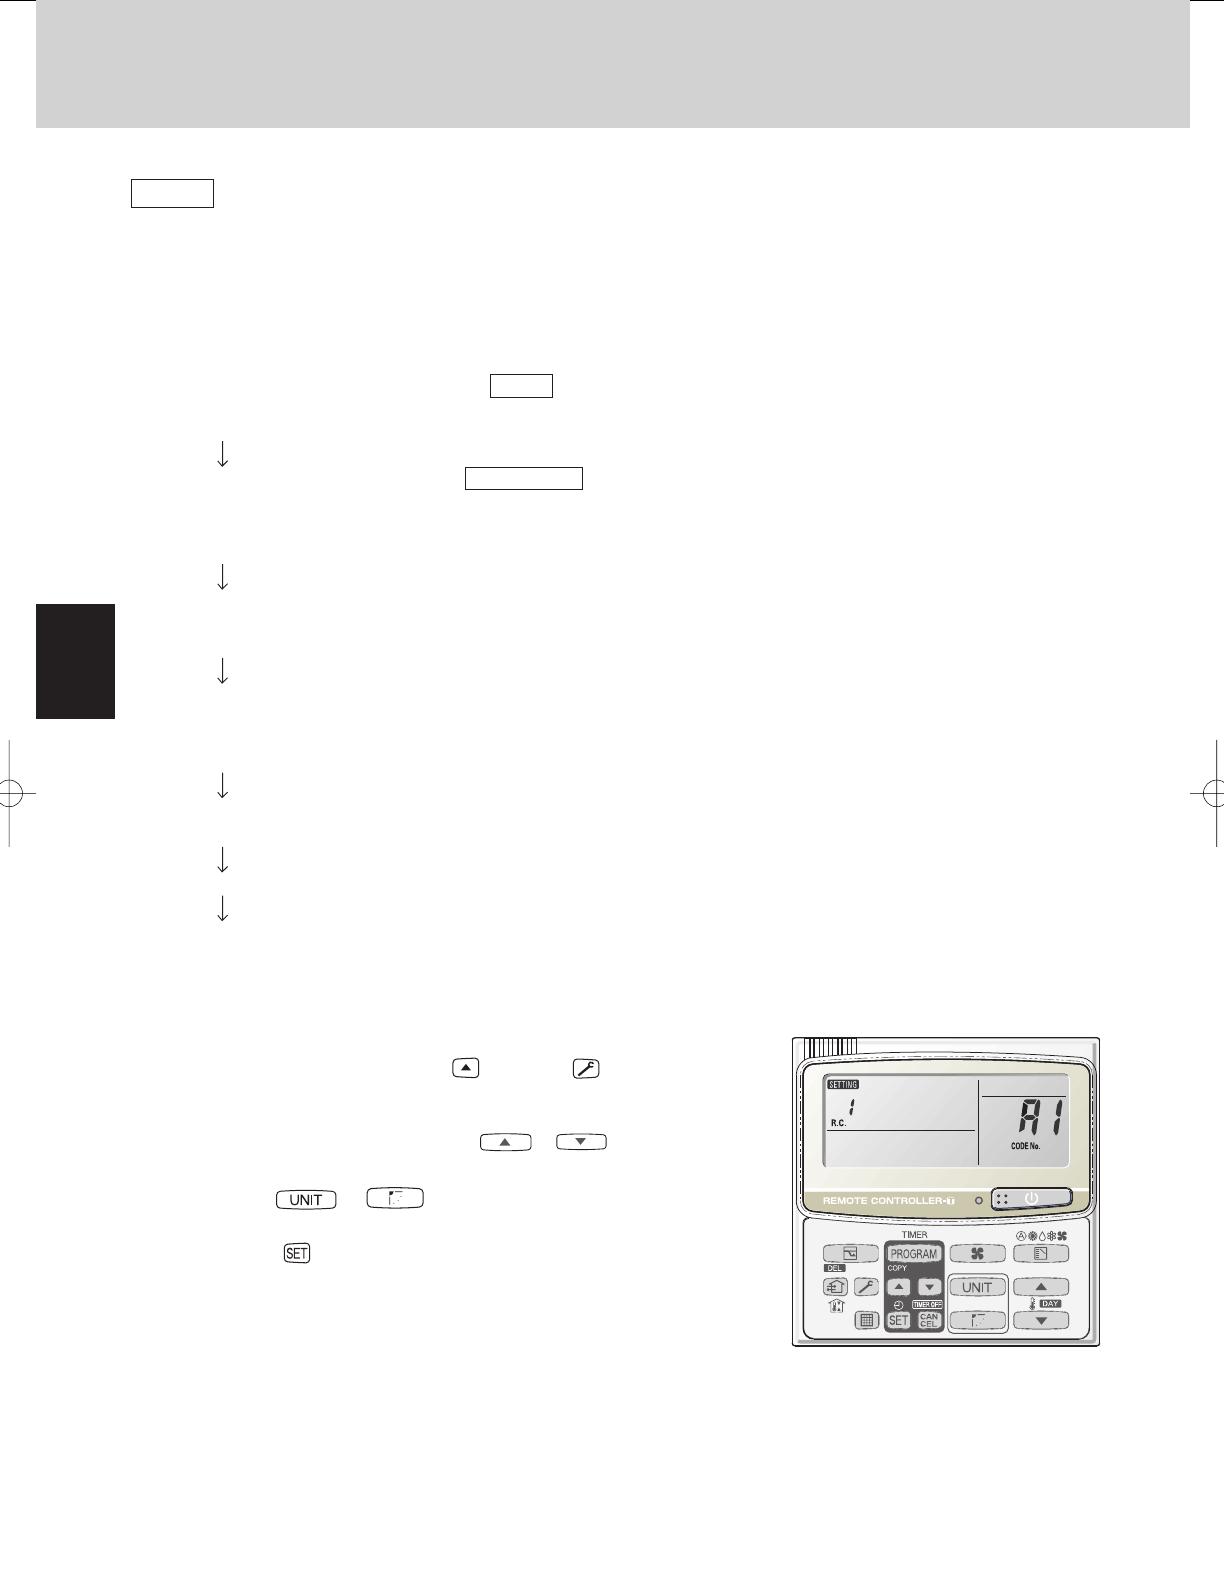
(
: Blinling) Connect the outdoor maintenance remote controller to the RC socket on the outdoor main unit control PCB (3P,
blue),and check the Alarm Messages on the remote controller display.
Possible cause of malfunction
Alarm
Message
Serial
communication
errors
Mis-setting
Remote controller is detecting
error signal from indoor unit.
Error in receiving serial communication signal.
(Signal from main indoor unit in case of group control)
Ex: Auto address is not completed.
<E01>
Error in transmitting serial communication signal. <E02>
Indoor unit is detecting error signal from remote controller (and system controller). <<E03>>
Indoor unit is detecting error
signal from main outdoor unit.
Error in receiving serial communication signal.
When turning on the power supply, the number of connected indoor units
does not correspond to the number set. (Except R.C. address is "0.")
E04
Error of the main outddor unit in receiving serial communication signal
from the indoor unit.
<E06>
Improper setting of indoor unit
or remote controller.
Indoor unit address setting is duplicated.
E08
Remote controller adress connector (RCU. ADR) is duplicated.
(Duplication of main remote controller)
<<E09>>
During auto address setting,
number of connected units does
not correspond to number set.
When turning on the power
supply, number of connected
units does not correspond to
number set.
(Except R.C. address is "0.")
Starting auto address setting is prohibited.
This alarm message shows that the auto address connector CN100 is
shorted while other RC line is executing auto address operation.
E12
Error in auto address setting. (Number of connected indoor units is less
than the number set.)
E15
Error in auto address setting. (Number of connected indoor units is more
than the number set.)
E16
No indoor unit is connected during auto address setting. E20
Main outdoor unit is detecting error signal from sub outdoor unit. E24
Error of outdoor unit address setting. E25
The number of connected main and sub outdoor units do not correspond
to the number set at main outdoor unit PCB.
E26
Error of sub outdoor unit in receiving serial communication signal from
main outdoor unit.
E29
Indoor unit communication error
of group control wiring.
Error of main indoor unit in receiving serial communication signal from
sub indoor units.
E18
Improper setting. This alarm message shows when an indoor unit for multiple-useis not
connected to the outdoor unit.
L02
Duplication of main indoor unit address setting in group control. <L03>
Duplication of outdoor R.C. address setting. L04
There are 2 or more indoor unit
controllers that have oparation
mode priority in refrigerant circuit.
Priority set remote controller L05
Non-priority set remote controller L06
Group control wiring is connected to individual control indoor unit. L07
Indoor unit address is not set. L08
Capacity code of indoor unit is not set. <<L09>>
Capacity code of outdoor unit is not set. L10
Mis-matched connection of outdoor units that have different kinds of
refrigerant.
L17
4-way valve operation failure L18
Activation of
protective
device
Protective device in indoor unit
is activated.
Thermal protector in indoor unit fan motor is activated. <<P01>>
Improper wiring connections of ceiling panel. <<P09>>
Float switch is activated. <<P10>>
Operation of protective function of fan inverter. P12
O
2
sensor (detects low oxygen level) activated. P14
Continued
z