Page is loading ...


- 2 -
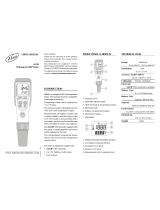
Contents
Introduction - 3 -
Battery Installation - 4 -
Keypad Functions - 4 -
Complete Kit - 5 -
Things to Know Before Use - 5 -
ORP Measurement - 5 -
ORP Calibration - 6 -
Parameter Setting - 7 -
Technical Specifications - 8 -
Icons and Functions - 8 -
Probe Replacement - 8 -
Warranty - 8 -
ATTENTION
1. You may find a few drops of water in the probe cap. These water droplets are
added to maintain the sensitivity of the pH sensor before the product leaves
factory. It does NOT mean the product is used.
2. The batteries are already preinstalled. Just pull off the paper slip before using
the tester. When you replace the batteries, make sure to follow the correct
directions: all four AAA batteries’ positive sides must FACE UP.

- 3 -
Introdu ction
Dear Customer,
Thank you for choosing Apera Instruments ORP60-Z Smart ORP Tester. Please carefully read this manual
before using the product in order to have a reliable testing experience.
1.1 This product is designed with a two-way control on both the tester and ZenTest Mobile App. Please refer
to the functions available on each platform in the following table. This manual shows you how to operate the
tester without connecting to a smartphone.
Table 1: Funtions on 60-Z Tester and ZenTest
®
Mobile App
Functions
60-Z Tester
ZenTest Mobile App
Display
LED display
1. Basic Mode: digital display+calibration info
Swipe to
switch among
various modes
2. Dial Mode: digital display+dial display
3. Graph Mode: digital display+graph display
4. Table Mode: digital display+real time
measurement and history display
Calibration
Press buttons to
operate
Operate on smartphone following graphic guides
Self-
Diagnosis
Er1 – Er6 icons
Detailed problem analysis and solutions
Parameter
Setup
Press buttons to set
up (except for P7
and P11)
All parameters can be set up in Settings.
Alarm
The screen turns
red when alarm
triggered; cannot
be setup
Alarm display and alarm values can be preset for each parameter
Datalogger
N/A
Manual or Auto. Datalogger; notes can be added to saved data
Data Output
N/A
Share data via Email
1.2 Search ZenTest in Apple App Store or Google Play App Store to download the latest App for your tester.
1.3 For video tutorials on how to connect the tester to your smartphone and perform more functions in ZenTest
Mobile App, please go to support.aperainst.com

- 4 -
Batte ry Inst allatio n
Please install batteries according to the following steps. *Please note direction of batteries: All POSITIVE
SIDES (“+”) FACING UP. (Wrong installation of batteries will cause damage to the tester and potential
hazards)
Keyp ad Funct ions
■ Short press------ < 2 seconds, Long press------- > 2 seconds
1. When turned off, short press to turn on the tester; long press to
enter parameter setting.
2. In calibration mode or parameter setting, short press to return
to measurement mode.
3. In measurement mode, long press to turn off the tester, short
press to turn on/off backlight.
1.In measurement mode, long press to turn on/off Bluetooth
®
receiver. When turned on, will be flashing; when connected to
smartphone, will stay on.
2.In parameter setting, short press to change parameter (Uni-
directional).
1. Long press to enter calibration mode.
2. In calibration mode, short press to confirm calibration.
3. In measurement mode, when automatic lock is turned off, short
press to manually lock or unlock readings.
① Pull the battery cap up ② Slide the battery cap along to the direction of arrow
③ Open the battery cap
④ Insert the batteries (ALL POSITIVE SIDES FACING UP) (see graph)
⑤ Close the battery cap ⑥ Slide and lock the battery cap along to the direction of arrow
⑦ Fit the tester’s cap while making sure to push all the way down. The tester’s waterproof
design may be compromised if the cap is not fitted correctly.
Battery Cap
Buttons
Probe
Probe Cap
LCD
+
+
+
+
-
-
-
-

- 5 -
Compl ete Kit
Things to Know B ef ore U se
1) A few drops of water are added to the probe cap to keep the pH electrode in an activated state before the tester
leaves factory. Generally, users can start using the tester directly. If the measuring response is slow, users can soak
the ORP electrode for 30 minutes in the 3M KCL storage solution (fill to the fill-line) before using it; if the electrode is
dry for a long time (> 1 month), the ORP electrode responds slowly, You can soak the ORP electrode for 8 hours in
the storage solution before using.
2) When the tester is not in use, we recommend adding one to two drops of tap water to the probe cap, and close the
cap (be careful not to add too much water). This way, the ORP probe’s sensitivity can be maintained and users can
start using the tester right away next time.
3) Do not soak the ORP electrode in purified (e.g. distilled/deionized) water for a long time, which will make the electrode
response slow. If this happens, soak the ORP electrode in 3M KCl solution for 3~5 hours, and then re-calibrate it
before using.
4) The storage solution is 3M KCL (SKU: AI1107), and the tester kit comes with a bottle of 10mL storage solution (can
be used repeatedly). If it is contaminated, replace it with a new one. Please do not use other brands’ storage solutions
as they may contain other chemicals that can cause damage to the electrodes.
5) Things needed in addition to what’s in the box:
a) Distilled or deionized water (8-16oz) for rinsing the probe after each test
b) Tissue paper for drying the probe
ORP Meas uremen t
ORP stands for Oxidation-Reduction Potential, measured in mV. It’s also called redox. ORP is a measure of the
cleanliness of water & its ability to break down contaminants. Rinse the probe in distilled water and dry it. Dip the probe
in sample solution, shake for a few seconds, and allow it to stand still. Get the ORP readings after appears and
stays on screen.
Graph-2

- 6 -
ORP C alibratio n
7.1 Pour some 222 mV ORP standard solution into the calibration bottle (to about half volume).
7.2 Rinse electrode in distilled water and dry it. Short press to turn the meter on. Long press to enter
calibration mode. If you need to exit calibration mode, short press
7.3 Dip electrode in the standard solution, stir gently, and allow it to stand still in the calibration solution until a stable
reading is reached. When stable icon comes up and stays, press to adjust the calibration value according to
the table below(also on thesolution bottle’s label). Then short press to complete the calibration.
222 mV (25˚C) ORP Standard Buffer Solution Calibration Reference Table
Temperature (˚C)
mV
Temperature (˚C)
mV
10
242
30
215
15
235
35
209
20
227
38
205
25
222
40
201
For example, if the temperature is around 25˚C, then adjust the calibration value to 222 mV. If the temperature is around
20˚C, then adjust the calibration value to 227 mV.
Notes
1) Usually there’s no need to calibrate for ORP testing. When the tester has been used for a long time, users can
test it in 222 mV ORP standard buffer. If the error is big, please calibrate according to the steps in 7.1 to 7.3.
2) The meter has self-diagnosis function. Please refer to the followed chart for detailed information.
Symbol
Self-Diagnosis information
How to fix
is pressed before the
measurement becomes stable
(smiley face comes up)
Wait till the smile icon appears and stays, then short press
During calibration, readings being
unstable for over 3 minutes
1. Please check whether ORP electrode is damaged or broken.
If so, please replace with a new one.
2. The platinum pin or junction is severely contaminated.
Please use a soft brush with soap water to clean it
thoroughly. Then soak it in 3M KCL overnight before
performing calibration again.
3. The electrode is aged (used for over a year and has a much
slower response). A replacement is needed.
If none of the above, please contact us at info@aperainst.com or +1
(614) 285-3080

- 7 -
The Maintenance of ORP Probes
After long-time use, the surface of the platinum pin can be contaminated and cause inaccuracy or slow response time.
If that happened, the following methods can be adopted to clean and re-activate the sensor:
a) For contamination caused by inorganic substances, dip the probe into 0.1 mol/L dilute hydrochloric acid for
30 minutes. Clean it with distilled water, soak it into the KCL storage solution for 6 hours, and then it will be
ready for use again.
b) For contamination caused by organic substances and oiliness, clean the platinum surface with dishwashing
liquid, and rinse with distilled water. And then the probe will be ready for use again after 6 hours’ soaking in
the storage solution.
c) If the platinum surface is so severely contaminated that there forms an oxide film, toothpaste can be used
to clean the platinum surface, and then wash it with distilled water. The probe will be ready for use again
after 6 hours’ soaking in the storage solution.
Param eter S etting
Table of Settings
Parameter Setting
1) When the meter is turned off, long press to enter parameter setting →short press to switch P01-P02…
→P5. Short Press , parameter flashes → short press to adjust parameter → short press to confirm
→Short press to exit parameter setting and go back to measurement mode.
2) Auto. Lock (P02) – Users can set the auto lock time from 5 to 20 seconds. For example, if 10 seconds is set, when
the measured value is stable for more than 10 seconds, the measured value will be automatically locked, and the
HOLD icon will be displayed. Short press to release the lock. When the setting is "Off" , the Auto. lock function
is turned off, that is, the measured value can only be manually locked. Short press to lock or unlock the
measured value. The HOLD icon will be displayed when reading is locked.
3) Auto. Backlight (P03) ─ Users can set the automatic backlight time for 1 to 8 minutes. For example, if 3 minutes
is set, the backlight will turn off automatically after 3 minutes; when the “Off” is set, the auto. backlight function will
be turned off, and short press to manually turn the backlight on or off.
4) Auto. Power off (P04) ─ The auto. power off time can be set to 10 to 20 minutes. For example, if 15 minutes is
set, the meter will automatically shut down after 15 minutes if no operation; when “Off” is set, the auto. power off
function will be turned off. Long press to manually shut down the meter.
5) ORP Back to Factory Default (P05) – Select “Yes” to restore instrument calibration to theoretical value. This
function can be used when instrument does not work well in calibration or measurement. Calibrate and measure
again after setting the instrument back to factory default.
Symbol
Parameter Setting Contents
Content
Factory Default
P1
Temperature Unit
˚C – ˚F
˚F
P2
Select automatic lock
5-20 seconds – Off
Off
P3
Automatic Backlight Off
1-8 minutes – Off
1
P4
Automatic Power Off
10-20 minutes – Off
10
P5
ORP restores back to factory default
On -- Off
Off

- 8 -
Technical Specifi cation s
ORP (mV)
Range
-1000 mV to 1000 mV
Accuracy
±0.2% F.S
Temperature
Range
0 to 50˚C (32-122˚F)
Accuracy
±0.5˚C
Ico ns an d Fun ction s
P robe R eplace ment
To replace a probe: 1)take off the probe cap; 2) screw off the probe ring 3) unplug the probe; 4) plug in the new
replacement probe (pay attention to the probe’s position); 5) screw on the probe ring tightly. The replacement probe that
is compatible with ORP60-Z is ORP60-DE (ORP Probe).
Warrant y
We warrant this instrument to be free from defects in material and workmanship and agree to repair or replace free of
charge, at option of APERA INSTRUMENTS, LLC, any malfunctioned or damaged product attributable to responsibility of
APERA INSTRUMENTS, LLC for a period of TWO YEARS (SIX MONTHS for the probe) from the delivery. This limited
warranty does NOT cover any damages due to: accidental damage, unauthorized repair, normal wear and tear, or external
causes such as accidents, abuse, or other actions or events beyond our reasonable control.
To claim for warranty or seek additional help, please go to support.aperainst.com and click New support ticket. After
the ticket is submitted, one of our customer care specialists will be assisting you within 1 business day.
APERA INSTRUMENTS, LLC
Address: 6656 Busch Blvd, Columbus Ohio 43229;Tel: 1-614-285-3080
Email: [email protected] Website: www.aperainst.com
Self-Diagnosis Symbol
Er2, Er3
Stable reading indicator
Waterproof Rating
IP67, floats on water
Reading Lock
HOLD
Power
DC3V, AAA batteries*4
Bluetooth Signal
Battery Life
>200 Hours
Low power reminder
Backlight
White: Measurement;Green:
Calibration;Red: Alarm
Auto. Power Off
Automatically power off if no operation for 10 minutes
Dimension/Weight
Instrument:40×40×178mm/133g; case:255×210×50mm/500g;
/