Telephone operation
Operation Steps
Making a call
Press PHONE or /SPEAKERSPEAKER -> Enter the telephone number.
On-hook dialing
(predialing)
Enter the telephone number -> Press PHONE or
/SPEAKERSPEAKER to call.
Answering a call
Press PHONE or /SPEAKERSPEAKER, or press any dialing keys
(0-9, TONE or #).
Ending a call
Press OFF or return the handset to the telephone base
or charger.
Handset
speakerphone
During a call, press /SPEAKERSPEAKER to switch between
handsfree speakerphone and normal handset use.
Redial Press REDIAL repeatedly to select the desired entry
-> PHONE or /SPEAKERSPEAKER to call.
Volume control
Press VOLUMEq to decrease or press VOLUMEp to
increase the listening volume during a call.
Call waiting
(Requires subscription
from telephone
service provider)
Press FLASH to put current call on hold and to take the
new call; press again to switch back and forth between
calls.
Caller ID
This product supports caller ID services offered by most telephone service providers.
The telephone stores caller ID information of the last 50 incoming calls in the
telephone base. This information is common to all devices.
Missed call indicator
When a handset is in idle mode and has new or missed calls, its screen shows
XX Missed calls.
You can erase the missed call indicator either by reviewing the call log one by
one, or by pressing and holding CANCEL in idle mode.
Review and dial a number in the call log
1. CID in idle mode -> q or p to scroll through the list.
2. PHONE or /SPEAKER to call when the desired entry is displayed.
Caller ID announce
When this feature is on and you have an incoming call, the handset speaks
“Call from...” and the name of the caller based on the directory or caller
ID information. You can turn this feature off for the base or each individual
handset, or both.
1. MENU -> q or p -> Settings -> SELECT.
2. q or p -> Caller ID annc -> SELECT.
3. q or p to choose Set all On/Off, Local handset or Base -> SELECT.
4. q or p to choose On or Off -> SELECT.
Answering system
About answering system and voicemail
Your telephone has separate indicators for two different types of voice messages:
those left on the built-in answering system and those left at your telephone
service provider’s voicemail. To listen to messages recorded on the built-in
answering system, refer to the Message playback section below; to listen to
voicemail, contact your telephone service provider for more information.
Turn answering system on/off
The answering system must be turned on to answer and record messages.
1. MENU.
2. q or p -> Answering sys -> SELECT.
3. q or p -> Answer ON/OFF -> SELECT.
4. q or p -> On or Off -> SELECT.
When the answering system is on, the handset shows ANS ON.
Message alert tone
When this feature is on, and there is at least one new message, the telephone
base beeps every 10 seconds.
1. MENU -> q or p -> Answering sys -> SELECT.
2. q or p -> Ans sys setup -> SELECT.
3. q or p -> Msg alert tone -> SELECT.
4. q or p -> On or Off -> SELECT.
Call screening
Use this feature to choose whether incoming messages can be heard over at
telephone base when they are being recorded. If you turn call screening on, you
hear the incoming message at the telephone base. While monitoring an incoming
message, you can answer the call by pressing PHONE on the handset.
1. MENU -> q or p -> Answering sys -> SELECT.
2. q or p -> Ans sys setup -> SELECT.
3. SELECT to select Call screening.
4. q or p to choose On or Off -> SELECT.
© 2014 Advanced American Telephones. All Rights Reserved.
AT&T and the AT&T logo are trademarks of AT&T Intellectual Property licensed to
Advanced American Telephones, San Antonio, TX 78219.
Printed in China. Issue 2.0 AT&T 03/14.
Directory
The directory can store up to 50 entries, which are shared by all system handsets.
Operation Steps
Adding an entry 1. MENU.
2. q or p -> Directory -> SELECT.
3. q or p -> Add contact -> SELECT.
4. Enter a telephone number up to 30 digits -> SELECT.
5. Enter a name up to 15 characters -> SELECT.
Searching/dialing
an entry
1. DIR in idle mode.
2. Press q or p to browse through the directory, or press
the dialing keys (0-9) to start a name search.
3. Press PHONE or /SPEAKER on a handset to call.
For more detailed instructions, please refer to the Abridged user’s manual
provided in your package, or for a full set of installation and operation
instructions, refer to the online CL82113/CL82213/CL82263/CL82313/CL82363/
CL82413/CL82463/CL82513 DECT 6.0 cordless telephone/answering system
with caller ID/call waiting Complete user’s manual at
www.telephones.att.com/manuals.
For customer service or product information, visit our website at
www.telephones.att.com or call 1 (800) 222-3111. In Canada, dial
1 (866) 288-4268.
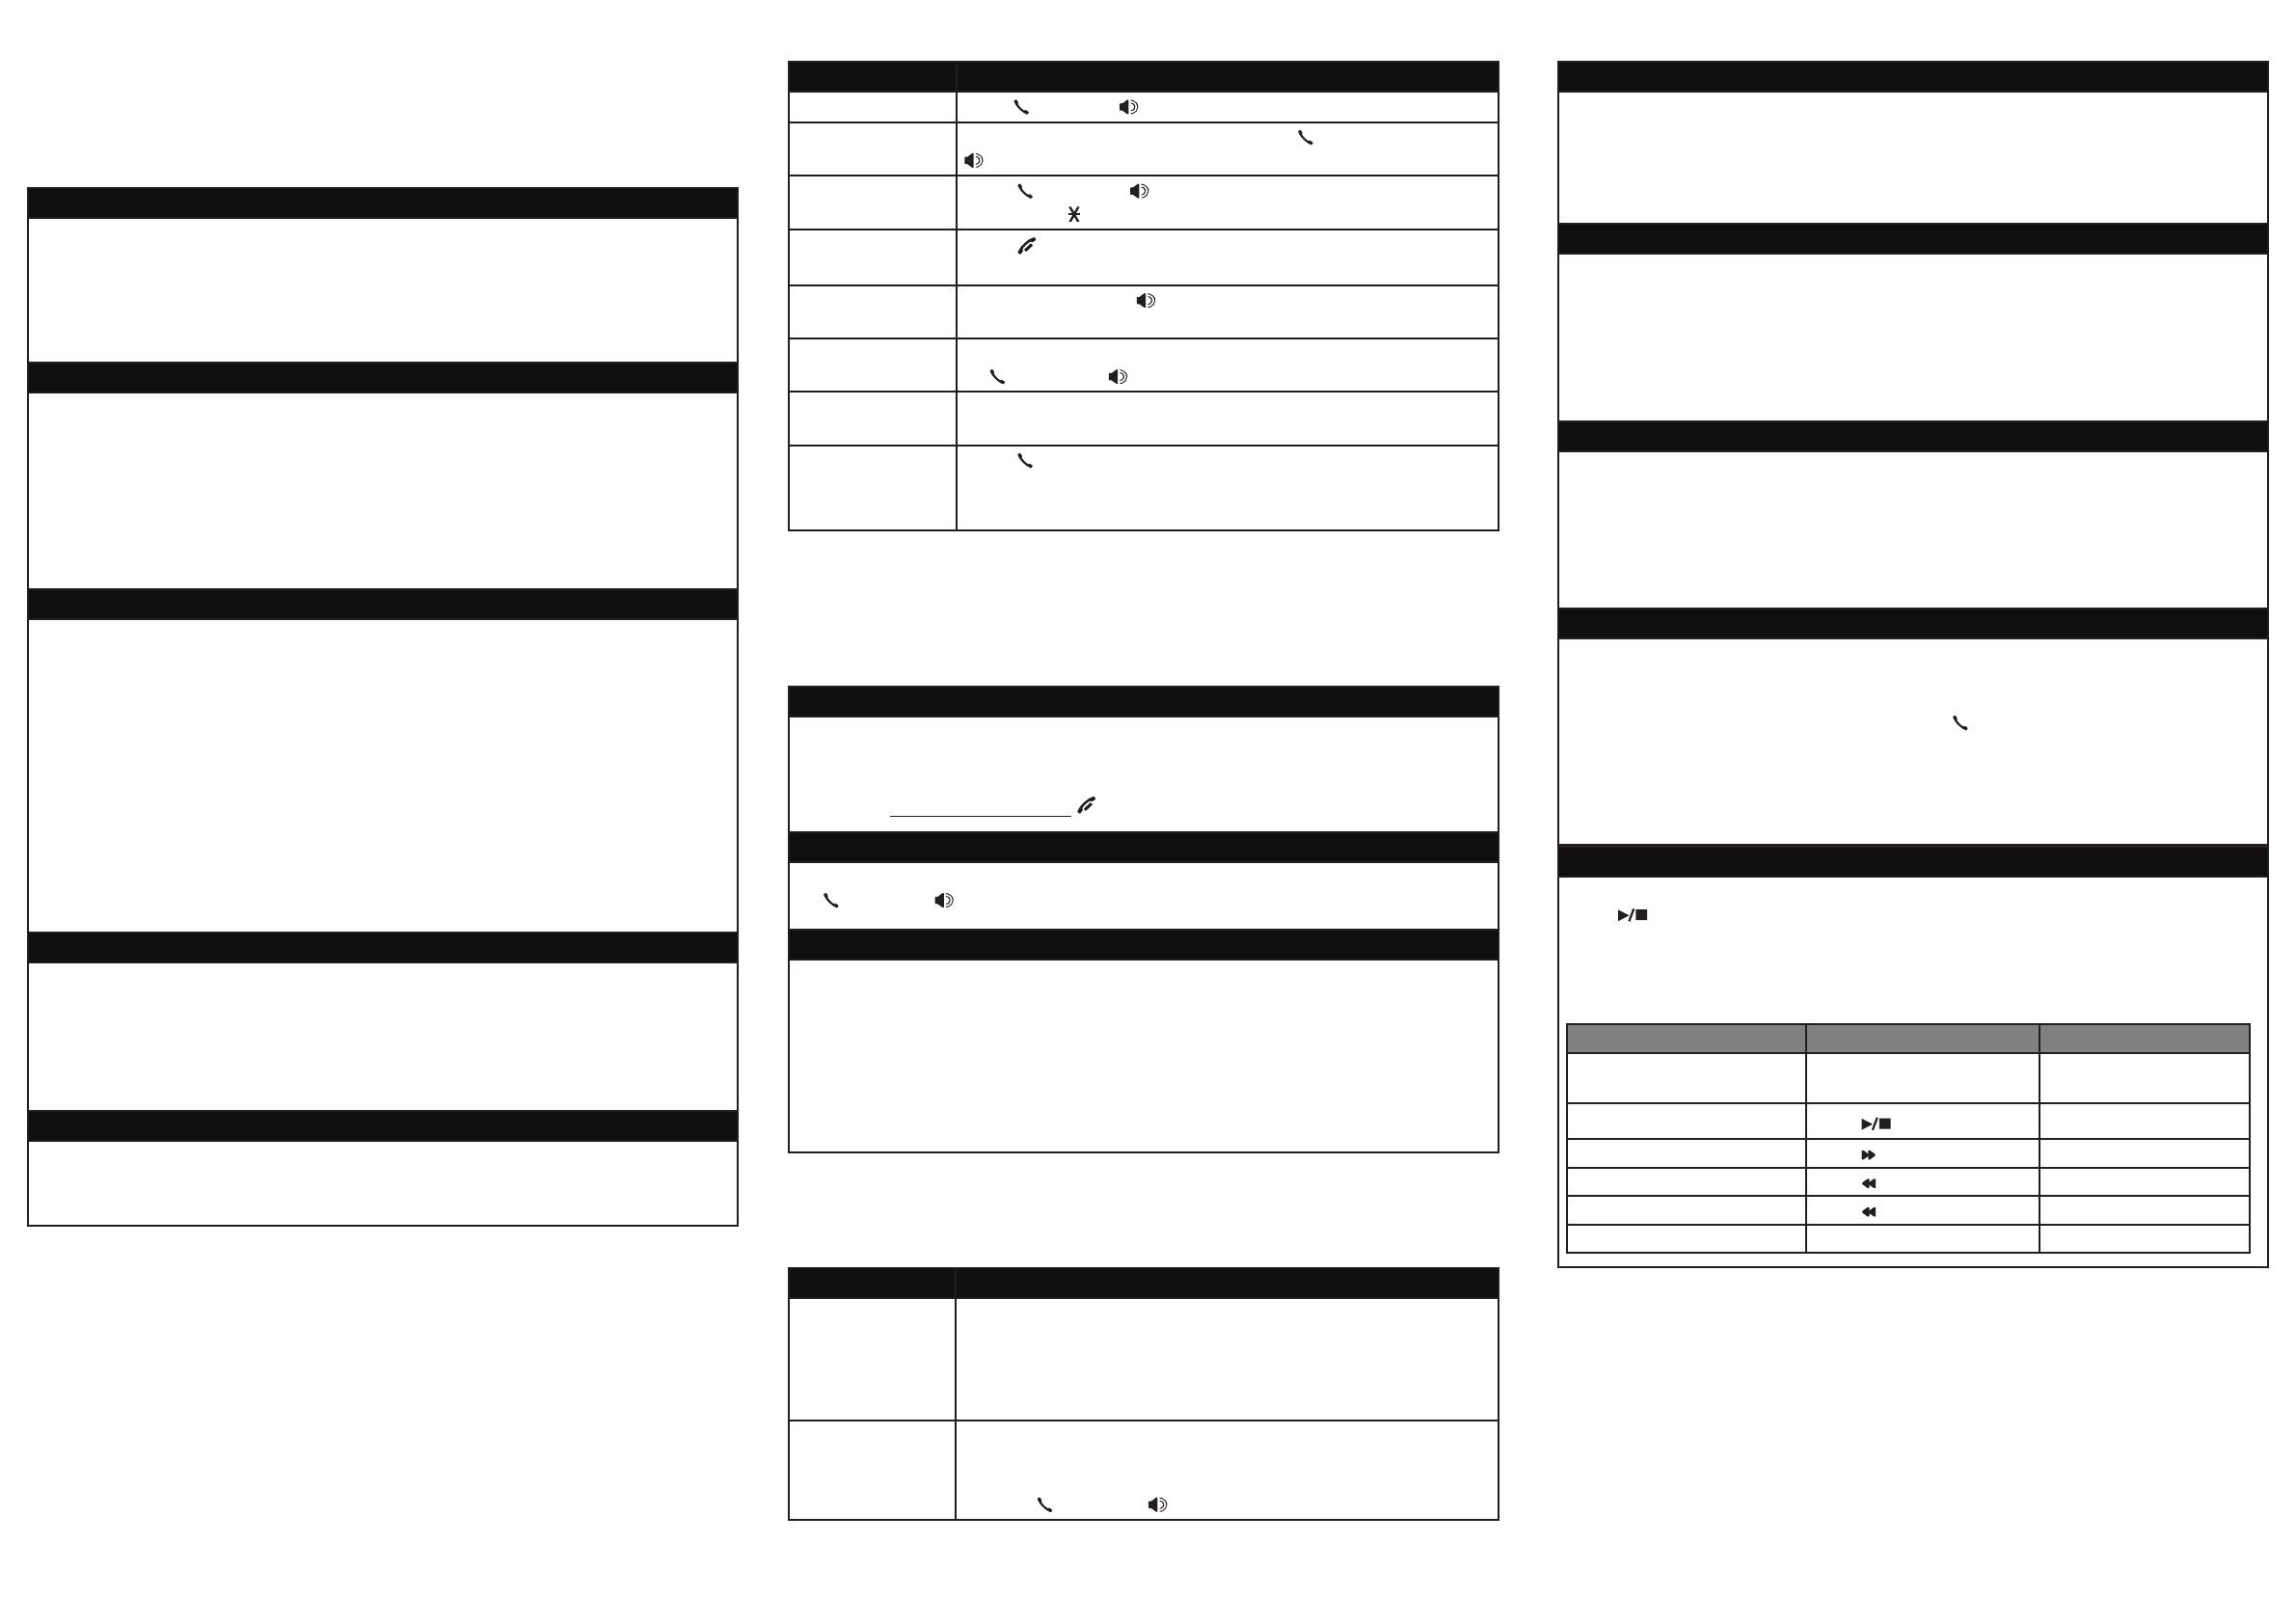
Message playback
Using the telephone base:
Press /PLAY when the telephone base is in idle mode.
Using a handset:
Press MENU twice when the handset is in idle mode.
Options during playback
Feature On the telephone base On a handset
Adjust playback volume
Press qVOL
-
or pVOL
+
Press qVOLUME or
pVOLUME
Stop playback
Press
/
STOP
Press 5
Skip to the next message Press /SKIP Press 6
Repeat the message Press /REPEAT Press 4
Play the previous message Press /REPEAT twice Press 4 twice
Delete the message Press X/DELETE Press DELETE
Initial settings
We recommend you program your telephone system before use.
The following are a few examples of common features to set before using the
telephone. Refer to the Handset settings and Answering system settings in
the Abridged user’s manual or the online Complete user’s manual for detailed
instructions on setting all telephone features.
Set date/time
Set the date/time before using the answering system.
MENU -> q or p -> Set date/time -> SELECT.
Enter the month, day and year using the dialing keys -> SELECT.
Enter the hour and minute using the dialing keys.
q or p to choose AM or PM -> SELECT.
1.
2.
3.
4.
Record your own announcement
Your outgoing announcement plays when calls are answered by the answering
system. You can use the preset announcement to answer calls, or replace it
with your own recorded announcement.
1. MENU -> q or p -> Answering sys -> SELECT.
2. SELECT to select Announcement.
3. SELECT to select Record annc.
4. Facing the handset, record your announcement and press 5 to end recording.
Number of rings
You can set the answering system to answer an incoming call after two, three,
four, five or six rings, or toll saver. If you choose toll saver, the answering
system answers a call after two rings if you have new messages, or after four
rings when there are no new messages.
If you want the built-in answering system instead of the voicemail to answer a
call, you should set the answering system to answer a call at least two rings
before the voicemail is set to answer. Contact your telephone service provider
for information on your voicemail settings.
1. MENU -> q or p -> Answering sys -> SELECT.
2. q or p -> Ans sys setup -> SELECT.
3. q or p -> # of rings -> SELECT.
4. q or p to choose among 2, 3, 4, 5, 6 or Toll saver -> SELECT.
Ringer volume
You can set the ringer volume level to one of the six levels or turn the
ringer off.
1. MENU -> q or p -> Ringers -> SELECT.
2. SELECT to select Ringer volume.
3. q or p to choose the desired level -> SELECT.
Reset language to English
If you have accidentally changed the screen display language and want to
switch it back to English, follow the steps below.
MENU in idle mode-> enter 364#.•

