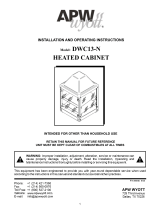
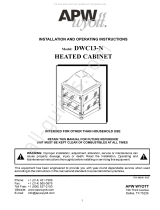
RTR-8

APW Wyott RTR-8 Operating instructions

  • Hello! I am an AI chatbot trained to assist you with the APW Wyott RTR-8 Operating instructions. I’ve already reviewed the document and can help you find the information you need or explain it in simple terms. Just ask your questions, and providing more details will help me assist you more effectively!
Phone: +1 (307) 634-5801
Fax: +1 (307) 637-8071
Toll Free: +1 (800) 752-0863
Website: www.apwwyott.com
INSTALLATION
AND
OPERATING
INSTRUCTIONS
INTENDED FOR OTHER THAN HOUSEHOLD USE
RETAIN THIS MANUAL FOR FUTURE REFERENCE
P/N 88142-10 8/07
1
APW WYOTT
P.O. Box 1829
Cheyenne, WY 82003
This equipment has been engineered to provide you with year-round dependable service when used
according to the instructions in this manual and standard commercial kitchen practices.
WARNING: Improper installation, adjustment, alteration, service or maintenance can
cause property damage, injury or death. Read the Installation, Operating and
Maintenance Instructions thoroughly before installing or servicing this equipment.
!!
R
IMPORTANT FOR FUTURE REFERENCE
Please complete this information and retain this manual for the life of the equipment. For
Warranty Service and/or Parts, this information is required.
Model Number Serial Number Date Purchased
REFRIGERATED TOPPING RAIL
Model: RTR-8
2
CONTENTS
General Information 2
Installation Instructions 3
Operating Instructions 3
Temperature Adjustment Instructions 4
Parts List & Exploded View 5
Electrical Schematic 5
Warranty 7
Electrical Hook-Up:
The required power supply for the Model RTR-a Topping Rail is120 Volt, 15 Amp, 60 Hertz and the unit
is equipped with a standard 15 Amp, 3-prong grounded plug.
Initial Cleaning:
Prior to operating your new Topping Rail, thoroughly wash the interior and covers with a mild detergent
or soap solution. Rinse with a clean rag dampened with clear water and allow to air dry.
Start Up:
To reach the correct interior temperature before storing food, plug in theTopping Rail and allow to
operate for approximately 60 minutes (at an ambience of 75°F). The thermostat has been preset at the
factory (elevation, 6100 ft.) to maintain a 36°F holding temperature.
Periodic Maintenance:
Cleaning: Interior should be cleaned daily, as described in "Initial Cleaning.”
CAUTION
Remove power cord from wall receptacle before cleaning or servicing.
Accessories:
Accessories should be cleaned as described in "Initial Cleaning.”
Cleaning Exterior:
Cabinets should be cleaned with a solution of mild soap and water. Do not use abrasive cleaners, since
this might damage the finish. If stainless steel surface becomes discolored, scrub by rubbing only in the
direction of the finish grain.
GENERAL INFORMATION
3
1 . Unit is to be installed on a flat,
level surface for best operating
performance.
2. Seal the unit to the countertop
with a silver-colored, room
te mp er at ur e vu lc an iz in g
silicone sealant. (See Figure
#1.)
3. Plug unit into 15 Amp, 120 Volt
outlet. This unit is ready for
operation.
INSTALLATION INSTRUCTIONS
OPERATING INSTRUCTIONS
Figure #1
Seal unit to countertop
with silicone sealant
Typ. all 4 sides
Refrigerated Topping Rail Leg Installation:
1. If unit is to be used with 4" appliance legs, place unit on flat surface. DO NOT turn unit over.
2. Lift front of unit and install 2 legs in weld nuts.
3. Lift back of unit and install 2 legs in weld nuts.
4. Put unit in place and level unit using leg adjust.
1 . After the unit has been properly installed and connected to an electrical source, it is to be
cleaned.
To clean the unit. first remove the plastic covers by squeezing the hinge tabs on the cover until
the pins clear the hinge tabs on the unit (See Figure #2.) Second, wash the covers with warm,
soapy water and rinse thoroughly. Clean the outside of the unit with a soft, damp cloth and
wipe it dry. Third, reinstall the cover (note that two of the covers have different hinges. These
covers go on the top well.)
NOTE: Covers must be installed for proper cooling.
2. Switch the unit on and allow it to cool approximately 45 minutes before adding condiments.
(Note: the power switch is in the lower middle area of the back panel next to the power cord.)
3. After unit has cooled down, place pre-cooled condiments into position.
Measure temperature of condiments at regular intervals. The food products are to be stored below
40°F.
If the unit is not holding the food products below 40°F, it is necessary to adjust the unit. This is done by:
first. shut unit off and disconnect power, and second, remove the six screws holding the back panel in
place. Remove back panel to expose the thermostat which is above the power cord. Adjust the
thermostat in small increments and let the unit and food product stabilize; continue this procedure until
the unit is holding your condiments at the desired temperature. Reassemble your unit.
The following clearances must be maintained: Rear = 6” Left & Right = 0” Top = Must be left open
4
! With unit turned off and at room temperature, remove back panel, check setting on thermostat.
! Place all eight (8) plastic pins in the unit and put approximately 3 cups of cool water in each
pan.
! Using a thermometer or temperature probe, check the temperature of all the pans; turn the unit
"ON."
! After allowing the unit's compressor to cycle, approximately 1 - 1 1/2 hours, check the
temperature of the water in the pans again. Check temperature in 15 minute intervals to
establish an average.
! If the temperature is not what you desire, adjust thermostat. Allow unit's compressor to cycle
then check the temperature of the water. Check temperature in 15 minute intervals to establish
an average. Continue this process until the desired temperature is obtained.
! Reinstall back panel after adjustments have been completed.
Note: Unit should be unplugged.
Note: In some areas, the thermostat might not have enough adjustment to achieve the
proper temperature. In this case, the adjustment of the range screw must be done
inside the thermostat.
! Unplug unit and remove back panel.
! Disconnect wires from back of thermostat and remove knob.
! Remove screws holding dial plate and thermostat to the bracket. Carefully pull the thermostat
out where you can see it.
! On one end of the thermostat, there is a plastic cover. Remove it by sliding it away from the
mounting. This will expose the range screw.
! The range screw has an indicator marking the direction to turn to make it colder. Adjustments
should be made in 1/4 to 1/2 turn increments. After adjusting the range screw, reassemble and
reinstall thermostat.
! Go through the temperature adjustment instructions.
! Use these procedures until the desired temperature is reached.
TEMPERATURE ADJUSTMENT INSTRUCTIONS
Range Screw
Removable Plastic Cover
5
ELECTRICAL SCHEMATIC
M M
Compressor
Cooling Fan
Thermostat
Power
Switch
Ground
White
Black
1
2
3
4
5
6
7
8
9
10
11
12
13
14
15
16
1/6 Size Pan 6" Deep
1/6 Size Pan 4" Deep
Upper Cover Assembly
Lower Cover Assembly
Top Hinge Anchor
Bottom Hinge Anchor
Power Switch
Thermostat
Condensor
Fan Blade
Fan Motor
Fan Mounting Bracket
Compressor
Back Panel
Power Cord
Dryer
24225-00
24226-00
217011-02
217011-04
217015-01
217015-11
13586-00
14795-00
18014-00
12000-00
12002-00
12001-00
18069-01
217014-04
15325-00
18120-00
1
2
3
4
5
6
7
8
9
10
11
12
13
14
15
16
PARTS LIST & EXPLODED VIEW
ITEM P/N DESCRIPTION ITEM P/N DESCRIPTION
6
Notes:
7
APW WYOTT EQUIPMENT LIMITED WARRANTY
APW Wyott Foodservice Equipment Company warrants it's equipment against defects in materials and workmanship, subject to the
following conditions:
This warranty applies to the original owner only and is not assignable.
Should any product fail to function in its intended manner under normal use within the limits defined in this warranty, at the option of
APW Wyott such product will be repaired or replaced by APW Wyott or its Authorized Service Agency. APW Wyott will only be
responsible for charges incurred or service performed by its Authorized Service Agencies. The use of other than APW Wyott
Authorized Service Agencies will void this warranty and APW Wyott will not be responsible for such work or any charges associated
with same. The closest APW Wyott Authorized Service Agent must be used.
This warranty covers products shipped into the 48 contiguous United States, Hawaii, metropolitan areas of Alaska and Canada. There
will be no labor coverage for equipment located on any island not connected by roadway to the mainland.
Warranty coverage on products used outside the 48 contiguous United States, Hawaii, and metropolitan areas of Alaska and Canada
may vary. Contact the international APW Wyott distributor, dealer, or service agency for details.
Time Period
One year for parts and one year for labor, effective from the date of purchase by the original owner. The Authorized Service Agency
may, at their option, require proof of purchase. Parts replaced under this warranty are warranted for the un-expired portion of the
original product warranty only.
Exceptions
*Gas/Electric Cookline: Models GCB, GCRB, GF, GGM, GGT, CHP-H, EF, EG, EHP. Three (3) Year Warranty on all
component parts, except switches and thermostats. (2 additional years on parts only. No labor on second or third year.)
*Broiler Briquettes,
*Heat Strips: Models FD, FDL, FDD, FDDL. Two (2) Year Warranty on element only. No labor second year.
*Glass Windows, Doors, Seals, Rubber Seals, Light Bulbs:
In all cases, parts covered by extended warranty will be shipped FOB the factory after the first year.
Portable Carry In Products
Equipment weighing over 70 pounds or permanently installed will be serviced on-site as per the terms of this warranty. Equipment
weighing 70 pounds or under, and which is not permanently installed, i.e. with cord and plug, is considered portable and is subject to
the following warranty handling limitations. If portable equipment fails to operate in its intended manner on the first day of
connection, or use, at APW Wyott's option or its Authorized Service Agency, it will be serviced on site or replaced.
From day two through the conclusion of this warranty period, portable units must be taken to or sent prepaid to the APW Wyott
Authorized Service Agency for in-warranty repairs. No mileage or travel charges are allowed on portable units after the first day of use.
If the customer wants on-site service, they may receive same by paying the travel and mileage charges. Exceptions to this rule: (1)
countertop warmers and cookers, which are covered under the Enhanced Warranty Program, and (2) toasters or rollergrills which have
in store service.
Exclusions
The following conditions are not covered by warranty:
*Equipment failure relating to improper installation, improper utility connection or supply and problems due to
ventilation.
*Equipment that has not been properly maintained, calibration of controls, adjustments, damage from improper cleaning
and water damage to controls.
*Equipment that has not been used in an appropriate manner, or has been subject to misuse or misapplication, neglect,
abuse, accident, alteration, negligence, damage during transit, delivery or installation, fire, flood, riot or act of god.
*Equipment that has the model number or serial number removed or altered.
If the equipment has been changed, altered, modified or repaired by other than an Authorized Service Agency during or after the
warranty period, then the manufacturer shall not be liable for any damages to any person or to any property, which may result from the
use of the equipment thereafter.
This warranty does not cover services performed at overtime or premium labor rates. Should service be required at times which
normally involve overtime or premium labor rates, the owner shall be charged for the difference between normal service rates and such
premium rates. APW Wyott does not assume any liability for extended delays in replacing or repairing any items beyond its control.
In all cases, the use of other than APW Wyott Authorized OEM Replacement Parts will void this warranty.
This equipment is intended for commercial use only. Warranty is void if equipment is installed in other than commercial application.
Water Quality Requirements
Water supply intended for a unit that has in excess of 3.0 grains of hardness per gallon (GPG) must be treated or softened before
being used. Water containing over 3.0 GPG will decrease the efficiency and reduce the operation life of the unit.
Note: Product failure caused by liming or sediment buildup is not covered under warranty.
“THE FOREGOING WARRANTY IS IN LIEU OF ANY AND ALL OTHER WARRANTIES EXPRESSED OR IMPLIED
INCLUDING ANY IMPLIED WARRANTY OF MERCHANTABILITY OR FITNESS FOR PARTICULAR PURPOSES
AND CONSTITUTES THE ENTIRE LIABILITY OF APW WYOTT. IN NO EVENT DOES THE LIMITED WARRANTY
EXTEND BEYOND THE TERMS STATED HEREIN.”
9/05
Rock Grates, Cooking Grates, Burner Shields, Fireboxes: 90 Day Material Only. No Labor.
90 Day Material Only. No Labor.
8
Phone: +1 (307) 634-5801
Fax: +1 (307) 637-8071
Toll Free: +1 (800) 752-0863
Website: www.apwwyott.com
APW WYOTT
P.O. Box 1829
Cheyenne, WY 82003
R
/