Barclay 4502-PL-PB Installation guide
- Category
- Sanitary ware
- Type
- Installation guide
This manual is also suitable for

ASSEMBLY INSTRUCTIONS
P 847•244•1234 www.barclayproducts.com
02/19/2016
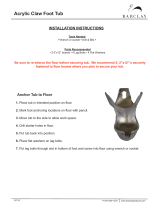
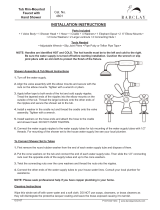
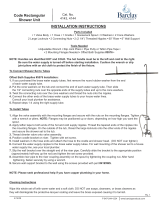
1. First be sure to shut off the the water supply. Remove old water supply tubing. Place a flat rubber washer onto the
upper end of each supply tube.
2. Screw flat floor flange on to 5” shaft with stop valve attached. Be sure to leave enough thread to go through
floor, to attach to your plumbing.
3. Screw flange back down till level with floor. Attach to floor with provided screws.
4. If rubber washers are inside connecting nuts remove them. Slide connecting nut over the thread end of the
supply tubes and up over the fittings. So that the fittings are completely inside the connecting nuts. Place
washers deep inside of connect nuts.
5. When fastening supply tube to wall mounts:
a. Attach wall mount flanges to the wall support tubes.
b. Attach tube fasteners to wall support tubes and tighten screws.
c. Decided where supports will be attached to the wall and fasten with provided screws. Use anchors if necessary.
d. Slide threaded end of top supply tube into tube fasteners.
6. Assemble supply tube into top of stop valve. Tighten screws on tube fastener.
Use on concrete floor requires special installation. We recommend using a plumbing professional.
Parts Included
• Left Supply Tube • Right Supply Tube • 2- Shafts each connected to a Stop Valve • 14 Screws • 14 Anchors •
• 2 Connecting Nuts and 2 Flat Rubber Washers • 2 Flat Floor Flanges • 2 Wall Mounts • 2 Wall Support Tubes • 2 Tube Fasteners •
Freestanding Bath
Supplies
Tools Needed
• Wrench • Pliers • Teflon Tape (use as a sealant on all male threaded tubing) •
This water supply tube kit includes the parts listed above ONLY. The faucet in your bathtub should
be purchased previously and separate from this kit. This should NOT be used with faucets that use shower risers
and shower rods, or with leg tubs that have factory drilled holes.
Cat. No.
4502-PL
Cleaning Instructions
Wipe this whole set off with warm water and a soft cloth. DO NOT use soaps, cleansers, or brass cleaners as they will
disintegrate the protective lacquer coating and leave the brass exposed causing it to tarnish.
NOTE: The Gold Nuts are extra pieces for use with your plumbing. They are not necessarily needed for your installation.
Please seek professional help if you have copper plumbing in your home.
(These instructions are for assembly of bath supplies ONLY not for connection to water supply.)
Wall Supports
-
 1
1
Barclay 4502-PL-PB Installation guide
- Category
- Sanitary ware
- Type
- Installation guide
- This manual is also suitable for
Ask a question and I''ll find the answer in the document
Finding information in a document is now easier with AI
Related papers
-
 Barclay Products TKADTR60-BCP3 Installation guide
-
 Barclay Products 4063-PL-CP Installation guide
-
Barclay Products TKCTR7H60-ORB2 Installation guide
-
 Barclay Products TKCTR67-CP5 Installation guide
-
 Barclay Products 4024-PL-CP Installation guide
-
 Barclay Products 4122-SN Installation guide
-
 Barclay Products 4022-PL-PB Installation guide
Other documents
-
 Barclay Products TKADTR60-WCP2 Installation guide
-
 Barclay Products TKCTR67-SN1 Installation guide
-
Pegasus 4502-PL-PB Installation guide
-
 Barclay Products TKCTR7H67-CP6 Installation guide
-
 Barclay Products TKCTR60-CP2 Installation guide
-
 Barclay Products TKADTR67-WORB1 Installation guide
-
 Barclay Products TKADTR60-WCP1 Installation guide
-
 Barclay Products TKCTR67-ORB1 Installation guide
-
 Barclay Products TKCTR67-CP1 Installation guide
-
Barclay Products TKATR60-WORB2 Installation guide


