Page is loading ...

4MP WI-FI PAN TILT CAMERA
QUICK START GUIDE
ENGLISH

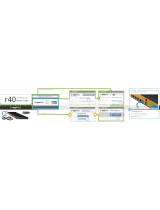
WELCOME!
Congratulations on your latest
purchase and welcome to the Q-See
family. This guide will help get your
camera up and running.
WHAT’S INCLUDED
• (1) QCW4MP1PT Wi-Fi Camera
• (1) Power Adapter
• (1) Mounting Hardware
• (1) Quick Start Guide
STEP 1
Before installing, please register your device on the Q-See Support Portal at www.q-
see.com/register to receive critical updates and support for your system. Registering
will also help us to assist you with any technical or warranty issues if ever necessary.
Please be sure to keep a record of your model number(s) and to save this
guide, as you will need this information if you are ever in need of technical or
warranty support.
NOTE: YOUR USERNAME AND PASSWORD USED TO REGISTER YOUR DEVICE ARE NOT
THE SAME AS THOSE YOU USE TO LOG IN TO YOUR SYSTEM. PLEASE WRITE DOWN YOUR
USERNAME, PASSWORD, AND MODEL NUMBER(S) IN THE SPACES PROVIDED BELOW:
Username:
Password:
Model #:
2

STEP 2
Plug the camera into a power
source and wait until the indicator
light begins to flash. After 15-30
seconds the light should slowly flash
green which indicates it is ready to
configure. If the light displays solid
red, hold the reset button for 15
seconds to reset the camera.
IMPORTANT: Go through all of
the steps to setup and test your system
before mounting your camera. Visit
www.q-see.com/support to find the
most recent guides and up-to-date support
for your Q-See products.
STEP 3
Download the Q-See Plus app from
the App Store on your mobile device.
Once installed, ensure that your
mobile device is connected to the
Wi-Fi network you wish to use for
your camera. Launch the app on your
mobile device.
STEP 4
Tap on Register and create an
account for the new camera. All
screenshots shown are from the
Q-See Plus app on Android.
3

STEP 5
Enter an email address to use for your account.
You should immediately receive an email with a
verification code. You will have two minutes to
enter the verification code, so be sure you will
have quick access to the email address used. Tap
Send verication code to mail.
STEP 7
Create a password for your account. You will
enter the same password twice to confirm. Tap
Register Again to continue.
STEP 6
Enter the verification code and click Next.
4

STEP 8
Enter your email address again and the new
password. Tap Login to continue.
STEP 9
Tap the + symbol to continue. In the following
screen, select “Wi-Fi Camera” for device type.
Next, using your mobile device’s camera, scan the
QR code on the back of the Wi-Fi camera.
5

STEP 11
In the next screen, tap “Yes, config Wi-Fi”. Enter
your Wi-Fi network’s password and before tapping
“Next”, place your mobile device within 12” of the
Wi-Fi camera. Click “Next” to proceed. Connecting
may take over a minute. Once connected, the LED
on the front of the Wi-Fi camera will turn solid green.
STEP 12
You should then see the confirmation screen.
Tap Start Live Preview and follow the on-screen
prompt to finalize the setup. If the camera is unable
to connect, try temporarily moving the camera
closer to your Wi-Fi router to complete the setup
process. If that doesn’t work, hold the reset button
for 15 seconds and start the process over.
STEP 10
Once the QR code scans, a new screen will appear
with login credentials. Do not edit any of the
credentials. Do not enter a verification code. Tap
OK to continue.
6

WI-FI CONNECTIVITY TROUBLESHOOTING
If you are having issues connecting your QCW Wi-Fi camera to the desired Wi-Fi
network, this tutorial will show you how to establish the connection with the help of
a standard Ethernet (CAT5) cable.
STEP 1
Select Ethernet Wi-Fi Setup.
STEP 2
Connect the Wi-Fi camera to your router using an
Ethernet cable (not included). Select Next.
7

STEP 3
If your camera is already connected to a Wi-Fi
network it will appear at the top. Select the Wi-Fi
network you wish to connect your camera to.
STEP 4
Enter the password for your Wi-Fi network.
STEP 5
Select Start Preview once the camera is connected.
You may now disconnect the Ethernet cable from
your camera.
8

CAMERA FEATURES
The 4MP Wi-Fi Pan Tilt Camera features the
ability to rotate your camera view left to right
(pan) and to adjust your camera view up and
down (tilt).
The camera’s microphone and speaker will
enable you to both hear and speak through
your camera for two-way audio purposes.
The QR code is located underneath the
camera for use when configuring the device.
RESETTING YOUR CAMERA
Your camera’s “reset” button is also its LED
indicator light. Press and hold the reset
button for 15 seconds in order to reset the
camera to its original factory settings.
The LED indicator light will ensure that your
camera is connected to Wi-Fi. A flashing
green light means it is ready to connect. A
solid green light means it is connected to
a Wi-Fi network. A solid red light indicates
that there is problem with the connection.
SPEAKER
CAMERA
LENS
MICROPHONE
QR CODE
NETWORK PORT
MICRO SD
CARD SLOT
POWER
PORT
RESET
BUTTON & LED
INDICATOR
9

10

Regulatory Information
FCC Information
This device complies with Part 15 of the FCC Rules. Operation is subject to the following two conditions:
(1) This device may not cause harmful interference, and
(2) This device must accept any interference received, including interference that may cause undesired operation.
Attention that changes or modification not expressly approved by the party responsible for compliance could void the user’s
authority to operate the equipment.
Note: This product has been tested and found to comply with the limits for a Class B digital device, pursuant to Part 15 of the FCC
Rules. These limits are designed to provide reasonable protection against harmful interference in a residential installation. This
product generates, uses, and can radiate radio frequency energy and, if not installed and used in accordance with the instructions,
may cause harmful interference to radio communications. However, there is no guarantee that interference will not occur in a
particular installation. If this product does cause harmful interference to radio or television reception, which can be determined
by turning the equipment off and on, the user is encouraged to try to correct the interference by one or more of the following
measures:
• Reorient or relocate the receiving antenna.
• Increase the separation between the equipment and receiver.
• Connect the equipment into an outlet on a circuit different from that to which the receiver is connected.
• Consult the dealer or an experienced radio/TV technician for help.
This equipment should be installed and operated with a minimum distance 20cm between the radiator and your body.
1.2.51.32.Tgz001-000
Check online at www.Q-See.com for more information on our terms of service.
DISCLAIMER: Although Q-See has made every effort to ensure that the information in this guide was
correct at the time of printing, Q-See does not assume any liability to any party for any loss, damage, or
disruption caused by any errors, omissions, or typos that may occur.
WARRANTY & SUPPORT
Q-See is always here to answer your questions and take your valued suggestions. Visit us at
www.q-see.com/support for 24/7 support and access to our Support Portal.
11

Rev. 11/20/17, QCW4MP1PT GQCW4MPT-E-V2
/