Page is loading ...

OM9020 B.4 ™ & © Char-Griller / A&J Mfg.
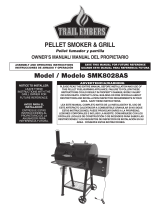
OWNER’S MANUAL
Wood Fire Pro™ Pellet Grill
Model # 9020
Keep your receipt with this manual for Warranty.
CUSTOMER SERVICE
1-912-638-4724
Contents of this manual are Trademarked and Copyrighted by Char-Griller | A&J Manufacturing. Using the information contained in this
manual without consent of Char-Griller and/or
A&J Manufacturing is strictly prohibited.

OM9020 B.4 ™ & © Char-Griller / A&J Mfg. 2
IMPORTANT SAFETY WARNINGS
READ ALL SAFETY WARNINGS AND INSTRUCTIONS CAREFULLY
BEFORE ASSEMBLING AND OPERATING YOUR GRILL
Use caution when assembling and operating your grill to avoid scrapes or cuts from sharp edges.
Do not use gasoline, kerosene or alcohol for lighting wood pellets. Use of any of these or similar
products could cause an explosion possibly leading to severe bodily injury.
Do not used lighter fluid or any flammable liquid on already lit wood pellets.
When adding wood pellets, use extreme caution.
Never move grill when it is in use or when it contains hot wood pellets or ashes, keep the grill in a
level position at all times while in use.
Do not place grill near flammable liquids, gases or where flammable vapors may be present.
When opening grill, first open slightly to let a small amount of air in for a few seconds. This prevents
large amounts of oxygen from getting to suffocated wood pellets which may cause dangerous flash
back.
Use caution since flames can flare-up when fresh air suddenly comes in contact with fire. When
opening the lid, keep hands, face and body safe from hot steam and flame flare-ups.
Removing excess fat before cooking will help prevent flare-ups.
Keep your grill clean to help prevent flare-ups.
Always put wood pellets into Hopper Box not directly into the Fire Cup of the grill.
Do not exceed a temperature of 570˚ F. Do not allow wood pellets to rest on the walls of grill. Doing so
will greatly reduce the life of the grill.
Avoid touching hot surfaces.
When opening lid, make sure it is pushed all the way back so it rests against the lid support bracket.
Use extreme caution as hood could fall back to a closed position and cause bodily injury.
Close lid to help suffocate flame.
Always hold an open lid from the handle to prevent it from closing unexpectedly.
Use caution to protect yourself and property. Carefully place remaining wood pellets and ashes in a
noncombustible metal container.
To protect against bacteria that could cause illness, keep all meats refrigerated and thaw in
refrigerator or microwave; keep raw meats separate from other foods; wash everything that contacts
raw meats; cook thoroughly; and refrigerate leftovers immediately. Cook meats medium to well done.
Do not use Grill in wet or rainy conditions.
Contact local building or fire officials about restrictions and installation inspection requirements in
your area.
Failure to follow these instructions could result in property damage, bodily injury or even death.
SAVE THIS INSTRUCTION FOR FUTURE REFERENCE.

OM9020 B.4 ™ & © Char-Griller / A&J Mfg. 3
WARNING
Follow these guidelines to prevent this colorless, odorless gas from poisoning you, your family or others.
Know the symptoms of carbon monoxide poisoning: headache, dizziness, weakness, nausea,
vomiting, sleepiness, and confusion. Carbon monoxide reduces the blood’s ability to carry oxygen. Low
blood oxygen levels and can result in loss of consciousness and death.
See a doctor if you or others develop cold or flu-like symptoms while cooking or in the vicinity of this
appliance. Carbon monoxide poisoning, which can easily be mistaken for a cold or flu, is often
detected too late.
Alcohol consumption and drug use increase the effects of carbon monoxide poisoning. “Carbon
Monoxide is especially toxic to mother and child during pregnancy, infants, the elderly, smokers, and
people with blood or circulatory system problems, such as anemia, or heart disease.
Creosote – Formation and need for removal. When wood pellets are burned slowly, they produce tar
and other organic vapors that combine with expelled moisture to form creosote. The creosote vapors
condense in a relatively cool oven flue and exhaust hood of a slow burning fire. As a result, creosote
residue accumulates on the flue lining and exhaust hood. When ignited, this creosote makes an
extremely hot fire.
The grease duct should be inspected at least twice a year to determine when grease and/or creosote
buildup has occurred.
When grease or creosote has accumulated, it should be removed to reduce risk of fire.
Disposal of ashes – Ashes should be placed in a metal container with a tight-fitting lid. The closed
container of ashes should be placed on a non-combustible floor or on the ground, well away from all
combustible materials, pending final disposal. When the ashes are disposed by burial in soil or
otherwise locally dispersed, they should be retained in the closed container until all cinders have
thoroughly cooled.
Use pellet wood with no more than 8,700 BTU/lb and 2% Ash Content.
Do not use accessories not specified for use with this appliance.
Storing your Grill:
•Disconnect power cord from outlet.
•Clean cooking grates.
•Store in dry location and out of reach of children.
•Cover grill if stored outdoors.
THIS GRILL IS FOR OUTDOOR USE ONLY.
A MAJOR CAUSE OF FIRES IF FAILURE TO
MAINTAIN REQUIRED CLEARANCES (AIR
SPACES) TO COMBUSTIBLE MATERIALS. IT IS OF
UTMOST IMPORTANCE THAT THIS PRODUCT BE
INSTALLED ONLY IN ACCORDANCE WITH THESE
INSTRUCTIONS.
Made in China
For Safe Use of Your Grill and to Avoid Serous Injury.
Keep Children and Pets away from Grill. Supervision is necessary
and do not leave grill unattended when in use.
Keep grill area clear and free from materials that burn.
Use caution when moving grill to prevent strains.
Use grill only in well-ventilated space. NEVER use in enclosed
space such as carport, garage, porch, covered patio, or under an
overhead structure of any kind.
Keep grill at least 10 feet from any combustible material (decks,
buildings, fences, trees, bushes, etc.).
Always place your grill on hard, level, non-combustible surfaces
where the protective surface has been approved for such use by
the authority having jurisdiction.

OM9020 B.4 ™ & © Char-Griller / A&J Mfg. 4
P.O. Box 30864
Sea Island, GA
31561
912-638-4724
www.CharGriller.com
Warranty Information — Wood Pellet Grill
Char-Griller® will repair or replace any defective part of its grillers/smokers for a period of up
to one year from the date of purchase. Char-Griller® will also repair or replace the body of its
grillers/smokers if the metal is rusted through or burned through for a period up to five years.
Proof of purchase, proof of purchase date, photo and prepaid return of the item in question
may be required. Misuse, abuse, or commercial use nullifies all warranties. Paint/finish is not
warranted. Products are not warranted against rust. Warranty applies to original purchaser
only whose name appears on credit card, check, or receipt.
The warranty is for replacement of defective parts only. Manufacture will not be responsible
for damage resulting from accident, alteration, misuse, abuse, hostile environments, improper
installation, installation not in accordance with local codes of service of unit.
This limited warranty does not cover any scratches, dents , corrosion or discoloring by heat,
abrasive and chemical cleaners nor any components used in the installation of the appliance.
Save your receipt for all warranty claims. No returns on used grills.
STOP! CALL FIRST! DO NOT RETURN PRODUCT TO STORE.
Register your Grill online at www.CharGriller.com to insure your satisfaction and for
follow-up service.
SERIAL #

OM9020 B.4 ™ & © Char-Griller / A&J Mfg. 5
Item Descripon QTY
1 Stopper,Lid 1
2 LogoPlate 1
3 Handle,Lid 1
4 Bezel,LidHandle 2
5 Lid 1
6 FireboxWeldedAssembly 1
7 Handle,Trolley 1
8 PelletDeliverySystem*:SeePage25 1
9 Tray,Grease 1
10 HeatDiffuser 1
11 Leg,RearRight 1
Item Descripon QTY
12 Leg,FrontRight 1
13 3"CasterWheel 2
14 BoomShelf 1
15 Leg,RearLe 1
16 Leg,FrontLe 1
17 Wheel,Metal, 2
18 CookingGrate 4
19 Bucket,Grease 1
20 Base,Chimney 1
21 Cap,Chimney 1
22 Gasket,
Chimney 1
PARTS LIST
*See additional breakdown of the Pellet Delivery System in the Pellet Delivery System Breakdown section of the manual.

OM9020 B.4 ™ & © Char-Griller / A&J Mfg. 6
Hardware Pack: 551006
HARDWARE LIST AND TOOLS REQUIRED
(Tools Not Included)
7/16" nut driver
STOP! CALL FIRST! DO NOT RETURN PRODUCT TO STORE.
CALL (912) 638-4724. This product has been built to the highest quality standards.
Call us should you have any questions not addressed in these instructions, or for service information.
NO RETURNS ON USED GRILLS
NOTICE: Always have a fire extinguisher near at all times.
Maintain and check your fire extinguisher regularly.
Have the grill’s serial number (located on the back of the grill body or on the leg) when
calling.
Item Picture Description QTY
Hex Bolt—1/4”-20 x 1/2” 29
Flat Washer—1.2” OD, 0.45” ID 2
Hex Nut—7/16”-20 2
Hex Nut—1/4”-20 2

OM9020 B.4 ™ & © Char-Griller / A&J Mfg. 7
Step 2: Place the Bottom Shelf between the (4) Legs making sure the holes on the Bot-
tom Shelf and Legs are aligned then tighten with (4) Hex Bolts.
(4) Hex Bolt --1/4”-20 x 1/2”
Back Right Leg
Front Right Leg
Back Left Leg
Front Left Leg
Hex Bolt
GRILL ASSEMBLY
Step 1: Lay the Grill Body with the Bottom of the grill facing up then Position Legs on
Grill Body as shown below and secure them with (4) Hex Bolts per Leg.
(16) Hex Bolt --1/4”-20 x 1/2”
Bottom Shelf
Hex
Legs
Legs

OM9020 B.4 ™ & © Char-Griller / A&J Mfg. 8
Step 3: Attach Caster Wheels onto the sockets at the bottom of the two legs as shown
below.
Step 4: Place the Metal Wheel, Flat Washer onto the Axle on the Leg then tighten them
with the 7/16-20 Hex Nuts.
(2) Flat Washer
(2) Hex Nut—7/16”-20
Caster Wheels
Metal Wheel
Flat Washer
Hex Nut
Legs

OM9020 B.4 ™ & © Char-Griller / A&J Mfg. 9
Step 5: Insert the edge of the Lid Stopper into the rectangular slot on the Grill Body then
tighten it with a Hex Bolt through the hole on the other end of the Lid Stopper.
(1) Hex Bolt --1/4”-20 x 1/2”
Step 6: Place the Handle Bezels on each end of the Handle then place them on the Grill
Lid then tighten them with (2) Hex Bolts, see below.
(2) Hex Bolt --1/4”-20 x 1/2”
Hex Bolt
Lid Stopper
Lid Handle
Lid
Handle Bezels
Hex Bolts

OM9020 B.4 ™ & © Char-Griller / A&J Mfg. 10
Step 7: Attach Chimney to the side of the Grill Body opposite the Hopper Box.
(2) Hex Bolt --1/4”-20 x 1/2”
Step 8: Attach Trolley Handle onto the side of Hopper Box.
(4) Hex Bolt --1/4”-20 x 1/2”
(2) Hex Nut—1/4”-20
Hex Bolts
Chimney
Gasket
Hex Nut—1/4”-20
Trolley Handle
Hex Bolt
Hopper Box
Hopper Box

OM9020 B.4 ™ & © Char-Griller / A&J Mfg. 11
Step 9: Place Heat Diffuser Shield Over the Fire Cup Inside Grill Body at the center of
the Grill.
Step 10: Place Grease Tray into Grill Body. The Edge with Cut out on the center should
goes into the Grease Channel.
Grease Tray
Heat Diffuser Shield
Grease Channel

OM9020 B.4 ™ & © Char-Griller / A&J Mfg. 12
Step 11: Place Cooking Grates into Firebox
Step 12: Hang Grease Bucket on hinge of grease tunnel
Cooking Grates
Grease Bucket

OM9020 B.4 ™ & © Char-Griller / A&J Mfg. 13
GRILL PREPARATION
Initial Firing Instructions
These instructions should be followed the first time the grill is ignited and each time the grill runs out of
pellets.
1.) Remove Cooking Grates, Grease Tray, and Heat Diffuser from the interior of Grill.
2.) Open the Pellet Hopper Lid, locate the auger. Make sure there are no foreign objects in the Auger.
3.) With the Temperature Dial in the OFF position, plug the power cord into an appropriate, grounded
electrical outlet.
4.) Turn the Temperature Dial to the SMOKE Position.
Check the following items:
A.) That the Auger is turning.
DO NOT place fingers or objects in the Auger Tube. This can cause serious injury.
B.) Place your hand over the Fire Pot and feel for air movement.
DO NOT place your hand in the fire Pot.
C.) Wait approximately 1 minute and look to see if the Fire Rod is Red Hot.
DO NOT touch the Fire Rod. This item gets extremely HOT and can cause burns.
5.) Turn the Temperature Dial to OFF.
6.) Fill the Pellet Hopper with Wood Pellets.
Use only wood pellet fuel (For Best Flavor, use Char-Griller’s Gourmet Wood Pellet Fuel).
Do not use pellet fuel labeled as giving additives.
7.) Turn the Temperature Dial to HIGH. During initial Auger charge, it will take time for the Pellets to
travel to the Fire Pot. Once the Pellets reach the Fire Pot, turn the Temperature Dial to OFF.
8.) Turn the Temperature Dial to SMOKE. Allow the Pellets to come to full flame. Once flames are com-
ing out of the fire pot, turn the Temperature Dial to OFF, and let the Grill cool down.
9.) After Grill has cooled, insert Heat Diffuser, Grease Tray, and Cooking Grates into Grill.
———————————————————————————————————————————————————————————-
Seasoning your Pellet Grill
Before cooking any food on the Grill, it MUST be seasoned.
1.) With the Lid open, turn the Temperature Dial to Smoke.
2.) In approximately 2 minutes, the pellets will ignite and white/gray smoke will be coming from the grill.
Once the pellets have ignited, close the lid, set the Temperature Dial to HIGH, and run for 45
minutes.
3.) Turn Temperature Dial to OFF position. Your grill is now ready for cooking.
Helpful Hint: For ease of use and easy clean-up, line the Grease Tray with heavy duty aluminum foil.
Make sure the Grease Tray is cool, then layer the aluminum foil across the Grease Tray, form it along all
edges. The foil should be flat and tight against the surface of the tray for optimum grease flow. Fre-
quently replace with new aluminum foil and dispose of the old.
Warning: ALWAYS START THE GRILL ON SMOKE SETTING WITH THE LID OPEN. ONCE THE PELLETS ARE
IGNITED THEN CLOSE THE LID AND SET THE TEMPERATURE DIAL TO ANY COOKING TEMPERATURE
DESIRED.

OM9020 B.4 ™ & © Char-Griller / A&J Mfg. 14
Grill Lighting Instructions
1.) With the Lid open, turn the Temperature Dial to Smoke.
2.) In approximately 2 minutes, the pellets will ignite and white/gray smoke will be coming from the grill. Once the
pellets have ignited, close the lid, set the Temperature Dial to HIGH, and run for 45 minutes.
If Grill Fails to ignite, perform the following:
1.) Turn the Temperature dial to OFF. Open the Lid, remove all food, the Cooking Grates, Grease Tray, and Heat
Diffuser.
2.) Remove all unburned Pellets and ash from the Fire Pot.
DO NOT touch the Fire Rod. This item gets extremely HOT and can cause burns.
3.) With the items removed from the Grill, turn the Temperature Dial to SMOKE.
Check the following items:
A.) Visually confirm the Fire Rod is getting HOT and turning Red.
DO NOT touch the Fire Rod. This item gets extremely HOT and can cause burns.
B.) Visually confirm Pellets are dropping into the Fire Pot from the Auger.
4.) If the Fire Rod is not getting HOT and/or the Pellets are not dropping from the Auger, see the
Troubleshooting section or contact Customer Service.
——————————————————————————————————————————————————————————-
Using your Pellet Grill
1.) The Temperature Dial can be changed at any time to increase or decrease the cooking temperature of the Grill.
It’s much easier to increase the temperature of the Grill, than to decrease. Once the Grill’s body temperature
is hot, it’s much harder to maintain a lower temperature. Allow time for the body of the Grill to cool.
2.) The SMOKE setting is for Smoking and adding Smoke Flavor to foods being cooked. The SMOKE setting can
also be used to maintain food temperatures at approximately 180
°- 200° F.
3.) The Char-Griller Pellet Grill is designed to operate with the Lid closed. Cooking with the Lid in the open position
will greatly increase your cooking time.
4.) When Estimating Cooking Times, the outdoor temperature will be an important factor. If it’s cold, wet or windy,
cooking times will take longer. If it’s hot outside, cooking times will be shorter.
5.) Never add Pellets to the Fire Pot by Hand. This is DANGEROUS and can cause serious injury. If the Fire Pot
runs out of Pellets, turn the Temperature Dial to the OFF Position. Then complete the Initial Firing Instructions.
6.) Never move the Grill when it’s HOT. If you’re transporting your Grill in a vehicle after cooking on it, make sure
the fire is out and the Grill is COLD before placing in a vehicle.
7.) Never put water in the Fire Pot. This will cause the Auger to jam.
8.) Make sure the Heat Diffuser is seated in the correct position. If Heat Diffuser is not seated properly over Fire
Pot, direct flame can cause grease on the Grease Tray to catch fire.
9.) Grease Fires are caused from not regularly cleaning the Grill. The Grease Tray, Grease Drain that the Grease
Tray rests in, Grease Drain Tube, and Grease Bucket should be cleaned on a regular basis to minimize grease
build-up. In the event of a Grease Fire, turn the Temperature Dial to the OFF position, and keep the Lid closed
until the fire is completely out. Never keep the Lid open during a Grease Fire. If the Fire does not go out, care-
fully sprinkle Baking Soda on the fire. Be careful not to burn yourself. Then close the lid again. Once the
Grease Fire has gone completely out and the grill is cool, clean all grease accumulation from Grease Tray,
Grease Drain, Grease Drain Tube, and Grease Bucket. Replace foil covering the Grease Tray.
GRILL OPERATION
NOTE: When operating Grill, maintain a minimum clearance of 10 inches from Grill to combustibles.

OM9020 B.4 ™ & © Char-Griller / A&J Mfg. 15
GRILL MAINTENANCE
1.) The Pellet Grill should be frequently checked for Grease Build-up. The following locations are where
grease build-up occurs.
Change the aluminum foil on the Grease Tray regularly.
Periodically, clean the grease out of the Grease Drain and Grease Drain Tube, and off all in-
terior
surfaces of the grill body.
Occasionally, empty the Grease Bucket. Lining this item with aluminum foil also makes
clean-up easier.
Not cleaning these areas often can result in grease buildup and can lead to Grease Fires. Make sure
these areas are cleaned regularly.
Helpful Hint: Cleaning Grease from the Grill is easiest when the Grill is warm, but not HOT. Be careful
to not burn yourself.
2.) Outside surfaces should be cleaned using warm, soapy water. DO NOT use abrasive cleaners or
chemicals as this can damage the paint finish.
3.) Depending on use, clean the ash build-up in and around the Fire Pot. Be sure Grill, Fire Rod, and ash
is cool before performing this procedure.
Helpful Hint: A shop-vac can be helpful in this procedure.
4.) If the Grill is stored outside, proper precautions should be taken to ensure water does not get into the
Pellet Hopper. Wood Pellets absorb moisture and swell considerably. Swelled Wood Pellets can jam
the Auger and/or cause damage. Remove any Swollen Wood Pellets from Pellet Hopper before
using.
Helpful Hint: Purchase a Char-Griller Custom Fit Cover, Model #9155, to protect your Grill from the
weather elements.
5.) It’s easiest to clean food debris from the grates right after cooking. Be careful to not burn yourself.
Using a long handled grill brush, lightly scrub the grates removing any food debris.
GRILL COVER #9155
Custom Fit
Weather Resistant

OM9020 B.4 ™ & © Char-Griller / A&J Mfg. 16
DIGITAL GRILL CONTROL
The Digital Grill Control regulates the desired temperature selection. The following information will provide you the
insight to properly using your controller.
Overview
Understanding LCD Screen Readouts
LCD Screen Displays Grill temperature, smoke settings, idle fuel feed settings, igniter
status, low temperature status, and error messages.
Temperature Dial Select Off, Smoke, or one of nine Temperatures the Grill will cook at.
Smoke Control Dial Select one of eight smoke modes/idle fuel feed rates.
Cook Mode The temperature of the grill is continuously monitored and the controller
operates the draft fan and auger to maintain a constant Grill temperature. See
COOK MODE section of manual for more information.
Smoke Mode In Smoke Mode, the Grill operates at a Low Temperature to provide maximum
smoke. The Smoke Dial has several “P” Settings to allow more or less smoke.
See SMOKE section of manual for more information.
888
When the Grill is connected to AC power, ‘888’ is displayed momentarily.
Temperature
In Smoke and Cook modes, the grill temperature is displayed in 5 degree ( ̊F ) increments.
Flashing
Temperature
In Smoke Mode, the displayed temperature flashes if the grill temperature is below 110 ̊F .
In Cook Mode, the displayed temperature flashes if the grill temperature is below 150 ̊F.
Flashing Dots
The igniter is on.
‘P’ Settings
P0-P7
When the Temperature Dial is in the Smoke position, the Smoke Control Dial is adjusted, the
smoke setting will be displayed for 3 seconds.
When the Temperature Dial is in the Cook Mode, the idle fuel feed rate setting is displayed for
3 seconds.
Flashing ‘ErH’
The grill temperature has exceeded 570 ̊F. The Auger, Igniter, and Draft Fan have turned off.
Turn Temperature Dial to OFF, Open Lid, wait 1-2 minutes, then select desired setting.
Flashing ‘ErP’
The Temperature Dial was not in the Off position when the grill was connected to AC Power.
Turn Temperature Dial to OFF, wait 2 seconds, then select desired setting.

OM9020 B.4 ™ & © Char-Griller / A&J Mfg. 17
DIGITAL GRILL CONTROL
Connecting Grill to AC Power
1.) The Temperature Dial must be in the OFF.
2.)
Plug the power cord into an appropriate, grounded electrical outlet.
3.) If ‘ErP’ is displayed, the Temperature Dial was not set to OFF. This causes an inadvertent start error,
which halts the ignition sequence. To clear the error, turn the Temperature Dial to OFF, wait 2 sec-
onds, then set the desired cooking temperature.
This feature keeps unintentional starts from occurring. For instance, if the Grill was in the garage
and plugged in unintentionally, the Grill would not ignite.
4.) If there are flashing dots on the LCD screen, the ignition is on. The ignition sequence was successful.
Note: Do not use Grill in wet or rainy conditions.
Ignition Sequence
1.) Set the Temperature Dial to SMOKE or any desired temperature.
2.) The ignition sequence is as follows:
A.) The draft fan turns on.
B.) The igniter turns on.
C.) The fuel feed auger turns on and delivers fuel continuously for 4 minutes.
D.) The igniter turns off after 5 minutes .
3.) Once the igniter has turned off, the Grill operates in its selected Mode. The flashing dots will turn off.

OM9020 B.4 ™ & © Char-Griller / A&J Mfg. 18
Digital Control Wiring Diagram

OM9020 B.4 ™ & © Char-Griller / A&J Mfg. 19
SMOKE / COOK MODES
When the Temperature Dial is set to SMOKE, the grill maintains a low temperature and outputs the desired amount
of smoke to increase the flavor of the foods.
Smoking
1.) Set the Temperature Dial to SMOKE. The LCD screen will display the current Grill Temperature.
2.) Use the Smoke Control Dial to set the Smoke Setting, P0-P7. The Smoke Setting will display current Grill Tem-
perature. See ‘Understanding Smoke Mode / Idle Fuel Feed Rate’ for more information on Smoke Settings.
3.) Once the igniter turns off, the auger delivers fuel at a constant rate determined by the Smoke Setting.
4.) If the Grill temperature is flashing, this is indicating the temperature is less than 110 ̊F. This is to alert the op-
erator that there is some risk of the fire going out. This is not an error condition and does not affect the opera-
tion of the grill.
5.) If the Grill temperature is greater than 570 ̊F, a flashing ‘ErH’ is displayed indicating a high limit error and the
grill will shut down.
Cooking
1.) Set the Temperature Dial to desired temperature. The LCD screen will display the current Grill temperature.
2.) Once the igniter turns off, the auger runs continuously until the set temperature is reached, then runs at the
idle fuel feed rate. If the measured grill temperature is below the set temperature, the auger runs continuously.
If the measured grill temperature is at or above the set temperature, the auger runs at the idle fuel feed rate.
3.) If the Grill temperature is flashing, this is indicating the temperature is less than 150 ̊F. This is to alert the op-
erator that there is some risk of the fire going out. This is not an error condition and does not affect the opera-
tion of the grill.
4.) If the Grill temperature is greater than 570 ̊F, a flashing ‘ErH’ is displayed indicating a high limit error and the
grill will shut down.
High Temperature Setting - If the Temperature dial is set to HIGH, the grill operates at 450 ̊F. If the grill is unable
to reach 450 ̊F due to ambient temperature and humidity, fuel type and quality, and/or thermal characteristics of
the grill, the auger will feed fuel continuously allow the grill to operate at its Maximum Temperature.
Idle Fuel Feed Rate - The idle fuel feed rate is the rate the auger delivers fuel while the grill is idling at the set tem-
perature. In Cook Mode, you can manually adjust the idle fuel feed rate using the Smoke Control Dial. See
‘Understanding Smoke Mode / Idle Fuel Feed Rate’ for more information.

OM9020 B.4 ™ & © Char-Griller / A&J Mfg. 20
UNDERSTANDING
SMOKE MODE / IDLE FUEL FEED RATE
Smoke Mode and Idle Fuel Feed Rate are both controlled by the Smoke Control Dial.
During Smoke Mode and the Idle Stage of Cook Mode, the Auger turns on, delivers fuel for 18 seconds, then turns
off. The off time is set by the Smoke Control Dial, which displays a ‘P’ setting. When the Smoke Control Dial is ad-
justed, the corresponding ‘P’ setting is displayed on the LCD screen momentarily. There are eight ‘P’ Settings,
ranging from P0 to P7.
Increasing the ‘P’ value decreases the fuel feed rate, resulting in lowering the Grill temperature. Adjust the ‘P’ set-
ting for the desired temperature and/or smoke output. For trouble free cooking, P2 is the recommended setting.
Decreasing the ‘P’ value increases the fuel feed rate, resulting in a higher Grill temperature.
The Larger the ‘P’ value, the lower the temperature and resulting, the more smoke.
Depending on ambient temperature, humidity, and wind speed, a smaller ’P’ setting would be desired. In cool, wet,
or windy conditions, too high of a ‘P’ value can cause too low of a Grill temperature and result in the fire going out.
The P setting also controls the Cook Mode’s idle fuel feed rate. For example, in Smoke Mode, setting ‘P4’ delivers
fuel for 18 seconds, then turns off for 115 seconds and reaps in Smoke Mode. In Cook Mode, setting ‘P4’ also
delivers fuel for 18 seconds, then turns off for 115 seconds and then repeats.
Cook Mode Idle Fuel Feed Rate
The idle fuel feed rate is the rate of the fuel delivery that maintains the fire in the fire pot without raising the grills
temperature.
In Cook Mode, when the temperature of the grill is at or above the set temperature, the auger runs at the idle fuel
feed rate. If the grill temperature is below the set temperature, the auger runs continuously.
Smoke Mode Fuel Feed Rate
In Smoke Mode, increasing the P setting, decreases the fuel feed rate, thus lowering the grill temperature. Manual-
ly adjust the P setting to achieve the desired temperature and smoke output.
‘P’ Setting Auger On Auger Off
P0 18 seconds 55 seconds
P1 18 70
P2 18 85
P3 18 100
P4 18 115
P5 18 130
P6 18 140
P7 18 150
/