Assistindo TV - 13
Assistindo TV
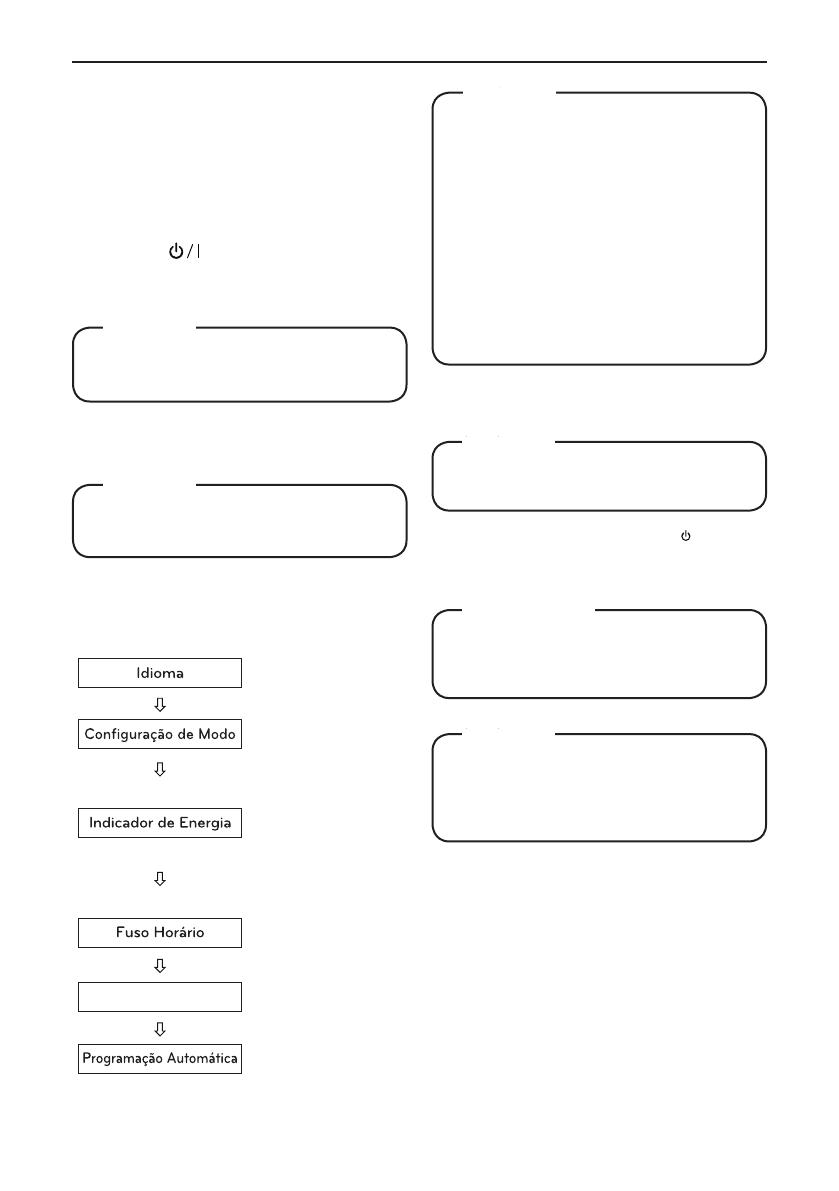
Ligando a TV pela primeira vez
Quando você acessa a TV pela primeira vez, a tela
inicial de ajuste aparece. Selecione um idioma e
personalize os ajustes básicos.
1. Conecte o cabo de força à tomada.
2. Pressione
8
ENGLISH
REMOTE CONTROL
REMOTE CONTROL
The descriptions in this manual are based on the buttons of the remote control.
Please read this manual carefully and use the Monitor set correctly.
To replace batteries, open the battery cover, replace batteries (1.5 V AAA) matching
and ends to the label inside the compartment, and close the battery cover.
To remove the batteries, perform the installation actions in reverse.
Make sure to point the remote control to the remote control sensor on the Monitor set.
CAUTION
Do not mix old and new batteries, as this may
damage the remote control.
INPUT
POWER
TV/PC
MTSFCR
MUTE REVIEW
MENU EXIT SLEEP
USB VOL
-
USB VOL +
ENTER
MEMORY/ERASE CAPTION
123
456
789
0
(POWER)
Turns the Monitor set on or
off.
MTS
Press repeatedly to select
Mono, Stereo, SAP sound
tone. But Stereo, SAP mode
are available only if included
on the broadcast signal.
TV/PC
Selects TV or PC mode.
FCR
Favorite channel button.
MUTE
Switches the sound on or
off.
INPUT
( See p.18)
Selects the input mode.
Number buttons
Enters numbers.
CAPTION
On <-> Off
USB Menu control buttons
USB menu(Music List).
MEMORY/ERASE
User can do manual channel
selection and store or erase
individual channels.
REVIEW
Turn to the last channel
viewed.
INPUT
POWER
TV/PC
MTSFCR
MUTE REVIEW
MENU EXIT SLEEP
USB VOL
-
USB VOL +
ENTER
CH
CH
VOL VOL
MEMORY/ERASECAPTION
123
456
789
0
ARCDASP
ARC/MARK
16
ENGLISH
WATCHING TV
Watching TV
1
Press
on the Remote control or on the
Monitor set to turn the Monitor set on.
2
Press
INPUT
and select
Antenna
.
3
Control the Monitor set using the following
buttons and menus while you are watching TV.
Managing channels
Automatically setting up channels
Use this to automatically find and store all available
channels.
1
Press
MENU
to access the main menus.
2
Press the Navigation buttons to scroll to
CHANNEL
and press
ENTER
.
3
Press the Navigation buttons to scroll to
Auto Tuning
and press
ENTER
.
4
Select
Yes
to start automatic tuning.
The TV scans and saves available channels
automatically.
5
When you are finished, press
EXIT
.
When you return to the previous menu, press
MENU
.
Button / Menu Description
CH(
,
)
Scrolls through the saved
channels
0 - 9 Selects a channel by entering
numbers
VOL
(
,
)
Adjusts the volume level
MUTE Mutes all sounds
APC Selects one of the preset image
modes ( See p.27)
DASP Selects one of the preset audio
modes. ( See p.29)
ARC Resizes an image ( See p.18)
4
To turn the Monitor set off, Press
on the
Remote control or
on the Monitor set.
Manually setting up channels
Manual Tuning lets you manually tune and arrange
the stations in whatever order you desire.
1
Press
MENU
to access the main menus.
2
Press the Navigation buttons to scroll to
CHANNEL
and press
ENTER
.
3
Press the Navigation buttons to scroll to
Manual Tuning
and press
ENTER
.
4
Press the Navigation buttons to scroll to
TV
or
CATV
.
5
Press the Navigation buttons or Number
buttons to select the desired channel number.
6
Press the Navigation buttons to scroll to
add or delete channels.
7
When you are finished, press
EXIT
.
When you return to the previous menu, press
MENU
.
16
ENGLISH
WATCHING TV
Watching TV
1
Press
on the Remote control or
on the
Monitor set to turn the Monitor set on.
2
Press
INPUT
and select
Antenna
.
3
Control the Monitor set using the following
buttons and menus while you are watching TV.
Managing channels
Automatically setting up channels
Use this to automatically find and store all available
channels.
1
Press
MENU
to access the main menus.
2
Press the Navigation buttons to scroll to
CHANNEL
and press
ENTER
.
3
Press the Navigation buttons to scroll to
Auto Tuning
and press
ENTER
.
4
Select
Yes
to start automatic tuning.
The TV scans and saves available channels
automatically.
5
When you are finished, press
EXIT
.
When you return to the previous menu, press
MENU
.
Button / Menu Description
CH(
,
)
Scrolls through the saved
channels
0 - 9 Selects a channel by entering
numbers
VOL
(
,
)
Adjusts the volume level
MUTE Mutes all sounds
APC Selects one of the preset image
modes ( See p.27)
DASP Selects one of the preset audio
modes. ( See p.29)
ARC Resizes an image ( See p.18)
4
To turn the Monitor set off, Press
on the
Remote control or
on the Monitor set.
Manually setting up channels
Manual Tuning lets you manually tune and arrange
the stations in whatever order you desire.
1
Press
MENU
to access the main menus.
2
Press the Navigation buttons to scroll to
CHANNEL
and press
ENTER
.
3
Press the Navigation buttons to scroll to
Manual Tuning
and press
ENTER
.
4
Press the Navigation buttons to scroll to
TV
or
CATV
.
5
Press the Navigation buttons or Number
buttons to select the desired channel number.
6
Press the Navigation buttons to scroll to
add or delete channels.
7
When you are finished, press
EXIT
.
When you return to the previous menu, press
MENU
.
19
ENGLISH
WATCHING TV
On-screen menu language
The installation guide menu appears on the
Monitor set screen when it is switched on for the
first time.
1
Press the Navigation buttons to scroll to
Desired Language
and press
ENTER
.
If you want to change Language
1
Press
MENU
to access the main menus.
2
Press the Navigation buttons to scroll to
OPTION
and press
ENTER
.
3
Press the Navigation buttons to scroll to
Language
and press
ENTER
.
4
Press the Navigation buttons to scroll to
Desired Language
option you want and press
ENTER
.
5
When you are finished, press
EXIT
.
When you return to the previous menu, press
MENU
.
y
If you do not finish the set-up
Installation
Guide
by pressing
EXIT
or if you time out on
the OSD (On Screen Display) the installation
menu will continuously appear until the set
up is completed whenever the Monitor set
is switched on.
NOTE
Locking the buttons on the
Monitor set
Lock the buttons on the Monitor set to prevent
any unwanted operations or accidents by children.
1
Press
MENU
to access the main menus.
2
Press the Navigation buttons to scroll to
OPTION
and press
ENTER
.
3
Press the Navigation buttons to scroll to
Key Lock
and press
ENTER
.
4
Press the Navigation buttons
to scroll to
On
and press
ENTER
to activate the Key lock
feature.
- To deactivate the Key lock feature, select
Off
.
5
When you are finished, press
EXIT
.
When you return to the previous menu, press
MENU
.
y
The Monitor set remember the last setting
after you turn the Monitor set off.
y
If you turn the monitor set off while the key
lock feature is activated and wish to turn it
back on, press the
on the monitor set.
You can also switch the device on using the
remote control by pressing the
, INPUT
,CH
or
Number
buttons.
y
If you press any button on the Monitor set
with the Key lock feature activated,
Key
Lock ON
appears on the screen.
NOTE
21
ENGLISH
ENTERTAINMENT
Browsing files
Access the
Photo
or
Music
lists and browse files.
1
Connect a
USB
storage device.
2
Press the Navigation buttons to scroll to
PHOTO LIST
or
MUSIC LIST
and press
ENTER
.
3
Select
Drive A
to access the connected USB
storage device
4
Select a folder you want.
- To return to the previous level, select
Up Folder
.
PHOTO LIST
Photo List
Photo List
Up Folder
Up Folder
Drive A
Drive A
Root
Root
Drive A
Up Folder BH 002
BH 001 BH 003
Page 2/3
Page 2/3
USB Device
USB Device
Free Space 150MB
Free Space 150MB
No Marked
No Marked
Navigation
Navigation
Option
Option
Mark
Mark
Exit
Exit
4 folder(s), 3file(s)
0 folder(s), 3file(s)
MUSIC LIST
power source.
- Please use a power adaptor for an external
power source. We do not guarantee an USB
cable for an external power source.
y
If your USB memory device has multiple
partitions or if you use a USB multi-card
reader, you can use up to 6 partitions or USB
memory devices.
y
If a USB memory device is connected to a
USB multi-card reader, its volume data may
not be detected.
y
If the USB memory device does not work
properly, disconnect and reconnect it.
y
How fast a USB memory device is detected
differs from device to device.
y
If the USB is connected in Standby Mode,
specific hard disk will automatically be
loaded when the Monitor set is turned on.
y
The recommended capacity is 32 GB or less
for USB memory.
y
Any device with more than the
recommended capacity may not work
properly.
y
USB storage devices below USB 2.0 are
supported as well.
y
When a broken file is played in the USB
storage, the Monitor set may turn off or
work abnormally.
y
If picture size is bigger than the recommended
size, the picture quality would be bad.
y
USB file/folder number has limitation, 648, at
each folder.
23
ENGLISH
ENTERTAINMENT
Listening to Music
1
Press the Navigation buttons to scroll to
USB
and press
ENTER
.
2
Press the Navigation buttons to scroll to
Music
List
and press
ENTER
.
3
Select
Drive A
to access the connected USB
storage device.
4
Press the Navigation buttons to scroll to a
folder you want and press
ENTER
.
5
Press the Navigation buttons to scroll to a file
you want and press
ENTER
.
A pop-up window will appears.
6
Play music by using the following menus.
ꔗ 1/17 ꔃ
Slideshow
BGM
Delete Option Hide
Using photo options
Use the following options while viewing photos.
Number of selected photos
Options
Option Description
Slideshow Starts or stops a slideshow with
selected photos.
If there are no selected photos, all
photos saved in the current folder
display during a slideshow.
To set a slideshow speed, select
Option
.
BGM Turns the background music on or off.
To set the background music folder,
select
Option
.
(Rotate) Rotates photos clockwise (90°, 180°,
270°, 360°).
NOTE
The supported photo size is limited.
You cannot rotate a photo if the
resolution of the rotated width is
larger than the supported resolution
size.
Delete Deletes a photo.
Option
y
Slide Speed
: Selects a slideshow
speed (
Fast
,
Medium
,
Slow
).
y
Music Album
: Selects a music folder
for the background music.
NOTE
You cannot change the music folder
while the background music is
playing.
Hide Hides the option window.
To display the options, press
ENTER
.
Menu Description
Play
,
Stop
Play
,
or
Play
Marked
Plays music, stops playback, or plays
the selected music file. If you play
music without selecting music files,
all of the music files saved in the
current folder will play.
The
icon will appear in front of the
duration on the currently playing file.
Play with
Photo
Displays photos during playback.
Mark All
or
Unmark All
Selects all files or clears all of your
selections
Delete Deletes a file saved in a USB storage
device.
Close Closes the pop-up menu.
Music List
Music
BH 001
Page 2/3
Title Duration
No Marked
Navigation
Option
Mark Exit
1 folder(s), 3 file(s)
Up Folder
Up Folder
BH 001.mp3
03:50
BH 002.mp3
03:55
BH 003.mp3
03:35
3945 KB 128 Kbps
Play
Play with Photo
Mark All
Delete
Close
USB Device
Free Space 150MB
23
ENGLISH
ENTERTAINMENT
Listening to Music
1
Press the Navigation buttons to scroll to
USB
and press
ENTER
.
2
Press the Navigation buttons to scroll to
Music
List
and press
ENTER
.
3
Select
Drive A
to access the connected USB
storage device.
4
Press the Navigation buttons to scroll to a
folder you want and press
ENTER
.
5
Press the Navigation buttons to scroll to a file
you want and press
ENTER
.
A pop-up window will appears.
6
Play music by using the following menus.
ꔗ 1/17 ꔃ
Slideshow BGM
Delete Option Hide
Using photo options
Use the following options while viewing photos.
Number of selected photos
Options
Option Description
Slideshow Starts or stops a slideshow with
selected photos.
If there are no selected photos, all
photos saved in the current folder
display during a slideshow.
To set a slideshow speed, select
Option
.
BGM Turns the background music on or off.
To set the background music folder,
select
Option
.
(Rotate) Rotates photos clockwise (90°, 180°,
270°, 360°).
NOTE
The supported photo size is limited.
You cannot rotate a photo if the
resolution of the rotated width is
larger than the supported resolution
size.
Delete Deletes a photo.
Option
y
Slide Speed
: Selects a slideshow
speed (
Fast
,
Medium
,
Slow
).
y
Music Album
: Selects a music folder
for the background music.
NOTE
You cannot change the music folder
while the background music is
playing.
Hide Hides the option window.
To display the options, press
ENTER
.
Menu Description
Play
,
Stop
Play
,
or
Play
Marked
Plays music, stops playback, or plays
the selected music file. If you play
music without selecting music files,
all of the music files saved in the
current folder will play.
The
icon will appear in front of the
duration on the currently playing file.
Play with
Photo
Displays photos during playback.
Mark All
or
Unmark All
Selects all files or clears all of your
selections
Delete Deletes a file saved in a USB storage
device.
Close Closes the pop-up menu.
Music List
Music
BH 001
Page 2/3
Title Duration
No Marked
Navigation
Option
Mark Exit
1 folder(s), 3 file(s)
Up Folder
Up Folder
BH 001.mp3
03:50
BH 002.mp3
03:55
BH 003.mp3
03:35
3945 KB 128 Kbps
Play
Play with Photo
Mark All
Delete
Close
USB Device
Free Space 150MB
24
ENGLISH
ENTERTAINMENT
Music
S003
0:27 / 3:67
y
A damaged or corrupted file will not play and
the duration of the file display as 00:00.
y
A copy-protected file will not play.
y
If the Monitor set is not in use for some
time during playback, the information box as
a screensaver will appear to prevent image
burn.
To return to the Music list screen, press
MENU or EXIT, ENTER.
NOTE
7
Control playback by using the following
buttons.
Button Description
Stops playback
/
Plays a music file and Pauses or
resumes playback
Skips to the next file
Skips to the previous file
Time elapsed / Duration
Folder name / File name
37
ENGLISH
TROUBLESHOOTING
TROUBLESHOOTING
General
The Monitor set does not operate properly
Problem Resolution
The remote control doesn’t work
y
Check to see if there is any object between the product and the remote
control causing obstruction. Ensure you are pointing the remote control
to the monitor set.
y
Ensure that the batteries are installed with correct polarity (
to , to
).
y
Ensure that the correct remote operating mode is set: TV, VCR, etc.
y
Install new batteries.
Power is suddenly turned off
y
Is the sleep timer set?
y
Check the power control settings. Power interrupted.
y
If the Monitor set is switched on and there is no input signal, it
will switch off automatically after 15 minutes to save the power
consumption.
y
When a broken file was played in the USB mode, the Monitor set
may turn off. Please check the file in your usb storage.
The video function does not work.
Problem Resolution
No picture & No sound
y
Check whether the product is turned on.
y
Try another channel. The problem may be with the broadcast.
y
Is the power cord inserted into wall power outlet?
y
Check your antenna direction and/or location.
y
Test the wall power outlet, plug another product’s power cord into
the outlet where the product’s power cord was plugged in.
Picture appears slowly after
switching on
y
This is normal, the image is muted during the product startup
process. Please contact your service center, if the picture has not
appeared after five minutes.
No color, poor color, or poor picture
y
Adjust Color in menu option.
y
Keep a sufficient distance between the product and the VCR.
y
Try another channel. The problem may be with the broadcast.
y
Are the video cables installed properly?
y
Activate any function to restore the brightness of the picture.
Horizontal / vertical bars or picture
shaking
y
Check for local interference such as an electrical appliance or power tool.
Poor reception on some channels
y
Station or cable product experiencing problems, tune to another
station.
y
Station signal is weak, reorient antenna to receive weaker station.
y
Check for sources of possible interference.
Lines or streaks in pictures
y
Check antenna (Change the direction of the antenna).
No picture when connecting HDMI
y
Check that your HDMI cable is High Speed HDMI Cable.
If the HDMI cables are not High Speed HDMI Cable, flickering or no
screen display can result. Please use the High Speed HDMI Cable.
6
ENGLISH
ASSEMBLING AND PREPARING
Mounting on a table
1
Lift and tilt the Monitor set into its upright
position on a table.
Leave a 10 cm (minimum) space from the wall
for proper ventilation.
3
Remove 2 screws and pull out the
Stand Body
from the Monitor set.
2
Connect the
Power Cord
to a wall outlet.
10 cm
10 cm
10 cm
10 cm
Using the Kensington security system
The Kensington security system connector is
located at the back of the Monitor set. For more
information of installation and using, refer to the
manual supplied with the Kensington security
system or visit
http://www.kensington.com
.
Connect the Kensington security system cable
between the Monitor set and a table.
The Kensington security system is optional.
You can obtain additional accessories from
most electronics stores.
y
It's a head fixed model
and prohibited from
adjusting the angle.
y
If you try to adjust the
angle forcibly, It can be
damaged.
NOTE
WARNING
3
ENGLISH
ASSEMBLING AND PREPARING
ASSEMBLING AND PREPARING
Unpacking
Check your product box for the following items. If there are any missing accessories, contact the local
dealer where you purchased your product. The illustrations in this manual may differ from the actual
product and accessories.
y
Do not use any pirated items to ensure the safety and product life span.
y
Any damages or injuries by using pirated items are not covered by the warranty.
y
The accessories supplied with your product may vary depending on the model.
y
Product specifications or contents in this manual may be changed without prior notice due to
upgrade of product functions.
CAUTION
NOTE
Remote control and Batteries
Stand base
Power Cord
CD(Owner's Manual) / Card
RGB Cable
na TV ou controle remoto para
ligar.
A luz indicadora de energia acenderá.
y Quando a TV está no modo de economia de
energia, a luz de standby ca na cor vermelha.
Nota
Getting Started 9
Getting Started
1
y
Depending on the conditions of the
recording equipment or the CD-R/RW (or
DVD±R/RW) disc itself, some CD-R/RW (or
DVD±R/RW) discs cannot be played on the
unit.
y
Depending on the recording software & the
nalization, some recorded discs (CD-R/RW,
DVD±R/RW, BD-R/RE) may not be playable.
y
BD-R/RE, DVD±R/RW and CD-R/RW discs
recorded using a personal computer or a
DVD or CD Recorder may not play if the
disc is damaged or dirty, or if there is dirt or
condensation on the player’s lens.
y
If you record a disc using a personal
computer, even if it is recorded in a
compatible format, there are cases in which
it may not play because of the settings of
the application software used to create the
disc. (Check with the software publisher for
more detailed information.)
y
This player requires discs and recordings to
meet certain technical standards in order to
achieve optimal playback quality.
y
Pre-recorded DVDs are automatically set to
these standards. There are many dierent
types of recordable disc formats (including
CD-R containing MP3 or WMA les) and
these require certain pre-existing conditions
to ensure compatible playback.
y
Customers should note that permission
is required in order to download MP3 /
WMA les and music from the Internet.
Our company has no right to grant such
permission. Permission should always be
sought from the copyright owner.
y
You have to set the disc format option
to [Mastered] in order to make the discs
compatible with the LG players when
formatting rewritable discs. When setting
the option to Live System, you cannot use
it on LG player. (Mastered/Live File System :
Disc format system for windows Vista)
,
Note
About the “
7
” Symbol Display
“
7
” may appear on your TV display during
operation and indicates that the function explained
in this owner’s manual is not available on that
specic media.
3. A tela inicial de ajuste aparecerá se você acessar
a TV pela primeira vez.
y Se você não operar a TV durante 40 segundos,
o menu de conguração irá desaparecer.
Nota
Getting Started 9
Getting Started
1
y
Depending on the conditions of the
recording equipment or the CD-R/RW (or
DVD±R/RW) disc itself, some CD-R/RW (or
DVD±R/RW) discs cannot be played on the
unit.
y
Depending on the recording software & the
nalization, some recorded discs (CD-R/RW,
DVD±R/RW, BD-R/RE) may not be playable.
y
BD-R/RE, DVD±R/RW and CD-R/RW discs
recorded using a personal computer or a
DVD or CD Recorder may not play if the
disc is damaged or dirty, or if there is dirt or
condensation on the player’s lens.
y
If you record a disc using a personal
computer, even if it is recorded in a
compatible format, there are cases in which
it may not play because of the settings of
the application software used to create the
disc. (Check with the software publisher for
more detailed information.)
y
This player requires discs and recordings to
meet certain technical standards in order to
achieve optimal playback quality.
y
Pre-recorded DVDs are automatically set to
these standards. There are many dierent
types of recordable disc formats (including
CD-R containing MP3 or WMA les) and
these require certain pre-existing conditions
to ensure compatible playback.
y
Customers should note that permission
is required in order to download MP3 /
WMA les and music from the Internet.
Our company has no right to grant such
permission. Permission should always be
sought from the copyright owner.
y
You have to set the disc format option
to [Mastered] in order to make the discs
compatible with the LG players when
formatting rewritable discs. When setting
the option to Live System, you cannot use
it on LG player. (Mastered/Live File System :
Disc format system for windows Vista)
,
Note
About the “
7
” Symbol Display
“
7
” may appear on your TV display during
operation and indicates that the function explained
in this owner’s manual is not available on that
specic media.
4. Siga as instruções na tela para customizar sua TV
de acordo com suas preferências.
Seleciona um idioma
para os menus de tela.
Selecione Casa para
o ambiente doméstico.
Selecione Ligado ou
Desligado para a luz do
indicador de energia.
Caso selecione o modo
Ligado, a TV acende
a luz de standby no
painel frontal quando
a TV estiver desligada.
Seleciona o fuso horário
e o horário de verão.
Mostra como usar o
Guia de Usuário e FAQ.
Procura e salva os
canais disponíveis
automaticamente.
Guia do Usuário e FAQ
y Para aqueles países que não conrmaram os
padrões de radiodifusão de TV digital, algumas
características DTV podem não funcionar, de-
pendendo do ambiente de radiodifusão de TV
Digital.
y Para exibir a imagem na melhor qualidade em
sua casa, selecione o Modo Casa.
y O Modo Demonstração de Loja é apropriado
para ambiente de loja.
y Se você seleciona o modo Demonstração de
Loja, a conguração anteriormente customizada
irá mudar para o ajuste padrão da Demonstra-
ção de Loja em 5 minutos.
Nota
Getting Started 9
Getting Started
1
y
Depending on the conditions of the
recording equipment or the CD-R/RW (or
DVD±R/RW) disc itself, some CD-R/RW (or
DVD±R/RW) discs cannot be played on the
unit.
y
Depending on the recording software & the
nalization, some recorded discs (CD-R/RW,
DVD±R/RW, BD-R/RE) may not be playable.
y
BD-R/RE, DVD±R/RW and CD-R/RW discs
recorded using a personal computer or a
DVD or CD Recorder may not play if the
disc is damaged or dirty, or if there is dirt or
condensation on the player’s lens.
y
If you record a disc using a personal
computer, even if it is recorded in a
compatible format, there are cases in which
it may not play because of the settings of
the application software used to create the
disc. (Check with the software publisher for
more detailed information.)
y
This player requires discs and recordings to
meet certain technical standards in order to
achieve optimal playback quality.
y
Pre-recorded DVDs are automatically set to
these standards. There are many dierent
types of recordable disc formats (including
CD-R containing MP3 or WMA les) and
these require certain pre-existing conditions
to ensure compatible playback.
y
Customers should note that permission
is required in order to download MP3 /
WMA les and music from the Internet.
Our company has no right to grant such
permission. Permission should always be
sought from the copyright owner.
y
You have to set the disc format option
to [Mastered] in order to make the discs
compatible with the LG players when
formatting rewritable discs. When setting
the option to Live System, you cannot use
it on LG player. (Mastered/Live File System :
Disc format system for windows Vista)
,
Note
About the “
7
” Symbol Display
“
7
” may appear on your TV display during
operation and indicates that the function explained
in this owner’s manual is not available on that
specic media.
5. Quando o ajuste básico estiver completo, pressio-
ne OK.
y Se você não completar a conguração inicial,
ele aparecerá sempre que você acessar a TV.
Nota
Getting Started 9
Getting Started
1
y
Depending on the conditions of the
recording equipment or the CD-R/RW (or
DVD±R/RW) disc itself, some CD-R/RW (or
DVD±R/RW) discs cannot be played on the
unit.
y
Depending on the recording software & the
nalization, some recorded discs (CD-R/RW,
DVD±R/RW, BD-R/RE) may not be playable.
y
BD-R/RE, DVD±R/RW and CD-R/RW discs
recorded using a personal computer or a
DVD or CD Recorder may not play if the
disc is damaged or dirty, or if there is dirt or
condensation on the player’s lens.
y
If you record a disc using a personal
computer, even if it is recorded in a
compatible format, there are cases in which
it may not play because of the settings of
the application software used to create the
disc. (Check with the software publisher for
more detailed information.)
y
This player requires discs and recordings to
meet certain technical standards in order to
achieve optimal playback quality.
y
Pre-recorded DVDs are automatically set to
these standards. There are many dierent
types of recordable disc formats (including
CD-R containing MP3 or WMA les) and
these require certain pre-existing conditions
to ensure compatible playback.
y
Customers should note that permission
is required in order to download MP3 /
WMA les and music from the Internet.
Our company has no right to grant such
permission. Permission should always be
sought from the copyright owner.
y
You have to set the disc format option
to [Mastered] in order to make the discs
compatible with the LG players when
formatting rewritable discs. When setting
the option to Live System, you cannot use
it on LG player. (Mastered/Live File System :
Disc format system for windows Vista)
,
Note
About the “
7
” Symbol Display
“
7
” may appear on your TV display during
operation and indicates that the function explained
in this owner’s manual is not available on that
specic media.
6. Desligue o aparelho, pressionando
8
ENGLISH
REMOTE CONTROL
REMOTE CONTROL
The descriptions in this manual are based on the buttons of the remote control.
Please read this manual carefully and use the Monitor set correctly.
To replace batteries, open the battery cover, replace batteries (1.5 V AAA) matching
and ends to the label inside the compartment, and close the battery cover.
To remove the batteries, perform the installation actions in reverse.
Make sure to point the remote control to the remote control sensor on the Monitor set.
CAUTION
Do not mix old and new batteries, as this may
damage the remote control.
INPUT
POWER
TV/PC
MTSFCR
MUTE REVIEW
MENU EXIT SLEEP
USB VOL
-
USB VOL +
ENTER
MEMORY/ERASE CAPTION
123
456
789
0
(POWER)
Turns the Monitor set on or
off.
MTS
Press repeatedly to select
Mono, Stereo, SAP sound
tone. But Stereo, SAP mode
are available only if included
on the broadcast signal.
TV/PC
Selects TV or PC mode.
FCR
Favorite channel button.
MUTE
Switches the sound on or
off.
INPUT
( See p.18)
Selects the input mode.
Number buttons
Enters numbers.
CAPTION
On <-> Off
USB Menu control buttons
USB menu(Music List).
MEMORY/ERASE
User can do manual channel
selection and store or erase
individual channels.
REVIEW
Turn to the last channel
viewed.
INPUT
POWER
TV/PC
MTSFCR
MUTE REVIEW
MENU EXIT SLEEP
USB VOL
-
USB VOL +
ENTER
CH
CH
VOL VOL
MEMORY/ERASECAPTION
123
456
789
0
ARCDASP
ARC/MARK
16
ENGLISH
WATCHING TV
Watching TV
1
Press
on the Remote control or
on the
Monitor set to turn the Monitor set on.
2
Press
INPUT
and select
Antenna
.
3
Control the Monitor set using the following
buttons and menus while you are watching TV.
Managing channels
Automatically setting up channels
Use this to automatically find and store all available
channels.
1
Press
MENU
to access the main menus.
2
Press the Navigation buttons to scroll to
CHANNEL
and press
ENTER
.
3
Press the Navigation buttons to scroll to
Auto Tuning
and press
ENTER
.
4
Select
Yes
to start automatic tuning.
The TV scans and saves available channels
automatically.
5
When you are finished, press
EXIT
.
When you return to the previous menu, press
MENU
.
Button / Menu Description
CH(
,
)
Scrolls through the saved
channels
0 - 9 Selects a channel by entering
numbers
VOL
(
,
)
Adjusts the volume level
MUTE Mutes all sounds
APC Selects one of the preset image
modes ( See p.27)
DASP Selects one of the preset audio
modes. ( See p.29)
ARC Resizes an image ( See p.18)
4
To turn the Monitor set off, Press
on the
Remote control or
on the Monitor set.
Manually setting up channels
Manual Tuning lets you manually tune and arrange
the stations in whatever order you desire.
1
Press
MENU
to access the main menus.
2
Press the Navigation buttons to scroll to
CHANNEL
and press
ENTER
.
3
Press the Navigation buttons to scroll to
Manual Tuning
and press
ENTER
.
4
Press the Navigation buttons to scroll to
TV
or
CATV
.
5
Press the Navigation buttons or Number
buttons to select the desired channel number.
6
Press the Navigation buttons to scroll to
add or delete channels.
7
When you are finished, press
EXIT
.
When you return to the previous menu, press
MENU
.
19
ENGLISH
WATCHING TV
On-screen menu language
The installation guide menu appears on the
Monitor set screen when it is switched on for the
first time.
1
Press the Navigation buttons to scroll to
Desired Language
and press
ENTER
.
If you want to change Language
1
Press
MENU
to access the main menus.
2
Press the Navigation buttons to scroll to
OPTION
and press
ENTER
.
3
Press the Navigation buttons to scroll to
Language
and press
ENTER
.
4
Press the Navigation buttons to scroll to
Desired Language
option you want and press
ENTER
.
5
When you are finished, press
EXIT
.
When you return to the previous menu, press
MENU
.
y
If you do not finish the set-up
Installation
Guide
by pressing
EXIT
or if you time out on
the OSD (On Screen Display) the installation
menu will continuously appear until the set
up is completed whenever the Monitor set
is switched on.
NOTE
Locking the buttons on the
Monitor set
Lock the buttons on the Monitor set to prevent
any unwanted operations or accidents by children.
1
Press
MENU
to access the main menus.
2
Press the Navigation buttons to scroll to
OPTION
and press
ENTER
.
3
Press the Navigation buttons to scroll to
Key Lock
and press
ENTER
.
4
Press the Navigation buttons
to scroll to
On
and press
ENTER
to activate the Key lock
feature.
- To deactivate the Key lock feature, select
Off
.
5
When you are finished, press
EXIT
.
When you return to the previous menu, press
MENU
.
y
The Monitor set remember the last setting
after you turn the Monitor set off.
y
If you turn the monitor set off while the key
lock feature is activated and wish to turn it
back on, press the
on the monitor set.
You can also switch the device on using the
remote control by pressing the
, INPUT
,CH
or
Number
buttons.
y
If you press any button on the Monitor set
with the Key lock feature activated,
Key
Lock ON
appears on the screen.
NOTE
21
ENGLISH
ENTERTAINMENT
Browsing files
Access the
Photo
or
Music
lists and browse files.
1
Connect a
USB
storage device.
2
Press the Navigation buttons to scroll to
PHOTO LIST
or
MUSIC LIST
and press
ENTER
.
3
Select
Drive A
to access the connected USB
storage device
4
Select a folder you want.
- To return to the previous level, select
Up Folder
.
PHOTO LIST
Photo List
Photo List
Up Folder
Up Folder
Drive A
Drive A
Root
Root
Drive A
Up Folder BH 002
BH 001 BH 003
Page 2/3
Page 2/3
USB Device
USB Device
Free Space 150MB
Free Space 150MB
No Marked
No Marked
Navigation
Navigation
Option
Option
Mark
Mark
Exit
Exit
4 folder(s), 3file(s)
0 folder(s), 3file(s)
MUSIC LIST
power source.
- Please use a power adaptor for an external
power source. We do not guarantee an USB
cable for an external power source.
y
If your USB memory device has multiple
partitions or if you use a USB multi-card
reader, you can use up to 6 partitions or USB
memory devices.
y
If a USB memory device is connected to a
USB multi-card reader, its volume data may
not be detected.
y
If the USB memory device does not work
properly, disconnect and reconnect it.
y
How fast a USB memory device is detected
differs from device to device.
y
If the USB is connected in Standby Mode,
specific hard disk will automatically be
loaded when the Monitor set is turned on.
y
The recommended capacity is 32 GB or less
for USB memory.
y
Any device with more than the
recommended capacity may not work
properly.
y
USB storage devices below USB 2.0 are
supported as well.
y
When a broken file is played in the USB
storage, the Monitor set may turn off or
work abnormally.
y
If picture size is bigger than the recommended
size, the picture quality would be bad.
y
USB file/folder number has limitation, 648, at
each folder.
23
ENGLISH
ENTERTAINMENT
Listening to Music
1
Press the Navigation buttons to scroll to
USB
and press
ENTER
.
2
Press the Navigation buttons to scroll to
Music
List
and press
ENTER
.
3
Select
Drive A
to access the connected USB
storage device.
4
Press the Navigation buttons to scroll to a
folder you want and press
ENTER
.
5
Press the Navigation buttons to scroll to a file
you want and press
ENTER
.
A pop-up window will appears.
6
Play music by using the following menus.
ꔗ 1/17 ꔃ
Slideshow
BGM
Delete Option Hide
Using photo options
Use the following options while viewing photos.
Number of selected photos
Options
Option Description
Slideshow Starts or stops a slideshow with
selected photos.
If there are no selected photos, all
photos saved in the current folder
display during a slideshow.
To set a slideshow speed, select
Option
.
BGM Turns the background music on or off.
To set the background music folder,
select
Option
.
(Rotate) Rotates photos clockwise (90°, 180°,
270°, 360°).
NOTE
The supported photo size is limited.
You cannot rotate a photo if the
resolution of the rotated width is
larger than the supported resolution
size.
Delete Deletes a photo.
Option
y
Slide Speed
: Selects a slideshow
speed (
Fast
,
Medium
,
Slow
).
y
Music Album
: Selects a music folder
for the background music.
NOTE
You cannot change the music folder
while the background music is
playing.
Hide Hides the option window.
To display the options, press
ENTER
.
Menu Description
Play
,
Stop
Play
,
or
Play
Marked
Plays music, stops playback, or plays
the selected music file. If you play
music without selecting music files,
all of the music files saved in the
current folder will play.
The
icon will appear in front of the
duration on the currently playing file.
Play with
Photo
Displays photos during playback.
Mark All
or
Unmark All
Selects all files or clears all of your
selections
Delete Deletes a file saved in a USB storage
device.
Close Closes the pop-up menu.
Music List
Music
BH 001
Page 2/3
Title Duration
No Marked
Navigation
Option
Mark Exit
1 folder(s), 3 file(s)
Up Folder
Up Folder
BH 001.mp3
03:50
BH 002.mp3
03:55
BH 003.mp3
03:35
3945 KB 128 Kbps
Play
Play with Photo
Mark All
Delete
Close
USB Device
Free Space 150MB
23
ENGLISH
ENTERTAINMENT
Listening to Music
1
Press the Navigation buttons to scroll to
USB
and press
ENTER
.
2
Press the Navigation buttons to scroll to
Music
List
and press
ENTER
.
3
Select
Drive A
to access the connected USB
storage device.
4
Press the Navigation buttons to scroll to a
folder you want and press
ENTER
.
5
Press the Navigation buttons to scroll to a file
you want and press
ENTER
.
A pop-up window will appears.
6
Play music by using the following menus.
ꔗ 1/17 ꔃ
Slideshow
BGM
Delete Option Hide
Using photo options
Use the following options while viewing photos.
Number of selected photos
Options
Option Description
Slideshow Starts or stops a slideshow with
selected photos.
If there are no selected photos, all
photos saved in the current folder
display during a slideshow.
To set a slideshow speed, select
Option
.
BGM Turns the background music on or off.
To set the background music folder,
select
Option
.
(Rotate) Rotates photos clockwise (90°, 180°,
270°, 360°).
NOTE
The supported photo size is limited.
You cannot rotate a photo if the
resolution of the rotated width is
larger than the supported resolution
size.
Delete Deletes a photo.
Option
y
Slide Speed
: Selects a slideshow
speed (
Fast
,
Medium
,
Slow
).
y
Music Album
: Selects a music folder
for the background music.
NOTE
You cannot change the music folder
while the background music is
playing.
Hide Hides the option window.
To display the options, press
ENTER
.
Menu Description
Play
,
Stop
Play
,
or
Play
Marked
Plays music, stops playback, or plays
the selected music file. If you play
music without selecting music files,
all of the music files saved in the
current folder will play.
The
icon will appear in front of the
duration on the currently playing file.
Play with
Photo
Displays photos during playback.
Mark All
or
Unmark All
Selects all files or clears all of your
selections
Delete Deletes a file saved in a USB storage
device.
Close Closes the pop-up menu.
Music List
Music
BH 001
Page 2/3
Title Duration
No Marked
Navigation
Option
Mark Exit
1 folder(s), 3 file(s)
Up Folder
Up Folder
BH 001.mp3
03:50
BH 002.mp3
03:55
BH 003.mp3
03:35
3945 KB 128 Kbps
Play
Play with Photo
Mark All
Delete
Close
USB Device
Free Space 150MB
24
ENGLISH
ENTERTAINMENT
Music
S003
0:27 / 3:67
y
A damaged or corrupted file will not play and
the duration of the file display as 00:00.
y
A copy-protected file will not play.
y
If the Monitor set is not in use for some
time during playback, the information box as
a screensaver will appear to prevent image
burn.
To return to the Music list screen, press
MENU or EXIT, ENTER.
NOTE
7
Control playback by using the following
buttons.
Button Description
Stops playback
/
Plays a music file and Pauses or
resumes playback
Skips to the next file
Skips to the previous file
Time elapsed / Duration
Folder name / File name
37
ENGLISH
TROUBLESHOOTING
TROUBLESHOOTING
General
The Monitor set does not operate properly
Problem Resolution
The remote control doesn’t work
y
Check to see if there is any object between the product and the remote
control causing obstruction. Ensure you are pointing the remote control
to the monitor set.
y
Ensure that the batteries are installed with correct polarity (
to , to
).
y
Ensure that the correct remote operating mode is set: TV, VCR, etc.
y
Install new batteries.
Power is suddenly turned off
y
Is the sleep timer set?
y
Check the power control settings. Power interrupted.
y
If the Monitor set is switched on and there is no input signal, it
will switch off automatically after 15 minutes to save the power
consumption.
y
When a broken file was played in the USB mode, the Monitor set
may turn off. Please check the file in your usb storage.
The video function does not work.
Problem Resolution
No picture & No sound
y
Check whether the product is turned on.
y
Try another channel. The problem may be with the broadcast.
y
Is the power cord inserted into wall power outlet?
y
Check your antenna direction and/or location.
y
Test the wall power outlet, plug another product’s power cord into
the outlet where the product’s power cord was plugged in.
Picture appears slowly after
switching on
y
This is normal, the image is muted during the product startup
process. Please contact your service center, if the picture has not
appeared after five minutes.
No color, poor color, or poor picture
y
Adjust Color in menu option.
y
Keep a sufficient distance between the product and the VCR.
y
Try another channel. The problem may be with the broadcast.
y
Are the video cables installed properly?
y
Activate any function to restore the brightness of the picture.
Horizontal / vertical bars or picture
shaking
y
Check for local interference such as an electrical appliance or power tool.
Poor reception on some channels
y
Station or cable product experiencing problems, tune to another
station.
y
Station signal is weak, reorient antenna to receive weaker station.
y
Check for sources of possible interference.
Lines or streaks in pictures
y
Check antenna (Change the direction of the antenna).
No picture when connecting HDMI
y
Check that your HDMI cable is High Speed HDMI Cable.
If the HDMI cables are not High Speed HDMI Cable, flickering or no
screen display can result. Please use the High Speed HDMI Cable.
6
ENGLISH
ASSEMBLING AND PREPARING
Mounting on a table
1
Lift and tilt the Monitor set into its upright
position on a table.
Leave a 10 cm (minimum) space from the wall
for proper ventilation.
3
Remove 2 screws and pull out the
Stand Body
from the Monitor set.
2
Connect the
Power Cord
to a wall outlet.
10 cm
10 cm
10 cm
10 cm
Using the Kensington security system
The Kensington security system connector is
located at the back of the Monitor set. For more
information of installation and using, refer to the
manual supplied with the Kensington security
system or visit
http://www.kensington.com
.
Connect the Kensington security system cable
between the Monitor set and a table.
The Kensington security system is optional.
You can obtain additional accessories from
most electronics stores.
y
It's a head fixed model
and prohibited from
adjusting the angle.
y
If you try to adjust the
angle forcibly, It can be
damaged.
NOTE
WARNING
3
ENGLISH
ASSEMBLING AND PREPARING
ASSEMBLING AND PREPARING
Unpacking
Check your product box for the following items. If there are any missing accessories, contact the local
dealer where you purchased your product. The illustrations in this manual may differ from the actual
product and accessories.
y
Do not use any pirated items to ensure the safety and product life span.
y
Any damages or injuries by using pirated items are not covered by the warranty.
y
The accessories supplied with your product may vary depending on the model.
y
Product specifications or contents in this manual may be changed without prior notice due to
upgrade of product functions.
CAUTION
NOTE
Remote control and Batteries
Stand base
Power Cord
CD(Owner's Manual) / Card
RGB Cable
(POWER)
na TV ou controle remoto
.
O indicador de energia irá desligar.
y Desconecte o cabo de força da tomada quando
você não usar a TV por um longo período de
tempo.
Cuidado
Operating30
Operating
4
Playing Blu-ray 3D disc
e
This player can play the Blu-ray 3D discs which
contains separate views for the left and right eyes.
Preparation
In order to playback Blu-ray 3D title in
stereoscopic 3D mode, you need to:
y
Check your TV is 3D capable and has HDMI
1.4 input(s).
y
Wear 3D glasses to enjoy the 3D experience
if it is necessary.
y
Check whether the BD-ROM title is the Blu-
ray 3D disc or not.
y
Connect an HDMI cable (Type A, High
Speed HDMI
TM
Cable) between the player’s
HDMI output and TV’s HDMI input.
1. Press HOME (
n
), and set the [3D Mode] option
on the [Setup] menu to [On] ( page 24).
2. Press
B
(OPEN/CLOSE), and place a disc on the
disc tray.
3. Press
B
(OPEN/CLOSE) to close the disc tray.
The playback starts automatically.
4. Refer to the owner’s manual of your 3D-ready
TV for the further instruction.
You may need to adjust the display settings and
focus on your TV’s setting for the improved 3D
eect.
y
Watching a 3D content for a long period
time may cause dizziness or tiredness.
y
It is not recommended to watch a movie
in 3D mode for inrm, child and pregnant
woman.
y
If you are experiencing headache, tiredness
or dizziness while viewing contents in 3D,
it is strongly recommended to stop the
playback and rest until you feel normal.
>
Caution
Enjoying BD-Live
TM
e
BD-Video supporting BD-Live (BD-ROM version 2
Prole 2) that has a network extension function
allows you to enjoy more functions such as
downloading new movie trailers by connecting this
unit to the internet.
1. Check the network connection and settings
(page 19).
2. Insert a USB storage device to the USB port on
the front panel.
A USB storage device is needed to download
bonus content.
3. Press HOME (
n
), and set the [BD-LIVE
connection] option on the [Setup] menu (page
30).
Depending on a disc, the BD-Live function may
not be operated if [BD-LIVE connection] option
is set to [Partially Permitted].
4. Insert a BD-ROM with BD-Live.
The operations are dier depending on the disc.
Refer to the manual supplied with the disc.
Do not extract the connected USB device
while content is being downloaded or a Blu-
ray disc is still in the disc tray. Doing so may
damage the connected USB device and BD-
Live features may not operate properly with
the damaged USB device anymore. If the
connected USB device seems damaged from
such an action, you can format the connected
USB device from the PC and reuse it with this
player.
>
Caution
y
Some BD-Live contents may be restrictively
accessed in some territories by contents
provider’s own decision.
y
It may take up to several minutes to load
and start enjoying BD-Live contents.
,
Note
y Você pode alterar o ajuste do aparelho do modo PC
para TV, pressionando TV/PC (controle remoto).
y Você pode ir até Conguração Inicial acessan-
do o item OPÇÕES nos menus principais.
Nota
Getting Started 9
Getting Started
1
y
Depending on the conditions of the
recording equipment or the CD-R/RW (or
DVD±R/RW) disc itself, some CD-R/RW (or
DVD±R/RW) discs cannot be played on the
unit.
y
Depending on the recording software & the
nalization, some recorded discs (CD-R/RW,
DVD±R/RW, BD-R/RE) may not be playable.
y
BD-R/RE, DVD±R/RW and CD-R/RW discs
recorded using a personal computer or a
DVD or CD Recorder may not play if the
disc is damaged or dirty, or if there is dirt or
condensation on the player’s lens.
y
If you record a disc using a personal
computer, even if it is recorded in a
compatible format, there are cases in which
it may not play because of the settings of
the application software used to create the
disc. (Check with the software publisher for
more detailed information.)
y
This player requires discs and recordings to
meet certain technical standards in order to
achieve optimal playback quality.
y
Pre-recorded DVDs are automatically set to
these standards. There are many dierent
types of recordable disc formats (including
CD-R containing MP3 or WMA les) and
these require certain pre-existing conditions
to ensure compatible playback.
y
Customers should note that permission
is required in order to download MP3 /
WMA les and music from the Internet.
Our company has no right to grant such
permission. Permission should always be
sought from the copyright owner.
y
You have to set the disc format option
to [Mastered] in order to make the discs
compatible with the LG players when
formatting rewritable discs. When setting
the option to Live System, you cannot use
it on LG player. (Mastered/Live File System :
Disc format system for windows Vista)
,
Note
About the “
7
” Symbol Display
“
7
” may appear on your TV display during
operation and indicates that the function explained
in this owner’s manual is not available on that
specic media.


