Page is loading ...

Page 1 1000005818 (Rev. A - 06/20)
1000005817
INSTALLATION MANUAL
To insure you install this Kit easily and correctly, PLEASE READ THESE
SIMPLE INSTRUCTIONS BEFORE STARTING THE INSTALLATION. CHECK
YOUR INSTALLATION FOR COMPLIANCE WITH PLUMBING, ELECTRICAL, AND
OTHER APPLICABLE CODES.
IMPORTANT
THIS IS AN INDOOR APPLICATION ONLY.
ALL SERVICE TO BE PERFORMED BY AN
AUTHORIZED SERVICE PERSON.
IMPORTANT! INSTALLER PLEASE NOTE.
THE GROUNDING OF ELECTRICAL EQUIPMENT SUCH AS TELEPHONE, COMPUTERS, ETC. TO WATER LINES
IS A COMMON PROCEDURE. THIS GROUNDING MAY BE IN THE BUILDING OR MAY OCCUR AWAY FROM
THE BUILDING. THIS GROUNDING CAN CAUSE ELECTRICAL FEEDBACK INTO A FOUNTAIN, CREATING AN
ELECTROLYSIS WHICH CAUSES A METALLIC TASTE OR AN INCREASE IN THE METAL CONTENT OF THE
WATER. THIS CONDITION IS AVOIDABLE BY USING THE PROPER MATERIALS AS INDICATED. ANY DRAIN
FITTINGS PROVIDED BY THE INSTALLER SHOULD BE MADE OF PLASTIC TO ELECTRICALLY ISOLATE THE
FOUNTAIN FROM THE BUILDING PLUMBING SYSTEM. WE SUGGEST THAT THE BOTTLE FILLING STATION
AND WATER COOLER BE PROTECTED BY A GROUND FAULT CIRCUIT INTERRUPTER (GFCI).
INSTALLER
TOOLS REQUIRED
BUT NOT PROVIDED:
GLOVES
SAFETY GLASSES
NEEDLE NOSE AND REGULAR PLIERS
¼ AND 5/16 NUT DRIVERS
FLAT HEAD SCREWDRIVER
T-20 TORX BIT OR 7/64 ALLEN WRENCH
BLACK MARKER
BUCKET
MULTI-METER
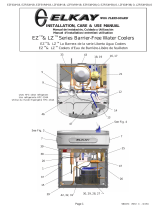
RETROFIT KIT EZS TO EZO

Page 2
1000005817
1000005818 (Rev. A - 06/20)
WATER COOLER PREPARATION
● Remove Lower wrapper on the cooler by removing the (4) screws using a 5/16 nut driver
● Shut o water to the cooler
● Remove water pressure by pressing on any of the cooler push bars until no water comes out of the bubbler
● Unplug the water cooler
● Remove the P-trap from the cooler drain
1. Remove the (4) screws – 2 per side on the upper shroud using the Torx bit or Allen
Wrench. (See Fig. 1) Note: The kit is for refrigerated units only.
2. Take a black marker and mark the water line where it enters the base of the evaporator.
This will ensure the water line is reinserted fully later. Fig. 2 & 3
Fig. 1
Fig. 4
Fig. 2 Fig. 3
3. Remove the water line from the evaporator. Have a bucket ready to catch water
coming from the evaporator.
4. Lift the basin shroud assembly, tilting forward towards the front of the water cooler and
unplug the two switch wires. One on the solenoid and one on the cold control. Once
both wires are free lift the assembly completely o.
5. Turn the basin/shroud assembly over on a table so that it is sitting on the basin.
6. Locate the serial number on the data label and write it down in permanent marker on
the blank label on the bottom of the new shroud.
7. Loosen the clamp on the drain and remove it and the plastic drain.
8. Remove the basin from the shroud by removing the four screws with the Torx bit or
Allen Wrench. Note: If your shroud has a regulator installed it will need to be
removed too.
9. Place the new shroud on the basin and attach it using the screws removed.
Note: If a regulator was removed from the old shroud it will need to be inserted
in the new shroud.
10. Insert the clamp and plastic drain into the rubber drain boot and tighten.
11. Using a Flat head screwdriver remove the plastic cap covering the electricals on the
compressor. Fig. 4

Page 3 1000005818 (Rev. A - 06/20)
1000005817
12. Remove the white wire from the compressor relay and the black wire from the overload. Leave the fan wires connected. Fig 5 & 6
13. Remove the power cord ground connection on the frame using the ¼ nut driver. Keep this
screw it will be needed to connect the ground wire on the new power cord. Fig. 7
Fig. 7
Fig. 5 Fig. 6

Page 4
1000005817
1000005818 (Rev. A - 06/20)
16. Measure 23 inches from the plug end of the power cord and place the strain relief on
the cord at that point. Fig. 9
17. Squeeze the strain relief and place in the slot in the bracket that the old power cord
was removed. Push up until it locks into place. Fig. 10
Fig. 10
Fig. 9
14. Using pliers, squeeze the strain relief on the power cord and pull down to remove the cord
from the bracket. Fig 8
15. Remove all remaining wires from the solenoid and cold control and discard.
Fig. 8

Page 5 1000005818 (Rev. A - 06/20)
1000005817
19. Connect both female connections on the power cord to both open terminals on the cold
control. It does not matter which connector goes on which terminal. If the connections
do not reach, spread the wire apart more to gain length. Fig. 12
18. Put the ground screw in the ring terminal on the green ground wire on the power cord.
Tighten the screw back into the frame where the old ground wire was connected.
Tighten the screw so that the terminal will not turn. To make sure that the grounding
connection is secure, use a multi-meter and check for continuity. Place one probe on
the round connector on the plug and the other probe on the frame. Fig. 11
20. Follow the wires on the power cord that will connect to the compressor. The side of
the power cord connected to the cold control will need to be connected to the overload
connection on the compressor and the side of the cord coming from the connector
block on the cord will connect to the relay on the compressor. Fig. 13
Fig. 13
Fig. 11
Fig. 12

Page 6
1000005817
1000005818 (Rev. A - 06/20)
22. Connect the black wire from the kit. The female connector is connection on the wire is connected to the piggyback terminal on the cold control and
the other end is connected to either one of the empty terminals on the solenoid. Fig. 15 & 16
NOTE: Some models have a dierent solenoid and location, however the wiring process remains the same.
23. Place the basin shroud assembly back on to the cooler frame and connect the sensor
wires. Connect the black wire to the piggyback terminal on the solenoid, the red wire
on the open terminal on the solenoid and the white wire to the white wire on the power
cord. Fig. 17
Fig. 17
21. Replace the cover over the compressor electricals. Place the slot on the cap on the lower arm on the compressor, slide all the wire into the large
slot in the cap. Rotate the cap upwards and push until it snaps into place. Fig. 14a, 14b & 14c
Fig. 14a Fig. 14b Fig. 14c
Fig. 15 Fig. 16

Page 7 1000005818 (Rev. A - 06/20)
1000005817
FOR PARTS, CONTACT YOUR LOCAL DISTRIBUTOR OR CALL 1.800.834.4816
REPAIR SERVICE INFORMATION TOLL FREE NUMBER 1.800.260.6640
PRINTED IN U.S.A.
ELKAY MANUFACTURING COMPANY • 1333 BUTTERFIELD ROAD SUITE 200 DOWNERS GROVE, IL 60515 • 630.574.8484 • www.elkay.com
● Push the water line down so it can be connected to the evaporator. Push the water line into the tting on the evaporator until it is up to the line that
was drawn on the water line earlier.
● Spin the fan blade to ensure it spins freely and there are not any wires or that the water line is not in it.
● Place the (4) screws back in to hold the basin/shroud assembly to the frame.
● Reconnect the P-trap.
● Remove the plastic covering the sensor bar.
● Turn on the water and plug the cooler back in. Place a cup over the bubbler and activate the sensor. Run water until all air is removed from the
system and there is a steady stream of water coming from the bubbler.
● Check for any water leaks and x as needed.
● Place the lower wrapper on the cooler and tighten the (4) screws.
/