Page is loading ...

1007260-2-B
ACRYLIC
BATHS
INSTALLATION
GUIDE
Español, Página 19
Français, Page 9
K-1132, K-1145, K-1169, K-1193,
K-1195, K-1197, K-1199, K-1207,
K-1219, K-1222, K-1229, K-1242,
K-1245, K-1247, K-1247, K-1249,
K-1259, K-1262, K-1267, K-1377,
K-1417, K-1419, K-1449, K-1454,
K-1456, K-1468, K-1490, K-1510

1007260-2-B
Kohler Co.
2
RECOMMENDED TOOLS AND MATERIALS
Plumbers
Putty
Hammer
and Nails
Tape
Measure
Level
Silicone
Sealant
Drill
S Drop Cloth
S Common
Woodworking T ools
S Water-Resistant
Wall Material
S 2x4’s
Square
BEFORE YOU BEGIN
S Observe local plumbing codes.
S Baths are designed for a
variety of installations,
depending upon the model
chosen.
S Follow only the st eps that
apply to your installation.
S Unpack and inspect the bath
for damage. Then return the
bath to the carton until you
are ready to install it.
S Install the unit to a level
subfloor.
S The basin area requires no
additional support when the
subfloor is level and square
with respect to the stud
framing. Consider using shims
for additional support if the
subfloor is uneven.
S A tiling-in bead may be optional
and is recommended when wall
material comes in contact with any
top surface of the bath.
S Some K -1179 tiling-in beads may
require trimming of the bottom
edgeforproperfit.
S Protect the bath floor during
installation.
S Provide properly-dimensioned
framing.
S Fixture conforms to ANSI Standard
Z124.1. All dimensions are nominal.
S Before installation, ensure proper
access to the final plumbing
connections.
S Compare the roughing-in and room
dimensions, and provide adequate
spaceforthebath.
S Optional aprons must be installed
before the finished floor and wall
materials are installed.

1007260-2-B
Kohler Co.
3
PREPARE SITE
1.
A. REMOVE OLD BATH
Disconnect the drain at the trap.
Remove the old wall material. Slip
boards under the old bath feet
to protect the floor, and slide the
old bath out of the recess as
illustrated.
Floor Protection Boards
Old Bath
B. PREPARE SUBFLOOR
Inspect the flooring under the bath,
and make repairs as needed. Make
sure the subfloor is level.
C. CONSTRUCT STUD FRAME
P o ssible stud frame arrangements
are illustrated below. Use the stud
construction appropriate for your
particular bath model. Some
modifications may be needed for
other types of construction.
Construct the 2x4 stud frame
according to the roughing-in
information packed. Be sure the
framing is square and plumb.
For an apron wall without a ledge,
the finished apron wall surface must
be at least 1/16” (2mm) under the
bath rim.
C
A
UTION:
R
isk of product
damage. Do not hang the bath
by the rim.
1. Recommended For Integral
Flange Model installations:

1007260-2-B
Kohler Co.
4
2. Recommended For Drop-In and
Sunken Model installations:
Recess Installation
Corner Installation
Peninsular Installation
Sunken Installation
D. INSTALL ROUGH PLUMBING
Locate the rough plumbing
according to the roughing-in
dimensions. Cap the supplies, and
check for leaks.
PREPARE BATH
3.
A. INSTALL TILING-IN BEAD -
APPLICABLE DROP-IN
MODELS ONLY
We recommend an optional tiling-in
bead for the side of the bath that
contacts the wall. This bead prevents
water from seeping between the
bath and the wall.
Install this bead now. Refer to the
installation instructions packed with
the tiling-in bead.
B. PARTIALLY INSTALL DRAIN
Install the drain to the bath
according to the drain
manufacturer’s instructions.

1007260-2-B
Kohler Co.
5
C. PROTECT BATH SURFACE
Use a drop cloth or similar material
to protect the bottom surface of the
bath.
Clean the bath to reduce the risk of
product damage.
INSTALL BATH
4.
A
. POSITION B
A
TH
CAUTION: Risk of product
damage. Do not hang the unit
by the rim.
Apply a generous amount of
construction adhesive to the support
blocks. Carefully move the bath into
the recess. Make sure the unit is
level. Install shims between the bath
and subfloor if necessary.
Insert the drain tailpiece into the
trap.
Apply a bead of silicone sealant
under the rim of the bath.
Apply construction
adhesive to the support
blocks
B. INTEGRAL FLANGE MODELS
Drill pilot holes through the
nailing-in flange at the stud centers.
Add shims between the nailing-in
flange and the studs as needed to
eliminate gaps.
Use #6 large-head galvanized nails
to secure the nailing-in flange to the
studs.
Install furring strips to the studs to
shim out to the edge of the
nailing-in flange.
Furring Strip
Stud
Nailing-In
Flange
Drill Pilot
Hole

1007260-2-B
Kohler Co.
6
C. INST
A
LL PLUMBING
CAUTION: Risk of
concealed leakage. Make sure
a watertight seal exists on all
bath drain connections.
Connect the drain to the trap.
Install the faucet valving according
to the manufacturer’s instructions.
Strap the supply connections to the
stud framing. Open the hot and cold
water valves, run water into the
bath, and check for leaks. Cap the
outlets.
Provide access to the plumbing
connections for future plumbing
maintenance.
Connect
Here
D.
A
TT
A
CHREMOV
A
BLEPILLOW
CAUTION: Risk of product
damage. Do not submerge the
pillow underwater or use it as a
seat cushion.
NOTE
: For best attachment to the
bath surface, moisten the back
surface of the pillow at the suction
cup locations.
Clean the bath surface of any soap
film or oils. Suction cups are located
on the back side of the pillows.
P osition the pillow as desired above
thewaterlinebypressingdown
firmly with the heel of your hand.
Check to make sure the pillow is
attached firmly to the bath.
Detach the pillow by lifting it off the
bath surface.
Suction
Cup
Pillow
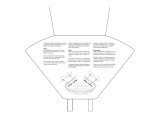
INSTALL OPTIONAL APRON
5.
T o install an optional apron, refer to
the installation instructions packed
with the apron.

1007260-2-B
Kohler Co.
7
INSTALL FINISHED WALL
6.
A. DROP-IN MODELS
Make sure the vinyl bead is securely
attached to the bath apron where
the bath surface will contact the
finished wall.
Install water-resistant wall material.
T ape and mud the water-resistant
wall material. Install the finished
wall material.
Apply a bead of silicone sealant
between the bath surface and the
finished wall.
Bath
Finished Wall
Covering
Water-Resistant
Wall Material
Silicone Sealant
Vinyl Bead
2x4 Studding
Framing or
Ledger Strip
For installations that do not use a
vinyl bead, cover the framing with
water-resistant wall material as
shown. Seal the joints between the
bath rim edge and the wall material
with silicone sealant.
T ape and mud the water-resistant
wall material. Install the finished
wall to the water-resistant wall
material,asshown.Sealthejoints
between the bath rim and the
finished wall material with silicone
sealant.
Silicone Sealant
Bath
Finished Wall
Material
Water-Resistant
Wall Material
B. INTEGRAL FLANGE MODELS
Apply a bead of silicone sealant to
the nailing-in flange. Install
water-resistant wall material with
thepaperboundedgeamaximumof
1/4” (6mm) above the bath deck.
T ape and mud the water-resistant
wall material. Install the finished
wall material.
Apply a bead of silicone sealant
between the bath rim and the
finished wall.
2x4 Studding
Finished Wall
Water-Resistant
Wall Material
Silicone
Sealant
Bath

1007260-2-B
Kohler Co.
8
COMPLETE INSTALLATION
7.
Seal around the valving and outlets
with silicone sealant or plumbers
putty.
Install the faucet and drain trim
according to the manufacturer’s
instructions.
CLEAN-UP AFTER INSTALLATION
8.
When cleaning up after
installation, do not use abrasive
cleansers as they may scratch
and dull the surface. Use warm
water and a liquid, non-abrasive
detergent to clean the surface.
Remove stubborn stains, paint, or
tar with turpentine or paint
thinner.
Do not allow cleaners containing
petroleum distillates to remain in
contact with the bath surface for
long periods of time.
Remove plaster by scraping with a
wood edge. Do not use metal or wire
tools. Use a powder-type detergent on a
damp cloth to provide mild abrasive
action to the residual plaster.
Questions? Problems? First review the installation instructions to ensure correct
installation. For additional assistance in the USA, call our Customer Service
Department for direct help. You may also contact us at our web site listed below.
Call 1-800-4-KOHLER within the U.S.
Call 1-800-964-5590 within Canada
Call 001-877-680-1310 within Mexico
CALL US FOR HELP
kohler.com

1007260-2-B
Kohler Co.
9
BAIGNOIRES
EN
ACRYLIQUE
D’INSTALLATION
GUIDE
K-1132, K-1145, K-1169, K-1193,
K-1195, K-1197, K-1199, K-1207,
K-1219, K-1222, K-1229, K-1242,
K-1245, K-1247, K-1247, K-1249,
K-1259, K-1262, K-1267, K-1377,
K-1417, K-1419, K-1449, K-1454,
K-1456, K-1468, K-1490, K-1510

1007260-2-B
Kohler Co.
10
OUTILS ET MATÉRIAUX RECOMMANDÉS
Mastic
d’étanchéité
Marteau et
clous
Ruban à
mesurer
Niveau
Mastic
silicone
Perceuse
S Linge
S Outils pour le bois
S Matérial pour le
mur résistant à
l’eau
S Colombage
Équerre
AVANT DE COMMENCER
S Respecter les codes de
plomberie locaux.
S Les baignoires ont été conçues
pour plusieurs installations que
varient selon le modèle choisi.
S Suivez les étapes qui
s’appliquent particulièrement à
votre installation.
S Déballer la baignoire et
l’examiner soigneusement pour
déceler tout dommage.
Remettre la baignoire dans
l’emballage de protection en
attendant de commencer
l’installation.
S Installer l’unité sur un
plancher de niveau.
S La cuve ne requère pas de
supportadditionnelsile
sous-plancher est de niveau et
d’aplomb par raport au
colombage. Utiliser des cales
pour du support additionnel, si
le sous-plancher n’est pas de
niveau.
S Il est possible d’utiliser un lit
carrelé, si le matérial du mur
touche une surface quelconque de la
baignoire.
S Certains lits carrelés doivent être
coupés au bord inférieur pour un
logement approprié.
S Protéger la surface de la baignoire
pendant l’installation.
S Prévoir une ossature de dimensions
appropriées.
S Lesdimensionsdelabaignoiresont
nominales et conformes aux
tolérances données par la norme
ANSI Z124.1.
S A vant l’installation, assurez-vous
d’avoir suffisamment d’accés pour
lesraccordsfinaux.
S Vérifierlesdimensionsbrutesdela
salle de bain, à fin de prévoir
suffisamment d’éspace pour la
baignoire.
S Le bandeau optatif doit être installé
avant d’installer le plancher fini et
le matériel du mur.

1007260-2-B
Kohler Co.
11
PRÉPARER LE SITE
1.
A. ENLEVER LA BAIGNOIRE
EXISTANTE
Débrancher le tuyau d’évacuation et
enlever le siphon. Retirer le matériel
existant du mur. Glisser des
planches sous les pieds de la
baignoire pour protèger le
plancher, et enlever la vieille
baignoire, tel qu’illustré.
Planches de protection
pour le plancher
Vieille
baignoire
B. PRÉPARER LE
SOUS-PLANCHER
Vérifier l’ètat du revêtement du sol
et réparer lorqu’il est nécessaire.
Vérifierqueleplanchersoitde
niveau.
C.CONSTRUIRL’OSSATUREEN
COLOMBE
Certains ossatures en colombe
possibles sont illustrées ci-dessus.
Utilisez une ossature appropriée à
votre installation, selon le modèle de
baignoire choisi. Certaines
modifications peuvent être
nécessaires pour d’autres types de
construction.
Construir l’ossature en colombe
suivant l’information du diagramme
de raccordement inclus. L’ossature
doit être à l’équerre et d’aplomb.
P our un bandeau sans rebord, la
surface du mur fini doit être au
moins 1/16 po (2mm) audessous du
rebord de la baignoire.

1007260-2-B
Kohler Co.
12
A
TTENTION :
R
is
q
ue
d’endommagement du
produit. Ne pas appuyer la
bagnoire sur le rebord.
1. Reccomandé pour des installations
avec bride intégrée :
2. Reccomandé pour des installations
surbaissées ou encaissées :
Installations dans cavités
Installations d’angle
Installations presqu’île
Installations encaissées
D.RACCORDERLAPLOMBERIE
Déterminer l’emplacement de la
plomberie, selon le diagramme de
raccordement. F ermer les robinets
d’arrêt et vérifier s’il y a des fuites.

1007260-2-B
Kohler Co.
13
PREPARER LA BAIGNOIRE
3.
A.INSTALLERLELITCARRELÉ-
UNIQUEMENT POUR DES
MODÈLES SURBAISSÉS
Nous recommandons le lit carrelé
optatif pour le côté de la baignoire
quitouchelemur.Cecipreviendrala
filtration d’eau entre la baignoire et
le mur.
Installer le lit carrelé maintenant.
Consultez la notice d’installation qui
accompagne le lit carrelé.
B. INSTALLER LE VIDAGE
PARTIELLEMENT
Installer le vidage à la baignoire
selon la notice du fabricant qui
accompagne le produit.
C. PROTECTION DE LA
BAIGNOIRE
Utiliser un linge doux pour protéger
la surface de la baignoire.
Nettoyer la baignoire pour réduire le
risque d’endommagement du
produit.

1007260-2-B
Kohler Co.
14
INSTALLER LA BAIGNOIRE
4.
A
.PL
A
CER L
A
B
A
IGNOIRE
ATTENTION : Risque
d’endommagement du
produit. Ne pas appuyer la
bagnoire sur le rebord.
Appliquer du mastic adhésif de
construction aux blocs de renfort.
Placer soigneusement la baignoire
dans la cavité. Vérifier que l’unité
soit de niveau. Placer des cales entre
la baignoire et le sous-plancher, le
cas échéant.
Introduire l’about dans le siphon.
Appliquer un boudin de mastic à la
silicone audessous du rebord de la
baignoire.
Appliquer du mastic
adhésif aux blocs de
renfort
B. MODÈLS AVEC BRIDE
INTÉGRÉE
P ercer des trous de guide à travers
de la bride de clouage au centre du
colombage. Placer des cales entre la
bride de clouage et le colombage au
besoin, pour éliminer les intervalles.
Utiliser des clous galvanisés Nº 6
pour assujetir la bride de clouage au
colombage.
Installer les coyaux au colombage
pour compenser le bord de la bride
de clouage.
Coyau
Tige de
fixation
Bride de
clouage
Percer un
trou de guide

1007260-2-B
Kohler Co.
15
C. INST
A
LLER L
A
PLOMBERIE
ATTENTION : Risque de
fuites non apparentes.
Assurer un joint étanche sur les
raccords du vidage.
Raccorder le vidage au siphon.
Assembler le robinet conformément
àlanoticedufabricant.Attacherles
raccords d’arrivée d’eau à l’ossature.
Ouvrir les valves d’eau chaude et
froide et vérifier s’il y a des fuites.
Fermer les sorties.
Prévoir suffisamment d’accès pour
l’entretien future des raccords.
Raccorder
ici
D. INST
A
LLER LE COUSSIN
AMOVIBLE
ATTENTION : Risque
d’endommagement du
produit. Ne pas submerger le
coussin dans l’eau et ne pas
utiliser comme siège.
REMARQUE
: P our un meilleure
assemblage, mouiller les ventouses à
la surface du coussin.
Éliminer toute trace de savon ou
huile de la surface de la baignoire.
Les ventouses se trouvent au dos des
coussins.
Placer le coussin à la place désirée,
sous le niveau repère, en appuyant
fermement sur la surface du coussin.
Vérifierquelecoussinsoitbien
attaché à la baignoire.
Soulever le coussin pour l’enlever de
la surface de la baignoire.
Ventouse
Coussin

1007260-2-B
Kohler Co.
16
INSTALLER LE BANDEAU OPTATIF
5.
P our installer le bandeau optatif ,
consulter la notice d’installation qui
accompagne le bandeau.
INSTALLER LE MUR FINI
6.
A. MODÈLES SURBAISSÉS
Vérifier que le lit en vinyle soit bien
attaché au bandeau de la baignoire,
àlaplaceoùlasurfacetouchele
mur fini.
Installer le matérial résistant à l’eau
du mur.
Appliquer le matériel du mur.
Complèter le mur fini.
Appliquer du mastic à la silicone
entre la surface de la baignoire et le
mur fini.
Parement du mur
fini
Matérial du mur
résistant à l’eau
Mastic silicone
Lit de vinyle
Mur en poutrelles
Colombe ou
lisse
Baignoire
P our les installations sans un lit de
vinyle, revêtir l’ossature avec du
matériel résistant à l’eau, tel
qu’illustré. Fixer les joints entre le
rebord de la baignoire et le matérial
du mur à l’aide de mastic à la
silicone.
Appliquer le matériel du mur.
Installer le mur fini sur le matériel
resistant à l’eau. Fixer les joints
entrelereborddelabaignoireetle
mur fini à l’aide de mastic à la
silicone.
Mastic silicone
Baignoire
Matériel du mur
fini
Matérial du mur
résistant à l’eau
B. MODÈLS AVEC BRIDE
INTÉGRÉE
Appliquer du mastic à la silicone à la
bride de clouage. Installer le
matériel résistant à l’eau avec le
bord broché à 1/4 po (6 mm)
audessus du comptoir de la
baignoire.
Appliquer le matériel du mur.
Complèter le mur fini.
Appliquer du mastic à la silicone
entrelereborddelabaignoireetle
mur fini.
Mur en poutrelles
Mur fini
Matérial du mur
résistant à l’eau
Mastic silicone
Baignoire

1007260-2-B
Kohler Co.
17
COMPLÉTER L’INSTALLATION
7.
Fixer autour des valves et des
sorties, à l’aide de mastic.
Assembler le robinet et le vidage
conformément à la notice du
fabricant.
NETTOYAGE APRÈS L’INSTALLATION
8.
Après l’installation, ne pas
utiliser d’abrasifs ;cesproduits
égratignent et abîment la surface
de la baignoire. Nettoyez la surface
avec un savon doux et de l’eau
tiède.
Les taches rebelles, la peinture ou
le goudron peuvent être nettoyés
au moyen de la térébenthine ou du
solvant à peinture.
Ne pas laisser longtemps des
produitsàbasedepétrolesurla
surfacedelabaignoire.
Les résidus de plâtre peuvent être
nettoyés au moyen d’un bord en bois.
Ne pas utiliser des grattoirs en métal
oudesbrossesenfildefer.Ilest
possible d’utiliser des nettoyants en
poudre sur un linge mouillé pour une
action abrasive douce.

1007260-2-B
Kohler Co.
18
Desquestions?Desproblèmes?Revoird’abordlanoticed’installationpour
s’assurer d’une installation correcte. Pour toute assistance additionnelle, contactez
notre département de service à la clientèle pour une aide directe. Vous pouvez
aussi nous joindre sur notre site Web à l’adresse donnée ci-dessous.
Aux É.-U., composer le 1-800-4-KOHLER
Au Canada, composer le 1-800-964-5590
Au Mexique, composer le 001-877-680-1310
APPELEZ-NOUS POUR TOUTE ASSISTANCE
kohler.com

1007260-2-B
Kohler Co.
19
BAÑERAS DE
ACRÍLICO
INSTALACIÓN
GUÍA DE
K-1132, K-1145, K-1169, K-1193,
K-1195, K-1197, K-1199, K-1207,
K-1219, K-1222, K-1229, K-1242,
K-1245, K-1247, K-1247, K-1249,
K-1259, K-1262, K-1267, K-1377,
K-1417, K-1419, K-1449, K-1454,
K-1456, K-1468, K-1490, K-1510

1007260-2-B
Kohler Co.
20
HERRAMIENTAS Y MATERIALES SUGERIDOS
Masilla de
plomería
Martillo y
clavos
Cinta
métrica
Nivel
Sellador
de silicona
Taladro
S Trapo para el piso
S Herramientas
comunes para
carpintería
S Material
impermeable de la
pared
S T ablas de madera
de 2x4
Escuadra
ANTES DE COMENZAR
S Cumpla con todos los códigos
locales de plomería.
S Las bañeras de hidromasaje
están diseñadas para una
variedad de instalaciones,
dependiendo del modelo
elegido.
S Siga las instrucciones
correspondientes a su
instalación.
S Saque las piezas de su caja y
revisequelabañeranotenga
daños. Luego, devuelva la
bañera al empaque hasta el
momento de la instalación.
S Instale la unidad sobre un piso
nivelado.
S El área interior de la bañera no
requiere de soporte adicional
cuando el subpiso está plomado
y a nivel con los travesaños de
la estructura. Considere el uso
de cuñas como soporte
adicional, en caso de que el
subpiso no esté nivelado.
S La colocación de tira selladora es
optativa y se recomienda cuando el
material de la pared entra en
contacto con cualquier superficie
superior de la bañera.
S Es posible que algunas tiras
selladoras para el modelo K-1179
requieran cortes en el borde inferior
para cuadrar de manera apropiada.
S Protejaelpisodelabañeradurante
la instalación.
S Proporcione una estructura con las
medidas apropiadas.
S El accesorio cumple con la norma
Z124.1 del ANSI. Todas las
dimensiones son nominales.
S Antes de la instalación, asegúrese
de tener acceso adecuado a las
conexiones finales.
S Revise las dimensiones de
instalación y de la habitación para
asegurar que haya espacio
suficiente para la bañera.
S La plataforma optativa debe
instalarse antes que el piso acabado
y los materiales de la pared.
/