Page is loading ...

Congratulations
Congratulations on the purchase of your state-of-the-art remote start
and security system. Reading this Owner’s Guide prior to using your
system will help maximize the use of your system and its many fea-
tures. For any additional questions please contact your authorized
AstroStart dealer.
Important information
Government Regulations and Safety information
Read the Government Regulations and Warning! Safety
First sections of this manual prior to operating this system.
Warning! Failure to heed this information can result in
death, personal injury or property damage and may also
result in the illegal use of the system beyond its intended
purpose.
Your Warranty
Your system comes with a warranty. The warranty terms are detailed at
the end of this guide. Make sure that you receive the proof of purchase
from your dealer, indicating the product was installed by an autho-
rized AstroStart dealer.
Replacement remote controls
Please see your authorized dealer. Remote control part numbers are
found on the back of the device.

2-way communication
Throughout this guide, there are references to 2-way communication
and/or confirmation of commands via the 2-way remote control.
Please note that your system may not be equipped with a 2-way
remote control so such feedback will not apply. For example, under
“Lock” in the “Basic Commands (Direct Access)” section, the guide
states: “... Lock LED turns on with 1 beep.” Such references only
apply to systems with a 2-way remote control. If you would like to
upgrade to a 2-way remote control, please consult your authorized
Directed dealer. Additional parts and labor may apply.

Contents
Getting Started .................................................................................................... 4
Keys to using this manual ...................................................................... 4
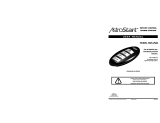
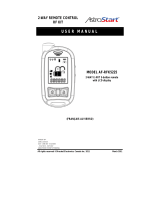
2625-TX 2-Way/2615-TX 1-Way Remote Control ................................................. 5
Antenna ............................................................................................................. 6
Using your System ............................................................................................... 7
Commands and Confirmations .............................................................. 7
Performing Commands ......................................................................... 7
Remote Control Command table ............................................................ 8
Fault Condition Alerts ........................................................................... 9
Basic Commands (Direct Access) ........................................................................ 10
Lock/Arm ......................................................................................... 10
Unlock/Disarm .................................................................................. 10
Remote Start ...................................................................................... 11
Trunk ................................................................................................ 11
Advanced Commands: (Level 1) ......................................................................... 12
Utility 1 ............................................................................................ 12
Utility 2 ............................................................................................ 12
Runtime Remaining ............................................................................ 12
Rear Defogger ................................................................................... 13
Advanced Commands: (Level 2) ......................................................................... 14
Utility 3 ............................................................................................ 14
Utility 4 ............................................................................................ 14
Alarm Valet ...................................................................................... 14
Battery Check Level ........................................................................... 14
Advanced Commands: (Level 3) ......................................................................... 15
Silent Lock......................................................................................... 15
Silent Unlock ..................................................................................... 15
Low Temperature Mode***................................................................. 15
Advanced Commands: (Level 4) ......................................................................... 16
Car finder ......................................................................................... 16
Timer Start Mode* ............................................................................. 16
Remote Control Configuration ............................................................................ 17
Remote Programming ......................................................................... 17
Remote Pairing ................................................................................. 17
Remote Features ............................................................................... 18
Keypad Lock ..................................................................................... 19
Page Mode ...................................................................................... 20
Car 2 ............................................................................................... 20
Remote Beep ..................................................................................... 21
Alarm Features ................................................................................................. 22
Normal Arm Protection ....................................................................... 22
Full Trigger ........................................................................................ 22
Trigger Zone Fault Report.................................................................... 23

Alarm Report ..................................................................................... 23
Nuisance Prevention (NPC) ................................................................. 24
Remote Start Features ........................................................................................ 25
Key Takeover..................................................................................... 25
Remote Start Safe-lock ........................................................................ 25
Disabling Remote Start ....................................................................... 25
Advanced Start ................................................................................. 26
Continuous Mode .............................................................................. 27
Safety Sequence Mode ....................................................................... 28
Turbo Timer Mode .............................................................................. 29
Remote Start Faults ............................................................................. 29
Remote and System Operations .......................................................................... 31
Passive Arming* ................................................................................ 31
Auto Re-arming* ................................................................................ 31
Valet Mode ....................................................................................... 32
Power Save ....................................................................................... 32
Rapid Resume ................................................................................... 32
Automatic Remote Updates ................................................................. 32
Out of Range .................................................................................... 33
No Remote Output ............................................................................. 33
Feature not Available ......................................................................... 33
Car Select ......................................................................................... 34
System Expansion Options ................................................................................. 35
Battery Information ............................................................................................ 37
Low Battery ....................................................................................... 37
Battery Life ........................................................................................ 37
Battery Replacement ........................................................................... 38
Battery Disposal ................................................................................ 38
Patent Information ............................................................................................. 40
Government Regulations .................................................................................... 41
Warning! Safety First ......................................................................................... 43
Installation ........................................................................................ 43
Remote Start Capable ........................................................................ 43
Manual Transmission Vehicles ............................................................. 43
Interference ....................................................................................... 45
Upgrades ......................................................................................... 45
Water/Heat Resistance ...................................................................... 45
Limited Lifetime Warranty................................................................................... 46


4
© 2016 Directed. All rights reserved.
Getting Started
Keys to using this manual
Specific actions (in bold type) and style conventions are used consis-
tently throughout this manual, they are as follows:
• Press: implies pushing in and the remote will play the transmit
beep to send the command.
• Hold: is used after Press actions. The remote will play a second
set of transmitter beeps to inform the user that the other sets of
command will be transmitted.
• Italicized words denote section/sub headings in this guide and
can be located through the table of contents.
• An asterisk (*) when used after a word or phrase denotes that
additional details can be found in related sections usually noted
at the bottom of the page or end of the section.
• Confirmation LED’s are identified by the command/function but-
ton they are associated with.

At a Glance
5
© 2016 Directed. All rights reserved.
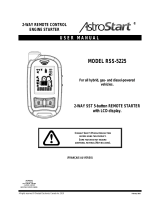
2625-TX 2-Way/2615-TX 1-Way Remote Control
Feature Description
Command buttons (4)
Used to perform arming, disarming, utility channel and
remote start commands
P button
Used to access function levels for commands, configuration
menus for programming, Car Selection, and to access other
advanced commands.
Confirmation LED’s* Each button has an associated LED next to it that are active
during related operations. These LED’s are labeled respec-
tively as:
Lock LED, Unlock LED, Remote Start LED and Trunk LED
* 2-way communication is only applicable to the 2625-TX remote
control.

6
© 2016 Directed. All rights reserved.
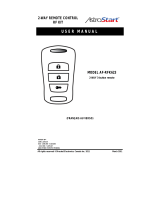
Antenna
AntennaLED Button
The Antenna, typically located on the upper part of the front wind-
shield sends and receives commands or messages to and from your
system. It consists of:
• The Status LED, as a visual indicator of the system’s status.
• The Antenna button, for placing the system into Valet Mode*.
* See “Valet Mode” on page 32 section for details.

Commands
7
© 2016 Directed. All rights reserved.
Using your System
Commands and Confirmations
Commands, Basic or Advanced, are used to activate system features
and are performed by pressing one of the Command buttons. Basic
commands control the most often used security and remote start fea-
tures while Advanced commands control more specialized features
and request reports.
Confirmations for Basic or Advanced commands are indicated
first by horn/siren* and parking light flashes, and then by illuminated
LED’s and beeps or tones on the remote control. A description of each
feature confirmation is found in the following Basic command and
Advanced command sections. Both the 2625-TX 2-way remote and
2615-TX 1-way remote operate the same way, with the exception of
confirmations/alerts which is only applicable to the 2-way.
Performing Commands
Perform Basic commands by pressing a Command button (Confirma-
tion LED’s are off).
Perform Advanced Commands by first accessing Levels 1-4 using the
button and then by pressing a Command button while within a
Level.
Advanced command example: Silent Lock
1. Press the
button once to access Function Level 3.
2. Press the
button to perform the Silent Lock command.
3. The Lock LED illuminates to confirm when the Silent Lock mes-
sage from the system is received.
* This feature must be installed by an authorized Directed dealer.

8
© 2016 Directed. All rights reserved.
Remote Control Command table
Button
Level
Direct Access
x 1
LEVEL 1
x 2
LEVEL 2
x 3
LEVEL 3
x 4
LEVEL 4
Arm/Lock
(Panic)
Utility 1 Utility 3 Silent Lock Car Finder
Disarm/Unlock Utility 2 Utility 4 Silent Unlock
Remote Start Runtime
Remaining*
Alarm Valet Low
Temperature
Mode
Timer Start
Mode
Trunk Rear
Defogger
Battery
Level*
Advance Level,
Change Car
(1.5 sec), Enter
programming
(5 sec)
*Not available for 2615-TX remote control

Commands
9
© 2016 Directed. All rights reserved.
Fault Condition Alerts
If, when performing a command, a condition exists that does not al-
low activation of an Alarm feature* or Remote Start feature**, a fault
tone plays to alert of the fault condition.
* Alarm feature not available when the system status is incorrect
upon receiving the command. (Example: Arming the car while
Alarm Valet is enabled).
Refer to the notes included in the following command descriptions
that address these faults or go to Feature not Available under the
“Remote and System Operations” on page 31 for details.
** Remote Start feature not available when the Remote Start status is
incorrect upon receiving the command. (Example: Remote Start
attempt while Safety Sequence mode was not complete).
Refer to the notes included in the command descriptions that ad-
dress these faults or go to Remote Start Faults under the “Remote
Start Features” on page 25 for more details.

10
© 2016 Directed. All rights reserved.
Basic Commands (Direct Access)
Lock/Arm
Press and release
The alarm arms, doors lock (if connected), and the horn/siren sounds
and parking lights flash once. The Lock LED and beeps play to con-
firm. If Valet mode* is On, the doors lock and the Lock LED and a
fault tone plays. Exit Valet mode to arm the alarm normally (if system is
programmed with security features).
If a trigger zone fault is detected the horn/siren sounds once again
and the remote will emit a Trigger Zone Fault Report**, the Lock LED
and a fault tone plays. (Applicable only when alarm feature is in-
stalled.)
To Lock and Panic
Press and hold
The alarm Arms (or Locks in Valet) and, after three seconds,
sounds the horn/siren and flashes the parking lights. The confir-
mation LED’s flash and siren tones play to confirm. Press the
or
button to stop the output.
Unlock/Disarm
Press and release
The alarm disarms (if installed), doors unlock (if connected), and the
horn/siren sounds and parking lights flash twice. The Unlock LED and
beeps play to confirm. If Valet mode* is On, the doors unlock and the
Unlock LED and fault tones play.

Commands
11
© 2016 Directed. All rights reserved.
If system is programmed with security features, an Alarm Report**
will replace the disarm output if the alarm was triggered; the siren will
chirp four times, and the Unlock LED and alarm triggered tones play
to alert of the report.
Remote Start
Press and release
Activates (or if On, deactivates) the remote starter. The engine and
parking lights turn On and the Remote start LED and On tones play,
or the engine and parking lights turn Off and the Remote start LED and
Off tones play to confirm. If a Remote start configuration issue prevents
the engine from starting, a fault tone plays while the parking lights
flash a Remote Start fault report*** to identify the fault.
Trunk
Press and release
The remote will generate a report status using the confirmation LED’s
and beeps once to display the system’s current status (Lock, Unlock,
Engine is running.)
Press and hold
The Trunk opens (if connected) when this button is pressed for 4 sec-
onds. The Trunk LED and tones play to confirm.
* See “Valet Mode” on page 32 for details.
** See “Trigger Zone Fault Report” on page 23 for details.
*** See “Remote Start Faults” on page 29 for details.
For Manual transmission vehicles see “Safety Sequence Mode” on page
28 for more details.

12
© 2016 Directed. All rights reserved.
Advanced Commands: (Level 1)
Press and release the button one time first, before pressing one of
the following command buttons.
Utility 1
Press and release
Activates (or if On, deactivates) the Utility 1 output. The Lock LED and
On tones or Off tones play to confirm.
Utility 2
Press and release
Activates (or if On, deactivates) the Utility 2 output. The Unlock LED
and On tones or Off tones play to confirm.
Runtime Remaining
Press and release
Requests the remaining Remote start runtime and temporarily displays
it in 4 increments using the confirmation LED’s.
Example for 12 minute runtime:
• Three LED’s: six to nine minutes remaining (50 - 75% of time
selected).
• One LED: less than three minutes remaining (<25% of time se-
lected).

Commands
13
© 2016 Directed. All rights reserved.
Rear Defogger
Press and release
Activates the vehicle Defogger circuit (if connected) while Remote Start
is activated and the parking lights flash three times. The Remote start
LED and defogger melody play to confirm. For convenience, the De-
fogger circuit will also automatically activate 10 seconds after remote
starting if the temperature is below 55°F/13°C.
Note
Remote Start must be active to use this feature.

14
© 2016 Directed. All rights reserved.
Advanced Commands: (Level 2)
Press and release the button two times first, before pressing one of
the following command buttons.
Utility 3
Press and release
Activates (or if On, deactivates) the Utility 3 output. The Start LED and
On tones or Off tones play to confirm.
Utility 4
Press and release
Activates (or if On, deactivates) the Utility 4 output. The Trunk LED and
On tones or Off tones play to confirm.
Alarm Valet
Press and release
Enters (or if On, exits) Valet Mode. The antenna LED turns on and off
accordingly. The Unlock LED and Valet melody play (one for on, two
for off) to confirm.
Battery Check Level
Press and release
Displays the battery level of the remote.
Example:
3 LED’s: Less than 75% battery remaining
1 LED’s: Less than 25% battery remaining

Commands
15
© 2016 Directed. All rights reserved.
Advanced Commands: (Level 3)
Press and release the button three times first, before pressing one
of the following command buttons.
Silent Lock
Press and release
The alarm arms, doors lock (if connected), and the parking lights flash
once. The Lock LED turns on to confirm. Valet mode* or Trigger Zone
Fault Report** messages may be received.
Silent Unlock
Press and release
The alarm disarms, doors unlock (if connected), and the parking lights
flash twice. The Unlock LED turns on to confirm. The Silent Unlock
output may be replaced by the Alarm Report**
Low Temperature Mode***
Press and release OR ( + )
Activates (or if On, deactivates) Low Temperature Mode. The park-
ing lights flash quickly five times for On and slowly five times for Off.
Remote Start and Trunk LED will flash 3 times to indicate Low Tempera-
ture Mode activation, and the LEDs will remain ON for 3 seconds to
indicate disactivation.
Note
System needs to be armed or Low Temperature Mode will
not start the engine.
* See “Valet Mode” on page 32 for details.
** See “Alarm Report” on page 23 for details.
*** See “Advanced Start” on page 26 for details.

16
© 2016 Directed. All rights reserved.
Advanced Commands: (Level 4)
Press and release the button four times first, before pressing one of
the following command buttons.
Car finder
Press and release OR ( + )
The siren emits one long chirp and the parking lights flash for 10 sec-
onds. The Lock and Unlock LEDs will flash alternately and Car finder
melody plays to confirm. The parking light flashes stop if armed or
disarmed while Car Finder is in progress.
Timer Start Mode*
Press and release
Activates (or if On, deactivates) Timer Start. The parking lights flash
quickly four times for On and slowly four times for Off. The Remote
Start LED and Trunk LED will flash alternately indicating the Timer Start
Mode being enabled, and upon disabling, the Remote Start and Trunk
LED will remain ON for 3 seconds to confirm.
Note
System needs to be armed or Timer Start will not start the
engine.
* This feature must be installed and turned on by an authorized Directed
dealer.

Configurations
17
© 2016 Directed. All rights reserved.
Remote Control Configuration
The 2625-TX and 2615-TX remote controls have operations that can
be configured to a user’s personal preferences. The following instruc-
tion directs you through the available programming options for both
remote controls.
Remote Programming
To Enter Programming: Press and hold the button for five seconds,
the remote emits one long beep and the Lock LED turns on while the
transmit LED flashes to indicate the Main Menu is accessed.
To Exit Programming: Press and release the
button once the Lock
LED shuts off and plays Exit Menu melody.
Remote Pairing
The following instructions step you through the remote pairing opera-
tion of the 2625-TX 2-way or 2615-TX remote.
Transmitter Pairing Mode Procedure
1. Press and hold the transmitter
button until the remote beep
once and LOCK button will illuminate for up to 20 seconds.
2. The remote is now in pairing mode for a maximum of 20 sec-
onds.
Vehicle Setup for Pairing
1. Open at least 1 vehicle door.
2. Turn Ignition ON.
3. Press and release, then press and hold the Antenna button
until the Antenna LED starts to flash. Release the button. The
system is now in pairing mode.

18
© 2016 Directed. All rights reserved.
4. Press the transmitter’s LOCK button. The horn/siren (if in-
stalled) will sound to indicate the system has learned the
remote ID. The 2-way transmitter will emit several tones to
confirm the pairing.
5. If pairing fails, the transmitter will play an error tone, yet
remains in pairing mode. Press the transmitter’s LOCK button
again to attempt another pairing.
Exit Pairing Mode:
Once pairing is completed, turn Ignition OFF. The horn/siren (if in-
stalled) will sound to confirm exiting.
Pairing will exit if:
• Step 2.4 is not completed within 60 seconds
• The doors are closed
• The ignition is turned off.
Remote Features
Enter programming to access the main menu as previously explained,
then press and release the
button to access the remote operation
features, the transmit LED remains ON and one long beep indicate the
remote features menu is accessed. Press the buttons indicated in the
following tables to set the feature option.
/