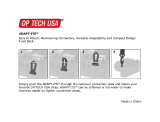
HOLD
TURN
Sleeve PlugRetainer
A
B
Locate the Quick Adapt connector at the top of the
coaxial cord. Completely remove screws A and B
with the provided allen key.
Disassemble the Quick Adapt connector by pulling
the coaxial cord out of and away from all three
components.
Low Voltage Monorail Quick Adapt Pendant • Field Cut Instructions
INSTALLATION INSTRUCTIONS
1.
While holding the tip of the Quick Adapt connector,
remove the base by turning it away from you.
2.
3.
Sleeve PlugRetainer
You can now identify the three components that
make up the Quick Adapt connector.
4.
5.
Measure the desired length and cut the cord.
(Note: Approx. 1 inch of the cord will be inserted into
the Quick Adapt connector)
Cut o the excess braided jacket so that ¾” of the
insulated center wire is exposed. Strip no more than
1/8” o of the insulated center wire.
Twist the remaining braided jacket snugly around
the center wire to ensure a clean insertion into the
Quick Adapt connector.
Peel
A
B
Once you’ve cut the cord to it’s desired length,
it will look like picture A shown to the le. Peel back
the braided jacket approx. ¾" from the tip of the
insulated center wire (Picture B).
6.
7.
8.
9.
10.
B
3/4"
1/8"
TURN
HOLD
INSERT CORD
TURN PLUG
FOOT
Reassemble the Quick Adapt connector by passing
the cord through the retainer and sleeve rst. Then
insert the cord into the turn plug making sure that the
foot of the plug covers the braided jacket. Turn the
plug while inserting the cord for an easier insertion.
Make certain you can see the center wire at the top
opening A of the plug to ensure a good connection.
Again using the provided allen key, tighten screw A at
the tip of the plug. Reattach the sleeve and retainer
to the plug. Tighten screw B on at the retainer. Your
Quick Adapt Pendant is now ready to attach to one
of many mounting options in our Quick Adapt System.
FINAL
A
A
B
www.jescolighting.com