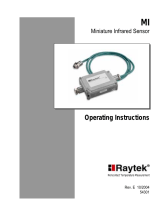
RayTek RAYCI3A10L Owner's manual

Type
Owner's manual
THE R MAL E R T
®
C I
C OMPAC T INF R AR E D
S E NS OR
OP E R ATOR S G UIDE
T W O Y E A R L I M I T E D WA R R A N T Y
R aytek w arrants this product to be free from defects in material and
workmanship under normal use and service for a period of two
years from date of purchase except as hereinafter provided. T his
warranty extends only to the original purchaser (a purchase from
R aytek or R ayteks licensed distributors is an original purchase).
This w arranty shall not apply to fuses or batteries. Factory calibra-
tion is warranted for a period of one y ear. T he w arranty shall not
apply to any product which has been subject to misuse, neglect,
accident, or abnormal conditions of operation or storage. Should
R aytek be unable to repair or replace the product w ithin a reason-
able amount of time, purchaser s exclusive remedy shall be a refund
of the purchase price upon return of the product.
In the event of failure of a product covered by this w arranty, R aytek
will repair the instrument w hen it is returned by the purchaser,
freight prepaid, to an authorized Service Facility w ithin the applica-
ble warranty period, provided Rayteks examination discloses to its
satisfaction that the product was defective. Raytek may, at its
option, replace the product in lieu of repair. W ith regard to any cov-
ered product returned within the applicable warranty period,
repairs or replacement will be made without charge and with return
freight paid by R ay tek, unless the failure was caused by misuse,
neglect, accident, or abnormal conditions of operation or storage, in
which case repairs will be billed at a reasonable cost. I n such a case,
an estimate w ill be submitted before w ork is started, if requested.
TH E FOR E GO IN G WA R R A N TY IS I N L IEU OF A L L OTH E R WA R -
R A N T IE S, E XPR E SSED OR IM PL IE D , IN C L UD IN G BU T N O T
L IM I TE D TO A N Y IM PL IE D WA R R A N T Y OF ME R C H A N TA BIL I-
TY, FITN ESS, O R A DE QU A CY FO R A N Y PA R TI CU L A R PU RPO SE
OR USE. R AY T E K SH A L L N O T BE L IA BL E FO R A N Y SPEC I A L ,
IN C ID EN TA L O R C ON SEQ UE N T IA L DA M A G ES, W H E TH E R I N
C ON TR A CT, TOR T, O R OT H E RW ISE.
R ev K
11/ 2009
56800-1
R aytek, the Ray tek L ogo, and T hermalert are registered trademarks and
C I is a trademark of R aytek Corporation
© C opyright 1996-2000 by Raytek Corporation
C I
Model Output Ac curacy
Overall
Temp. R ange
C I1A
C I2A
C I3A
C I1B
C I2B
C I3B
J Thermocouple
K Thermocouple
Voltage
J Thermocouple
K Thermocouple
Voltage
0 to 35 C
(32 to 66 F)
30 to 50 C
(86 to 93F)
0 to 115û C (32 to 240û F )
larger of ±2% or ±3 û C (±6 û F )
116 to 22 C (241 to 44 F )
larger of ±5 % or ±6 û C (±1 0û F)
226 to 35 C (441 to 66 F )
>±5%
100 to 500û C (212 to 932û F)
larger of ±2 % or ±3 û C (±6 û F)
30 to 99û C (86 to 21 F)
larger of ±5 % or ±6 û C (±1 0û F)
A full range of accessories for various applications and
industrial environments are available (see Figure 1).
A ccessories may be ordered at any time and added
on-site. A lso available is a J- or K -type thermocouple
connection kit and extension cables.
T H ER M A LE R T C I
The Thermalert
®
C I
C ompact Infrared Sensor series
of online instruments are noncontact infrared tempera-
ture measurement systems. T hey are designed to meas-
ure accurately and repeatably the amount of heat ener-
gy emitted from an object and to convert that energy
into a measurable electrical signal.
E ach model (see Table 1) comes with a 1 m (3 ft) cable
and two mounting nuts and is designed for easy inte-
gration into standard 4-w ire systems. T here are J or K
thermocouple output models or 10 mV / °C voltage out-
put models if your application is susceptible to noise or
requires a long cable run. T he electronics are protected
by a rugged N E M A 4 stainless steel housing.
2
1
R ight angle mirror
accessory
Air purge collar
accessory
Air/Water-cooled housing
with integrated air purge
(factory installed option)
S ens or
S ens or
F ixed
mounting bracket
accessory
Mounting nuts
(2 supplied)
Adjustable mounting
bracket acces sory
A C C E S S O R I E S
Table 1: M odels
Figure 1: A ccessories and Options
THERMALERT SERIES
1.888.610.7664 sales@GlobalTestSupply.com
OPTIONS
Options for various applications and environments
are available. Options are factory installed and must
be ordered with base model units. These include the
following:
NIST traceable certification
Air/Water-cooled housing (comes with integrated
air purging and high temperature cable)
High temperature cable–260°C (500°F) maximum
ambient temperature (comes standard with
air/water-cooled housing option)
Longer 3 m (10 ft) standard cable
3
Optical Resolution
Spectral Response Range
Thermal
Measurement range
Detecting element
Accuracy
Repeatability
Temperature coefficient
Operational
Temperature resolution
Emissivity
Response time
Warm-up period
4:1
@
90% energy
718 µm
See Table 1
Thermopile
See Table 1
±1% of reading
0.2˚ C per ˚C (0.2˚ F per ˚F)
< 0.5˚ C (1˚ F)
Fixed at 0.95
350 mSec (95% response)
< 1 minute
SPECIFICATIONS
Table 2 (below and continued on Page 4) lists the sen-
sor’s optical, thermal, operational, electrical, environ-
mental, and physical specifications.
Continued on next page
Table 2: Specifications
4
Electrical
Power supply voltage
Maximum current draw
Ripple
Output impedance
Minimum load impedance
Outputs
Environmental
Sensing head rating
EMI
Conducted noise immunity
Relative humidity
Storage temp. range
Thermal shock
Ambient operating range
air cooling
water cooling
water cooling/high temp cable
Physical
Dimensions
Weight
Material
CableStandard
Maximum ambient temperature
Material (type & color)
Cable length
Gauge
CableHigh Temperature
Maximum ambient temperature
Material (type & color)
Cable length
Gauge
12 24 VDC @20 mA
10 mA
2.5%
50 ohms
50K ohms
J or K thermocouple,
10mV/˚C Linear Voltage
IP 65, NEMA 4
IEC 801-4, Level 1
10 to 95%, non-condensing
-30 to 85˚ C (-22 to 185˚ F)
Max error of 5˚ C (for T=25˚)
stabilization time=20 mins.
0 to 70˚ C (32 to 160˚ F)
0 to 94˚ C (32 to 200˚ F)
0 to 105˚ C (32 to 220˚ F)
0 to 260˚ C (32 to 500˚ F)
19 mm dia x 87 mm L
(0.75 in dia x 3.4 in L)
130 g (4.5 oz)
Stainless steel
105˚ C (220˚ F)
PVC, grey
1 m (3 ft)
AWG 24 (J, K t/c cable)
AWG 22 (10mV/˚C cable)
260˚ C (500˚ F)
Teflon, black
1 m (3 ft)
AWG 24
Table 2 (continued): Specifications
65
Focus Point D:S = Distance to spot divided by spot diameter at the focus point
Far Field D:S = Ratio at distances greater than 10x the focus distance
Target spot size
at focus point
Diameter of target
spot size in inches
Distance from sensor
to object in inches or feet
Distance from sensor to
object in millimeters or meters
Diameter of target
spot size in millimeters
Optical Chart
Figure 2 shows you how to read the optical chart. The
optical chart (Figure 3) indicates the nominal target
spot diameter at any given distance from the sensing
head and assumes 90% energy.
Figure 2: How to Read the Optical Chart
INSTALLATION
The installation process consists of the following:
Preparation
Mechanical Installation
Electrical Installation
The most important part of the installation process is
preparation. Please read the following section thor-
oughly before proceeding with the mechanical and
electrical installations.
Preparation
Distance and Spot Size—The size of the area (spot
size) you wish to measure determines the distance
between the sensor and the target (see Figure 3 for dis-
tances and spot sizes). The spot size must not be larg-
er than the target. Mount the sensor so the measured
spot is the same or smaller than the target. Figure 4 is
an overview of proper sensor placement.
Sensor
GoodBest Incorrect
Target equal
to spot size
Target smaller
than spot size
Target greater
than spot size
Background
Figure 4: Proper Sensor Placement
Figure 3: Optical Chart
1.888.610.7664 sales@GlobalTestSupply.com
Ambient Temperature—The sensing head is designed
to operate in ambient temperatures from 0 to 70°C (32
to 160°F). For ambient temperatures above 70°C
(160°F), a factory installed air/water-cooled housing
option is available that allows operation in ambient
conditions up to 260°C (500°F) with water cooling.
The air/water-cooled housing option comes with a
high-temperature cable and integrated air purging.
Atmospheric Quality—Smoke, fumes, dust, and other
contaminants can coat the lens and cause erroneous
temperature readings. We recommend using the air
purge collar accessory in these types of environments
to keep the lens clean. (The air/water-cooled housing
comes with integrated air purging.)
Electrical Interference—To minimize electrical or elec-
tromagnetic interference or “noise,” mount the sensor
away from motors producing large step load changes.
Wiring—Before installing, be sure to check the dis-
tance between the sensor and the monitoring/control-
ling device. If necessary, extension cables are available
as accessories.
Power—Have available a 12–24 VDC, 10 mA, power
supply.
Mechanical Installation
All sensors come with a 1 m (3 ft) cable and 2 mount-
ing nuts. You can mount the sensor in brackets or
cutouts of your own design, or you can use the fixed
and adjustable mounting bracket accessories. Figures
5 through 7 show the mounting bracket accessories’
and sensor’s dimensions.
8
7
Figure 5: Fixed Mounting Bracket
38
(1.5)
22
(.875)
1.5
(.06)
38
(1.5)
2X 13
(2X .5)
5
(.196)
2X 90˚
2X 45˚
19
(.75)
38
(1.5)
38
(1.5)
19 (.76)
5 (.196)
Full R
mm (inches)
Air/Water-cooled Housing with integrated air purge
The air/water-cooled housing option (Figure 8) allows
the sensor to withstand ambient temperatures up to
260° C (500° F) with water cooling and the high-temper-
ature cable. (The high-temp cable is standard when the
housing is ordered as an option.) It has 1/8” NPT fit-
tings for water and air. Water temperature should be
15-30° C (60-86° F) for best performance. Chilled water
below 10° C (50° F) is not recommended. Without the
high-temperature cable, the sensor can withstand ambient
temperatures only up to 105° C (220° F) with water cooling.
9 10
137
(5.38)
~ 25
(~ 1)
13
(0.5)
6
(0.25)
118
(4.63)
25
(1)
96
(3.79)
12
(0.45)
10
(0.39)
~ 13
(~ 0.5)
38 (1.5)
mm (inches)
3/4"16UNF 2A
1/8" NPT fittings (3)
flats
Rear View
38 (1.5)
20 (0.8)
Front View
Figure 8: Air/Water-cooled Housing
Figure 6: Adjustable Mounting Bracket
41
(1.625)
22
(.875)
38
(1.5)
2X 13
(2X .5)
5
(.196)
2X 90˚
2X 45˚
19
(.75)
38
(1.5)
59
(2.31)
19 (.76)
5 (.196)
Full R
mm (inches)
38
(1.5)
Figure 7: Sensor
7
(.27)
19
(.75)
63
(2.48)
89
(3.5)
17 (.67)
mm (inches)
1 m (3 ft)
PVC Cable
4 (.17)
3/4"16UNF 2A
M18 x 1 (if ordered metric)
14 (.56) 19 (.75)
1.888.610.7664 sales@GlobalTestSupply.com
11
35
(1.36)
21
(0.84)
11
(0.42)
9
(0.37)
31
(1.21)
61
(2.38)
~ 25
(~ 1)
35
(1.38)
19 (0.75)
10/32" threads
3/4" 16UNF 2A
mm (inches)
Inside threads M18 x 1
(if ordered with metric threaded sensor)
Air Purge Collar—The air purge collar accessory
(Figure 9) is used to keep dust, moisture, and other
contaminants away from the lens. It must be screwed
in fully. Air flows into the 10/32” fitting and out the
front aperture. Clean or “instrument” air is recom-
mended. The air purge collar accessory is not needed with
the air/water-cooled housing.
Figure 9: Air Purge Collar
Recommended
Cooling water supply
Temperature
Flow rate
Pressure drop
(across unit only)
Cooling air supply
Temperature
Flow rate
Pressure drop
(across unit only)
Air purge air supply
Temperature
Flow rate
Pressure drop
(across unit only)
1530˚ C (6086˚ F)
1.89 liters per min (0.5 gpm)
< 0.69 bar (10 psi)
< 30˚ C (< 86˚ F)
70.8 liters per minute (2.5 SCFM)
< 0.34 bar (5 psi)
< 30˚ C (< 86˚ F)
11.33 liters per minute (0.4 SCFM)
< 0.34 bar (5 psi)
Table 3: Recommended Water and Air
12
Right Angle Mirror—The right angle mirror accessory
(Figure 10) allows a perpendicular view of a target. It
may be used when space is limited or when you need
to avoid excessive radiation to the sensor. This can be
mounted either on the end of the sensor or on the air
purge collar, but not on the air/water-cooled housing.
Note: When using the right angle mirror, a small
amount of energy emitted by the source is lost, which
results in a lower than actual temperature reading. To
compute the corrected temperature, use this formula:
T = 1.035T
m .035Tamb
where T=corrected temperature, Tm=temperature read-
ing with mirror, and Tamb=ambient temperature. All
temperatures are in either °C or °F.
20
(.8)
31
(1.25)
13
(.5)
3/4"16 UNF 2B
20 (.8)
mm (inches)
82
Figure 10: Right Angle Mirror
13
WARNING
Incorrect wiring will cause severe, per-
manent damage to the sensor.
Pay close attention to the wiring diagram in
Figure 11, and match your sensor to the appropri-
ate output type in Table 4 or 5. Wire accordingly.
DO NOT CONFUSE OUTPUT WIRES WITH
POWER SUPPLY WIRES.
Electrical Installation
Sensor to Electronics Cable—The sensor to electron-
ics cable is a 1m (3 ft), 4-wire, PVC cable. One end is
attached, at the factory, to the sensor head. The
other end has two pairs of wires and a bare shield
(ground) wire (see Figure 11).
The unlabeled pair of wires is for connecting to a
controller or chart recorder or for attaching to a ther-
mocouple plug (for connecting to a thermocouple
meter). DO NOT CONNECT TO A POWER
SOURCE.
The second pair of wires, with the label, is for con-
necting to a power source.
14
Figure 11: Wiring Configuration
12 24 VDC Red (+)
1
2
3
4
5 (Shield)
NOTE LABEL
(ON POWER
SUPPLY WIRES ONLY)
Wire Numbers
(Refer to Table 4 or 5)
Wire
Number
FunctionWire ColorOutput Label
J-type
Thermo-
couple
K-type
Thermo-
couple
10mV/˚C
Voltage
1
2
3
4
5
1
2
3
4
5
1
2
3
4
5
Output
Power
Supply
Output
Power
Supply
Output
Power
Supply
White
Red (white stripe)
Red (yellow stripe)
Yellow
Bare
Yellow
Red (yellow stripe)
Red (white stripe)
White
Bare
White
Green
Red
Black
Bare
Signal + (Iron)
Signal (Constantan)
Power Supply +
Power Supply
Shield Ground
Signal + (Chromel)
Signal (Alumel)
Power Supply +
Power Supply
Shield Ground
Signal +
Signal Ground
Power Supply +
Power Supply
Shield Ground
Table 4: Standard Cable Wiring
Wiring—Wire the electronics cable using Figure 11 and
Table 4 or 5 (for high temp cables) as a guide. USE
ONLY THE OUTPUT TYPE OF YOUR SENSOR.
WIRING TO THE WRONG OUTPUT WILL DAM-
AGE THE SENSOR. Note in Figure 11 that the num-
bers refer to the wire numbers in Table 4 or 5, which
shows proper wiring connections based on insulation
color coding.
1.888.610.7664 sales@GlobalTestSupply.com
E xtension C abl es—E xtension cables are available as
accessories. A lso available is a thermocouple connec-
tion kit.
M A I N T E N A N C E A N D
T R O U B L E S H O O T I N G
If your sensor is not performing as it should, try to
match the symptom in Table 6 to its probable cause. If
the table does not help, call us at one of the phone
numbers listed on the last page.
Our customer service representatives are always at
your disposal for application assistance, calibration,
repair, and solutions to specific questions or problems.
C ontact our Service D epartment before returning any
equipment to us. In many cases, problems can be
solved over the telephone.
I M PO R TA N T
Be aware of the following when using the sensor:
If the sensor is exposed to significant changes in
ambient temperature (hot to cold or cold to hot),
allow 20 minutes for the temperature to stabilize
before taking or recording measurements.
Do not operate the sensor near large electrical or
magnetic fields (e.g., around arc w elders or induc-
tion heaters). Electro-M agnetic Interference (E M I)
can cause measurement errors.
C onnectors or wires must be connected only to the
appropriate input jacks or terminals.
16
15
O PE R AT I O N
Once the sensor is in position and you have made sure
that the appropriate power, air, water, and cable con-
nections are secure, the system is ready for continuous
operation.
To operate, complete the following simple steps:
1. Turn on the power supply.
2. Turn on the meter, chart recorder, or controller.
3. R ead/ monitor the temperature.
WA R N I N G
I f using the air/water-cooled housing, do not
leave it in a heated environment with the
coolant turned off. D amage to the sensor and to
the housing can occur.
Table 5: H igh Temperature C able Wiring
Wire
Number
F unctionWire C olorOutput L abel
J -type
Thermo-
couple
K -type
Thermo-
couple
10mVC
Voltage
1
2
3
4
5
1
2
3
4
5
1
2
3
4
5
Output
P ower
S upply
Ð
Output
P ower
S upply
Ð
Output
P ower
S upply
Ð
White
R ed (white s tripe)
R ed
Y ellow
B are
Y ellow
R ed
R ed (white s tripe)
White
B are
R ed
Y ellow
R ed (white s tripe)
White
B are
S ignal + (Iron)
S ignal Ð (C onstantan)
P ower S upply +
P ower S upply Ð
S hield G round
S ignal + (C hromel)
S ignal Ð (Alumel)
P ower S upply +
P ower S upply Ð
S hield G round
S ignal +
S ignal Ground
P ower S upply +
P ower S upply Ð
S hield G round
17
S ymptom
No output
E rroneous Temp.
E rroneous Temp.
E rroneous Temp.
P robable C aus e
No power to sensor
Incorrect wire
connection
Faulty sensor cable
F ield of view
obstruction
S olution
C heck the power
supply
C heck wire color
codes and reconnect
Verify cable continuity
R emove obstruction
L ens C leaning—K eep the lens clean at all times. Blow
off loose particles (if not using the air purge accessory)
with clean compressed air, then carefully wipe surface
with moist cotten sw ab (w ater or water-based glass
cleaner). D O N O T use solvents.
Table 6: Troubleshooting
1.888.610.7664 sales@GlobalTestSupply.com
  • Page 1 1
  • Page 2 2
  • Page 3 3
  • Page 4 4
  • Page 5 5

RayTek RAYCI3A10L Owner's manual

Type
Owner's manual

Ask a question and I''ll find the answer in the document

Finding information in a document is now easier with AI