Sony CCD-TR440PK Owner's manual

Category
Camcorders
Type
Owner's manual

The Sony CCD-TR440PK is a versatile and user-friendly camcorder that combines video recording, playback, and editing capabilities in a compact and portable design. With its powerful features and intuitive interface, it's an excellent choice for capturing and sharing your precious moments.

The Sony CCD-TR440PK is a versatile and user-friendly camcorder that combines video recording, playback, and editing capabilities in a compact and portable design. With its powerful features and intuitive interface, it's an excellent choice for capturing and sharing your precious moments.

CCD-TR44/TR330/TR330PK
SERVICEMANUAL
US Model
CCD- TR44
E Model
CCD- TR330/TR330PK
Hong Kong Model
Tourist Model
CCD- TR330
PHOTO : CCD-TR330
Video8
HandgEam
I B MECHANISM I
SPECIRCATIONS
For MECHANISM ADJUSTMENT, refer to the
"8mm Video MECHANICAL ADJUSTMENT
MANUAL _" (9-973-801-11).
Video Camera Recorder
System
Video recording system
Two rotary heads, Helical
scanning, FM system
Audio recording system
Rotary heads, FM system
Video signal
color, EIA standards
Usable cassette
8 nun video format cassette
(standard 8 mm)
Tape speed
SP mode: Approx. 1%2inch
(1.43 cm)/second
LP mode: Approx. SA6inch (0.72
cm)/second
Recording/Playback time
SP mode: 2 hours (P6-120)
LP mode: 4 hours (P6-120)
Fastforward/rewind time
Approx. 5 min. (P6-120)
Image devide
CCD (Charge Coupled Device)
Viewfinder
Electronic viewfinder,
Black and white
EEEEEEEllm
llllEllEll
mElEE
I MCROF LM
Lens
]0 x, Combined power zoom
lens, F1.6 - 2.7, Filter diameter 1
1,_inches (37 ram), TTL
autofocus system inner focus
wide macro system
Focal distance
f = z/4- 2 lh inches (6.3 - 63 mm)
] 13.46- 17 3/(inches (45 - 450
mm) when converted to a 35
mm still camera
Colour temperature
Auto
Minimum illumination
0.6 Ix at F 1.6
Illumination range
0.6 to 100,000 Ix
Recommended illumination
More than 100 Ix
Input and Output connectors
Video output
Phono jack, 1 Vpp, 75 _,
unbalanced, sync negative
Audio output
Monaural, Phono jack, 327 mV,
(at load impedance 47 k.Q),
impedance less than 2.2 k.Q
RFU DC OUT
specialm_jack,DC5v
LANC jack
Stereo-mini-mini-jack (e 2.5
ram)
MIC jack
ML_i-jack, 0.388 mV, low
impedance with 2.5 to 3 V DC,
output impedance 6.8 k.Q (o
3.5 mm)
General
Power requirements
On battery mounting surface
6.0V (battery pack), 7.5V (AC
power adaptor)
Average power consumption
3.6 W
Installation
Vertically, Horizontally
Operating temperature
320}: to 104°F (0°C to 40°C)
Storage temperature
--4°F to +140°F (-20°C to
+60°C)
Dimensions
Approx. 4 3/8x 4 t/8 x 8 inches
(110 x 103 x 202 ram) (w/h/d)
Mass
Approx. 1 Ib 8 oz (690 g)
Excluding the battery pack,
lithium battery, cassette and
shoulder strap
Approx. 2 lb (910 g)
Including the battery pack NP-
33, lithium battery CR2025,
cassette P6-120 and shoulder
strap
Microphone
E]ectret condenser
microphone, monaural type
Supplied accessories
See page 2.
-- Continuedonnextpage--
VIDEOCAMERARECORDER
The instructions in this manual are for CCD-TR44.
As you read through this manual, buttons and settings on the camcorder are shown in capital letter.
e.g. Set the POWER switch toCAMERA.
r Contents of the recording cannot be compensated if recording or playback is not made due to a
malfunction of the camcorder, video tape, etc. I
Before using your camcorder, you first need to charge and install the battery pack. To charge the battery
pack, use the supplied AC-V15 AC power adaptor.
Charge the battery pack on a flat place without vibration.
(1) ConneCt the AC power adaptor to the wall outlet.
(2) Align the right side of the battery pack with the llne on the AC power adaptor, then slide the battery
pack in the direction of the arrow.
(3) Set the selector to CHARGE. The CHARGE lamp (orange) lights up. Charging begins.
When charging is completed, the CHARGE lamp goes out. Unplug the unit from the mains, and then
remove the battery pack and install it on the camcorder.
'1
2 3
Charging Time
Battery pack NP-33
(supplied)
Charging 60
time*
NP-98/98D
215
NP-80/80D NP-68 NP-C65 NP-60D
190 !25 105 9O
*Approximate minutes to charge an empty pack using the AC-V15 (Lower temperatures require a
longer charging time.)
Battery Life
Battery pack NP-33 NP-g8/98D NP-80/80D NP-68 NP-C65 NP-60D
(supplied)
Tipical recording time* 40 150 135 90 70 60
Continuous recording time** " I I
** Approximate minutes when recording while you repeat recording start/stop, zooming and turning
the power on/off. The actual battery life may be shorter.
*** Approximate continuous recording time indoors.
i
crt
m rrl
z O
m--
B.
o
o
o
-.4
"o
Removing the Battery Pack
Slide the battery pack in the direction of the arrow,
Notes on charging the battery pack
The POWER lamp will remain lit fora while even if thebatterypack is removed and thepower cord is
unplugged after charging the battery pack. This is normal.
li_the POWER lamp does not light, set the selector to VTR (DC OI.Y'Dand disconnect the power cord.
After about one minute, reconnect the AC power cord and set the selector to CHARGE again.
You cannot operate the camcorder using the AC power adaptor while charging the battery pack.
Installing the Battery Pack
(1) Insert the top of the battery pack into the top of the battery mounting surface.
(2) Push the battery pack so that it attaches firmly.
,b: You can hear the beep sound to confirm your operation.
#
Removing the Battery Pack
Slide BA'IT, and then pull the lower part of the battery pack.
9
i
i
z
8
9
Make sure that a power source is installed.
(1} While pressing the small blue button, slide EJECTin the direction of the arrow. The cassette
compartment automatically opens.
(2) Insert a cassette (not supplied) with the window facing out.
(3) Press the PUSH mark on the cassette compartment to dose it. The cassette compartment
automatically doses.
,h: You can hear the beep sound to confirm ),our operation.
rl EJECT
2
3
To Eject the Cassette
While pressing the small blue button, slide EJECTin the direction of the arrow.
To Prevent Accidental Erasure
Slide the tab on the cassette to expose the red mark.
If you insert the cassette with the red mark exposed and close the cassette compartment, the beeps sound
for awhile. If you try to record with the red mark exposed, the _ and _--indicators flash in the
viewfinder, and you cannot record on the tape. To re-record on this tape, slide the tab back out to cover
the red mark.
Make sure that a power source and a cassette is inserted.
When you use the camcorder for the first time, power on it and reset the date and time to your time (p.
31) before you start recording. When you reset the date and time, the date is automatically recorded for
10seconds after you start recording (AUTO DATE feature). This feature works only once a day.
Before you record one-time events, you may want to make a trial recording to make sure that you are
using the camcorder correctly.
(1) _naile pressing the small g_=en button on the POWER switch, turn it to CAMERA.
(2) Slide the START/STOP MODE switch to ._..
(3) Turn STANDBY up. The "STBY" indicator appears in the viewfinder.
(4) Press START/STOP (red button). The camcorder starts recording and the "STBY"indicator changes
to the "REC" indicator.
You can also select Recording mode, SP (standard play) mode or LP (long play) mode. Set REC MODE
(p. 27) according to the length of your planned recording before you start.
_: You can hear the beep sound to confirm your operation.
I .... I
I ..V. | s I I -:÷:-
L "" =" "=_ ) L
To Stop Recording Momentarily [a]
Press START/STOP again. The "REC" indicator in the viewfinder changes to the "STBY" indicator
(Standby mode).
To Finish Recording [b]
Press START/STOP. Turn STANDBY down, and set the POWER switch to OFF.
Then, eject the cassette (p. 10)and remove the battery (p. 9).
[a)
STBY 0:3_
10 11
Note on Standby mode
If you leave the camcorder for 5 minutes or more _ith a cassette inserted in Standby mode, the
camcorder goes off automatically. This prevents wearing do_'n the battery and weanng out the tape. To
resume Standby mode, turn STANDBY down once and turn it up again. To start recording, press
START/STOP.
To Focus the Viewfinder Lens
If the xdewfinder is not in focus at all or when you use the camcorder after someone else has used it,
focus the viewfinder lens. Turn the viewfinder lens adjustment ring so that the indicators in the
viewfinder come into sharp focus.
STBY 0:00:00
,,e
Note on the indicators in the vlewfinder
The indicators appear in CAMERA mode only. They do not appear in PLAYER mode.
Recording with the START/STOP button depressed
You can also make recording while pressing down the START/STOP button. To make the START/STOP
button work this way, slide the START/STOP MODE switch to _l . [a]
Shooting scenery in several short takes
You can automatically make recording forabout 5 seconds with the 5 SEC (p.25).To make the START/
STOP button work thisway, slidethe START/STOP MODE switch to 5 SEC. [b]
[a] [b]
START/STOP MODE
,,_,..1111 IL-
5
SEC
s o0
-----ii ii i=------
5
SEC
Note on recording
When you record from the beginning ofthe tape, run thetape forabout 15 seconds before actual
recording.This prevents the camcorder from missing any start-upscenes when you play back the tape.
Notes on recording mode
This camcorder records in the SP mode (approximately 19/32 inch (1.43crn)/second) and in the LP
mode (approximately 5/16 inch (0.72crn)/second) (p.27) and can play back in the SP mode and LP
mode. The playback quality in the LP mode, however, willnot be as good as that in the SP mode.
When a cassetterecorded on thiscamcorder in LP mode isplayed back on other types of 8 mm
camcorders or VCRs, the playback quality may not be as good as thaton thiscamcorder.
Notes on the tape counter
* The tape counter indicatesthe recording time.Use itas a guide. There willbe a time lag of several
seconds from the actual time.To setthe counter to zero,press COUNTER RESET locatedbelow the
viewfinder.
Ifthe tape isrecorded inSP and LP modes mixed, the tape counter shows incorrectrecording time.
When you intend to edit the tape using the tape counter, record in same (SP or LP) mode.
on beep sound
Note
As indicated with _ in the ll]UstTations, a beep sounds when you turn the power on or when you start
tM
recording and two beeps sound when you stop recording, confirming the operation. Severa] beeps also o
sound as a warning of any unusual condition of the camcorder (p. 49). Note that the beep sound is not
recorded on the tape. If you do not want to hear the beep sound, set BEEP to "OFF" (p. 27).
Note on the AUTO DATE feature
The clock is set to the East Coast Standard Time at the factory. You can reset the clock (p. 31).
The Ab_I'O DATE feature works once a day. However, the date may automatically appear more than
once a day when:
- you reset the date and time.
- you e_=ct and insert the cassette again.
- you stop recording within 10 seconds.
When moving from indoors to outdoors (or vice versa)
Turn STANDBY up and point the camcorder at a white object for about 15 seconds so that the white
balance isproperly adjusted.
12 13
, Using the Zoom Feature_.
Zooming is arecording technique that lets you change the size of the subject in the scene. For more
professional-looking recordings, use the zoom sparingly.
T side: for telephoto (subject appears closer)
W side: for wide-angle (subject appears farther away)
Zooming Speed
Turn the power zoom lever full,,, for a high-speed zoom. Turn it lightly for arelatively slow zoom.
When you shoot a subject using a telephoto zoom
If you cannot get a sharp focus while in extreme telephoto zoom, turn the power zoom lever towards the
W side until the focus is sharp.
You can shoot a subject that is at least 2.6 feet (about 80 cm) away from the lens surface in the telephoto
position, or 1 / 2 inch (about I cm) in the wide-angle position.
For hand-held shots, you'll get better results holding the camcorder according to the following
suggestions:
[a] [b]
Hold the camcorder firmly and secure it with the grip strap so that you can easily manipulate the
controls with your thumb. [a]
Place your right elbow against your side.
Place your left hand under the camcorder to support it. Do not cover the microphone with your fingers.
Place your eye firmly against the viewfinder eyecup.
Use the viewfinder frame as a guide to determine the horizontal plane.
You can also Rcord in a low position to get an interesting recording angle. Turn the viewfinder up for
recording from a low position. [b]
Place the camcorder on a flat surface or use a tripod
Try placing the camcorder on a table top or any other fiat surface of suitable height. If you have a tripod
for a still camera, you can also use it with the camcorder (p. 45).
When attaching a non-Sony tripod, make sure the tripod screw is shorter than 9/32 inch (6.5 ram).
Other-wise, the screw may damage the inner parts of the camcorder.
Cautions on the viewflnder
Do not pick up the camcorder by the viewfinder. [€]
Do not place the camcorder so as to point the viewfinder toward the sun. The inside of the viewfinder
may be deformed. Be careful in placing the camcorder under sunlight or by the window. [d]
[€] [d]
Z
g
!
5"
,.j
14 15
o_
UsingED1TSEARCH,youcan reviewthe lastrecorded sceneorcheck the recorded picture in the
viewfindec.
(1) Whilepressing the smallgreenbuttonon thePOWERswitch, turnit toCAMERA.
(2) TurnSTANDBYup.
(3) PressEDITSE.M_CH.Pressthe- (g)) side momentari]y,the lastfew seconds ofthe recordedportion
plays back(Re¢Review}.
Holddown the- side ofEDITSEARCHuntilthe camcorder goes backtothe scene you want. Thelast
recordedportion is played back.Togo forward,hold down the+ side (Editsearch).
3
÷E0tTSF3_CH-
6
To Begin Re-recording
Press START/STOP Re-recording begins from the point you released EDITSEARCH. Provided you do
not eject the cassette, the transition between the last scene you recorded and the next scene you record
will be smooth.
You can use this camcorder as a VCR by connecting it to your TV for playback. It is recommended to use
the house current as the power source (p. 20).
If a VCR is connected to a TV
Connect the camcorder to LINE IN on the VCR by using the supplied A/V connecting cable. Set the
input selector on the VCR to LINE. Set the TV/VCR selector to VCR on the 'IV.
,--,.,..
OUT
AUDIO OUT
:Signal flow
VIDEO IN
AUDIO IN
Connecting Directly to a 13/
Connect the camcorder to your "IVby using the the supplied A/V connecting cable. Set the TV/VCR
selector to VCR on the 'IV.
l
li
;
: Signalflow
To Connect a TV or a VCR without Video/Audio Input Jacks
Use the RFU°95UC RFU adaptor (not supplied).
16
17
You can monitor the playback picture in the viewfinder. You can also monitor on the TV screen, after
connecting the camcorder to the TV/VCR (p. 17).
{1) While pressing the small green button on the POWER s_sitch, turn it to PLAYER.
(2) Insert the recorded tape with the window facing out.
(3) Press I_-. Playback starts.
,h: You can hear the beep sound to confirm your operation.
1
O_F
3
STOP REW_ i PLAY _FF PAUSE
To stop playback, press II.
TO rewind the tape, press <l<l.
TO fast-forward the tape, press IH,-.
Various Playback Modes
To view a still picture (playback pause)
Press II during playback. To resume playback, press II or D,,-.
To locate a scene (Picture Search)
Keep pressing '41<1or _ during playback. To resume normal playback, release the button.
TO monitor the high-speed picture during fastforward or rewind (Skip Scan)
Keep pressing <1<1 while rewinding or _ while advancing the tape. To resume normal playback,
press II,.-.
To view the picture in a sequence of stop-motion images
Press EDITSEARCH in playback pause mode. If you keep pressing EDITSEARCH, you can view the
picture playback in the forward (+) or reverse (-) direction.
Notes on playback
Streaks appear and the sound is muted in the various playback modes.
When still picture mode lasts for 5 minutes or more, the camcorder automatically enters stop mode.
€€
18 19
You can choose any of the fonowing power sources for your camcorder, battery pack (P.7), the house
current, and 12/24 V car battery. Choose the appropriate power source depending on where you want to
use yOur camcorder.
Place Power source Accessory 1:obe used
Indoors House current AC power adaptor AC-V15(sopplied), AC-SI0
Outdoor Battery pack Battery pack NP-33 (supplied), NP-98/98D, NP-80/80D,
NP-68, NP-C65, NP-60D
In the car 12 V or 24 V car battery DC pack DCP-77
This mark indicates that this product is agenuine accessory for Sony video products.
When purchasing Sony video products, Sony recommends that you purchase
accessories with this "GENULNE VIDEO ACCESSORIES" mark.
Using the House Current
To use the supplied AC-V] 5 AC power adaptor.
(1) Connect the AC power cord to a wall outlet. Insert the top of the connecting plate of the AC power
adaptor into the top of to the battery mounting surface. Push the conneCting plate so that it attaches
firmly.
(2) Set the selector to \rI_ (DC OUT).
_: You can hear the beep sound to confirm your operation.
2
WARNING
AC power cordmust onlybechangedatqualifiedserviceshop.
PRECAUTIONS
The set is not disconnected from the AC power source (mains) as long as it is connected to the wall
outlet, even if the set itself has been turned off.
Notes on the POWER lamp
* The POWER lamp willremain litfor a while even ifthe unit isunplugged afteruse. This isnormal.
* Ifthe POWER lamp does not light,set the selectorto V'l" (DC OUT) and disconnect the AC power
cord. After about one minute, tryagain.
To remove the adaptor
The adaptor isremoved in the same way as the batterypack (p.10).
Using a Car Battery ..........
U_ the DCP-T'/DC pack (not supplied). Connect thecord of the DC pack to the cigarettelighter socket
of acar (12 V or 24 V). Connect the DC pack to the battery mounting surface of the camcorder.
To remove the DC pack
The DC pack is removed in the same way as the battery pack (p. 10).
Options for Charging the Battery Pack
AC-SI0 AC power adaptor.
You can charge a batterypack whether itisused up or not with thisadaptor becau_ ithas a discharging
function.
e_
o
20 21
(D
22
Before you startrecording,press DATE or TIME. You can record the date or time displayed in the
viewfinder with the picture.You cannot record the date and time at the same time. Except for the date or
time indicator,no indicatorin the viewfinder isrecorded.
The clock issetto theEast Coast Standard Time at the factoH'.
To Stop Recording with the Date or Time
Press DATE or TIME again. Recording continues.
You can select from three PROGRAM AE (Auto Exposure) modes to suit your shooting situation. When
you use PROGRAM AE, you can capture high-speed action or night views.
Selecting the Best Mode ...... , ....
Select the best mode by using the following examples.
Sports mode
Outdoor sports scenes such as football, tennis,
golf or skiing
A landscape in a moving car
t_ High-speed shutter mode
A golf swing ora tennismatch in fine weather
with the ball captured clearly
Playing back certain scenes with high-speed
movements in clear, sharp picture
Using the PROGRAM AE Function
_,)Twilight mode
Recording night views, neon signs or
fireworks
Set the mark of the desired mode to the @ mark above the PROGRAM AE dial.
Note on shutter speed
The shutter speed in each PROGRAM AE mode is as follows:
Sports mode - bet_,een 1/60 to 1/500
High-speed shuttermode - I/4000
Twilight mode- 1/60
AUTO mode - 1/60
g
_L
o
St
c
o
J
23
When you shoot a subject with the light source behind the .¢ubject or a subject with a light background,
use the BACK LIGHT.
P_ss BACK LIGHT. The [] indicator appears inside the vie_,ffinder.
[a]
_,BACKLIGHT (_
[a] Subject is too dark because of backlight.
[b] Subject becomes bright with backiight compensation.
After Shooting
Press BACK LIGHT again to let the [] indicator go out under normal lighting condition. Otherwise, the
picture will be too bright under normal lighting condition.
This function isalso effective under following conditions:
On the snow e.g. at the ski resort
At the beach under strong sunshine
A subject xxith a light source nearby or a mirror reflecting light
A white subject against awhite background. Especially when you shoot a person wearing shiny
clothes made of silk or synthetic fiber, his or her face tends to become dark if you do not use this
function.
Long, continuous shots of scenery tend to be dull, and have to be edited to make an interesting video.
With the 5 SEC (5-second recording) mode, the camcorder records for about 5 seconds and then switches
to Standby mode, so that you will automatically take a series of quick shots resulting in a lively video.
(1) Slide the START/STOP MODE switch to 5SEC.
(2) Turn STANDBY up and p_*ss START/STOP. Recording starts. Five dots appears in the viewfinder.
The dots disappear ata rate of one per second. When five seconds elapse and all the dots disappear, the
camcorder switches to Standby mode automatically.
To Extend the Recording Time
Press START/STOP again before all the dots disappear. Recording continues for about 5 seconds from
the moment you press START/STOP.
To Cancel 5-Second Re(ording
Slide the START/STOP MODE switch to _ (normal recording). Ifyou slide the switch while recording,
recording continues.
_r
==
=t
=,
o
=.-
24 25
..A
You can select from nine preset titles to superimpose it on the picture during recording. Each time you
press TITLE,the preset titles appear one by one.
To Superimpose from the Beginning
(1) Turn the POWER switch to CAMERA.
(2) Turn STANDBY up.
(3) Press TITLErepeatedly until the desired title appears. The title flashes.
(4) Press START/STOP to start recording.
(5) Press TITLEwhen you want to turn off the title.
To Superimpose On the Way of Recording
(1) PressTITLE repeatedly until the desiredtitle appears.The title flashes.
(2) When the title stopsflashing,pressTITLE. The title disappears.
(3) Press START/STOP to start recording.
(4) Press TITLEwhen you want to superimpose the title.
(5) Press TITLEwhen you want to turn off the title.
_[ I
+
[ THE ENDI
+
[ GREAT,)
t
( NO.I)
+
I VACATIONI '
( BIRTHDAYFUNI
I OURHOLIDAY)
€,
I HOWPRETrYt I
,€.
I THEWEDDINGI
I
Note on selecting a title
You cannot select a title during recording.
You can change the mode settings to further enjoy the features and functions.
(1) Slide the cover to the left. You will find the mode switches.
(2) Set the mode switches to the desired mode.
(3) Close the cover.
BEEP \
ON _ OFF \
REC MODE \
SP I'D"-] LP k
Selecting the Mode Setting of Each Item
COMMANDER <ONIOFF>
Set to ON when using a Remote Commander (not supplied).
The Remote Commanders are available on option.
Set to OFF when not using a Remote Commander for the camcorder.
BEEP <ON/OFF>
Set to ON to turn the beep sound on.
Set to OFF to turn the beep sound off.
REC MODE <SPILl>>
Select SP to record a tape in SP (standard play) mode.
Select LP to record a tape in LP (long play) mode.
E"
It
3
tn
9
a=
(
26 27
I
You can create your own video program by editing with any other 8ram, Him Hi8, _ VHS, S_ S-
VHS, _ VHSC, S_ S-VHSC, IQBetamax or _ ED Betamax VCR that has video/audio inputs.
After connecting the camcorder to the VCR,
(1) Turn the POWER switch to PLAYER.
(2) Insert ablank tape (or a tape you want to record over) into the recording VCR. Then insert your
recorded tape into the camcorder.
(3) Play back the recorded tape on the camcorder until you locate the point where you want to start
editing. Then set the camcorder toplayback pause mode.
(4) Set the recording VCR to recording pause mode.
(S) Press II on the camcorder and VCRsimultaneously to start editing.
To Edit More Scenes
Repeat steps3 to 5.
To Stop Editing
Press STOP on the camcorder and VCR.
Use of the EDITSEARCH button
To play back a tape in the forward or reverse directionkeep pressing EDITSEARCH during playback
pause. You can play back stillpicturessuccessivelyat specificintervalsby pressing EDITSEARCH
intermittently.
Your camcorder is supplied with the lithium battery installed. The lithium battery lasts for about I year
under normal operation. When the battery becomes weak or dead, _'_ indicator flashes in the vlewfinder
forabout 5 seconds when you set the POWER switch to CAMERA. In thiscase,replace the battery
with the Sony CR2025 or Ouracell O1.-2025 lithium battery. Use of another battery may present a
risk of fire or explosion.
Note on Lithium Battery
Notethatthelithiumbatteryhasa positive(+)and anegative(-)terminalsasillustrated,Be sureto
installthe lithiumbatteryso thatterminalson the batterymatch theterminalson the camcorder.
WARNING
The battery may explode if mistreated. Do not recharge, disassemble, or dispose of in fire.
Caution
Keep the lithium battery out of the reach of children. Should the battery be swallowed, consult a
doctor immediately.
o
!
G
f
o
28 29
.,a.
The playback mode is selected automatically according to ti_ recording system (SPILl) mode) in which
the tape was recorded.
Foreign 8 mm video
You cannot play software recorded on a different "IVcolor system. Because the TV color systems differ
from country to country, you may not be able to play back foreign pre-recorded software. Refer to page
39 to check the TV color system of foreign countries.
This section shows you how you can get the most out of your battery pack.
. P_paring the Battery Pack
Always Carry Additional Batteries
Have sufficient battery pack power to do 2 to 3 times as much recording as you have planned.
Battery Life is Shorter in Cold Environment
Battery efficiency is decreased and the battery, will be used up more quickly if you are recording in cold
environment.
To Save Battery Power
Turn the STANDBY switch on the camcorder down when not recording to save battery power. [a] on
page 33.
A smooth transition between scenes can be made even if recording is stop/x_i and started again. While
positioning the subject, selecting an angle, or looking through the viewfinder lens, the lens moves
automatically and the battery is used. The battery is also used when acassette is inserted or removed.
When to Replace the Battery
While you are using your camcorder inCAMERA mode, the remaining battery indicator decreases
gradually as battery power is used up.
When the remaining battery indicator reaches the lowest point, the e¢3indicator appears and starts
flashing in the viewfinder. [b]
When the c_Oindicator in the viewfinder changes from slow flashing to rapid flashing while you are
recording, turn the POWER switch to OFF on the camcorder and replace the battery pack. Leave the tape
in the camcorder to obtain smooth transition between scenes after the battery is replaced.
Note on the remaining battery indicator
The remaining battery indicator of the camcorder may indicate a different remaining capacity from that
of the battery pack with the remaining battery indicator (not supplied). The indicator of the battery pack
is more accurate.
[a]
[b]
Notes on the Rechargeable Battery Pack
Caution
Never leave the battery pack in temperatures above 140 °F (60 °C), such as in a car parked in the sun or
under direct sunlight.
The Battery Heats Up
During charging or recording, the battery pack heats up. This is caused by energy that has been
generated and achem cal change that has occurred inside the battery pack. This is not cause for concern.
Battery Pack Care
Remove the battery pack from the camcorder after using the battery pack, and keep it in a cool place.
When the battery pack is attached to the camcorder, a small amount of current flows to the camcorder
even if the POWER switch is set to OFF, which shortens battery life.
The battery pack is always discharging even when it is not in use after charging. Therefore, you should
charge the battery right before using the camcorder.
How to Use the Switch on the Battery Pack
When theswitchissuppliedwiththebarrypack ([€}onp.34)you can useittofindwhetherthebattery
pack is charged or not. Set the switch to the "no mark" position when charging is completed. Set the
switch to the "red mark" position when the battery is used up (or in whichever direction you want to
remind yourself).
The Life of the Battery Pack
If the (2Qindicator flashes rapidly iust after turning on the camcordrer with a fully charged battery pack,
the battery pack should be replaced with a new fully charged one.
!:
§
!
32 33
Charging Temperature
You shouldchargebatteriesattemperaturesfrom50eFto86°F(fromI0°C to30°C).Lower temperatures
require a longer charging time.
Sony Batteries are Recommended
Use ofnon-Sonybatteriesmay damage yourHandycam camcorder.
Notes on Charging _ ,_
A Brand-new Battery
A brand-new battery pack is not charged. Before using the battery pack, charge it completely.
After Long Storage
Recharge the batterypack aftera long period ofstorage.Ifthe battery pack ischarged fullybut not used
fora long time (about I year), itbecomes discharged. Charge itagain,but in thiscase the battery lifewill
be shorter than normal. After several charging and discharging _,cles,the battery lifewillrecover its
original capadty.
Notes on the Terminals
If the terminals (metal parts on the back) are not clean, the battery charge duration will be
shortened.
When the terminals are not clean or when the battery pack has not been used for a long time, repeat
installing and removing the battery pack a few times. This improves the contact condition. Also, wipe
the + and - terminals with a soft cloth or paper.
Be Sure to Observe the Following
To prevent an accident caused by a short circuit, do not allow metal objects such as a necklace
to touch the battery terminals. Carry the battery pack attaching to the terminal cover. [d]
* Keep the battery pack away from fire.
Keep the battery pack dry.
Do not open nor convert the battery pack.
Do not expose the battery pack to any mechanical shock.
It]
If the camcorder is brought directly from a cold place to a warm place, moisture may condense inside the
camcorder, on the surface of the tape, or on the lens. If this happens, the tape may stick to the head drum
and be damaged or the camcorder may not operate correctly. To prevent possible damage under these
circumstances, the camcorder is furnished with moisture sensors. However, take the following
precautions.
Inside the Camcorder
If there is moisture inside the camcorder, the beep sounds and the [] indicator or the DEW lamp flashes.
Ifthis happens, none of the function except cassette ejection will work. Open the cassette compartment,
turn off the camcorder, and leave it about 1 hour. When A indicator flashes at the same time, the cassette
is inserted in the camcorder. Eject the cassette, turn off the camcorder, and leave also the cassette about 1
hour.
\1 I I/
..'[]A'..
"ii iix"
On the Lens
No indicator will appear, but the picture becomes dim. Turn off the !:x)wer and do not use the camcorder
for about I hour.
How to Prevent Moisture Condensation
When bringing the camcorder from a cold place toa warm place,put the camcorder in a plasticbag and
allow itto adapt to room conditions over a period of time.
(1) Be sure to tightlysealthe plasticbag containing the camcorder.
(2) Remove the bag when the airtemperature insideithas reached the temperature surrounding it(after
about I hour).
o
;r
3"
m
3"
34 35
+ .
To ensure clearpictures,clean the \ddeo heads. When 0 appears in the viewfinder inCAMERA mode or
playback picturesare "noisy" or hardly visible,the_ideo heads may be contaminated.
[a] _ ,-- [b]
[a] Slight contamination
[b] Critical contamination
If this happens, clean the video heads with the Sony VS-2._LH cleaning cassette (not supplied). After
checking the piCtUre, if it is still "noisy", repeat the cleaning. (Do not repeat cleaning more than 5 times.)
Caution
Do not use a commercially available wet-_,pe cleaning cassette. It may damage the video heads.
Note
If the VS-25CLH cleaning cassette is not available in )'our area, consult your nearest Sony dealer,
' Remov|ng Dus_from inside"the viewfinder .....
(1) Remove the screw with a sox_wdriver (not supplied). Then, while sliding the RELEASEknob, turn
the eyecup in the direction of the arrow and pull it out.
(2) Clean the surface with a commercially available blower.
21
@
To Reattach the Eyecup
(1) Align the groove on th eyecup with the mark on the barrel.
(2) Turn the eyecup in the direction of the arrow. Then, replace the screw.
2
Caution
Do not remove any other screws. You may remove only the screw to remove the eyecup.
36 37
Precautions
Camcorder Operation
Operate the camcorder using 6.0 V (battery pack), or 7.5 V (AC power adaptor).
ForDC or AC operation, use only the accessories recommended in this manual.
Should any solid object or liquid fall into the casing, unplug the camcorder and have it checked by your
nearest Sony dealer before operating it any further.
Avoid rough handling or mechanical shock. Be particularly careful of the lens.
Keep the POWER switch set toOFF when not using the camera.
Do not wrap up the camcorder and operate it since heat may build up internally.
Keep the camcorder away from strong magnetic fields or mechanical vibration.
On Handling Tapes
Do not insert anything into the small holes on the rear of the cassette. These holes are used to sense the
type, thickness of tape, or if the tab is out or in.
Camcorder Care
When the camcorder is not to be used for a long time, disconnect the power source and remove the
cassette. Periodically turn on the power, operate the camera and player sections and play back a tape
for about 3 minutes.
Clean the lens with a soft brush to remove dust. If there are fingerprints on the tens, remove them with
a soft cloth.
* Clean the camcorder body with a soft dry cloth, or a soft cloth lightly moistened with a mild detergent
solution. Do not use any type of solvent which may damage the finish.
AC Power Adaptor
Charging
Use only for the specified battery pack. This unit cannot be u_ed to charge a lithium ion _'pe battery.
Attach the battery pack firmly.
Charge the battery pack on a fiat surface without vibration.
Others
Unplug the unit from the ",,,-all(mains) outlet when not in use for a long time. To disconnect the cord
(mains lead), pull it out by the plug. Never pull the cord itself.
Do not operate the unit with a damaged cord or if the unit has been dropped or damaged.
DO not bend the AC power cord (mains lead) forcibly, or put a hea\'y object on it. This will damage the
cord and may cause a fire or an electrical shock.
Be sure that nothing metallic comes into contact with the metal parts of the connecting plate. If this
happens, a short may occur and the unit may be damaged.
Always keep the metal contacts clean.
Do not disassemble the unit.
DO not apply mechanical shock or drop the unit.
While the unit is in use, particularly during charging, keep it away from AM receivers and video
equipment because it ,,-ill disturb AM reception and video operation.
The unit becomes warm while in use. This is normal.
Do not place the unit in locations that are:
- Extremely hot or cold
- Dusty or dirty
- Very humid
- Vibrating
If any difficulty should arise, unplug the unit and contact your nearest Sony dealer.
Eachcountry has its own electricity and "IVcolor systems. Before using your camcorder abroad, check
the following points:
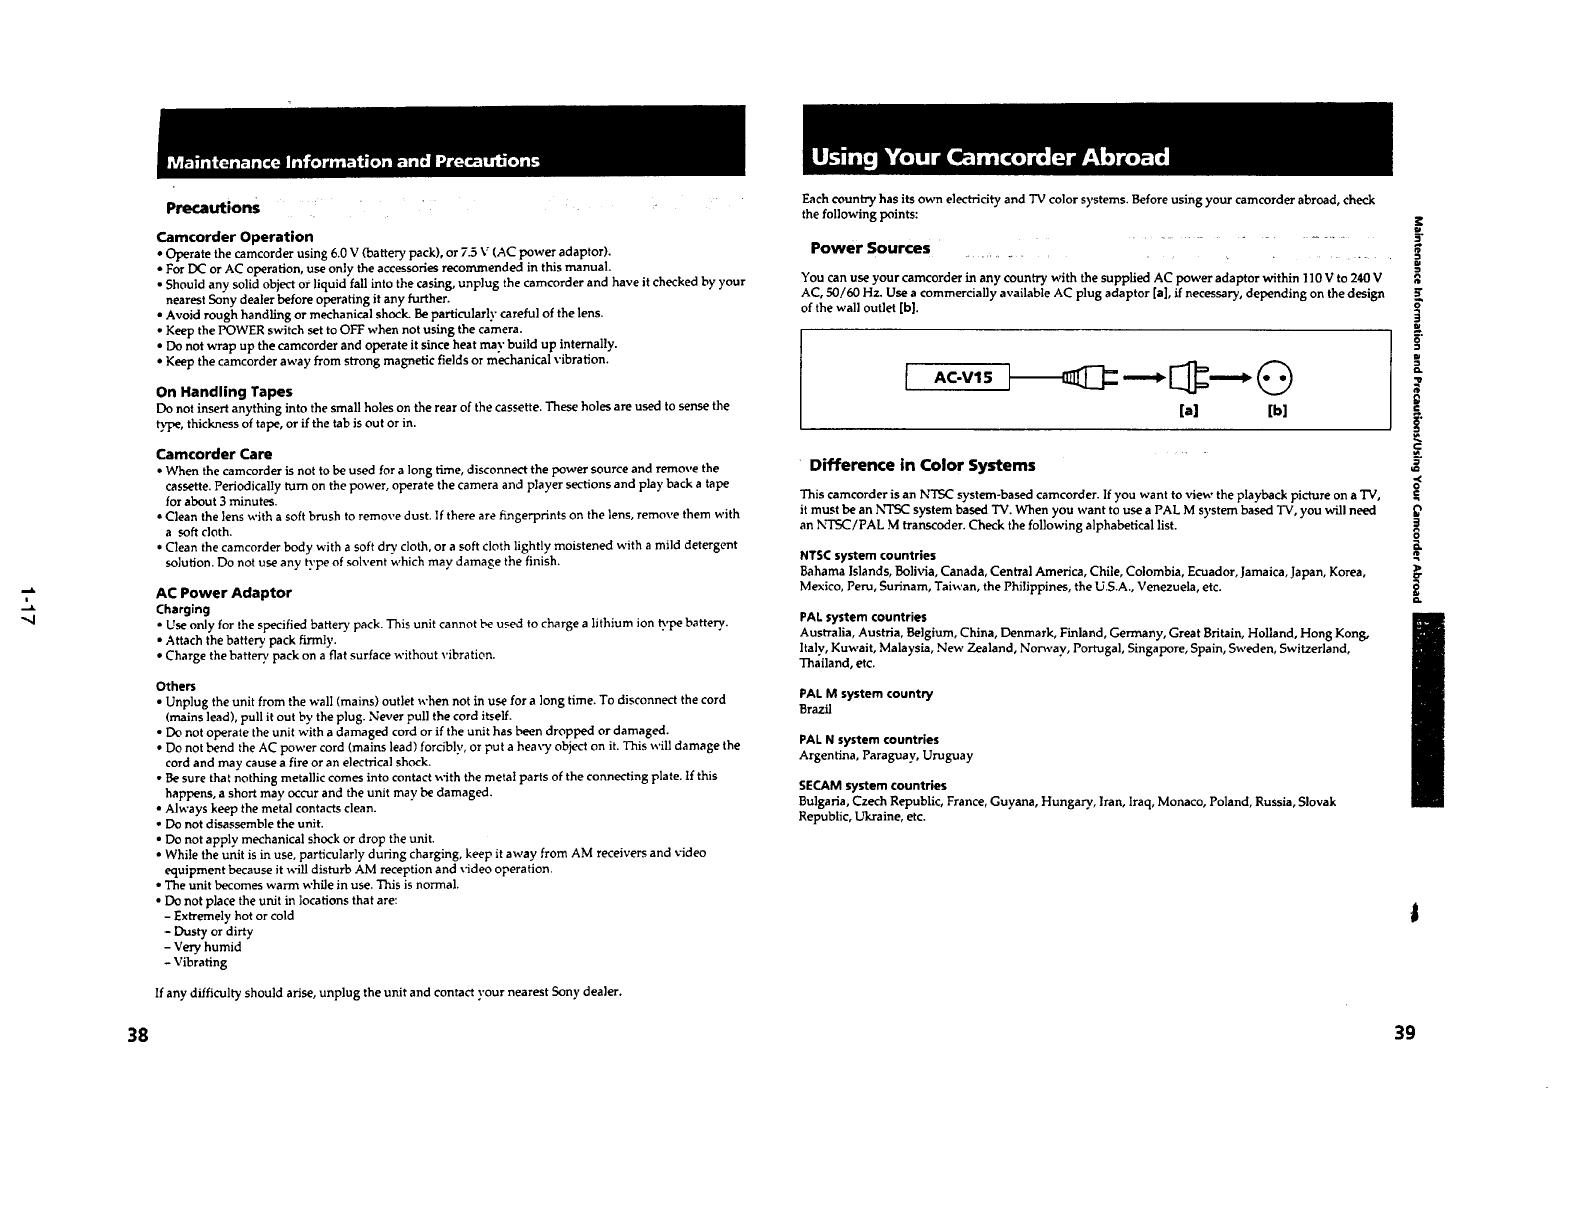
Power Sources
You can use your camcorder in any country with the supplied AC power adaptor within 1]0 V to 240 V
AC, 50/60 Hz. Use a commercially available AC plug adaptor [a], if necessary, depending on the design
of the wall outlet [b].
I
[,] [b]
" Difference in Color Systems
This camcorder is an NTSC system-based camcorder. If you want to view the playback picture on a'IV,
it must be an Nr'rsc system based "IV.When you want to use a PAL M system based TV, you will need
an N'TT_/PAL M transcoder. Check the following alphabetical list.
NTSCsystem countries
Bahama Islands, Bolivia, Canada, Central America, Chile, Colombia, Ecuador, Jamaica, Japan, Korea,
Mexico, Peru, Surinam, Taiwan, the Philippines, the U.S.A., Venezuela, etc.
PALsystem countries
Australia, Austria, Belgium, China, Denmark, Finland, Germany, Great Britain, Holland, Hong Kong,
Italy, Kuwait, Malaysia, New Zealand, Norway, Portugal, Singapore, Spain, Sweden, Switzerland,
Thailand, etc.
PAL M system country
Brazil
PAL N system countries
Argentina, Paraguay, Uruguay
SECAM system countries
Bulgaria, Czech Republic, France, Guyana, Hungary,, Iran, lraq, Monaco, Poland, Russia, Slovak
Republic, Ukraine, etc.
z
o
Q.
c
D.
38 39
[]
[]
[]
[]
[]
®
[]
[] POWER switch (p. 11, 18)
[] DATE(+) button (p. 22, 31)
[] TIME(NEXT) button (p. 22, 31)
[] TITLE button (p. 26)
[] COUNTER RESET button (p. 13)
[] Eyecup (p, 15, 37)
[] Battery mounting surface (p. 9)
[] LANe I_ control jack
Connect the LANC _ connecting cable to a wired remote controlunit such as an editingcontroiler.
In thiscase,setthe COMMANDER mode to OFF (p.2/").12 stands for Local Application Control Bus
sytem. The 12 controljackisused forcontrollingthe tape transport of video equipment and
peripherals connected to it.This jackhas the same function as the connectors indicated as CONTROL
L or REMOTE.
[] BATr (battery) release knob (p. 9)
[]
[]
[]
[]
[]
[]
[]
[] Power zoom lever (p. 14)
[] EJECT knob (p. 10)
[] Hooks for shoulder strap (p. 47)
[] Eyecup release knob (p. 37)
[] START/STOP button (p. 11)
[] STANDBY switch (po 11)
[] Grip strap (p. 15)
[] Cassette compartment (p. 10)
[] VIDEO OUT jeck (p. 17)
[] RFU DC OUT (RFU adaptor DC out) jack
[] AUDIO OUT jack (p. 17)
[] Jack cover
[] MIC (microphone) jack
Connect an optional external microphone. This jack also accepts a "plug-in-power" microphone.
[] Tripod receptacle (p. 15)
Attach a tripod (not supplied) here.
[]
[]
f
44 45
Attaching the shoulder strap
Attach the supplied shoulder strap to the hooks for the shoulder strap ([1"_on page 45).
[]
[]
[]
[] Tape transport buttons (p. 18, 19)
_rOP
<1<1PEW (rewind)
PLAY (playback)
FF (fast forward)
I I PAUSE
These buttons will function in PLAYER mode.
[] EDITSEAflCH button (p. 16)
[] Lens cover
[] Built-in microphone
[] Remote sensor
Aim a Remote Commander (not supplied) here for remote control.
[] Camera recording/battery lamp
[] DEW lamp (p. 35)
[] Viewfinder adjustment ring (p. 12)
[] Viewflnder (p. 12, 37, 48)
[] BACK UGHT button (p. 24)
[] START/STOP MODE switch (p. 11, 12, 25)
[] PROGRAM AE dial (p. 23)
[] Mode switches (p. 27)
[] Lithium battery compartment (p. 30)
[]
[]
[]
[]
To Watch the Demonstration
You can watch abrief demonstration of pictures with titles.
Ifthe demonstration appears when you turn on the camcorder for the first time, exit the Demo mode to
use your camcorder.
o.
To enter Demo mode ,_
(1) Eject the cassette and turn the POWER switch to OFF.
(2) Turn STANDBY up.
(3) While holding down liD- PLAY, turn the POWER switch to CAMERA. Demonstration starts. The
demonstration stops when you insert the cassette.
Note that once you enter Demo mode, this mode is retained as long as the lithium battery is in place.
Therefore, demonstration starts automatically t 0 minutes later every time you turn the POWER switch to
CAMERA, or after you eject the cassette.
To exitDemo mode
(1)Turn thePOWER switchtoOFF.
(2)TurnSTANDBY up.
(3)Whileholdingdown • STOP,turnthePOWER switchtoCAMERA.
46 47
1 / 1

Sony CCD-TR440PK Owner's manual

Category
Camcorders
Type
Owner's manual

The Sony CCD-TR440PK is a versatile and user-friendly camcorder that combines video recording, playback, and editing capabilities in a compact and portable design. With its powerful features and intuitive interface, it's an excellent choice for capturing and sharing your precious moments.

Ask a question and I''ll find the answer in the document

Finding information in a document is now easier with AI

Ask the document