Page is loading ...

USER
’
S MANUAL
FUTREX
®
-5500A/WL
BODY FAT AND FITNESS ANALYZER
FUTREX INC.
6 Montgomery Village Avenue
Suite 620
Gaithersburg, MD 20879
Version 1.0

2
FUTREX-5000A/WL USER’S MANUAL
This manual provides you with all the information needed to operate the FUTREX-5500A/WL
Table of Contents
Appearance and Part Names....................................................................................................................... 3
Preparation .................................................................................................................................................. 4
Printer Paper Installation ............................................................................................................................. 5
Models of the Futrex Body Fat & Fitness Analyzers ................................................................................... 6
Percent Body Fat Estimation ...................................................................................................................... 7
Selecting the Biceps Measurement Site .................................................................................................... 15
Selecting the Triceps Measurement Site ................................................................................................... 16
Selecting the Thigh Measurement Site ...................................................................................................... 16
Adjusting the Body Fat Percentage Readout ............................................................................................. 13
Estimating Relative Fat Distribution ........................................................................................................... 14
Date Function ............................................................................................................................................ 16
Connecting the FUTREX to a Computer ..................................................................................................... 17
Printout Programs ..................................................................................................................................... 18
Fitness Analysis .......................................................................................................................... 18
Update Analysis ........................................................................................................................... 20
Youth Fitness Analysis ................................................................................................................. 23
Color Fitness Analysis Reports .................................................................................................... 24
Function Mode .......................................................................................................................................... 29
Trouble Shooting ....................................................................................................................................... 34
General Specifications .............................................................................................................................. 38
Keypad Description ................................................................................................................................... 39
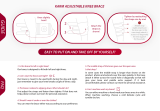
Note: FUTREX CAUTIONS THE USER AND/OR INDIVIDUAL TESTED TO SEEK THE ADVICE OF A HEALTH CARE
PROFESSIONAL PRIOR TO UNDERTAKING ANY NUTRITION AND/OR EXERCISE PROGRAM.
Copyright © 2003 FUTREX, INC.

3
Futrex-5500A/WL
Optical
Standard
Light Wand AC Adapter
Biceps
Locator
Light Shield RS-232 Cable
Fitness
Wheel
Bodyometry™
Software
Appearance and Part Names

4
Preparation
1) Battery Installation
Insert 6 1.5V “AA” size alkaline batteries into the battery compartment located on
the rear of the Main Body. Be sure the batteries are oriented as indicated in the
battery compartment.
NOTE: Batteries must be alkaline type. Other types will not work.
2) Light Wand
Connect the Light Wand Cable to the connector jack located on the right hand
side of the Main Body.
It is recommended that the Light Wand always remain attached to the Main Body.
This will avoid possible damage to the connector.
3) A/C Adapter
Connect the A/C Adapter cable to the connector jack located on the right side
of the Main Body (the jack closest to the top of the unit).

5
Printer Paper Installation
Remove the clear plastic cover from the printer.
Start feeding the paper into the slit inside the Paper Roll Compartment by pressing the PAPER FEED key.
NOTE: The paper must be thermal paper and cut square prior to inserting

6
Models of the FUTREX Body Composition Analyzer
There are three models available for estimating percent body fat in humans:
• FUTREX-5500/XL
Estimates the percent body fat of Adults only (ages 18-80)
• FUTREX-5500A/ZL
Estimates the percent body fat of:
1.) Adults
2.) Adolescent Children (13-17)
3.) Pre-Adolescent Children (5-12)
When age is entered, the FUTREX-5500A/ZL automatically sets the instrument to the proper calibration (e.g. if you entered the
subject’s age as 14 during the Body Fat Measurement Sequence (page 7), the FUTREX-5500A/ZL will use its Adolescent calibration
to determine percent body fat).
• FUTREX-5500A/WL
Includes a special calibration for high school aged athletes (13-23) as well as all features of the FUTREX-5000A/ZL
CAUTION: This Manual is only for use with the FUTREX-5500A/WL

7
Percent Body Fat Measurement
TO ESTIMATE PERCENT BODY FAT:
1.) Turn Power Switch ON.
The display will show a software version number (e.g. AO.51) and will then start a 15 second countdown.
The display will show Sd.
2.) Insert Light Wand into Optical Standard.
Be sure the silver stripe from the Light Wand is aligned with the silver stripe from the Optical Standard.
3.) Press the ZERO ADJUST Key. The display will now show 0.0. The zero adjustment
has been made.
Remove Light Wand from the Optical Standard.
Install the Light Shield on the Wand as shown in the sketch (allow the Wand to
protrude from the edge of the shield by about 1/8 of an inch). The Light Shield was
provided to ensure that no external light interferes with the estimation of percent
body fat. Therefore, this shield should always be used when estimating percent
body fat.
The FUTREX-5500A/WL is ready to start the body fat estimation sequence.
4.) The printer will ask “Athletic Cal: 1 = Yes, 2 = No” If the desire is to measure an athlete
between the ages of
13 and 23, press the “1” key, otherwise press the “2” key.
NOTE: If “1” (i.e. “YES”) is pressed follow steps 4a - 4k. If “2” (i.e. “NO”) is pressed, skip the following and go to Step 5.

8
4a) The printer will ask “ENTER # SITES: 1 or 3”.
There are two alternative measurement methods.
• One Site Measurement - The measurement is on the midpoint biceps of the dominant arm (the arm used for
writing).
• Three Site Measurement - The measurement is made combining data from three body sites:
• Biceps - The first measurements are at the midpoint of the biceps of the dominant arm; i.e., the arm
used for writing. Measurement point on the front of the arm midway between the armpit and the
inside of the elbow.
• Triceps - The second measurements are at the midpoint of the triceps of the dominant arm.
Measurement point on the back of the upper arm midway between the shoulder and elbow.
• Thigh - The third measurements are at the thigh. Measurement point on the front of the thigh
midway between groin line and the top of the patella (knee).
NOTE: If “1” is pressed, skip the following and go to Step 5.

9
4b) Press ENTER to start the body fat estimation sequence.
4c) Enter Weight in lbs. or kg. (refer to page 29 to switch between English and Metric Units). Press ENTER.
4d) Enter Height in inches or cm.
4e) Printer will show MEASURE BICEPS.
Place Light Wand firmly on biceps of the dominant arm (see page 15 for locating exact measurement point)
4f) Press GREEN BUTTON on the Light Wand
The display will flash a decimal point following the number “1a”.
Then the number “2a” will be displayed.
NOTE:
IT IS IMPORTANT TO: Aim the silver stripe of the Light Wand directly toward the shoulder. Keep the arm relaxed (do not permit
the subject to flex his/her muscle). A relaxed biceps can be achieved by having the subject seated while resting his arm (elbow
bent) on a table.
Use the Light Shield to block the external light. Always avoid measurements under strong lights (e.g. direct sunlight) because
errors may occur.
CAUTION: Do not move the Light Wand while the decimal point is illuminated. The actual estimation is being made at that time.

10
4g) Remove the Light Wand and replace it on the same point on the biceps. Press GREEN BUTTON on the Light
Wand. The display will flash a decimal point, then the number “1b”.
4h) Place Light Wand firmly on Triceps of same arm (see page 16 for exact measurement point).
Press ENTER. The display will flash a decimal point. Don’t move the Light Wand until “2b” is displayed.
4i) Remove Light Wand and replace it on the same point on the triceps. Press ENTER.
The display will flash a decimal point. Don’t move Light Wand until “1c” is displayed.
4j) Place Light Wand firmly on thigh at same side of body that the arm was measured; e.g. if right arm, then measure
right thigh. (See page 16 for exact measurement point.)
4k) Remove Light Wand and replace it on the same point on the thigh. Press ENTER. Display will again flash a
decimal point. Don’t move the Light Wand until percent fat is displayed and printing starts.
NOTE: Aim silver stripe directly toward the shoulder. Keep arm relaxed.
NOTE: Steps 5 through 16 are not applicable. Those steps are for measurements using only the biceps.
NOTE: Aim silver stripe directly up the leg. Press ENTER. The display will flash a decimal point.
Don’t move Light Wand until “2c” is displayed.

11
5.) Press ENTER to start the body fat estimation sequence.
6) Enter Age in years
7) Enter Sex by pressing the MALE or FEMALE Key.
8) Enter Weight in lb or kg. Press ENTER.
9) Enter Body Frame by pressing the SMALL, MEDIUM or LARGE Key (not asked if the subject is bewteen the ages of 5 and 17).
There are many methods for measuring Frame Size. Futrex does not recommend any specific method but does offer two
techniques often used for determining frame size:
a) Ankle Girth
• Measure the ankle girth at the smallest point above the ankle with the tape as tight as possible.
• Standards
b) Wrist Girth
• Place your left thumb and middle finger around your right wrist and gently squeeze your fingers together.
• Small Frame - Fingers overlap
• Medium Frame - Fingers touch
• Large Frame - Fingers do not touch
NOTE: The age entered in Step 6 automatically places the instrument into the proper calibration for estimation.
(i.e. adults 18 and above, adolescents 13-17, pre-adolescents 5-12)
Small Frame Medium Frame Large Frame
Men Less than 8 inches 8 to 9.25 inches Greater than 9.25 inches
Women Less than 7.5 inches 7.5 to 8.75 inches Greater than 8.75 inches
NOTE: If you have long fingers, this method may
underestimate your frame size.

12
10) Enter Height in inches or cm (whole numbers only: e.g. 68 in. is acceptable). Refer to page 29 to switch between English
and Metric units. Press ENTER.
11) Enter F.I.T. Value (not asked if the subject is bewteen the ages of 5 and 17).
The following procedure provides a quantitative method to determine a subject’s Physical Activity Rating.
A person’s F.I.T. value is a function of 3 parameters:
• Exercise Frequency - How often the exercise is performed.
• Exercise Intensity - How much energy is expended during exercise.
• Exercise Time - How many minutes the exercise is performed during each session.
The F.I.T. value is calculated by multiplying all three parameters: F.I.T. = Frequency x Intensity x Time
The F.I.T. values help to account for the long term effects of physical activity.
When entering the F.I.T. values, you should consider what the individual’s average Frequency, Intensity and
Time have been over the past six months.
For example, if an individual has not been particularly active for a short period of time (i.e. several weeks), but had been
previously training for competitive athletics, you should take that previous training regimen into account for the F.I.T.
values. Conversely, if an individual has been training hard for a short time (i.e. several weeks), but was much less active
previously, you should take the previous light activity into account for the F.I.T. values.
11A) Enter Frequency Value. Press ENTER.
FREQUENCY 5 Daily or almost daily (6 or 7 times per week)
4 3 to 5 times per week
3 1 or 2 times per week
2 A few times per month
1 Less than once per month

13
11B) Enter Intensity Value. Press ENTER.
INTENSITY 5 Aerobic activities that result in sustained heavy breathing and perspiration
(e.g. high impact aerobics, running, speed swimming, distance cycling).
4 Intermittent aerobic activities that result in sustained heavy breathing and
perspiration (e.g. tennis, racquet-ball, squash).
3 Moderate aerobic activity (e.g. normal bike riding, jogging, low impact
aerobics).
2 Moderate aerobic activity (e.g. recreational volleyball, moderate speed
walking).
1 Light aerobic activity (e.g. normal walking, golfing).
11C) Enter Time Value. Press ENTER.
TIME 4 Over 30 minutes
3 20 - 30 minutes
2 10 - 20 minutes
1 Under 10 minutes
NOTE: You may customize how the FUTREX-5500A/WL asks the F.I.T. Questions. See Page 27 for details.
12) Place Light Wand firmly on biceps of the dominant arm as shown below: (see page 15 for locating exact estimation point).
NOTE:
IT IS IMPORTANT TO: Aim the silver stripe of the Light Wand directly toward the
shoulder. Keep the arm relaxed (do not permit the subject to flex his/her muscle). A
relaxed biceps can be achieved by having the subject seated while resting his arm (elbow
bent) on a table.
Use the Light Shield to block the external light. Always avoid measurements under strong
lights (e.g. direct sunlight) because errors may occur.

14
15) Press the GREEN BUTTON on the light wand.
The display will flash a decimal point following the number “2”.
16) Percent Body Fat is displayed and printed.
The FUTREX-5500A/WL will also print the following information:
• Fat Weight (lbs of body weight that is fat).
• Lean (fat-free) body weight.
• Total Body Water (FUTREX-5500 A/WL Adult Users Only).
This is the calculation of the subject’s normal hydration state. The percent body water is
based on research that has shown lean tissue to be composed of approximately 73% water,
whereas fat contains 4 to 8% water. For example:
Men between 6 - 24% Fat; 69 - 57% Water Women between 9 - 35% Fat; 67 - 50% Water
13) Press the GREEN BUTTON on the light wand (NOTE: the ENTER button on the keypad may also be used).
The display will flash a decimal point following the number “1”. Then the number “2” will be displayed.
CAUTION: Do not move the Light Wand while the decimal point is illuminated. The actual estimation is being made at that time.
To Repeat the Measurement Sequence - Press ENTER and follow the steps outlined under 5-16.
OFF Message - An Off Message will appear and the FUTREX-5500A/WL Automatic Power Down feature will turn the unit off if
the user has not pressed any key for 6 minutes. To use the unit again, turn the Power Switch OFF and ON again.
14) Remove the Light Wand and replace it on the same point on the biceps as shown in the illustration below:

15
Prior to conducting the actual body composition analysis, you should locate the proper
measurement site at the biceps of the dominant arm.
1) Have the test subject hold his/her arm straight out, with the elbow locked, and the
palm of the hand facing up towards the ceiling.
2) Using the Biceps Locator (shown below), find the “halfway point” between the armpit
and the inside of the elbow, where the elbow bends (i.e. the acromion). As shown in
the illustration, place the end marked “To Underarm” at the point marked “A.” The
end marked “To Elbow” should extend past the bending point of the elbow towards
point marked “B” in the illustration.
3) Once the Biceps locator is in place as described in step 2, identify the number on
the Biceps Locator that crosses the point “C” on the arm. Point “C” is the place
where the elbow bends.
4) Locate the corresponding number identified by point “D” in the illustration (e.g. if the
number at point “C” is “6,” then find the corresponding “6” at point “D.”) This is the
midpoint, or the “belly” of the biceps.
5) It is recommended that you mark this spot by placing a small line just to the inside
or outside of the spot with a highlighter or washable marker.
Biceps Locator
Placing the
Biceps Locator
Selecting the Measurement Site

16
(for use with 3-site test using the athletic calibration)
1) Have the test subject bend his/her arm at a 90 degree angle, then using a tape measure or ruler of adequate length, measure
from the top of shoulder to the tip of elbow.
2) The measurement point will be half way between these two points. For example, if the distance from the top of the shoulder to
the tip of the elbow is 16 inches, then the measurement point will be at the 8 inch mark.
3) It is recommended that you mark this spot by placing a small line on the spot with a highlighter or washable marker.
(for use with 3-site test using the athletic calibration)
1) Have the test subject sit down, then using a tape measure or ruler of adequate length, measure from the groin line to the top of
the patella (knee).
2) The measurement point will be half way between these two points. For example, if the distance from the groin line to the top of
the patella (knee) is 20 inches, then the measurement point will be at the 10 inch mark.
3) It is recommended that you mark this spot by placing a small line on the spot with a highlighter or washable marker.
Selecting the Triceps Measuring Site
Selecting the Thigh Measuring Site

17
Adjusting The Percent Body Fat Reading
The FUTREX-5500A/WL has been carefully calibrated to provide body fat estimations. The calibration is traceable to the generally
accepted hydrostatic procedure.
However, some users may desire to have the FUTREX-5500A/ZL estimations traceable to their own laboratory. For those users the
following adjustment procedure is provided:
1) Turn unit on.
2) During countdown press CLEAR, SELECT PROGRAM, RISKS.
3) The Digital display will read “A1”
Press ENTER
4) The digital display will show the value of the optical standard.
5) If no change to the calibration is desired - press CLEAR.
6) If you wish to change the calibration:
Press SELECT PROGRAM, then press RISKS. The display will show “0.0” (if no calibration adjustment has been made)
or the previously entered adjustment value.
7) To adjust the calibration:
Press the numbered key to enter the amount of adjustment. For example, if you want to decrease the instrument’s
estimates by 1.0% - press 1, press 0, then the minus sign, and then ENTER. All future body fat estimates will now read 1.0% lower.
8) Once the correct offset has been entered into the unit, press ENTER. The adjusted optical standard value will be displayed.
9) To exit this mode: Press CLEAR.

18
In addition to estimating percent body fat, a relative body fat estimation on other sites of the body (e.g. quadriceps, abdominal region)
can be obtained using the FUTREX-5500A/WL.
1) Turn Power Switch ON.
The display will show a software version number (e.g. 7.30) and will then start a 15 second countdown.
The display will show “Sd”.
2) Insert Light Wand into Optical Standard.
The silver stripe on the Light Wand should be lined up with the silver stripe on the Optical Standard.
3) Press the ZERO ADJUST Key.
The display will now show “0.0”. The zero adjustment has been made.
4) Press the Number “2” Key.
This will shut off the printer function.
5) Remove Light Wand from the Optical Standard.
The FUTREX-5500A/WL is ready to estimate relative body fat. The display will show “1.”
6) Place the Light Wand in the Light Shield and place firmly on the body part where you want to estimate the “Relative Fat.”
Estimating Relative Fat Distribution

19
NOTE: It is important to:
• Aim the silver stripe of the Light Wand vertically toward the upper portion of the body.
• Keep the body site to be estimated relaxed (do not permit subject to flex muscle area being estimated).
• Use the Light Shield to block the external light. ALWAYS avoid estimations under strong lights (e.g. direct
sunlight) because errors may occur.
• Press GREEN BUTTON on the Light Wand.
The display will then show a decimal point following the number “1”. The number “2” will then be displayed.
CAUTION: Do not move the Light Wand while the decimal point is illuminated. The actual
estimation is being made at that time.
• Remove the Light Wand and replace it on the same site on the body. Press GREEN BUTTON on the Light
Wand. The display will then show a decimal point following the number “2.”
7) The Relative Body Fat Estimation is displayed.
To Estimate Another Site or Repeat an Estimation - Place the Light Wand firmly on the particular body site and follow steps
outlined in 6 and 7.
OFF Message - An OFF Message will appear and the FUTREX-5500A/WL Automatic Power Down feature will turn the unit OFF if
the user has not pressed any key for 6 minutes. To use the unit again, turn the Power Switch OFF and then ON again.
NOTE: This relative body fat is not a direct “Percentage” estimation. This value, however, can be used as a guide to
monitor changes in fat distribution within the location estimated.

20
Displaying the Date
The FUTREX-5500AWL allows you to display the date on each printed test result. The default setting from the factory is to not
display the date.
If you wish to display the date, you must first activate that feature:
1) Switch the instrument “ON.”
2) During the 15 second countdown press the Number “2” key. The letter “F” will be displayed
3) Press the Number “7.” You will see either F7 0 or F7 1.
4) To activate the date function press “1.” Once F7 1 is displayed, press ENTER and switch the instrument OFF.
5) To deactivate the date display, follow the steps outlined above, but make sure that F7 0 is displayed.
If you activate the Date function, the FUTREX-5500A/WL requires that the date be manually changed each day. Use the following
procedure to change the date:
1) Press SELECT PROGRAMS then press the Number “6” key. The printer will show the current setting, e.g. June 1, 1996.
2) Printer then prompts user to change month. Use keypad to enter new month (i.e. “1” = January, “2” = February,
... “12” = December). If no change, just press ENTER.
3) Printer prompts user to change day. If no change, press ENTER, or type in correct number and press ENTER.
4) Printer prompts user to change year. If no change press ENTER, or type in the correct two digits (i.e. 2003 would be 03) then ENTER.
Changing the Date
NOTE: If an invalid month, day or year is entered, the display will reset to “0”, and you must enter a correct value.
For example, the only valid entries for month are 1 through 12. If in error you enter 15, the display will show “0”.
/