Kicker BX360.4 Owner's manual
- Category
- Audio amplifiers
- Type
- Owner's manual
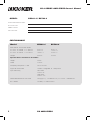
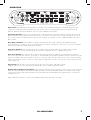
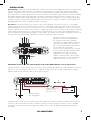
Kicker BX360.4 is a powerful 4-channel amplifier that delivers 60 watts RMS per channel at 4 ohms, 90 watts RMS per channel at 2 ohms, and 180 watts RMS in bridged mono mode at 4 ohms. It features a variable electronic crossover with selectable high-pass and low-pass filters, a bass boost circuit, and a remote bass level control.
Kicker BX360.4 is a powerful 4-channel amplifier that delivers 60 watts RMS per channel at 4 ohms, 90 watts RMS per channel at 2 ohms, and 180 watts RMS in bridged mono mode at 4 ohms. It features a variable electronic crossover with selectable high-pass and low-pass filters, a bass boost circuit, and a remote bass level control.


-
 1
1
-
 2
2
-
 3
3
-
 4
4
-
 5
5
-
 6
6
-
 7
7
-
 8
8
-
 9
9
-
 10
10
-
 11
11
-
 12
12
-
 13
13
-
 14
14
-
 15
15
-
 16
16


Kicker BX360.4 Owner's manual
- Category
- Audio amplifiers
- Type
- Owner's manual
Kicker BX360.4 is a powerful 4-channel amplifier that delivers 60 watts RMS per channel at 4 ohms, 90 watts RMS per channel at 2 ohms, and 180 watts RMS in bridged mono mode at 4 ohms. It features a variable electronic crossover with selectable high-pass and low-pass filters, a bass boost circuit, and a remote bass level control.
Ask a question and I''ll find the answer in the document
Finding information in a document is now easier with AI
in other languages
- Deutsch: Kicker BX360.4 Bedienungsanleitung
Related papers
-
Kicker ZX650.4 User manual
-
Kicker 2011 ZX 350.4 User manual
-
-
-
-
-
-
-
-
Other documents
-
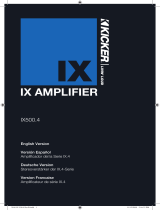 audio-design IX500.4 User manual
-
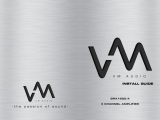 VM Audio SRA1200.4 Shaker Series Installation guide
-
Crunch DSX1750 Owner's manual
-
Quantum QM-FOUR-PP 4-CHANNEL PLUG+PLAY MINI AMPLIFIERVERS Owner's manual
-
Renegade REN1000S Mk3 User manual
-
JL Audio JX360 Owner's manual
-
Audio Design GTi4100 User manual
-
Magnat Audio Power Core Four:S Owner's manual
-
-

