WARNING!
1. Installing a shock absorber, that is not
approved by the vehicle manufacturer, may
affect the stability of your vehicle. Öhlins
Racing AB cannot be held responsible for
any personal injury or damage that may oc-
cur after fi tting the shock absorber. Contact
an Öhlins dealer or other qualifi ed person
for advice.
2. Please study and make certain that you fully
understand all the mounting instructions and
the owner’s manual before handling this shock
absorber kit. If you have any questions regard-
ing proper installation procedures, contact an
Öhlins dealer or other qualifi ed person.
3. The vehicle service manual must be
referred to when installing the Öhlins shock
absorber
!
NOTE!
During storage and transportation, especially
at high ambient temperature, the oil and
grease used for assembling may run out in-
side the packing and damage the expanded
polystyrene packing material. This is not
unusual and is in no way detrimental to the
shock absorber.
1
Put the motorcycle on the center stand.
2
Remove the passenger’s and the rider’s seat.
Mounting Instructions
Safety Signals
Important information concerning safety is
distinguished in this manual by the following
notations:
The Safety alert symbol means:
Attention! Your safety is involved.
WARNING!
Failure to follow these warning instruc-
tions could result in severe or fatal
injury to anyone working with, inspect-
ing or using the shock absorber, or to
bystanders.
CAUTION!
Caution indicates that special pre-
cautions must be taken to avoid damage
to the shock absorber.
NOTE!
Indicates information that is of importance
regarding mounting procedures.
!
!
WARNING!
1. It is advisable to have an Öhlins dealer
or other qualifi ed person install the shock
absorber.
2. Follow the instructions in the vehicle service
manual when changing the shock absorber.
3. When working on a raised vehicle, make
sure that it is securely supported to prevent
it from falling.
!
3
Loosen the brake caliper.
4
Remove the rear wheel.
5
Loosen the adjustment cylinder to the hydraulic
spring pre-load adjuster.
6
Remove the lower shock absorber screw.
7
Remove the right seat bracket.
8
Remove the upper shock absorber screw.
9
Remove the shock absorber together with the
hydraulic spring pre-load adjuster.
10
Install the Öhlins shock absorber in the upper
bracket. The gas valve should be pointing back-
wards. Use the original screw.
11
Install the adjustment cylinder to the hydraulic
spring pre-load adjuster in the original bracket.
Lead the hose between the air box and the
battery box.
12
Attach the lower shock absorber bracket.
13
Reattach the rear wheel and the brake caliper.
14
Reattach the right seat bracket, the driver’s and
the passenger’s seats.
NOTE!
Make sure that all bolts are tightened to the
correct torque and that nothing fouls or re-
stricts movement of the shock absorber when
the suspension is being fully compressed or
extended.
15
Read more about the Öhlins shock absorber in
the Öhlins owners manual.
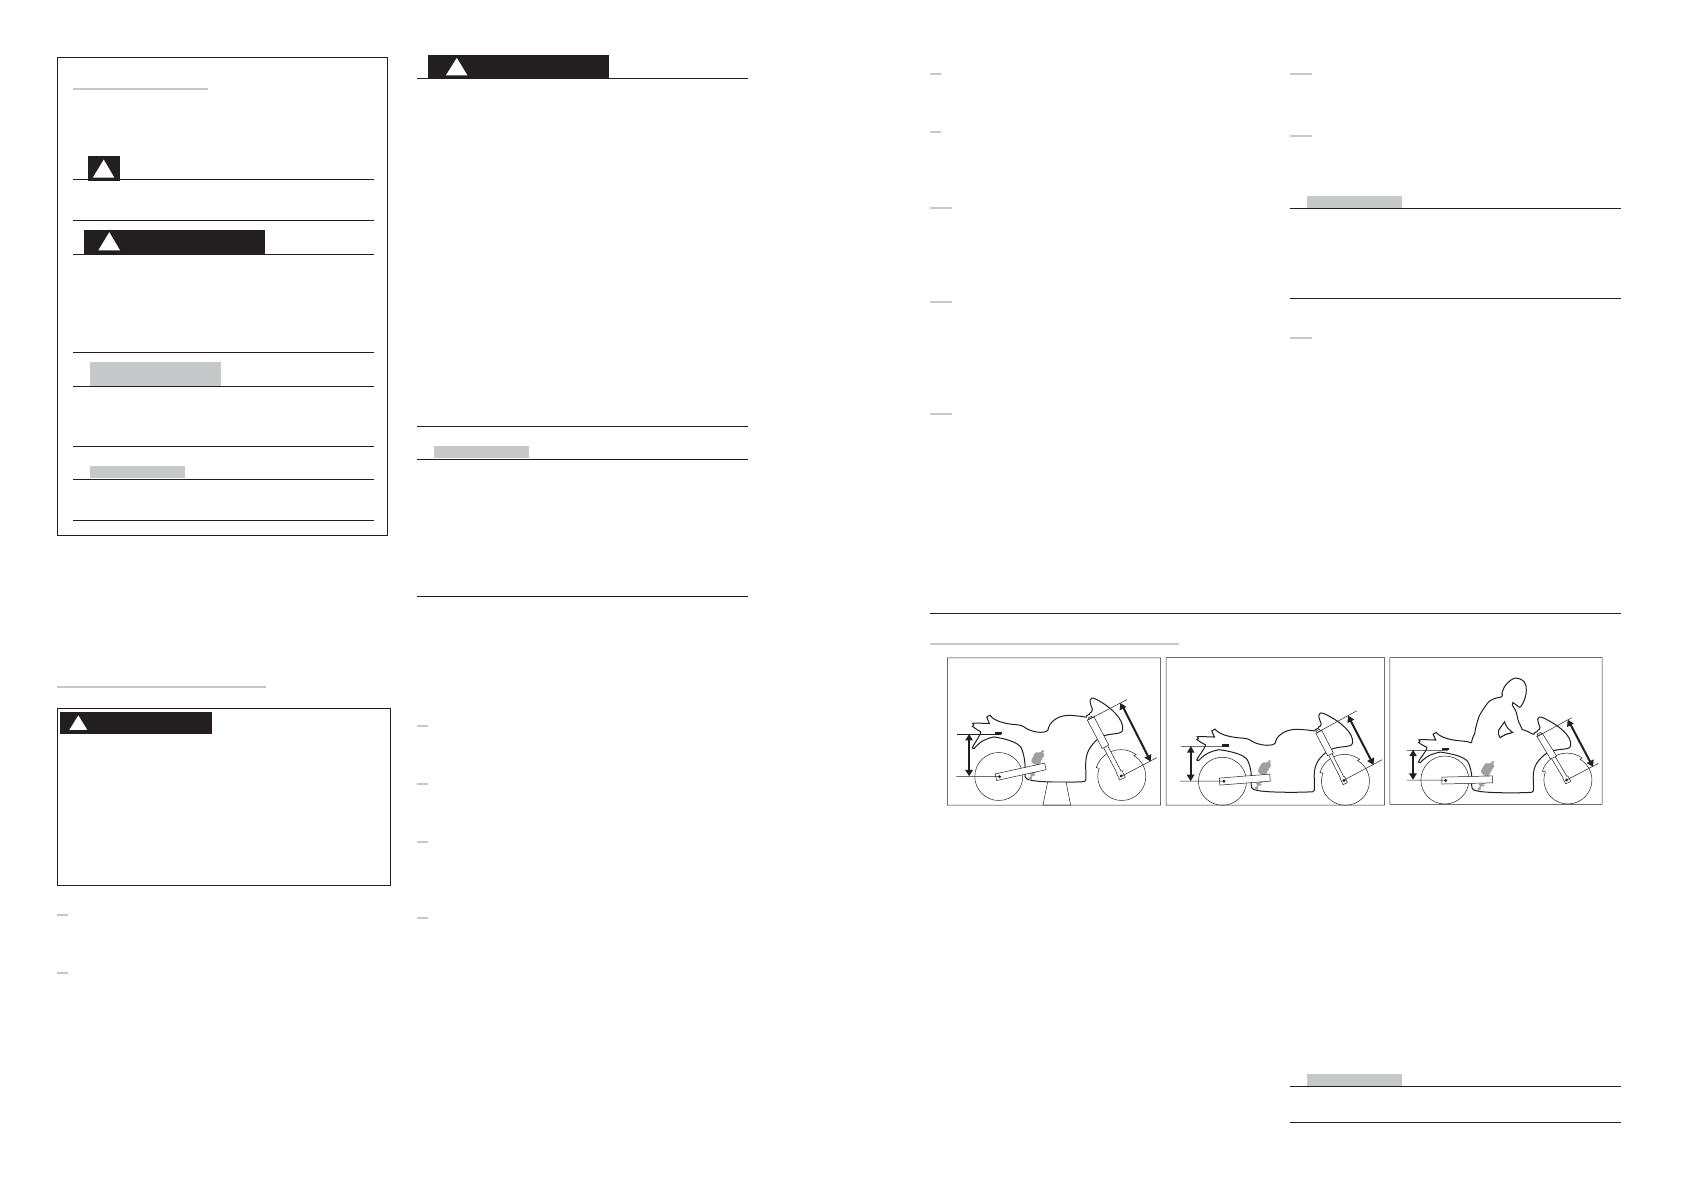
R1
R2
R3
F1
F2
F3
Bike on a stand Bike on the ground
Bike with rider on
Front suspension
F1. Bike on a stand with the
suspension fully extended = ............
F2. Bike on the ground without rider = ............
F3. Bike on the ground with rider = ............
Free sag F1 - F2 = ............
Ride height F1 - F3 = ............
Rear suspension
R1. Bike on a stand with the
suspension fully extended = .............
R2. Bike on the ground without rider = ............
R3. Bike on the ground with rider = ............
Free sag R1 - R2 = ............
Ride height R1 - R3 = ............
Check sag and ride height
NOTE!
Read more about sag and ride height and differ-
ent settings in your Öhlins Owner’s manual.

