Page is loading ...

31
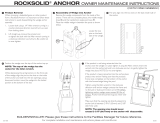
LIST OF CANNONDALE TANDEM-SPECIFIC REPLACEMENT PARTS KITS
Part # Description
A463/ Tandem rear brake cable housing stops, fit into top tube through
guides, pair
A095T/ Shifter boss kit, for pre-’99 tandem frames with 2
1
/4" downtube
A448/ Shift cable adjusting barrels, fit ’99 tandem downtube stops, pair
A457/ Tandem BB cable guide plus derailleur cable guide rollers &
plastic disc
A399/EBO Tandem stoker stem, 120-170mm, 27.2mm post clamp, 25.4
bar clamp
A181/ Tandem bottom bracket eccentric, complete
2506A Barrel nut for tandem bottom bracket eccentric
8025S Bolt for tandem bottom bracket eccentric, M5x.8x60mm
107394 This tandem owner’s manual supplement
C
APPENDIX:
Tandem Supplement 5.4.99 12:12 PM Page 31

30
Please note that this manual is meant to supplement, not replace, your
Cannondale Owner’s Manual for Multi-Speed Bicycles. That owner’s
manual contains valuable information regarding safe operation, adjust-
ment, and maintenance of your bicycle, as well as more complete war-
ranty information. Please read the bicycle owner’s manual thoroughly
before riding your bicycle, and keep it and this booklet for future refer-
ence.
GETTING IN TOUCH WITH CANNONDALE
For warranty related questions or for more information on this or any
Cannondale product, please feel free to contact us.
USA and Canada: (800) BIKE-USA
Europe (EC): (31) 5415-89898
Japan: (81) 722-99-9399
Australia: (612) 9979-5851
www.cannondale.com
jch/pca/sp 011599 #107394
Tandem Supplement 5.4.99 12:12 PM Page 30

29
the two rollers located just behind and below the rear bottom bracket.
3. Thread the front derailleur cable through the vertical brass roller so
that the cable is directed up towards the front derailleur.
4. FOR MOUNTAIN TANDEMS: Position the horizontal gray plastic disc
so that the cable hole through it is to the outside of the center bolt.
Route the rear derailleur cable through the cable hole in the disc so
that the cable is directed towards the rear derailleur on the right
dropout.
5. FOR ROAD TANDEMS: Route the rear derailleur cable to the inside of
the horizontal brass roller so that the cable is directed towards the
rear derailleur on the right dropout.
6. Install the cables to the derailleurs and adjust according to the
manufacturer’s instructions.
Tandem Supplement 5.4.99 12:12 PM Page 29

28
If for any reason the eccentric must be removed from the bike or
replaced, it is very important that the outer surfaces (including under
the wedge) are thoroughly cleaned and then coated with anti-seize
compound or grease before re-installation. Also, the eccentric MUST
be re-installed with the head of the allen bolt on the right side of the
bike to assure that the bottom bracket is installed the correct direction.
DERAILLEUR CABLE ROUTING
The primary difference in routing derailleur cables on a Cannondale
tandem is the use of two rollers to help direct the cables.
1. Install and route the cables from the shifters according to the shifter
manufacturer’s instructions. The front derailleur cable will run
through the adjusting barrel (#A448/, for use on ’99 tandems) placed
in the left stop on the down tube, while the rear derailleur cable will
run through the adjusting barrel placed in the right stop on the down
tube (Fig. 5 illustrates cable routing on a 1999 frame).
2. Run the cables through the plastic cable guide under the front bottom
bracket. The front derailleur cable will run through the left slot, and
the rear cable through the right slot. Then route the cables back to
Fig. 5
Tandem Supplement 5.4.99 12:12 PM Page 28

27
FRONT BOTTOM BRACKET ECCENTRIC
The purpose of the eccentric is to provide a means of adjusting the ten-
sion on the timing chain between the two riders which runs on the left
side of the tandem. As the chain wears and stretches, use the eccentric
to return the chain to a maximum of 1/2" of vertical chain deflection
between the two cranks.
ADJUSTING THE ECCENTRIC
1. Using a 4mm allen wrench, turn the socket head bolt on the right
side of the eccentric counter-clockwise several turns to loosen the
eccentric assembly. Do not completely remove the bolt. If the bolt
has been previously installed tightly it will be necessary to tap the
head of the bolt with a mallet to free the wedge assembly.
2. Once the assembly is free, use a bottom bracket pin tool such as the
Park SPA-1 (green) to rotate the eccentric until proper chain tension
is obtained. Secure the assembly in its new position, centered in the
frame, by tightening the 4mm allen bolt clockwise to 60 In-Lbs
(6.75 Nm.) See Fig. 4.
Fig. 4
Tandem Supplement 5.4.99 12:12 PM Page 27

26
CAUTION: Drivetrain systems are very important to the safety of any
bicycle and Cannondale strongly recommends that any work to them
be performed by an authorized Cannondale dealer. The following
instructions are provided for persons who have a good knowledge of
bicycle specific mechanical procedures and who are equipped with
the proper tools and equipment. Incorrect installation or service may
reduce bicycle performance, and could lead to injury or death. If you
have any doubts about your ability to perform the following proce-
dures, contact your local authorized Cannondale dealer.
B
CANNONDALE
TANDEM DRIVETRAIN
INFORMATION
Tandem Supplement 5.4.99 12:12 PM Page 26

25
allowing the captain or stoker to use the drum brake as a drag brake
on descents. This allows the riders to set a desired level of secondary
braking friction but does not require constant user input.
4. Install the cable through a length of brake housing from the drum
brake lever to the housing stop located under the downtube near the
headtube, with bare cable continuing to the center slot of the plastic
cable guide located under the front bottom bracket.
5. On pre-1999 tandems, the drum brake cable will then run from the
center slot of the bottom bracket cable guide directly to the drum
brake, without additional housing or guides. For ’99 tandems, the
drum brake cable must be routed from the plastic cable guide
straight back to the cable stop in front of the rear bottom bracket.
From this stop the cable will run in housing through the housing
guide on the left chainstay, and to the adjusting barrel stop on the
brake. For all tandems, the cable must be attached to the brake’s
cable anchor bolt according to the brake manufacturer’s instructions.
6. Adjust the drum brake according to the brake manufacturer’s
instructions. Use the drum brake cable barrel adjuster to remove
slack from the cable as necessary.
Tandem Supplement 5.4.99 12:12 PM Page 25

24
3. Run cable housing from the rear stop on the top tube to a stop at
the rear brake, install the brake cable to the rear brake, and adjust the
brake according to the brake manufacturer’s instructions.
REAR DRUM BRAKE INSTALLATION
1. Install the drum brake on the rear wheel according to the brake
manufacturer’s instructions.
2. Position the rear wheel in the rear dropouts in the normal manner.
Before tightening the axle, swing the brake arm around until the hole
in the drum brake arm lines up with the slot of the drum brake anchor.
This anchor is located on the underside of the tandem frame’s left
chainstay. Put the bolt supplied with the drum brake through both the
hole in the drum brake arm and the frame’s drum brake anchor. If
used on a 1999 frame, the supplied bolt may be too short. If so, it
should be replaced with a longer M5 x 20mm, Grade 8 bolt. Tighten
the bolt as per the brake manufacturer’s instructions (using Loctite or
a nyloc-type nut), and then secure the rear wheel in the dropouts.
3. Install whatever type of lever you wish to use to control the drum
brake, according to the lever manufacturer’s instructions. Some
tandem riders use a friction-type shift lever to control the drum brake
Tandem Supplement 5.4.99 12:12 PM Page 24

23
2. Cable actuated brake systems should use the included pair of black
housing stop inserts (#A463/) in the front and rear top tube cable
guides, with bare brake cable running between these two cable stops
along the length of the top tube (See Fig. 2.) Do not run brake cable
housing this entire distance as the increased friction and compres-
sion of the housing will decrease braking efficiency.
Note that on some 1999 tandem frames which use a secondary sloping
top tube (mountain tandem sizes 20"/16", 20"/18", and 18"/16", road
tandem sizes 19"/17" and 21"/17"), two sets of housing stop inserts are
provided. Each of the two smaller stops should be placed in either end
of the front cable guide (on the secondary sloping top tube), large ends
facing out (See Fig. 3.) One of the larger cable housing stop inserts
should then be placed in the first guide on the horizontal top tube
(actually the second guide back from the head tube) and the other in
the rear-most guide on the top tube. The rear brake cable housing
should be run from the rear brake lever to the first of the two small
guides. A second shorter piece of housing is then used to route the
cable around the bend from the second small stop to the larger housing
stop insert on the horizontal top tube. This will allow the bare cable to
run in a straight line along the horizontal top tube.
Fig. 2
Fig. 3
Tandem Supplement 5.4.99 12:12 PM Page 23

22
The cable routing for this lever is somewhat different than traditional
road brake levers with aero cable routing. Each brake cable is routed
through the front of the lever and out the back of the lever through a
rectangular double housing stop block. The first brake cable must be
inserted through the countersunk hole in the lever assembly and through
the rear of the lever. Run the rectangular housing stop block (with two
countersunk holes) down the length of the cable and into the rear of the
lever, with the larger side of the holes facing out the back of the lever.
Then run the brake cable housing over the cable and into one of the
larger holes in housing stop block, which you just positioned inside the
lever. Repeat this procedure for a second brake cable if necessary. Note
that the second brake cable hole in the brake lever is not countersunk.
The first cable should be run to the rear cantilever or V brake and the
second cable may be used for either for the front brake or to the
supplemental rear drum brake. See below for rear brake cable
routing instructions.
REAR BRAKE CABLE INSTALLATION
1. Be certain that the brake lever is securely clamped to the handlebar.
Refer to the brake lever manufacturer’s torque specifications.
Tandem Supplement 5.4.99 12:12 PM Page 22

21
PRE-1999 RIGHT BRAKE LEVER WITH DOUBLE CABLE PULL
The right brake lever on some pre-1999 Cannondale road tandems is
equipped to pull two brake cables, allowing the use of two brakes from
the same lever (See Fig. 1). Note that this setup is standard only on
older road tandems equipped with cable actuated brakes. This allows
the right lever to either control both a rear rim brake and a rear drum
brake, or both front and rear rim brakes, leaving the left brake lever to
control the drum brake.
Caution: If the double pull road brake lever is used to control both
front and rear rim brakes, the captain will not have independent
control of the front and rear brakes as would be standard on a sin-
gle bicycle. Before using a single lever to control both rim brakes,
you should investigate the pros and cons of this configuration by
consulting with people or references which are knowledgeable
about tandem bicycles. The setup and maintenance of such a sys-
tem is very important, as each brake will have to be adjusted to
activate with equal cable pull from the single lever. Therefore, the
setup and maintenance of this configuration should be left to an
authorized Cannondale retailer.
Fig. 1
Tandem Supplement 5.4.99 12:12 PM Page 21

20
be developed by a heavily loaded tandem under heavy braking can
reduce stopping power and cause the hydraulic fluid to expand.
Brake fluid expansion in a closed system will force the brake pads
to close, causing drag on the disc rotor and possible locking of the
brakes in extreme conditions, with attendant risk of injury or death
to the rider(s). Consult your authorized Cannondale retailer for
advice about adding mechanical (non-hydraulic) or “open” system
hydraulic disc brakes to your tandem.
WARNING: Brake systems are very important to the safety of any
bicycle and Cannondale strongly recommends that any work to them
be performed by an authorized Cannondale dealer. The following
instructions are provided for persons who have a good knowledge of
bicycle specific mechanical procedures and who are equipped with
the proper tools and equipment. Incorrect installation or service may
reduce braking performance, and could lead to injury or death. If you
have any doubts about your ability to perform the following proce-
dures, contact your local authorized Cannondale dealer.
Tandem Supplement 5.4.99 12:12 PM Page 20

19
Some 1999 Cannondale tandem frames also feature a disc brake mount
on the left rear dropout and/or on the front fork. These disc brake
mounts conform to the international mounting standard. Refer to the
brake manufacturer’s literature for installation instructions and tandem
bicycle suitablility.
WARNING: Do not use any type of disc brake on a frame or fork
which was not built with an ORIGINAL EQUIPMENT integral disc
brake caliper mount. Do not attempt to weld, clamp, or otherwise
attach a disc brake mount to a frame or fork. Do not use caliper
mounting adapters or brackets unless they are manufactured by or
specifically recommended by Cannondale. The incredible braking
forces which can be produced by a disc brake, especially on the
front wheel of a tandem, can bend or break a fork or frame which
has not been designed and tested to withstand such a load.
Therefore, the use of non-standard brake caliper mounts places the
rider(s) at risk of personal injury or death.
WARNING: Do not use a disc brake system which uses a “closed”
hydraulic system on any tandem bicycle. The brake heat which can
Tandem Supplement 5.4.99 12:12 PM Page 19

18
FRAME INFORMATION
All Cannondale tandem frames are equipped with a mount for a supple-
mentary rear Arai brand (or similar) drum brake arm. The mount is weld-
ed to the bottom of the left chainstay. Additionally, a cable housing stop
is welded to the underside of the downtube near the headtube of the
tandem for the routing of the drum brake cable. Finally, Cannondale tan-
dem frames are equipped with housing-through guides on the top tube,
allowing the use of hydraulic lines for disc or hydraulic brake systems. If
cable actuated brakes are to be used, see instructions below for the use
of housing stop inserts (#A463/).
A
CANNONDALE
TANDEM BRAKE
INFORMATION
Tandem Supplement 5.4.99 12:12 PM Page 18

17
CANNONDALE-SPECIFIC INFORMATION
2
Tandem Supplement 5.4.99 12:12 PM Page 17

16
Tandem Supplement 5.4.99 12:12 PM Page 16

15
◆ Local tandeming/bicycling clubs in your area have many helpful
people. Ask your Authorized Cannondale retailer to put you in touch
with them.
◆
The Tandem Scoop
, the only book about tandeming we know
of, contains extensive instructions on smooth technique, racing, tour-
ing, and dirt riding, riding with children, blind and disabled stokers,
and other subjects. (By John Schubert, published by Burley Designs,
Eugene, Oregon, 1996. Paperback, $9. ISBN 0-9637190-0-9)
◆
The Tandem Book, The Complete Guide to Buying,
Riding and Enjoying Tandem Bicycles.
(By Angel Rodriguez
and Carla Black, $14.95, available from Adventure Cycling, 800-721-
8719 8am.-5pm. M-F Mtn. Time, or www.adv-cycling.org)
Tandem Supplement 5.4.99 12:12 PM Page 15

14
requires more road width than a single. With polite assertiveness, claim
enough space on the road to operate your tandem safely. Use hand signals
to show overtaking motorists when it is or isn’t safe to pass you.
Remember, most people you encounter think you’re something special.
Smile and be a good ambassador for tandeming—the best cycling
there is!
FURTHER READING & INFORMATION:
This supplement can’t cover everything you might want to know about
tandeming. For additional information on riding technique, we suggest you
contact:
◆ Tandem Club of America, c/o Jack & Susan Goertz, 2220 Vanessa
Dr., Birmingham, AL 35242, 205-991-7766, e-mail: tca_of_a@mind-
spring.com. Their magazine,
Doubletalk
, and attendance at TCA events
will make you an expert. Besides, TCA events, such as the various regional
tandem rallies, are lots of fun.
◆ The League of American Bicyclists’ magazine contains frequent
tandem technique articles. Individual membership is $25 from the League,
1612 K St. NW, Suite 401, Washington, DC 20006, 202-822-1333.
Tandem Supplement 5.4.99 12:12 PM Page 14

13
TANDEM BIKE FIT:
The captain should fit the tandem as she/he would fit on a single bike.
But on a tandem, it’s doubly important to have 2-3 inches of crotch
clearance for the starting and stopping maneuvers described earlier.
The stoker uses the same seat-to-pedals distance as on a single bike.
But the handlebars will be closer (which is okay, since the stoker
doesn’t need to steer).
SAFETY:
Most of tandem safety comes from good technique, which we’ve
described above. A few specific warnings merit mention, though.
Riding a tandem at night is legal if you have a headlight and taillight—
but we don’t recommend it. Nighttime riding is more mentally demand-
ing than day time riding. Tandem riding is more mentally demanding
than single riding. A tandem at night adds up to too much demand,
and too small a margin for error. A tandem is a pleasure vehicle, so use
it during day—the most pleasant time to ride.
Always think farther ahead than you do on your single bike. Be aware
that your tandem is bigger, heavier, and less maneuverable—so it
Tandem Supplement 5.4.99 12:12 PM Page 13

12
Tire pressure is critical. Low tire pressure invites pinch-cut flats, while
high pressure improves your performance and makes the tires last
longer. Use the maximum pressure named on the tire sidewall.
Cables are critical. Because of their length, they’re vulnerable to poor
performance from cable friction or poor cable routing. Spokes, handle-
bar stems, and other components must be inspected for tightness every
month, or after every long ride. The front derailleur needs visual inspec-
tion, since you can’t see it when you’re riding (as on your single bike).
The timing chain—between the two cranksets—is unique to tandems. It
stretches in normal use, and must be kept tight. A loose timing chain
can flop sideways and snag a crank arm, or it can come off entirely.
Hold the chain in its middle and wiggle it up and down. You should be
able to wiggle it about 1/2 inch, and no more. If it moves more than
1/2 inch take it to your Authorized Cannondale Retailer for tightening.
The timing chain should be checked for tightness every 200-300 miles.
Buy a chain wear indicator to know when to replace both chains. A tan-
dem has a lot of expensive chainwheels and cogs, so the chain wear
indicator will quickly pay for itself.
Tandem Supplement 5.4.99 12:12 PM Page 12
/