17
:: ESC Manual
#29138
XP SC500-BL
Brushless ESC
Introduction
Congratulations on your XP Brushless Electronic Speed Control (ESC)
purchase. The latest electronics technology along with the design and
engineering experience that is responsible for multiple World Championship
titles has been incorporated into its design.
Your XP Brushless ESC is water-resistant for maximum durability. Its light
and compact design allows for easy installation in most 1/10 vehicles.
Simple calibration and a wide variety of tuning options make this ESC perfect
for both casual enthusiast and racers. When paired with a Reedy Brushless
Motors, you create a potent combination of power and efficiency that brings
performance to a new level. More power and less maintenance elevate the
fun factor by increasing top speeds and reducing down time.
Please read the following before installing and operating
your new ESC.
Specifications
Features
• Adjustable LiPo Low-Voltage Cutoff
• LiPo Cell Count Auto Detect
• Reversible With Reverse Lockout
• Fully Proportional Brakes
• Adjustable Drag Brakes
• Adjustable Throttle Profile
• Hard Case with Aluminum Heat Sink
• Water Resistant
• Heavy Duty Silicone Wires
• Deans® Ultra Plug® Connector
• 3.5mm Motor Connectors
• Pre-Wired For Optional Cooling Fan
Description
Cells
On Resistance
Brakes
Motor Limit
Reversible
Low Voltage Cutoff
Dimensions
Weight
Power Wires
Connector Type
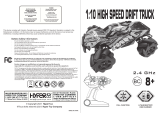
Installation
• Mount your ESC securely using double-sided tape.
• Install your ESC in a position that allows easy access to all connectors.
• Plug the ESC’s receiver wire into the receiver (refer to radio
manufacturer’s manual).
• To prevent radio interference, arrange ESC wiring so that it is not in close
proximity to the receiver antenna wire.
• Connect the three motor leads exiting the ESC to the three leads exiting
your motor. If the motor runs backwards when giving it forward throttle,
reverse any two motor leads. The motor will now run the desired direction.
• Always power ON your transmitter before the ESC and power OFF the
ESC before the transmitter.
Safety Precautions
This product is a sophisticated hobby product and not a toy. It must be
operated with caution and common sense and requires some basic
mechanical ability. Failure to operate this product in a safe and responsible
manner could result in injury or damage to the product or property. This
product is not intended to be used by children without direct adult
supervision. It is essential to read and follow all instructions and warnings
found in this manual prior to installation, set up, and use, in order for the
product to operate properly and to avoid damage or injury.
Your new ESC must be calibrated before use. Before calibration, be sure to
set your radio’s throttle and brake EPAs to 100% and your throttle trim to
neutral. Then follow the steps outlined below.
Throttle/Brake Calibration
Procedure
Power ON transmitter
Throttle trigger position to maximum throttle (hold)
Power ON ESC
Throttle trigger position to neutral
Throttle trigger position to maximum brake
Throttle trigger position to neutral
Power OFF ESC, Power OFF transmitter
Signal From ESC
Audio
bibibibibibi
bibi-bibi
bibi-bibi
Once the calibration procedure is complete, turn on your transmitter, then
your ESC, and begin operating your vehicle. Note: If you choose to make
settings adjustments at this time, you can do so immediately after step #6
of the throttle calibration procedure.
Your ESC comes with pre-programmed default settings. But you can also
change the settings based on the type of vehicle and battery used as well
as personal performance preferences based on the track you are driving on
and your driving style.
Drag Brake - Drag brake is the amount of braking achieved when the throttle
is returned to neutral. A setting of 0% means the vehicle will free wheel to a
stop while higher settings will stop the car faster. Please note that regardless
of the drag brake setting, you will still be able to use the brake trigger to
manually slow the car.
Throttle Profile – This setting adjusts the power delivery of your ESC/motor
combination. The Very Soft setting can be used on loose or bumpy track to
reduce wheel spin while the Maximum setting works well when high traction is
available. Four settings provide options for any track condition.
Run Mode - This gives the option of using reverse or eliminating it completely
(for competition). With reverse activated, you will still have fully proportional
braking. To make settings adjustments, you must first follow the calibration
procedure. You will encounter a 5-second delay before entering step #1 of the
settings adjustment mode. All changes will be made using your transmitter’s
throttle trigger. Note: Once you enter the settings adjustment mode, the ESC
will scroll through all options. If you fail to choose a setting, the ESC will keep
the previously saved setting.
For example, if you want to change the throttle profile from Soft to Standard,
enter the settings mode. You will encounter the Drag Brake mode first at
which time you can let the ESC scroll through the choices (the previously
saved setting will be kept) until you reach the Throttle Profile choices. You
must make the selection by pulling the throttle trigger to maximum after the
ESC scrolls to the desired setting (in this case Standard) indicated by the
appropriate audible tones. Once this setting (or any setting for that matter) is
chosen, you can skip to Step #4 if no other changes are desired.
Programmable Settings
Procedure
Drag Brakes
0%
2.5% (default)
5%
10%
Throttle trigger position to maximum to select value
Throttle position to neutral
Throttle Profile
Very Soft
Soft (default)
Standard
Maximum
Throttle trigger position to maximum to select value
Throttle position to neutral
Run Mode
Reverse Off (Forward Only)
2-stage Reverse (default)
Throttle trigger position to maximum to select value
Throttle position to neutral
Power OFF ESC and transmitter
Power ON transmitter and ESC
Step #
1
2
3
4
5
LED
red static/green flashes
red static/4 green flash
red static
red static/green flashes
red static/4 green flash
red static
red static/green flashes
red static/4 green flash
3 green flash, 2 red
flash/green static
or red static
Signal From ESC
Warranty
Your XP Electronic Speed Control is warranted to the original purchaser for
30 days from the date of purchase, verified by the sales receipt, against
defects in material and workmanship. Product that has been mishandled,
abused, used incorrectly, used for an application other than intended, or
damaged by the user are not covered under warranty.
Associated Electrics Inc. is not liable for any loss or damage, whether direct
or indirect, incidental or consequential, or from any special situation, arising
from the use, misuse, or abuse of this product.
Vehicle Operation
To operate the vehicle, pull back on the throttle trigger to move forward and
push forward on the throttle trigger to engage brakes. To engage reverse,
push forward on the throttle trigger to maximum brakes. Hold the trigger in this
position for at least .5 seconds before returning the throttle trigger to neutral.
Now push the throttle trigger forward to reverse the vehicle.
Battery Management System - A choice of either LiPo mode or NiMH mode
adjusts the low voltage cutoff point. This is critically important when using LiPo
batteries that should not, for performance and safety reasons, be discharged
below 3.0V per cell. In LiPo mode, the ESC detects whether you are using 2
or 3 cells and adjusts the cutoff accordingly.
The ESC can be toggled between LiPo and NiMH by following the steps
outlined below.
IMPORTANT! When the transmitter and ESC are turned on, the color of the
ESC LED at neutral indicates which mode the ESC is in. When the LED is
green, the ESC is in LiPo mode. When the LED is red, the ESC is in NiMH
mode.
Associated Electrics, Inc
26021 Commercentre Dr.
Lake Forest, CA 92630 USA
www.teamassociated.com
www.rc10.com
call: (949) 544-7500
fax: (949) 544-7501
Procedure
Battery Management System
Power ON Transmitter
Trigger position to maximum brake (hold)
Power On ESC
Throttle position to neutral
Power OFF ESC, then transmitter
Power ON transmitter, then ESC
Step #
1
2
3
4
5
6
LED
2 green flash/ green static (LiPo Mode)
or red static (NiMH Mode)
3 green flash, 2 red flash,
green static or red static
Signal From ESC
Audio
bi-bi
melody
bibi-bibi