Page is loading ...

ASSEMBLY INSTRUCTION
DUAL POWER SOFA
HLVN 7105R1 / 7105R2 / 7105R3
Manufactured for Rooms To Go
IMPORTANT:
ASSEMBLING
THIS
UNIT
NEEDS
MINIMUM
2
PERSONS
HLVN SKU:
7105R1-39 15171553
7105R2-39 15171565
7105R3-39 15171577
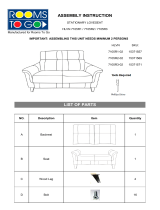
LIST OF PARTS
NO. Description Item Quantity
ABackrest
(LSF, Middle, RSF) 3
B Seat 1
CWall plug
transformer 1
D Wood Leg 4
E Plastic Leg 6
F Bolt 16

ASSEMBLY INSTRUCTIONS
Step
1:
Take out carefully the back cushions & inner carton from the packing.
Step 2: With seat cushion facing upside down. Attach 4 pcs wood legs (using 4 bolts per leg) & turn
6 pcs plastic legs clockwise until it has been completely screwed in.
Metal plate have to be aligned in a certain direction as shown in the following pictures.
Step 3: Flip platform and cushion over so it is right side up. Test the sofa to make sure that it is level
and sitting evenly on the floor.
POWER CONNECTION
Step 4: Connect the adjustable headrest cables, then place seat back cushions accordingly.
Allow sufficient space between reclining sofa and the wall behind it.
Step 5: Connect wall plug transformer to transformer switch.
And connect transformer plug to electrical outlet.

ELECTRICAL CONTROLS
1 Press button to recline the sofa to desired position
2 Press button to raise the sofa to the upright position.
3 Press button to activate the headrest forward.
4 Press button to return headrest to the closed position.
5 Press home button returns both footrest and headrest to the
original upright or closed position.
6 USB port
WARNINGS
* Keep unit at least 4" from wall.
* Keep unit at least 24" from all heat sources.
* Avoid placing unit in areas where unit can be exposed
to direct sunlight other powerful light sources, as fading
or discoloration may occur.
* Do not reach under seat when mechanism is operating or serious injury may occur.
* Reclining mechanism should only be operated while seated properly.
* Do not sit on arms or backrest.
* Do not jump or roughhouse on furniture.
* If unit must be moved, do not drag. Unit must be lifted in order to be moved.
* Do not continuously operate mechanism for more than one minute or unit may go into
protection mode by shutting down to prevent overheating.
* Unplug unit from power source prior to cleaning mechanism.
* Do not allow electrical components to come into contact with any liquids.

CARE AND CLEANING
* Upholstered furniture is packaged tightly to protect it during transsit. This packaging can sometimes cause
creases or misshaped cushions when the furniture comes out of the packaging. These issues will correct
themselves over time as the fibers of the cushions are exposed to air. However, shaping the cushions with
your hands can alleviate the creases and compressed fibers more quickly.
* Use a vacuum cleaner to remove dust and debris from seams and crevasses.
* Use a soft damp cloth to gently clean soiled areas and wipe clean. Do not rub.
* Do not use household cleaners or solvents. Such cleaners may cause damage and/or discoloration.
* Do regularly use dedicated leather care product onto the leather furniture to prevent built up of body oils.
TROUBLE SHOOTING
PROBLEM SOLUTION
Headrest not working Ensure that wall power outlet is functional Step 5
Ensure that headrest power cable is plugged into the seat cable Step 4
Not Reclining Ensure that wall power outlet is operational Step 5
USB not working Check all power connections Step 4, 5
Backrests gaps Ensure the backrests are properly clipped into the male posts located on seat
mechanism. Check that brackets are not loose, positioned improperly or bent.
/


