Page is loading ...

Instruction Manual
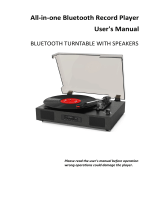
Turntable with Cassette and Bluetooth - COBTR7CU11


General Safety 4
Product Overview 7
Operation 8
Cleaning and Maintenance 14
Troubleshooting 15
Specifications 15
Customer Helpline Last Page
CONTENTS

4
GENERAL SAFETY
Read this manual thoroughly before you start using the turntable.
Store this manual, the completed warranty card, your receipt and the product packaging.
The safety precautions instructions reduces the risk of fire, electric shock and injury when
correctly complied to.
Please follow all instructions and take notice of all warnings.
The lightning flash with symbol within the
triangle is intended to warn you of a
non-insulated dangerous voltage in the
product’s enclosure that could be of
sucient magnitude to generate a risk of
electric shock to persons.
The exclamation point within the triangle
is intended to warn you to the presence
of important operating and maintenance
instructions in the documents included with
the product.
The lightning flash symbol within the triangle is intended to warn you of
non-insulated dangerous voltage the product’s enclosure that could be of
sucient magnitude to generate a risk of electric shock to persons.
• Only using furniture that can safely support the Products.
• Ensure the Product is not overhanging the edge of the supporting furniture.
• Do not place the product on a high furniture without securing both the furniture
and the product to a stable support.
• Do not place the product on cloth or other conductive materials.
• Warn children of the dangers of climbing on furniture to reach the product
or its controls and to call for an adult to assist.
IMPORTANT INFORMATION
This unit must be serviced by a qualified
service personnel only.

5
GENERAL SAFETY INSTRUCTIONS (Cont.)
This product must be positioned in a suciently stable location, it can be
potentially hazardous due to falling when mounted and can cause injury, particularly
to children if it positioned incorrectly.
• Do not use a damaged power cord, plug or loose outlet. Doing so may cause an
electric shock.
• If mains plug or an appliance coupler is used as the disconnect device, the disconnect
device shall remain readily operable.
• Do not plug several devices into the same outlet. Doing so may cause the outlet to
overheat and start a fire. Make sure the outlet is readily accessible during operation
of the equipment.
• Do not bend, twist or kink the power cord excessively.
• The apparatus shall not be exposed to dripping or splashing and no objects filled with
liquids, such as vases, shall be placed on the product. Dry location use only.
• Do not run the power cord near heat-producing appliances such as radiators, stoves or
irons. The excessive heat could melt the insulation and expose live wires, resulting in
fire or electric shock.
• No naked flame source, such as candles, should be placed on the product.
• Do not allow anything to rest on or roll over the power cord. Doing so may cause fire
or electric shock.
• Do not run the power cord near heat-producing appliances such as radiators, stoves
or irons. The excessive heat could melt the insulation and expose live wires, resulting in
fire or electric shock.
• Unplug ths product during lightning storms or when unused for long periods of time.
Not doing so may result in fire or electric shock.
• Do not cover the ventilation openings of the product with items such as newspapers,
tablecloths, curtains etc or insert objects into the slots available on the products.
As this could result in the product temperature rising and could cause a fire.
• Do not expose this product to rain or moisture as it may result in fire or an
electric shock hazard
• Do not temper or change or modify the product in any way.
• Only use Accessories outlined and recommended by the manufacturer.
• Please do not expose the product to splashing or water contact
• Please do not place any object on top of the product
IMPORTANT INFORMATION

6
GENERAL SAFETY INSTRUCTIONS (Cont.)
• If you notice any unusual odors or smoke around the unit, immediately disconnect the
unit from the outlet and contact the service center. Failure to do so may result in fire
or electric shock.
• When not using the unit for long periods of time or when you are moving the unit
please ensure to disconnect the power supply from the wall socket.
• Please beware that Dust could accumulate over time on the unit and cause it to
generate heat and or deteriorate insulation, which in turn may result in an electrical fire.
• The product is not intended for use by persons (including children) with reduced physical,
sensory or mental capabilities, or young children of any age, They must be supervised
product by a person responsible for their safety.
• To maintain the product do not use any chemical or cleaning agent or wet cloth, please
only ensure to utilize a dry cloth to wipe it down from marks or dust and only after
unplugging the product from the power socket.
• Please ensure to contact our call center for any repair or service required for the products.
Please make sure upon positioning this product, the place is:
• Not wet or damp and Well ventilated
• Away from direct sunlight or heaters.
• Away from splashes or food.
• Protected from excessive dust or grease.
• Do not place this equipment in a confined space such as a bookcase or similar unit. Allow
20cm above and 5cm spacing on both sides for proper ventilation.
• Do not place the Product near heat sources such as radiators, stoves or other audio
visual equipment that produce heat.
• Do not place containers with liquids, if liquid falls inside the products it may result in
short-circuit, fire or electric shock.
• Do not place small metallic objects on top of the unit.
• Do not use or store flammable or combustible materials near the unit. Doing so may
result in fire or explosion. Do not place any naked flame sources, such as lit candles,
cigarettes or incense sticks on top of the product.

7
PRODUCT OVERVIEW
1 Lift lever
2 Auto stop switch
3 Tone arm lock
4 Speed switch
5 Tone arm
6 Turntable platter
7 Dynamic stereo speakers
8 Transparent dust cover
9 45 RPM adapter
10 Cartridge with stylus
11 DELETE
12 REC
13 FOLDER+
14 EQ
15 PLAY/PAUSE
16 PREV
17 STOP
18 NEXT
19 POWER/VOLUME control knob
20 FUNCTION switch
21 Earphone
22 AUX IN
23 USB
24 SD/MMC Card slot
25 Cassette PLAY/EJECT/FFWD
26 Cassette slot
1
3
4
5
6
8
9
10
11
12
13
14
15
16
1718
19 20 21 22 23 24 25 26
7
2

8
OPERATION
Before First Use
• Unpack the appliance but keep all packaging materials until you have made sure your new
equipment is undamaged and in good working order. Plastic wrapping can be a suocation
hazard for babies and young children, so ensure all packaging materials are out of their
reach.
• Unwind the cord to its full length and inspect it for damage. Do not use the appliance if the
appliance or its cord have been damaged or are not working properly. In case of damage,
contact our after sales support line for advice on examination or repair or return of the
damaged product.
• Read this manual to familiarise yourself with all the parts and operating principles of the
equipment. Pay particular attention to the safety instructions on the previous pages.
• Do not connect the unit to the mains power socket before checking the mains voltage and
before all other connections have been made.
• Do not cover any vents and make sure that there is a space of several centimeters around
the unit for ventilation.
Connections
• Connect the power cord to an AC power outlet.
• Rotate the POWER/VOLUME knob to the right to turn on the unit. The backlight on the
LCD display screen should light up, indicating the power supply is working properly.
• Your Turntable with Cassette Deck is now ready for use.
• Move the FUNCTION switch to your desired input source: PHONO (Vinyl record player),
AUX IN, TAPE (Cassettes) and USB/SD.
• To connect headphones to this unit, use a connecting cable with a 3.5mm headphone jack
and plug it into the headphone socket at the front of the unit.
• To connect an external sound source such as an MP3 , use the AUX IN socket at the front
of the unit.

9
OPERATION (Cont.)
IMPORTANT: To avoid damaging the stylus, ensure that the included stylus
guard is in place whenever the turntable is being installed, moved or cleaned.
Playing a Record
• Connect the AC power cord to an electrical outlet and raise the dust cover.
• Turn ON (with the POWER/VOLUME KNOB) and adjust the volume to an appropriate
level.
• Slide the FUNCTION switch to the PHONO position.
• Place a record on the turntable platter and select the correct playing speed: 33 1/3, 45, 78
RPM (according to the vinyl being played).
• Set the auto/manual stop control. Set the AUTO STOP switch to ON if you are playing a
33 RPM record and you want the turntable to stop turning when it has reached the end of
the record. If the switch is set to OFF, the turntable will continue turning at the end of the
record.
• Remove the stylus guard and unlock the tone arm lock. Push the lift lever upward to raise
the tone arm and then gently move the tone arm to the desired position over the record.
The platter will begin to spin when the tone arm is moved toward the record.
• Push the lift lever forward to lower the tone arm slowly onto the desired position on the
record and begin playing the record.
• If the AUTO STOP switch is set to ON, the record will stop automatically. If it is set to OFF,
the record will not stop automatically.
• When you have finished playing the record, push the lift lever backward to raise the tone
arm and gently move it back to its rest.
• When you have finished playing records, engage the tone arm lock to protect it from
accidental movement. Turn the POWER KNOB to switch the unit OFF. Unplug it from the
power supply if you are not going to use it for a while.
• NOTE: If your record stops before the last track finishes, set the AUTO STOP switch to
OFF. Your record will now play to the end, but you will have to stop the turntable rotation
manually.
• NOTE: Depending on the record length, AUTO STOP may be enabled before the end of
the recording. Do not rely on AUTO STOP alone to turn o playback.

10
OPERATION (Cont.)
Playing a Cassette
• Connect the AC power cord to an electrical outlet.
• Turn ON (with the POWER/VOLUME KNOB) and adjust the volume to an appropriate level.
• Set the FUNCTION switch to TAPE.
• Insert a pre-recorded tape into the cassette slot with the tape side to the right. By pushing
slightly, the cassette will slide into the tape mechanism and will start playing automatically.
NOTE: One end of the tape will remain visible.
• To fast forward the cassette tape, press the PLAY/EJECT/FFWD button halfway down while
the cassette is playing.
• To resume normal playback, release the PLAY/EJECT/FFWD button.
• To stop playback, press the PLAY/EJECT/FFWD button completely. Playback will be
stopped and the cassette tape will be ejected.
Playing Music from an Input
• Connect the AC power cord to an electrical outlet.
• Using a 3.5mm Stereo cable, connect the external audio device to the AUX IN socket at
the front of the unit.
• Turn ON (with the POWER/VOLUME KNOB) and adjust the volume to an appropriate
level.
• Set the FUNCTION switch to AUX IN.
• Use the POWER/VOLUME KNOB to control the volume level or use the controls on the
external audio device to control the Playback/Volume functions.
Bluetooth Playing
• Set the Function switch to USB/SD position. The display shows [BT].
• Select the COBTR7CU11 on your portable device (smartphone, tablet) and confirm
the connection.
• When pairing is successful, the LED stops flashing.
• Now you can listen to the music from your portable device through the stereo
system.
Playing Music from a USB Device/SD/MMC Card
• Connect the AC power cord to an electrical outlet.
• Turn ON (with the POWER/VOLUME KNOB) and adjust the volume to an appropriate
level.
• Insert a USB device face up into the USB port, making sure it is fully inserted.
Alternatively, insert a memory card in the direction of the arrow (as shown on the label
next to the memory card slot), making sure to insert it straight without bending it.

11
OPERATION (Cont.)
MEDIA CONTROL
• Connecting the USB device upside down or backwards could damage the audio system
or the storage media (USB drive, SD or MMC card). Check to ensure the direction is
correct before connection.
• Always back up important information to avoid accidental loss of data. We are not
responsible for any damage and/or data loss due to lack of backup.
• Set the FUNCTION switch to USB/SD. The LCD display screen will display the number of
tracks and the total time of the storage medium.
• The system will then start audio playback from the media storage device (USB or SD
card) automatically.
• To pause playback, press the PLAY/PAUSE button once to halt playing. Press it again to
continue playback.
• To play the previous track, press PREV once or hold it down continuously to rapidly
progress through previous tracks.
• To play the next track, press NEXT once or hold it down continuously to rapidly advance
through tracks.
• To choose dierent sound eects, press the EQ Function button.
a. E1 – NORMAL SOUND
b. E2 – POP
c. E3 – ROCK
d. E4 – JAZZ
e. E5 – CLASSIC
NOTE: The EQ function is only available during USB/SD playback.
• To delete a file on your media storage device, press the DELETE button for about 2
seconds.
WARNING: Files cannot be recovered once they are deleted from your media storage
device. Please make sure that you regularly back-up your data.
• To switch between dierent folders (if there are more than one), press the FOLDER+
button. This will switch the stored music files (the music which you have stored in
memory devices) and the recorded music files (the music which is recorded from the
turntable, cassette, and auxiliary).
• To stop playback of the music track, press STOP.

12
OPERATION (Cont.)
NOTE:
• The recording speed is 1:1. Recording will take as long as playing the record, cassette tape
or CD.
• The recording format is preset at MP3 bit rate 96 kbps.
Encoding and Recording onto a USB Device/SD Card
This equipment has the capacity to encode your traditional music media (vinyl records,
cassette tapes or CDs via AUX IN) into a digital format and record it onto a USB device or
SD/MMC card as an MP3 file(s).
• Set the FUNCTION switch to the appropriate function: PHONO, TAPE or AUX IN.
• Insert a storage device (USB stick/SD/MMC card) into the relevant slot.
• Get your traditional music media ready for playback: either start playing a record on
the turntable, insert a cassette tape into the cassette slot, or insert a CD into a CD player
connected to the AUX IN socket.
• Press the REC button to start recording: the music track(s) will be recorded automatically
onto the storage medium as MP3 file(s).
• Press the STOP button to stop recording: the music track(s) will be saved directly onto
the storage device (USB device or SD card) inserted.
• The default media is USB; press the USB/SD switch button to change to an SD card.
Connecting to External Headphones
To listen to the content via headphones, plug your external device or headphones into the
3.5mm Headphone Jack at the front of the unit.

13
OPERATION (Cont.)
• Connecting the USB device upside down or backwards could damage the audio system
or the storage media (USB drive, SD or MMC card). Check to ensure the direction is
correct before connection.
• Always back up important information to avoid accidental loss of data. We are not
responsible for any damage and/or data loss due to lack of backup.
• Set the FUNCTION switch to USB/SD. The LCD display screen will display the number of
tracks and the total time of the storage medium.
• The system will then start audio playback from the media storage device (USB or SD
card) automatically.
• To pause playback, press the PLAY/PAUSE button once to halt playing. Press it again to
continue playback.
• To play the previous track, press PREV once or hold it down continuously to rapidly
progress through previous tracks.
• To play the next track, press NEXT once or hold it down continuously to rapidly advance
through tracks.
• To choose dierent sound eects, press the EQ Function button.
a. E1 – NORMAL SOUND
b. E2 – POP
c. E3 – ROCK
d. E4 – JAZZ
e. E5 – CLASSIC
NOTE: The EQ function is only available during USB/SD playback.
• To delete a file on your media storage device, press the DELETE button for about 2
seconds.
WARNING: Files cannot be recovered once they are deleted from your media storage
device. Please make sure that you regularly back-up your data.
• To switch between dierent folders (if there are more than one), press the FOLDER+
button. This will switch the stored music files (the music which you have stored in
memory devices) and the recorded music files (the music which is recorded from the
turntable, cassette, and auxiliary).
• To stop playback of the music track, press STOP.

14
CLEANING & MAINTENANCE
• When opening or closing the turntable cover, handle it gently, moving it
either at the center or equally from both sides.
• Do not touch the stylus tip with your fingers; avoid bumping the stylus on
the turntable mat or on the edge of the record.
• Clean the stylus tip frequently, using a soft brush with a back-to-front
motion only.
• If you use a stylus cleaning fluid, use it very sparingly.
• Wipe the dust cover and turntable housing gently with a soft cloth. Clean
the unit only with a dry, clean cloth. Do not use liquid or aerosol cleaners.
• Never apply harsh chemicals or solvents to any part of the turntable
system.
• Prior to moving the turntable, always unplug it from the AC power outlet
and fasten the tone arm on the tone arm rest with the vinyl twist-tie.
Replacing the Stylus
Removing the needle from the cartridge:
• Place a Flat-head screwdriver at the tip of the needle head shell and push downwards in the
direction shown in sketch “A”.
• Remove the needle head shell by pulling it forwards and pushing downwards.
Inserting the needle into the cartridge:
• Insert the needle by pushing it upwards and pushing it backwards.
• Insert the needle head shell upwards as shown in sketch “B”.

15
TROUBLSHOOTING
If you experience problems with your product, or it appears
not to be operating correctly, check the information below for solutions
to common problems. If none of the solutions oered help you solve your
problem, please contact our support centre for advice on info@ayonz.com
Do not attempt to repair the appliance yourself!
SPECIFICATIONS
Rating 220-240V~ 50Hz, 10W
Audio Output 2 x 1.5 RMS
Dimensions 325 (w) x 295 (d) x 125 (h) mm

CUSTOMER HELPLINE:
info@ayonz.com
DISTRIBUTED BY:
AYONZ PTY LTD
/