Page is loading ...

25 03 19 Rev.1.0
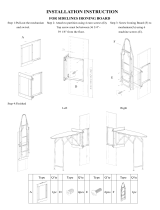
INSTALLATION INSTRUCTIONS
For more information about TOOLKISS®
products please visit
WWW.TOOLKISS.COM
+1(832)3768443
Customer
service:
TK19118-4872MB
TK19118-5472MB
TK19118BN
TK19118MB
46''-48''x72''MB
50''-54''x72''MB
56''-60''x72''BN
56''-60''x72''MB
®
Do not return product to the store.Contact
TOOLKISS
directly
with any questions.
TK19118-6058MB 56''-60''x58''MB

100622Rev.1.0
Preparation
1. Prior to installation, examine all boxes and packages for shipping damage and compare the piece
count with your packing slip. After opening all boxes and packages read this introduction carefully.
Check that all of the needed parts are included in the package by checking off the components
on the “Detailed Diagram of Shower Door Components”. If the unit has been damaged, has a
finishing defect, or has missing parts, please contact our customer support department within
3 business days of the delivery date. Please note that TOOLKISS®
TOOLKISS®
TOOLKISS®
will not replace any
damaged products or missing parts free of charge after 3 business days or if the product
has been installed. Feel free to contact if you have any questions, and please
provide an order number, job name or other proof of purchase to help us identify your original
order.
2. Please note that you should consult your local building codes with questions about
installation compliance standards. Building and plumbing codes may vary by location, and
is not responsible for code compliance standards for your project and will not
accept any returns.
3. If this unit is going to be installed in a new construction, please install all of the required
plumbing and drainage before installing the shower. Use a competent and licensed (if required
by local code) plumber for all plumbing installation.
4. Please make sure that prior to beginning the installation, the surfaces are leveled and solid and
will be able to support the total weight of the unit. Also make sure the walls are at right angles.
Irregular installation surface level, radius corners or improper angle of side walls will result in
serious problems for your installation. Please, note that some adjustments and drilling may be
necessary during the installation process.
5. Please protect all primary surfaces of the product during installation. Never set your glass down
directly onto a tile floor. Leave corner protectors in place until necessary to remove them.
Always use a piece of wood or cardboard to protect the bottom edge and corners of the glass
prior to and during installation.
6. This unit must be installed upon a finished threshold and against finished walls.
7. This model has 4” of total width adjustment: including 1/2” of adjustment per wall profile for out-of-
plumb wall conditions plus 3” of overall width adjustment with the expanding top and bottom rails.
Be sure that you have ordered the correct model size to fit your finished opening.
8. This model requires a minimum 1-3/8” of flat threshold space for installation.
9. Professional installation recommended.
NOTE: This door is reversible for right or left-hand door installation. The right-hand door installation is
shown as an example throughout this manual.

1
This product is heavy and may require two people to install.
1/4"
1/8"
5/16"
Inspect the product immediately upon receipt for transit damage, missing packs/parts or
manufacturing fault. Damage reported later will not be accepted. Handle the product with care
avoiding knocks and shock loading to all sides and edges of the glass.
Read these instructions carefully before start of installation.
Special care should be taken when drilling walls to avoid hidden pipes or electrical cables.
Note: This product is heavy and may require two people to install.
After use, your shower should be cleaned with soap and water. This is particularly important in hard
water districts where insoluble lime salts maybe deposited and allowed to build up. Cleaners of a
gritty or abrasive nature should not be used. Care should be taken to avoid contact with strong
chemicals, they can be used but with caution, if in doubt contact the manufacturer of the cleaner in
question.
Keep these instructions for aftercare and customer service details.

Assembly Drawing
6
5
13
4
14
14
7
9
10
3
3
2
2
1
12
11
2
1
2
3
1pc
2pcs
2pcs
Wall Jambs
Door Panels
Bottom Horizontal Rail
4pcs
4pcs
Screw ST4x5/8"
Screw ST4x1 3/8"
10
11
PACKING LIST
PART # Q’TY
DESCRIPTION PART #
12
13
15
14
4pcs
4pcs
1pc
4pcs
Wall Plugs
Screw ST4x5/16"
Q’TY
DESCRIPTION
1pc
4sets
7
9
4
5
6
8
4pcs
4pcs
2pcs
1pc
Top Horizontal Rail
Glass Blocks
Glass Block Caps
Towel Bar
Screw Caps
Bottom Guides
Roller Bracket Assembly
8
8
AllenWrenches
15

Step 1
±00
±00

50'' 51'' 52'' 53'' 54''
46'' 47'' 48''
56'' 57'' 58'' 59''
4'' 3'' 2'' 1''
60''
Step 2
A
B
A
Measure the drip rail with a tape
measure. Cut the length according to
installer's recommendation.
B
4
1

Installation Steps
Step 1 A
1
A
12
1/4"
A
B
B
1
3
A
B
B
B1
B
Screw
ST4x5/8"
3
10
5
3
Step 2
A
11
B2
3
6

3
Step 3
Step 4
1/8"
View from inside
4
A
A
A
Screw
ST4x5/8"
14
13
A
4
9
B
A
4
B
4
9

5
Step 5
Step 6
B
A
B
A
B
A
A

Step 7
24 HOURS
Allow 24 hours for silicone to dry before use.
24 HOURS
Allow 24 hours for silicone to dry before use.

100622Rev.1.0
For more information about TOOLKISS®
products please visit
WWW.TOOLKISS.COM
+1(832)3768443
Customer
service:
®
Do not return product to the store.Contact
TOOLKISS
directly
with any questions.
Product Maintenance
BASES and BACKWALLS: To ensure long lasting life for your acrylic back walls: wipe them off
after each use with a soft cloth. To clean the acrylic back walls use non-abrasive sprays or cream
based cleaners. Avoid the use of aerosol spray cleaners. Never use abrasive cleansers, metal
brushes or scrapers that could scratch or dull the surface.
GLASS: To ensure long lasting life for your glass shower products: wipe them off after each use
with a soft cloth. Rinse and wipe off the glass using either a soft cloth or a squeegee to prevent
soap buildup and water spots (Hard water can etch the surface of the glass over time if left to dry).
To prevent scratching the surface: never use abrasive cleaners or cleaning products that contain
scouring agents. Never use bristle brushes or abrasive sponges that may scratch the surface.
HARDWARE: To ensure a long lasting finish: wipe off the metal parts after each use with a soft
cloth. Do not use abrasive cleaners or cleaning products containing ammonia, bleach or acid. If
accidentally used, rinse the surface as soon as possible to prevent damage to the finish (peeling or
corrosion). After cleaning the polished finishes, rinse thoroughly and wipe dry with soft cloth.
Clean stainless steel surfaces at least once a week. When applying stainless steel cleaner or polish
to stainless steel hardware, work with (not across) the grain. Never use an abrasive sponge or cloth,
steel wool or wired brush as these may permanently scratch the surfaces.
NOTE: To maximize the life of your door, it is important to regularly inspect the glass and
other hardware for misalignment, proper attachment, and/or damage. Contact TOOLKISS
with any questions or concerns.
Please provide the belowing information if you have any qaustions.
1. order number:
2. description of the issue:
3. who install it? installer or yourself?
4. some photos or video of the issue:
5. If you need replacement parts, please circle the part you need on the page 2, then send
the photo to us.
6. your address and phone number (if you need something re-shiped) :
We will give you a solution as soon as possible.
/