Page is loading ...

Printing Color: White/Black.
Material QUALITY: 100g wood-free printed paper.
Size: A6
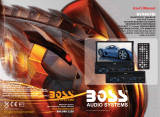
OWNER’S MANUAL

Table of contents
Safety Precautions.....................................................................1
Main Features...........................................................................2
.......................................................................
..........................................................................
. . . . . . . . . . . . . . . . . . . . . . . . . . . . . . . . . . . . . . . . . . . . . . . . . . . . . . . . . . . .
Appearance and Function Introduction.............................................
Connect To Storage Accessories. . . . . . . . . . . . . . . . . . . . . . . . . . . . . . . . . . . . . . . . . . . . . . . . . . . .
. . . . . . . . . . . . . . . . . . . . . . . . . . . . . . . . . . . . . . . . . . . . . . . . . . . . . . . . . . . .
Touch Screen Menu And Operation.................................................
. . . . . . . . . . . . . . . . . . . . . . . . . . . . . . . . . . . . . . . . . . . . . . . . . . . . . . . . . . . . .
DVD Mode Menu Interface. . . . . . . . . . . . . . . . . . . . . . . . . . . . . . . . . . . . . . . . . . . . . . . . . . . . . . . . . . .
. . . . . . . . . . . . . . . . . . . . . . . . . . . . . . . . . . . . . . . . . . . . . . . . . . . . . . . . . . . . . . . . . . . .
Radio Function Interface ............................................................
.............................................................
...............................................................
.................................................................
Function Index Sign. . . . . . . . . . . . . . . . . . . . . . . . . . . . . . . . . . . . . . . . . . . . . . . . . . . . . . . . . . . . . . . . . .
..................................................................................
.....................................................................
User Introduction 3
Wiring Diagram 3
Unit Rear Side Connection 4
5
5
Remote Control Operation 6
9
Bluetooth system settings 9
10
11
Audio/Video Menu Setup 12
Warning 16
Trouble Shooting 16
USB/SD Operation 11
SYS System Settings ..13
DVD System Settings 14
15
.

1 2
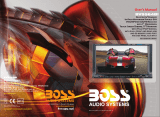
1.6.2” Wide screen TFT LCD high-definition media player monitor.
2. This unit is with touch icon interface and touch button icon.
3. Built-in AV / DVD / USB / SD / FM/AM /Bluetooth function.
4. DVD/VCD/MP3/CD/MPEG compatible.
5. FM/AM digital synthesizer tuner with 30 memory presets.
6.Intelligentize bluetooth function, for you to make and answer the phone comfortably.
7. Built-in 4X25W power amplifier, 4.1 soundtrack audio output, can connect to external
audio device.
8. Signal: 1 video output, 1 video input.
9. Under car reverse mode, can auto switch to the reversing mode, if connect to the camera,
can observe the back side of car to ensure the safety.
10. Menu function: all function is operated by OSD menu.
11. Display system: AUTO/PAL/NTSC.
12. Auto memory: all the feature or position adjustment can be auto memoried and will auto
resume.
13. Support USB/SD card to play MP3/MP4/WMA/AVI/JPEG media format.
14. Remote control: full function remote control operation.
15. Picture pixel:800*480
16. Power: DC 12V ±10%; Low power consumption: ~25W.
17. Working Temp: -10℃~60℃.
18. Max Current: 10 A.
19. This unit has anti shock function.
Safety Precautions
!!
!!
!!
!!
This product without waterproof function. To avoid the risk of fire breakout or electric
shock, please do not expose this unit in the rain or moist environment. Do not open
the cabinet. Such operation will absolve relative maintenance guarantee. Only the
legally authorized professionals are allowed to conduct such operation.
LASER: This unit installs a laser system. To ensure proper use of this product,
please read this owner's manual carefully before operating this unit and keep it for
future reference. If the unit requires maintenance, please contact an authorized
professional. Please operate according to correct process in order not to hurt by
laser beam.
Please use this unit at normal temperature. Do not put the unit under -10 degree or
higher than +60 degree environment. Otherwise it will distort the plastic shell,
debase the display quality and products quality.
Installation should be very tight and secured to prevent the fallen unit hurt people
and damage the unit when moving on or a sudden brake.
Please install carefully to avoid damaging working platform. Please clean the
internal working platform, and ensure sufficient space for installation. Inner shell will
be installed on the working platform. Then install the mainframe, connecting the
power and video signals jack, then put mainframe into the shell. Then assemble the
shell with the mainframe device.
Please do not try to repair display device by yourself. It is made up of many precision
electronic elements, and any dismantlement or refit will make it damaged or broken.
If any problem on the unit, please switch off the power immediately, and consult your
nearest seller or distributor.
Please keep the monitor away from the pollution of moisture, dust, water soot etc.
Please switch off the power immediately if any moisture or other objects pollute,
please contact the seller or distributor.
If you drive with the sound at a level preventing you from hearing sounds outside the
car please keep the unit at an appropriate sound level, otherwise this may affect
your driving and cause an accident.
For your safety, please do not watch or operate the monitor when you are driving.
The apparatus shall not be exposed to dripping or splashing and that no objects
filled with liquids, such as vases, shall be placed on the apparatus.
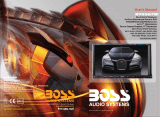
Main Features
Thank you for your support of the company’s products and options. This unit is crystallization
of the modern high-tech. It is a cross-functional player mode and adjustable true color LCD
automatic retractable screen LCD touch screen. Allows you to be arbitrary choice To
appreciate the program. Here, we wish you to personally experience this high-tech products
can be Perfect fun and enjoyment. To ensure proper use of this product, please read this
owner’s manual carefully before operating this unit and keep it for future reference.
Preface
Note: The graphics of this manual are for your reference only, please in-kind products prevail.
!!

3 4
User Introduction
1. Please connect the signal cable with power cable according to “Unit rear side connection” to
connect to power and signal.
2.After connect to power, press the power button, screen to enter the main interface.
3. When display DVD or VCD disc, the unit is automatically identify the video system PAL and
NTSC.
4. Can through the button on panel to adjust the function. And can use the remote control or
touch screen to adjust the function.
Wiring Diagram
1. Black/Steering Wheel GND, Black/GND: connect to ground.
2.Green(Black)/FL-: Front left audio output (cathode).
3.Green/FL+: Front left audio output (positive pole).
4 .Purple(Black)/FR-: Front right audio output (cathode).
5.Purple/FR+: Front right audio output (positive pole).
6. Grey/RL+: Rear left audio output (positive pole).
7. Grey(Black)/RL-: Rear left audio output (cathode).
8. White/RR+: Rear right audio output (positive pole).
9. White(Black)/RR-: Rear right audio output(cathode).
10. Blue(Black)/REARVIEW: Car reversing cable.
11. Blue/AMP-CON:Control power amplifier switch.
12/13. Brown/Steering wheel button 1, Brown(Black)/Steering wheel button 2:
Connected to the steering wheel button (positive pole).
14. Orange/PWM: Headlight control
15. Red/ACC: Trigger power
16. Yellow/B+12V: +12V power cable.
Unit Rear Side Connection
TV SUB L R RR FR
CAM- V AU X- IN RCA- OU T RL FL
V V
WHITE/AUDIO L IN
WHITE/RL OUT
WHITE/FL OUT
RED/AUDIO R IN
RED/RR OUT
RED/FR OUT
Radio-signal interface
SUBWOOFER
GPS TV SU B L R RR FR
CAM- V AUX- IN RC A- OU T RL FL
V V
MAIN O UTLE T
YELLOW/VIDEO IN
YELLOW/VIDEO OUT Display
RADIO/TV
YELLOW/BACK V IN
Camera
BATTERYBATTERY
REAR RIGHT
REAR LEFT
FRONT RIGHT
FRONT LEFT
YELLOW/B+12V
Brown/Steering wheel button 1
RED/ACC
BLACK/GND
Brown(Black)/Steering wheel button 2
Orange/MUTE
WHITE/RR+
GREY/RL+
PURPLE/FR+
GREEN(Black)/FL+
GREEN/FL-
PURPLE(Black)/FR-
GREY(Black)/RL-
WHITE(Black)/RR-
Blue(Black)/RERAVIEW
Blue/AMP-CON
Black/Steering wheel GND
Black/GND
Green(Black)/FL-
Green/FL+
Purple(Black)/FR-
White/RR+
Grey(Black)/RL-
Grey/RL+
Purple/FR+
Brown/Steering Wheel Button 1
Blue/AMP-CON
Blue(Black)/REARVIEW
White(Black)/RR-
Brown(Black)/Steering Wheel Button 2
Orange/PWM
Red/ACC
Yellow/B+12V
Black/Steering Wheel GND

5 6
Appearance and Function Introduction
Connect To Storage Accessories
Connecting With USB
1. Under power on mode, click the USB icon in the main interface, it will play the USB.
2. It will display “USB READ ”, then play the file.
3. Pull out the USB when you want to stop playing.
Connecting With SD Card
1. Under power on mode, click the SD icon in the main interface, it will play the SD card.
2. Will show can play the fi le.
3. Pull out the SD card when you want to stop playing.
If there are some file in the memory card that can’t play, please delete it then connect to the
unit to read the file.
Note: Please take attention for the SD card using direction, upward label side , then insert the
card.
Remote Control Operation
1. : Power
Press this button to turn on/off the unit.
2. : Play/Pause
3. : MUTE
4. Cursor direction key
Press these to move cursor.
5. System Select: BND/TA/SYS
6. Enter
7. Volume: VOL+/VOL-
8. SEEK- /SEEK+ : Previous/next
9. DVD Programming
10. OSD
Press it to display the disc information.
11. SEL: Sound adjustment function
12. AMS/RPT
DVD mode is Loop broadcast, radio
mode is the search channel
13. Under DVD mode,press it for shuffle
14. Number: Pilih lagu
15. AUDIO memilih mode.
16. Switching sub menu
17. Subtitle on/off
18.Anycast title,chapter,audio,subtitle
19. MODE: Change modes
20. : Stop playing
21. DVD display disc there are more
angle select (need the disc support)
22. SLOW: slow forward/slow playing
23. SETUP: DVD system setup
Precautions Before Using Remote Control Unit
1. Please pull out the PVC when the remote control unit is first using.
2. Don’t drop or step in remote control unit or subject it to shocks.
3. Note that it maybe impossible to operate the main unit if there are obstacles between it
and the remote sensor.
4. Using the remote control unit within the specified operating range.
25. ZOOM
Press it can zoom or shrink picture
displayed
26. : Eject button.
press this button to eject or slot -in
the disc
5
4
6
20
9
12
7
13
16
10
14
26
17
24
23
22
21
25
11
8
15
18
13
2
19
24. TITLE
Return to the menu title
18
14
7
13
96
1
17
8
16
11
5
4
3
2
12
10
15
1. RTS: Reset butto
2. Stop playing
3 Play/Pause
Previous/next
.
.
.
.
n.
:
4/5. /
6 Manual station search, t
7 Remote control window.
8 Mini USB connector.
9 Press down the mute, Rotation around the
volume control
.
urning right
is for searching stations forward, turning
left is for searching stations backford.
10
11 BAND: AM
12.
13 ower key
14
15 Shortcut key to enter the DVD
16 Disc eject
17 Eject/enter the disc
18 TF card reader slot.
.AMS:Automatic income units
.FM/ band shows
SRC:Mode conversion
. P
.MIC: Microphone.
.
.
.
.

7 8
Replacing The Battery
1. Insert your finger nails into A and B on the diagram
below, press A according to the direction, then pull
out the battery holder.
2. Remove the old battery, then insert the new
battery into the battery holder with the + side
facing upwards.
3. Fit the battery holder back to its place.
Lithium battery(Cr2025)
Note:
To prevent leakage of fluid from the lithium
battery, remove the battery when not using
the remote control unit for long periods of
time(one month or more), If the battery leaks
fluid, carefully wipe it out of the battery case,
then change to a new lithium battery.
Basic Operation
Remote Control Unit Operating Range
Horizontal: ±30 degree
Vertical: ±30 degree
Distance: 6M
1. Power on /off
Press the “ ” button on remote control, enter into power on condition, press this button
again to turn off the unit.
2. PLAY/PAUSE
On normal play disc mode, press this “ ” button to pause. Press this button again to
continue playing.
3. STOP
In play mode, press it to stop playing, press “PLAY” button to resume playing.
4. DISC IN /OUT
Press to eject the disc. The disc into the disc slot, will inhale automatically.
5. MUTE control
Press “ ” button on remote control to turn off the sound. Press it again will resume the
previous volume level.
Note: there are some functions no work when mute.
6. Function mode switch
Press “MODE” button on remote control to switch the mode. But if the unit without disc/SD/
USB inside, can’t enter to DVD/SD/USB mode.
7. “ ” “ ”
In DVD mode, short-press for previous/next item, long-press for fast forward/fast back;
In FM mode, short-press for adjust radio frequency, long-press for manual search forward
up/down; In TV mode, short-press for previous / next channel, long-press for fine-tuned.
2626
9.Select the subtitle
10. Press “Sub-T” to select different subtitles inherent in DVD disc.
11. Press ZOOM key for times, the picture will change in order of 1/2,1/4,1/8, and1/16 of normal
size. (Note: When playing MP3/USB/SD, this button is invalid.)
12. Press SLOW on the remote control to slow playing. Change the playing speed to 1/2, 1/4,
1/8, and 1/16 through pressing SLOW button.
13.During playback press the "AUDIO" voice key, can be included on the DVD disc in a variety
of audio languages to choose.
14. “GOTO” chooses play button, Press it, the play information will show on screen, use cursor
button on the remote control to choose disctitle, chapter or time and then press “enter” button
to play.
15. Press ANGLE to select the play angle when the main unit is in play mode for DVD disc,
there is no function for other disc. It will be no working if the disc not have this function.
16. Press ZOOM key for times, the picture will change in order of 2X, 3X and 4X of normal
size. (Note: When playing MP3/USB/SD, this button is invalid.)
17. The main unit may auto play the list according to the order of title, chapter or set list;
Press ST/PROG, the menu will shown on the screen.
8. ODD:
Press the OSD remote control key, the screen will display elapsed time, remaining time,
title,chapter, time, section time, time remaining chapters, show off
NOTE:
(1). The program list will be cancel when the main unit is power off or eject the disc.
(2). There is no program function for some disc.
(3). The unit can not play the list if you select the item that does not exist in the disc.
Hint: TT is for Title, CH is for Chapter of DVD disc. DVD disc
is divided into several parts called Title. Then title is divided
into chapter; Normally one movie only corresponding to one
title. CD disc is divided into several items. For KARAOKE disc
one music corresponding to one title.
Use move cursors to “play”, press “enter” button,
the unit starts playing on the program list. Press “Play/Pause”
button or choose "Exit" button, press “enter” to exit.
Use the and number button, to input the corresponding title, chapter, same as
the picture showing:
1
2
3
4
5
6
7
8
9
10
TT: CH:
TT: CH:
TT: CH:
TT: CH:
TT: CH:
TT: C H:
TT: C H:
TT: C H:
TT: C H:
TT: C H:
EXIT Next
11
12
13
14
15
16
17
18
19
20
TT: CH:
TT: CH:
TT: CH:
TT: CH:
TT: CH:
TT: C H:
TT: C H:
TT: C H:
TT: C H:
TT: C H:
Previous EXIT

9 10
Touch Screen Menu And Operation
Main Interface
Once opening the unit, it can automatically enter into the main interface, As shown
1. TPHONE luetooth
2. DVD mode
3. TV function mode(Invalid Function keys)
4. RADIO: radio mode
B : B function.
5/7. USB/SD: Memory signal input mode,
(Connect the usb/sd can be to enter)
6.POWER: Off key
8.Close the screen display, and then click on
the scree nback to normal.
9. : signal input mode.
10 : press this button can slip in/out disc
11. SETUP: setup menu.
AUX AUX
.
Touch screen “1,2,4,5,7,10,11” the center of the corresponding function, the screen
immediately enter to interface of your chosen functions mode. If have connected signal source,
there are clear picture for you to enjoy. Touch the screen "6" off; touch "13" point can enter the
setup menu to set product function and display; specific instructions, please refer to the
corresponding menu interface.
Touch corresponding center icon on the screen, then can enter into the interface what
function you choose
Bluetooth system settings
3.
4.
5.
.
7.
.When play songs by bluetooth, they act
as respectively pause/play, previous song, s
top playing and next song
Delete button: touch the button can
delete the already input number.
Dialing button: answer and make the
phone.
Press the call state, phone call mode
conversion mode with the external call
Hang up button: end the call or refuse the
call.
Number buttons
6
8
Operating instructions
1. Starting up and enter into the bluetooth system picture.
2. Open up the bluetooth equipment of the mobile phone can search this unit's bluetooth
equipment “CAR KIT”.Then match the bluetooth by presentation.
3. Input 4 figures pass code“0000”,this unit's bluetooth will be set up to the authorized
equipment of the mobile phone. If the match is successful the status of the bluetooth
picture will show “LINK OK”
Tips: If it unable to match please starting up again. After setting up the unit to authorized
equipment, the bluetooth will connect or enter into mobile phone bluetooth system
automatically. Select “CAT KIT”to connect it.
4. After you match successfully you can make and answer the phone comfortably.
Within the effective limits, this unit can also transmit the music which is playing in the
mobile phone. And can adjust the voice through mobile phone.
(Within the effective limits of 10 meters).
Cautions: This unit can only match with one mobile phone equipment which has bluetooth
function. The bluetooth function of this unit can only receive audio frequency information.
DVD Mode Menu Interface
Panel or by remote control "MODE" ; Or on main menu to touch MEDIA icon enter to DVD
mode(touch screen the menu toolbar appears when the menu toolbar Hide):
1.
2/3.VOL-/VOL+:
4/6. /
5/7: /
8. :
9. :
10.MUTE
11. I
Back to the main interface
Volume control button
Disc out of the warehouse
:
:
AUDIO: n DVD playback, press
this button, Press it to select the
channel when the main unit is in play
mode for DVD disc
12.RPT
13.TITLE
14.MENU
15.SUB:Subtitle selection(need the disc support)
16.SET: (
)
17. :
previous /Next
Fast forward / Fast back
Stop
Play/Pause
Tools, Touch it enter to AUDIO/VIDEO menu Please refer to audio / video menu
description
1
58
4
3
2
14
12
11
10 13
9
15
6
7
16 17
7
13
2
4
5
6
8
Press the remote control "mode", select display picture, or icon on the touch screen to
enter the BT Bluetooth mode: see the picture below.
Note:
In any mode, once placed the DVD disc, it will automatically switch back to DVD mode.
1234
6810
5 7 911
1. Back to the main interface.
Status Information shows column.2.

11 12
USB/SD Operation
While the USB/SD is playing, and if you Insert the disc, will go to DVD playing. Pull out
the USB/SD when you want to stop playing. Click the file directly can play the selected file.
00:12 02:27
002/013
MP3
Mp3
Mp3
Mp3
1234567
RPT .
8
When the unit connect USB/SD, touch the “USB” or “SD” icon in main interface, will auto
read .As shown:
1.
/ .
4
5 6
7
8
Close the screen display, and then click
on the screenback to normal.
2 3 Volume control button
.PRT
/ . / Previous/Next
. Play/Pause
. Stop
After opening the machine, Select main screen or select on the remote control "mode" to
switch to the RADIO,As shown:
Radio Function Interface
1.
2
Close the screen display, and then click on
the screenback to normal.
. MUTE:
3/4. Volume adjustment buttons
5. SCAN: Touch "Scan" Department, will
automatically search for and select "SGAN"
will automatically save
6. BAND: Select FM/AM wave band.
7/8.
Touch MUTE to turn off the sound,
press again to resume to previous volume
level.
Click the Search radio channel up / down
9/10.Receiving frequency tuning
11. Status Information shows column.
12.FM/AM band shows
Audio/Video Menu Setup
1.
2.
3.
4. BAS:
5.
6.
7.CLASS:
8.ROCK:
AUDIO mode: Touch this icon, the icon is
concave, then will enter to audio setting mode.
VIDEO mode: Touch this icon, the icon is
concave, then will enter to video setting
mode.
TRE: Alt volume adjustment, Touch the
“ ” “ ” icon, on the screen, the alt
volume will change.
BAS: Bourdon volume adjust.
Touch the “ ” “ ” icon on the screen, the
bourdon volume will change.
FAD: Front and Rear volume adjustment,
Touch the “ ” “ ” icon on the screen, the
front and Rear volume will change.
BAL: Left and right track adjustment,
Touch the “ ” “ ” icon on the screen, the
left right track volume will change.
11.
12.
13.COL: Color,
14.
15.
16.
17.
18.VIVID
BRI: Brightness
Touch the“ ” “ ” icon on the screen,
to adjust the picture brightness.
CON: Contrast,
Touch the“ ” “ ” icon on the screen,
to adjust the picture contrast.
Touch the “ ” “ ” icon on the screen,
to adjust the picture color.
HUE: Hue,
Touch the “ ” “ ” icon on the screen,
to adjust the picture hue.
STDY: Standard mode.
BRIG: Brightness.
SOFT: Soft.
9.JAZZ
10.POP
Under DVD mode, touch “SET” button enter to “AUDIO/VIDEO”menu setting interface.
(Picture 1) Audio setting interface (Picture 2) Video setting interface
12
3
4
5
6
78910
11
12
13
14
15 16 17 18
87.75 88.65 89.00
92.35
91.15
89.45
87.75 Mhz Fm1
12345678
8
910
11
When playing USB or SD card, Touch the DVD menu arrow keys to move the cursor to the file
bag, file, MP3 or JPEG icon icon you want, and then press to confirm the selection, the selected
file will automatically play . Play JPEG photo files, touch to confirm the current picture to exit
picture playback, press the stop button to exit.
Note: Click the bottom half of the screen can appear "Actions" menu, then click the "
disappeared.

13 14
2.Audio Setup Psage
DVD System Settings
, P
General Setup Page、
、Video Setup Page and Preference Page。below is for the details menu for
your reference
Under the DVD display mode, press the “SETUP”button on remote control ress " "
to move the cursor and "ENTER"Confirmation option Conduct Audio
Setup Psage
1. General Setup Page
Set Tv Display Mode
General Serup Page
Tv Display Wide 4:3 Panscan
Angle Mark Off
Osd Lang Eng
Captions Off
4:3 Letterbox
16:9
Screen Saver Off
Last Memory
Off
Off
Tv Display Wide
Osd Lang Eng
Captions Off
Angle Mark Off On
General Serup Page
Set Angle Mark
Screen Saver Off
Last Memory
Off
Go To General Setup Page
Captions Off
Tv Display Wide
Angle Mark Off
Osd Lang Eng
Set Osd Language
General Serup Page
German
Italian
Portuguese
Spenish
Screen Saver Off
Last Memory
Off
English
Chinese
French
Off
Tv Display Wide
Osd Lang Eng
Captions Off
Angle Mark Off
General Serup Page
Closed Caption
Screen Saver Off
Last Memory
Off
On
Off
Tv Display Wide
Osd Lang Eng
Captions Off
Angle Mark Off
General Serup Page
Screen Saver
Screen Saver Off
Last Memory
Off
On
Off
Tv Display Wide
Osd Lang Eng
Captions Off
Angle Mark Off
General Serup Page
Set Last Memoru State
Screen Saver Off
Last Memory
Off On
3. Setup Psage Video
In the video settings menu,The quality of the LCD screen to set a plan“Sharpness”“
Brightness”“Contrast”“Hue”“Saturation”Sub-menu to choose from,Press the
remote control arrow keys on the LCD screen can be set to adjust picture quality
In the Audio setup menu,it has submenu choice-“lt/Rt”“Stereo”two submenu choices.
SYS System Settings
Steering operate
.
2/3
4.
5.
6.CANCEL
7.MODE
When the user want to re-set steering
wheel keys for short-cut purpose, firstly,
press the “Delete” key to delete the
previously set before re-designate
functions on steering wheel, Secondly,
long-press he buttons of the car's steering
wheel and hold down the “function “keys
on car, and then click ”learn” button on the
steering wheel of the unit. Thirdly, select the appropriate function you like, the status bar
on the unit will display the corresponding information, Fourthly, click the “save “button
on the screen of the unit.When exist, you can achieve the purpose for setting the steering
wheel functions.
1
Volume adjustment buttons
Dialing button: answer and make the
phone.
Hang up button: end the call or refuse
the call.
Previous song/Next song
.
Language settings
1
23456
78
9
10
11
12
12
8.MUTE
9.SAVE
10.STUDY
11.POWER
12. Status Information shows
column.
Note All keys in the steering wheel are invalid if not in the learning setting mode.:
Touch-efficiency adjustment
Touch-efficiency adjustment (follow the prompts to click on the center of "+" sign, if
successfully adjust, it will auto-exit)
prompt Set the audio / video and DVD menu when audio video mode operation the same: /
1.
2
Back to the main interface
.English / Portuguese
After opening the machine, Under the main menu screen on the touch screen "SYS" key to enter
"SYS" system setting interface,Interface shows 、 、Touch prospective
effect、 ,As shown:
AUDIO/VIDEO Steering
Language settings
Tv Display
Angle Mark
Osd Lang
Captions
Screen Saver
Last Memory
PS
Off
Eng
Off
Off
Off
Go To General Setup Page
-- General Setup Page - -
-- Audio Setup Page - -
Goto Speaker Setup Page
Analog Audio Setup
-- Video Setup Page - -
Panel Quality
Go To Video Panel Quality Setup Pa ge

16
15
4. Preference Page
Set Tv Standard
Preference Page
Tv Type PAL PAL
Audio Eng
Subtitle
Disc Menu Eng
ATUO
NTSC
Parental
Password
Default
Preferred Audio Language
Preference Page
Audio Eng
Subtitle
Disc Menu Eng
Parental
Password
Default Russian
Japanese
Korean
Spenish
English
Chinese
French
Tv Type PAL
Set Preference To English
Preference Page
Audio Eng
Subtitle
Disc Menu Eng
Parental
Password
Default Russian
Japanese
Korean
Spenish
English
Chinese
French
Tv Type PAL
Preferred Menu Language
Preference Page
Audio Eng
Subtitle
Disc Menu Eng
Parental
Password
Default Russian
Japanese
Korean
Spenish
English
Chinese
French
Tv Type PAL
Preferred Menu Language
Preference Page
Audio Eng
Subtitle
Disc Menu Eng
Parental
Password
Default 7 Nc 17
5 Pgr
6 R
3 Pg
1 Kid Safe
4 Pg 13
2 G
Tv Type PAL
FM Frequency range
S/N Ratio
S/N Ratio
87.5~108.0MHZ
49.25~85.25MHZ
417.25~863.25MHZ
168.25~216.25MHZ
15dBu
50dBu
80dBu
Video output scope
Max output power
75Ω
75Ω
VHF-L
VHF-H
UHF
PAL B/G, I/I, D/K NTSC
25W*4CH
1+/-0.2V
≥600
FM
TV
AUDIO
VIDEO Video Horizontal Resolution
Antenna resistance
Antenna resistance
Noise limit sensitivity
TV Type
Function Index Sign
1. To ensure the accurate of touch function, please touch the center point of relative function.
2. There are build in anti-jamming system in touch screen, to prevent the wrong position touch, please
keep to touch this function for 0.5 second, then the product will get respond for your instruction.
3. Please do not use the object, which is bigger than the function icon to touch the screen. Otherwise
the touch function will failure or give the wrong operation to other function.
4. To ensure the panel safety, please don't press or use the sharp object to touch the panel.
5. Don't play the severity scratch disc, otherwise will damage the DVD play capability.
6. Be sure to distinguish the anode and the cathode when connecting the power. If connect wrong, the
fuse in filter box will melt immediately to protect unit. Then please replace the same parameter fuse.
7. DC 12V should be best to connect with the power adapter to prevent from the over-voltage drop the
may influence the normal work of the monitor.
8. Keep this machine away from too hot, or under effect of moisture, dust or oil smoke, avoid this
machine from dropping or impacting, never extrude or chafe this machine with sharp objects.
9. Dangerous high voltages are present inside the enclosure. Do not open the cabinet, non-
professionals can not disassemble unit.
10. Installation should be very tight and secure. Preventing the fallen unit hurt people when moving on
or a sudden brake.
Trouble Shooting
Warning
PROBLEM CAUSE SOLUTION
Cannot power on
After ignition switch off,
setting information all lose
Remote control no function
Poor performance of radio
station
Cannot play disk
Cannot switch language/
subtitle
No image
Check whether power fuse melt or not
Some factor cause MCU wrong operation
Wrong connection between ignition line
ACC and power line anode pole
No enough power supply from battery
Improper set of length of antenna, poor
connection of antenna grounding
Disk is scratched.
Put wrong side of disk into unit.
Disk has dirty.
There is only one language/subtitle in
dish
Video line between unit and TV is not
properly connected.
Change fuse same as the old one.
Press RES button on the panel by
penpoint, then power on
Reconnect line
Change battery of remote control
Check whether antenna is connected
or not, or poor connection.
Change new disk
Slot in the disk with sign side up
Clean disk
If disk is not with multi-language/subtitle,
it cannot switch language/subtitle
Reconnect lines
-- Preference Page - -
Tv Type
Audio
Subtitle
Disc Menu
Parental
Password
PAL
Eng
Off
Off
Eng
Default
Set Tv Standard
/