Genie CB 1000 Operation & Maintenance Manual

Category
Garage Door Opener
Type
Operation & Maintenance Manual
GARAGE DOOR OPENER MODELS
PowerMax® 1200/1500, SC 1200/1500, TriloGTM 1200/1500, PowerLift® 900, GPowerTM 900,
SilentMax® 1000/1200, CB 1000/1200, IntelliG® 1000/1200
SCREW/BELT/CHAIN DRIVES
OPERATION & MAINTENANCE MANUAL
Genie, Genie logo, Intellicode, Safe-T-Beam, IntelliG, PowerMax, PowerLift, ChainMax and SilentMax are registered trademarks TriloG and GPower are trademarks of GMI Holdings, Inc., dba The Genie Company
Homelink is a registered trademark of Johnson Controls Technology Company. Car2U is a registered trademark of Lear Corporation. ©The Genie Company 2012 PN#38209501582, 5/2012
WARNING
Includes INTELLICODE® 2 Remote Control. Safe-T-Beam® System must be installed to close door.
For use only with residential sectional or one piece overhead garage doors.
Homelink®and Car2U® compatible.
For Answers and Assistance:
1.800.354.3643
or visit www.geniecompany.com
SAVE THIS MANUAL FOR FUTURE REFERENCE
INSTALLER: LEAVE THIS MANUAL WITH HOMEOWNER
To reduce the risk of injury to persons or damage to property – Use this opener only with a one-piece or sectional door.
38209501582
2
Safety Information
Safety Notifications .......................................... 3
Important Safety Instructions ............................ 3
Infrared Protection Function ............................. 3
Features
Safety .............................................................. 4
Opener ............................................................. 4
Required Programming
Introduction ...................................................... 5
Overview of Powerhead Controls ...................... 5
Travel Limits
Closing Garage Door (DOWN Limits) ............. 6
Opening Garage Door (UP Limits) ................. 7
Wall Console Overview ..................................... 8
Series III Wall Consoles with Black Buttons .. 8
Series II Wall Consoles with White Buttons ... 8
Force and Speed Control .............................. 9
Contact Reverse Test ................................... 9
Remotes/New Intellicode 2 Openers ............... 10
Optional Programming
Keypad ........................................................... 12
Clearing Memory for Remotes ........................ 13
Intellicode 1 Remotes ..................................... 14
One Piece Doors
Attaching Door Bracket to Door ...................... 15
Attaching Door Arm to Door Bracket ............... 15
Maintenance and Adjustments
Maintenance Safety........................................ 16
Regular Maintenance ..................................... 16
Corrective Maintenance .................................. 17
Adjustment Guides ......................................... 18
Wiring Diagram .................................................. 20
Troubleshooting ................................................. 21
Warranty ............................................................ 23
Table of Contents
TRANSMITTER COMPLIANCE STATEMENT
Transmitters comply with all United States and Canadian legal
requirements as of the date of manufacture. No warranty is made that
they comply with all legal requirements of any other jurisdiction. If
transmitters are to be used in another country, the importer must
determine compliance with any local laws and regulations which may
differ from United States and Canadian requirements prior to use.
Los transmisores cumplen con todas las reglamentaciones legales de los
Estados Unidos y del Canadá, en la fecha de fabricación. Ninguna garantía
se da que cumplan con todas las reglamentaciones legales de ninguna
otra jurisdicción. Si los transmisores se van a utilizar en otro país, el
importador debe determinar si cumplen con las reglamentaciones y leyes
locales que puedan ser diferentes a las reglamentaciones de los Estados
Unidos y del Canadá, antes de usar los mismos.
Les émetteurs sont conformes à la réglementation américaine et
canadienne à compter de leur date de fabrication. Aucune garantie
n’est stipulée indiquant qu’ils sont conformes à toutes les prescriptions
juridiques d’autres autorités. Si les émetteurs sont utilisés dans d’autres
pays, il incombe à l’importateur d’en déterminer leur conformité aux lois
et règles locales pouvant différer de celles des États-Unis et du Canada
avant toute utilisation desdits émetteurs.
Sendegeräte entsprechen allen gesetzlichen Bestimmungen in den
USA und Kanada zum Zeitpunkt der Herstellung. Wir übernehmen keine
Gewährleistung für die Einhaltung aller gesetzlichen Bestimmungen in
anderen Ländern. Sollen Sendegeräte in anderen Ländern eingesetzt
werden, so muss der Importeur vor dem Gebrauch sicherstellen, dass die
Sendegeräte auch solchen lokalen Bestimmungen entsprechen, welche
von den Bestimmungen der USA und Kanadas abweichen.
READ AND FOLLOW ALL INSTRUCTIONS
SAVE THESE INSTRUCTIONS
1
2
3
4
5
6
7
8
9
3
Safety Information
1
OVERVIEW OF POTENTIAL HAZARDS
READ THIS SAFETY INFORMATION
CONVENTIONS USED IN THESE INSTRUCTIONS
Garage doors are large, heavy objects that move with the help of
springs under high tension and electric motors. Since moving objects,
springs under tension, and electric motors can cause injuries, your
safety and the safety of others depend on you reading the information
in this manual. If you have questions or do not understand the infor-
mation presented, call your nearest trained door system technician or
visit our website at www.geniecompany.com
The following safety alert symbol and signal words are used
throughout this manual to call attention to and identify different levels
of hazard and special instructions.
This is the safety alert symbol. This symbol alerts you to
potential hazards that can kill or hurt you and others.
All safety messages will follow the safety alert symbol and the word
DANGER”,WARNING”, or CAUTION”.
s $!.'%2 indicates an imminently hazardous situation which, if
NOT avoided, will result in death or serious injury.
s WARNING indicates a potentially hazardous situation which, if
NOT avoided, could result in death or serious injury.
s #!54)/. indicates a potentially hazardous situation which, if
NOT avoided, may result in injury or property damage.
s 4HEWORDNOTE is used to indicate important steps to be followed or
important considerations.
Potential
Hazard Effect Prevention
WARNING Keep people clear of opening
Could result while door is moving.
in Death
or Serious DO NOT allow children to play
Injury with the door opener.
DO NOT operate a door that
jams or one that has a
broken spring.
WARNING Turn OFF power before
Could result removing opener cover.
in Death
or Serious When replacing cover, make
Injury sure wires are NOT pinched or
near moving parts.
Opener must be fully
grounded.
WARNING DO NOT try to remove, install,
Could result repair or adjust springs or
in Death anything to which door spring
or Serious parts are fastened, such as,
Injury wood blocks, steel brackets,
cables or other like items.
Installations, repairs and
adjustments must be done
by a trained door system
technician, using proper tools
and instructions.
Important Safety Instructions
TO REDUCE THE RISK OF SEVERE INJURY OR DEATH
READ AND FOLLOW ALL SAFETY, INSTALLATION AND OPERATION INSTRUCTIONS. If you have
any questions or do not understand an instruction, call The Genie® Company or your local
Genie® Factory Authorized Dealer.
s$/./4install operator on an improperly balanced door. An improperly balanced door
could cause severe injury. Repairs and adjustments to cables, spring assembly, and other
hardware must be made by a trained service person using proper tools and instructions.
s2EMOVEALLROPESANDDISABLEALLLOCKSCONNECTEDTOTHEDOORBEFOREINSTALLINGOPERATOR
s)NSTALLDOOROPERATORFEETORMOREABOVETHEmOOR-OUNTTHEEMERGENCYRELEASEKNOB
FEETABOVETHEmOOR
s$/./4connect the operator to the source of power until instructed to do so.
s Locate the wall console button: A) Within sight of door. B) At a minimum height of 5 feet
so small children cannot reach it. C) Away from all moving parts of the door.
s Install the entrapment WARNING label next to the wall button or console. Install the
emergency release tag on, or next to, the emergency release handle.
s4HEOPERATORMUSTREVERSEWHENTHEDOORCONTACTSAINCHHIGHOBJECTONTHEmOOR
ATTHECENTEROFTHEDOORWAY4HISISABOUTTHESIZEOFAXBOARDLAIDmAT
WARNING
4
Features
2
SAFETY FEATURES
Safe-T-Beam® (STB) Non-Contact
Reversing System
Puts an invisible beam across the door opening.
The door stops and reverses to the full open
position if anything passes through the beam.
LED indicator lights on the powerhead and on
the STBs provide a self-diagnostic code if an
operational problem exists.
Safe-T-Reverse® Contact Reversing System
Automatically stops and reverses a closing door
within two seconds of contact with an object.
Automatic ForceGuard Control
Automatically sets the force required to fully
open and close the door for maximum safety.
Watch Dog Monitoring System
Monitors the Safe-T-Beam® system to ensure
proper functionality and will automatically stop
and reverse a closing door if a problem
is detected.
Manual Emergency Release
Manually releases door from door opener. Used
during a power failure or other emergency to
allow manual opening and closing of door.
SmartSet™ Electronic Programming
Easily adjust the programming to reduce
opening speed to a desired rate, vary limits
and force, and program new remotes.
Automatic Lighting System
Two bulb lighting system supplies light for safer
evening exits and entries. Turns ON when door is
activated and automatically turns OFF 4 minutes
later.
Integrated Motion Detection (Not available on
all models)
Some units have motion detection built into the
powerhead. Lights automatically turn ON when
motion is detected for much safer movement
through the garage. Lights will turn OFF after
4 minutes of no motion.
OPENER FEATURES
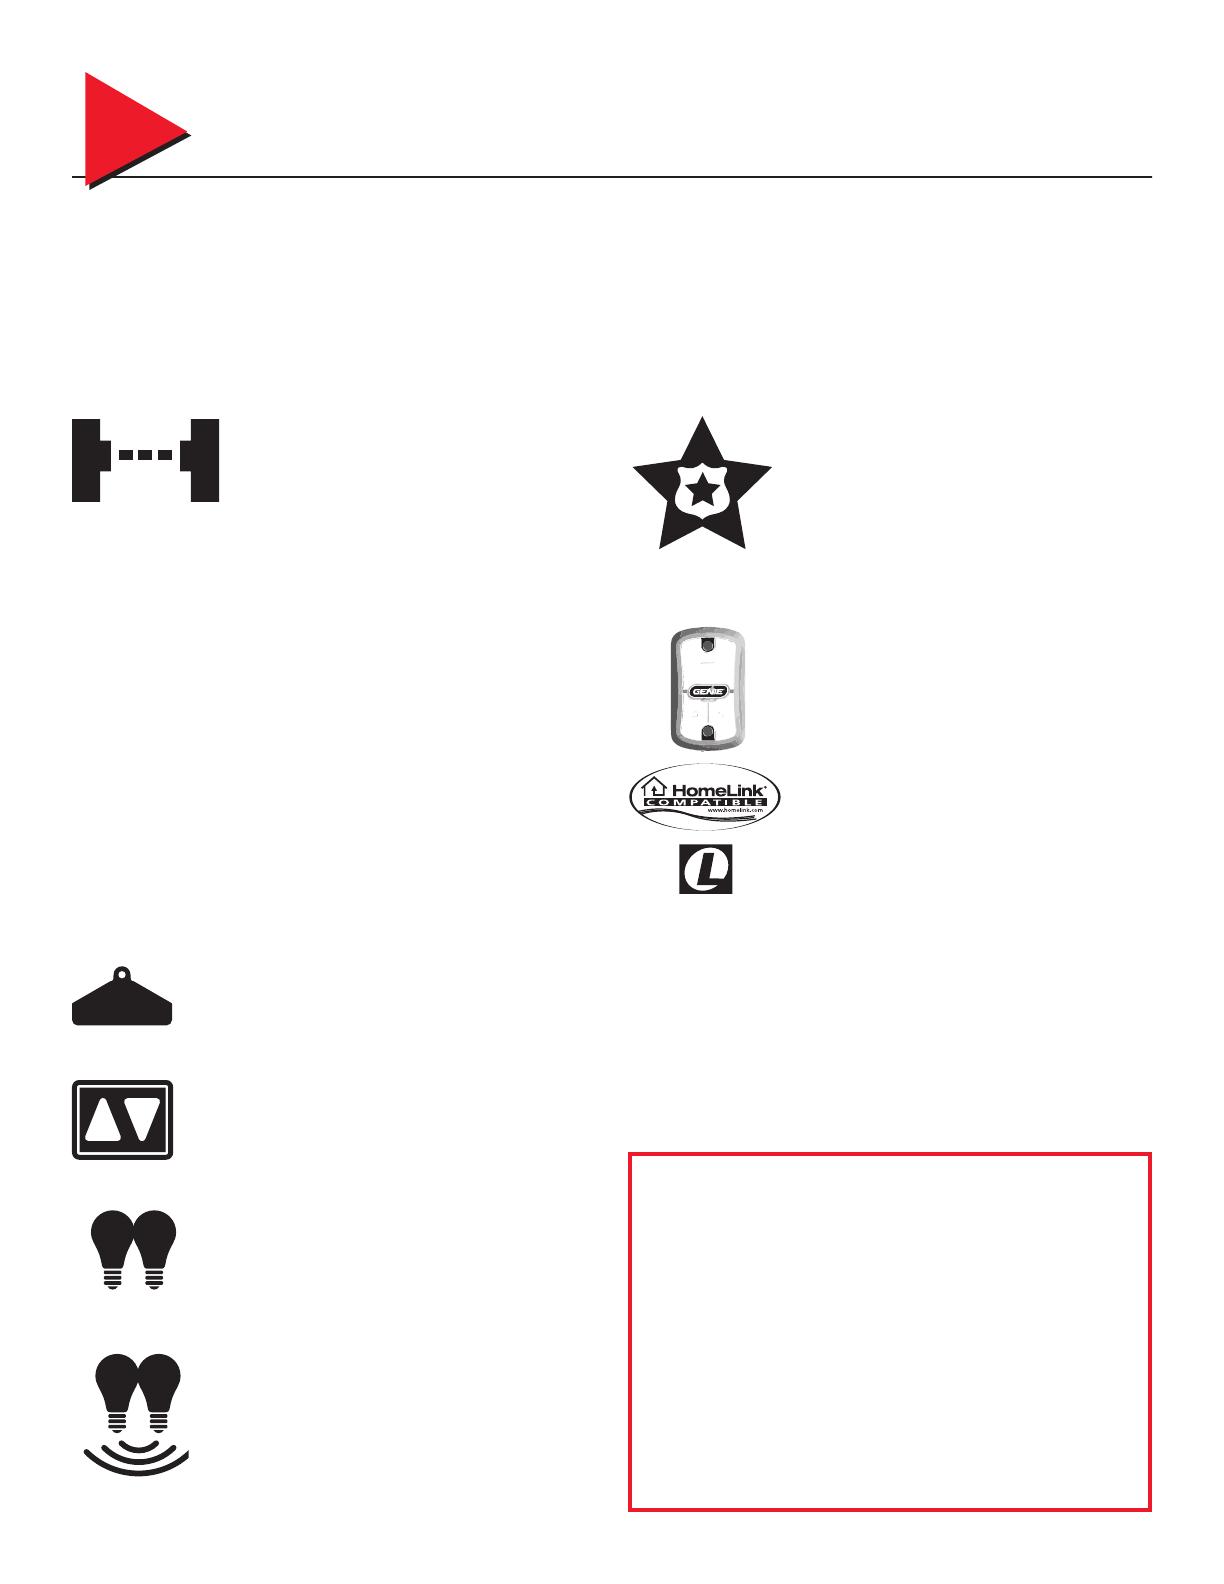
INTELLICODE® 2 Access Security System
A new generation superior encryption system
that enhances the security of the door opener
by continuously changing the access code each
time the remote is used. The door opener re-
sponds to each new code only once. An access
code copied from a working system and tried
again, will not control the door opener.
Wall Console
Operates door opener from inside garage.
The wall console has an indicator light with:
Open/Close, Sure-Lock, and independent
light control buttons.
Home Link and Car2U® compatible. Refer to the
programming instructions on page 11.
NOTE: Use this manual ONLY after completing assembly
and installation of opener. Review Assembly/Installation
Instructions poster. Check that all steps have been
completed.
Contact your Genie® Professional Dealer for an
Assembly/Installation Instructions poster, if needed,
or call 1-800-35GENIE. You can also go to
www.geniecompany.com to download a printable file.
Begin here ONLY AFTER completing assembly and installation of the opener. Review the Assembly and Installation poster to ensure all steps have
been performed.
There are no assembly or installation steps included in this manual. Contact your Genie® Professional Dealer for an installation poster, if needed,
or call 1-800-35GENIE. You may also visit www.geniecompany.com to download a PDF file.
INFRARED PROTECTION FUNCTION
1. The Safe-T-Beam® has no effect on the door during an opening cycle.
2. If the Safe-T-Beam® detects an obstruction when trying to close the
door, it will not allow the door to close.
3. When the garage door is closing, if Safe-T-Beam® is interrupted by
a person or obstacle, the garage door will stop its downward travel
and reverse automatically to its fully opened position.
4. If the Safe-T-Beam® System fails, loses power, or is installed
improperly, press and hold the wall console “open/close” button
until the door reaches its fully closed position. If you release the
“open/close” button on the wall console during the closing
movement, the door will reverse automatically to its fully-opened
position.
5
Required Programming
3
NOTE: Before you begin programming, check to make sure there are
no objects in the garage door opening.
INTRODUCTION
Now that your Genie garage door opener is installed, you will want to
program the opener so that the door opens and closes properly and
all remote devices operate correctly. The following steps guide you
through setting your opener so it functions properly for you.
The following information will take you through programming your
opener’s functional settings for use.
There are only 2 “required” programming processes you will need to
follow to set up your garage door opener for operation:
1. “TRAVEL LIMITS”
2. “REMOTE PROGRAMMING”
Term Definitions:
Travel Limits programming allows you to set how far your door
travels up or down in opening and closing your garage door.
Remote Programming synchronizes your remote control devices
(remotes, wall console, and keypad) with the powerhead.
Force Control refers to how much power is needed to move (open/
close) your particular door and does NOT require programming.
Speed Control refers to how fast or slow your opener opens and
closes your particular door and is preset at the factory. This
function does NOT require programming.
OVERVIEW OF POWERHEAD CONTROLS
This section describes the programming functions on the powerhead
of the opener. Use the following information to familiarize yourself with
the buttons, LED indicators and products used to program functions.
Powerhead: There are 3 programming buttons and 2 LED lights on
the powerhead. Each of the buttons is used to enter and complete
the setup programming. The LED lights indicate status or a function
change by illuminating ON, OFF, or ON FLASHING in one of three
different colors: blue, red or purple.
There are 4 programs (The 2 “Factory Set” programs are unlikely to
need changes.)
1. Door Travel Limits Program
This program automatically sets how far your door travels up
and down.
2. Remote Programs (Default menu)
These show you how to program your remotes to synch with
additional remote control devices, wall consoles, keypads, and
the powerhead.
3. Door Force Program (Factory Set)
This program is only used for minor adjustments under certain
circumstances.
4. Door Speed Program (Factory Set)
This program does not require manually initiated changes.
NOTE: The 3 programming buttons are for programming ONLY. These
buttons should NOT be used to operate the opener once the Required
Programming section has been successfully completed.
LONG LED
Indicator
PROGRAM
SET +
+
PROGRAM
SET
Enters into and selects programming menus.
Located on bottom of Powerhead.
Multi-function; move door during programming
and advance through menus
Open Travel
Button
ROUND LED
Indicator
Facing
Garage
Door
Close Travel
6
TRAVEL LIMITS
NOTE: If shuttle/bullet has NOT been engaged to carriage, do so now.
See page 17.
NOTE: You have 30 seconds to execute each step. If you see two
solid red or flashing LEDs on the Powerhead, you have run out of
time and must go back to the beginning of the step and start over. You
can restart as many times as necessary to complete each step.
Closing Garage Door (Down Limits)
(continued next page)
s-AKESUREDOORWAYISINVIEWANDCLEAROFOBSTACLESAND
people to avoid injury or damage to property.
sDO NOT operate this unit from wall console before LIMITS
are set. Severe damage to the opener can occur.
s4HESHUTTLEMUST be engaged to carriage BEFORE setting limits.
See Installation Poster (if provided) or call Customer Service at
1-800-35GENIE or visit www.geniecompany.com
WARNING
1
1
2
1Lift the door open by hand until the shuttle/bullet
engages the carriage on the rail.
PROGRAM
SET +
3Release down arrow button (-) and the long LED
will begin flashing.
PROGRAM
SET +
PROGRAM
SET +
HOLD
4Press and hold the down arrow button (-) until
garage door is fully closed, then release.
PROGRAM
SET
PROGRAM
SET +
HOLD
2 seconds
HOLD
2 seconds
2Press and hold the down arrow button (-) for
2 seconds until the long LED comes on blue
(round LED remains off).
Required Programming
3
7
Required Programming
3
The DOWN (closed) limit is programmed.
Opening Garage Door (Up Limits)
NOTE: Beginning with garage door closed is recommended but not
necessary.
The UP (open) limit is programmed.
BOTH DOOR LIMITS ARE NOW PROGRAMMED.
PROGRAM
SET
PROGRAM
SET +
5Press and release the Program Set button (both
LEDs flash blue and go off).
PROGRAM
SET +
PROGRAM
SET +
HOLD
8Press and hold the up arrow button (+) until door is
fully open, then release.
PROGRAM
SET
PROGRAM
SET +
HOLD
2 seconds
HOLD
2 seconds
6Press and hold the up arrow button (+) for
2 seconds until the long LED light comes on blue
(round LED remains off).
PROGRAM
SET +
7Release up arrow button (+) and the round LED
will begin flashing.
PROGRAM
SET
PROGRAM
SET +
9Press and release the Program Set button (both
LEDs flash blue and go off).
8
Required Programming
3
Required Programming
3
MODEL AC SR3 THE GENIE COMPANY
FCC ID: B8Q AC SR3 Residential Door Operator
IC: 2133A-CSD1D 120V. 60HZ. 5A
S/N:10XXXX XXXXXXX
STB BWC IWC
NOT
USED
NOT
USED
NOT
USED
NOT
USED
FROM STBs
FROM WALL
CONSOLE
STB BWC IWC
FROM STBs
FROM WALL
CONSOLE
B/W W
Open/Close Button
Opens and closes door from inside garage.
Sure-Lock™ Button
– LOCK disables controls
after door is completely
closed.
– UNLOCK allows controls to
work normally.
Indicator Light
–Red indicator light is
always ON.
–When Sure-Lock™ is ON,
the indicator light flashes.
Independent Light Control Button
Controls door opener lights from inside garage.
To powerheadTo powerhead
B/W W
Open/Close Button
Opens and closes door from inside garage.
Sure-Lock™ Button
– LOCK disables controls after
door is completely closed.
– UNLOCK allows controls to
work normally.
Indicator Light
–Red indicator backlight is ON.
–When Sure-Lock™ is
ON, the indicator light is OFF
Independent Light Control Button
Controls door opener lights from inside garage.
To powerheadTo powerhead
WALL CONSOLE / Overview
This opener has a serial
number sticker in which
the serial numbers begin
with 10 or higher.
Wall consoles from other manufacturers may not work with openers
of these serial number groups. Use only the wall console provided with
this unit. Each wall console has three buttons.
In your carton you will find one of the following
wall consoles:
Series II Wall Consoles with White Buttons
Indicator Light
Large white button will display Red when wall console is properly
wired and Sure-Lock is OFF. When Sure-Lock is ON, this light is off
Open/Close Button
Use this button to open or close garage door. When Sure-Lock™ is
ON, the Open/Close button will CLOSE the door only.
NOTE: Constant button pressure in the CLOSE mode will override
STB fault in the powerhead and close door.
Independent Light Control Button
Use this button to turn powerhead lights ON. Powerhead lighting will
remain ON until this button is pressed again or a door action has been
completed.
NOTE: If opener has a Motion Detector sensor, it will keep powerhead
lights ON as long as motion is detected.
Sure-Lock Button
When Sure-Lock is ON, the powerhead cannot be activated by the
wall console or a remote.
s0RESSANDRELEASEORUNTILREDLIGHTGOESOFFTOACTIVATE3URE,OCK.
s0RESSANDRELEASETOTURN3URE,OCK OFF.
Series III Wall Consoles with Black Buttons
Indicator Light
Indicator light will display Red when wall console is properly wired and
Sure-Lock is OFF. When Sure-LockIS/.INDICATORLIGHTmASHES
Open/Close Button
Use this button to open or close garage door. When Sure-Lock™ is
ON, the Open/Close button will CLOSE the door only.
NOTE: Constant button pressure in the CLOSE mode will override STB
fault in the powerhead and close door.
Independent Light Control Button
Use this button to turn powerhead lights ON. Powerhead lighting will
remain ON until this button is pressed again or a door action has been
completed.
NOTE: If opener has a Motion Detector sensor, it will keep powerhead
lights ON as long as motion is detected.
Sure-Lock Button
When Sure-Lock is ON, the powerhead cannot be activated by the
wall console or a remote.
s0RESSANDHOLDFORSECONDSORUNTIL)NDICATOR,IGHTmASHESTO 
activate Sure-Lock.
s0RESSANDRELEASETOTURN3URE,OCK OFF.
TIP
9
Required Programming
3
Force and Speed Control
These controls are factory programmed and automatically set
themselves when you use the Wall Console to open and close the
garage door for the first time. The door MUST complete a full cycle
from open to close and close to open before it is fully set.
NOTE: Force or Speed controls DO NOT require programming. Force
and Speed Limits are factory set and rarely require adjustments.
Making adjustments to these settings is covered in Troubleshooting
Section of this manual (pages 21-22).
NOTE: Using these functions for the first time automatically sets the
Force needed to open and close your garage door.
FORCE AND SPEED CONTROL ARE NOW SET.
Contact Reverse Test
NOTE: The Limit and Force settings MUST BE COMPLETED before
performing the Contact Reverse Test.
When the door contacts the board, it should stop and reverse direction
within 2 seconds to the fully OPEN position.
Contact Reverse Adjustment
If the door stops before contacting the board or if it does not reverse
direction to fully open after contact with the board, it may be due to
improperly set DOWN limits.
Repeat the Setting the Down Limit steps 1-5 to make certain the door
ISCLOSINGTIGHTTOTHEmOOR
Repeat step 10 to set force limits.
Then repeat the WALL CONSOLE/Contact Reverse Test, steps 11-13.
Repeat this process as needed until door passes the Contact Reverse
Test. For further help, refer to MAINTENANCE and ADJUSTMENTS,
Regular Maintenance, pages 16-19.
10 Open and close your garage door using the Wall
Console Open/Close button.
11 Open the garage door using the Open/Close button
on the Wall Console.
12 Lay a 2” x 4” board flat under the center of the
door opening.
13 Close the garage door using the Open/Close
button on the Wall Console.
10
Required Programming
3
REMOTES / New Intellicode 2 Openers
NOTE: The following instructions are for the remote control
transmitters (“Remotes”) provided with this opener. This Remote is
preset for use with the Intellicode 2 Access Security System. Refer to
page 14 for additional information on Intellicode 1 and 2 Remotes and
how to switch from Intellicode 2 to Intellicode 1. See page 14
for programming instructions using Intellicode 1 Remotes.
NOTE: You have 30 seconds to execute each step. If you see two
flashing red LEDs on the Powerhead, you have run out of time and
must go back to the beginning of the step and start over. You can
restart as many times as necessary to complete each step.
NOTE: Each button on each Remote must be programmed separately,
following these steps.
NOTE: Do NOT hold Remote too close to the Powerhead when
programming Remote buttons.
(continued next page)
PROGRAM
SET +
HOLD
2 seconds
HOLD
2 seconds
14 Press and hold the Program Set button (the round
LED turns blue).
PROGRAM
SET +
15 Release the Program Set button (the long LED
begins flashing purple).
PROGRAM
SET +
17 Press and release the button you have choosen
on the Remote (long LED comes on purple).
PULL
16 Remove protective film for battery from remote.
11
The Remote button is now programmed.
Repeat as necessary for additional Remotes.
To program the same Remote for other garage door openers, repeat
the steps above using one of the other two Remote buttons.
Each Remote can be programmed for three door openers.
BASIC PROGRAMMING IS COMPLETE AND YOUR GARAGE DOOR IS
READY TO USE!
NOTE: For Car2U and HomeLink, park the car outside the garage
with the ignition key in the “Accessory” position. Follow the Car2U or
HomeLink instruction to set the button in the car to Genie mode.
IMPORTANT: Your HomeLink® device will
ONLY respond to pressing THIS button
on your Intellicode remote when it's searching
to connect to your remote in "Learn Mode" as
described in the HomeLink® instruction manual.
Required Programming
3
PROGRAM
SET
PROGRAM
SET
18 Press and release the same button on the remote
(both LED’s flash blue and then turn off).
19 Press and release the same button on the remote
(the door should open or close).
12
KEYPAD
NOTE: Set your pin number using keypad instructions.
THE KEYPAD IS PROGRAMMED.
PROGRAM
SET
PROGRAM
SET +
HOLD
2 seconds
HOLD
2 seconds
1Press and hold the Program Set button on the
Powerhead for 2 seconds (the round LED turns blue
and then off, the long LED will begin flashing purple).
2Enter your PIN number on the wireless Keypad.
PROGRAM
SET +
3Press and release the UP or DOWN arrow button
on the Keypad once (the long LED will be purple).
PROGRAM
SET
PROGRAM
SET +
4Press and release the UP or DOWN arrow button
a second time (both LEDs flash blue and turn off).
5Press and release the UP or DOWN arrow button
on the Keypad (door opens and closes).
Optional Programming
4
13
Optional Programming
4
CLEARING MEMORY FOR REMOTES
If the memory has been cleared, the Remote will not activate the door
opener.
NOTE: The garage door opener will operate normally using the Wall
Console.
NOTE: When the remote is pressed the round LED will flash blue but
will not activate the door opener.
NOTE: Clearing Remotes from the Powerhead memory will clear ALL
programmed Remotes and wireless Keypads. Your opener will no
longer recognize any signal received from a missing Remote.
All remaining (or recovered) Remotes and wireless Keypads MUST BE
reprogrammed as shown on pages 9 and 12.
(continued next page)
PROGRAM
SET
PROGRAM
SET +
HOLD
2 seconds
HOLD
2 seconds
1Press the Program Set button on the Powerhead
and hold 2 seconds, round LED comes ON.
PROGRAM
SET +
2Release the Program Set button, round LED goes
off and the long LED flashes purple.
PROGRAM
SET
PROGRAM
SET +
HOLD HOLD
3Press up arrow button (+) and down arrow
button (-) simultaneously on the Powerhead and
hold until both LEDs flash blue and then go OFF.
4To verify that the memory is cleared, press
a remote button that was previously
programmed to the Powerhead.
14
INTELLICODE 1 REMOTES
Remotes provided with this unit can operate other (Intellicode 1)
models of Genie garage door openers. The default Intellicode 2 setting
must be changed to Intellicode 1. (Follow these same steps to change
Intellicode 1 back to Intellicode 2.)
NOTE: The button directly above the logo on the transmitter is preset
to Intellicode 1.
The LED color displayed on the Remote indicates the Intellicode mode:
Red = Intellicode 1 Green = Intellicode 2
***Repeat Step 2 to turn the RED LED on the Remote back to GREEN
for operation with Intellicode 2 openers.
Once the LED on the Remote turns RED when the button is pressed,
that button is programmed to the Intellicode 1.
If your door opener has a black antenna wire and the serial number
does not start with 10 or higher, the Learn Code Button and
Indicator LED are located near the antenna. The light lens may need to
be opened. If you use an external receiver, it may need to be opened
to access the Learn Code Button and Indicator LED.
If you have questions, see your Genie instructions for this Intellicode I
model of opener.
NOTE: Choose the Genie Remote using Intellicode 1 button for this
activity. All new Remotes have the button directly above the logo
preset to Intellicode I.
This button is set to Intellicode 1.
Optional Programming
4
1Select a Remote button NOT already programmed to
the Powerhead. Press and hold the button for 10 seconds
(both the RED and GREEN LEDs on the Remote turn ON).
2Press and release the Remote button 3 times.
3Find the Learn Code Button and Learn Code Indicator LED
on your older Genie door opener.
4Press the Learn Code Button (the LED on the Opener
flashes RED).
5Press the Remote button 2 times (the LED on the Opener
turns OFF).
6Press the Remote button again. If the door moves, the
Remote button is programmed to your opener.
15
One-Piece Doors
5
ATTACHING DOOR BRACKET TO DOOR
NOTE: Center bracket on door as high as possible, preferably top edge.
ATTACHING DOOR ARM TO DOOR BRACKET
1Using bracket, mark holes on door or frame and drill
5/32" hole completely through door frame.
Door centerlineDoor centerline
2Secure bracket with 5/16" x 2" or 5/16" x 4-1/2" carriage
bolts and nuts or drill 1/8" pilot holes and secure with 1-1/2"
to 2" lag bolts. (Bolts, nuts, and screws not furnished.)
Screw drive models:
One-Piece Doors will only accept a straight door arm.
Straight door arm (not included)Straight door arm (not included)
Curved door armCurved door arm
3/8" Lock nut3/8" Lock nut
3/8"-16 x 7/8"
Bolt
1a
Chain/belt drive models:
One-Piece Doors will only accept a straight door arm.
Straight door arm (not included)Straight door arm (not included)
Straight door armStraight door arm
3/8" Lock nut3/8" Lock nut
3/8"-16 x 7/8"
Bolt
1b
2Secure door arm to the door bracket and with clevis pin
and cotter pin.
Clevis pinClevis pin
Door bracketDoor bracket
Cotter pinCotter pin
Straight door arm
Straight door arm
16
Maintenance and Adjustments
6
If you have any questions, please do not hesitate to contact customer
service at: 1-800-35-GENIE or visit www.geniecompany.com
IMPORTANT SAFETY INSTRUCTIONS
REGULAR MAINTENANCE
Basic monthly maintenance tasks include:
s#ONTACT2EVERSE
s3AFE4"EAM3YSTEM#HECK
s$OORBALANCE
s,UBRICATEDOORHARDWARE
A. Contact Reverse Test
See page 9.
B. Safe-T-Beam® (STB) System Check
Check that both the RED and GREEN LEDs are ON steady. This
indicates the system is working properly. If both LEDs are not ON
steady, check the appropriate items below:
 s34"RED,%$mASHES
Check for obstruction.
Check alignment.
Verify wire routing from STBs to STB connection in powerhead
Check for signal interference from another Safe-T-Beam® unit
(for multiple door installations).
 s.O34"REDORGREEN,%$DISPLAYED
Check wiring and wire connections.
If the system appears to be working properly, perform the check as
follows:
1. Start the door closing.
2. Pass an object through the beam. The door should stop and
reverse to the fully open position.
C. Door Balance (Spring Tension)
Perform the check as follows:
 s7ITHTHEDOORCLOSEDPULLMANUALEMERGENCYRELEASEHANDLE
DOWN and let go to release door carriage assembly from drive
system.
 s2AISEANDLOWERTHEDOORMANUALLYITSHOULDMOVEFREELYAND
smoothly.
 s2AISEDOORMANUALLYABOUTgTOgFEETANDLETGO
– Door should remain stationary or move very slowly.
– If door moves quickly, CONTACT A TRAINED DOOR SYSTEM
TECHNICIAN to have your door springs serviced.
 s#LOSETHEDOOR
(continued next page)
WARNING
TO REDUCE THE RISK OF SEVERE INJURY OR DEATH, READ
AND FOLLOW ALL INSTRUCTIONS.
1. NEVER let children operate or play with the door controls.
2. Keep remote away from children.
3. ALWAYS keep the moving door in sight and away from people
and objects until door is completely closed. NO ONE SHOULD
CROSS THE PATH OF THE MOVING DOOR.
4. NEVER GO UNDER A STOPPED, PARTIALLY OPEN DOOR.
5. Test opener monthly. The door MUST reverse on contact with a
 HIGHOBJECTORAXBOARDLAIDmATATTHECENTEROF
 DOORWAYONTHEmOOR!FTERADJUSTINGEITHERTHEFORCEORLIMITOF
travel, retest door opener. Failure to adjust the opener properly
may cause severe injury or death.
6. When possible, use emergency release only when door is
closed. Use caution when using this release with the door open.
Weak or broken springs are capable of increasing the rate of
door closure and increasing the risk of severe injury or death.
7. KEEP DOORS PROPERLY BALANCED. See your garage door
Owner’s Manual. An improperly balanced door increases the
risk of severe injury or death. Have a trained door system
technician make repairs to cables, spring assemblies, and
other hardware.
SAVE THESE INSTRUCTIONS
WARNING
s 'ARAGEDOORHARDWARESPRINGSCABLESBRACKETSPULLEYSETC
are under extreme pressure and tension.
s DO NOT attempt to repair or adjust door springs or any hardware,
and DO NOT OPERATE garage door automatically or manually if
door is improperly balance or springs are broken.
s CONTACT A TRAINED DOOR SYSTEM TECHNICIAN.
WARNING
Use of any other wall control can cause unexpected operation of
the door and loss of lighting feature. Locate wall console within
sight of door and far enough from door to prevent contacting it
while operating the console. Control must be at least 5 feet above
mOORTOPREVENTSMALLCHILDRENFROMOPERATINGIT
3' - 4'
Sectional Door
3' - 4'
One-Piece Door
17
WARNING
s5SEEXTREMECAUTIONWHENWORKINGFROMALADDERORSTEPSTOOL
s7HENREPLACINGLIGHTCOVERMAKESUREWIRESARENOTPINCHEDOR
near moving parts.
Maintenance and Adjustments
6
REGULAR MAINTENANCE (continued)
s 3CREWDRIVEMODELS6ERIFYSHUTTLERELEASELEVERISIN%.'!'%$
(UP) position (pull release handle toward opener and let go)
s #HAINBELTDRIVEMODELS6ERIFYBULLETISENGAGEDTOCARRIAGE
Pull/release cord down and back towards opener and let go.
Operate door using a remote or wall console.
Door will re-attach itself to carriage assembly.
CORRECTIVE MAINTENANCE
Changing Light Bulbs
1. Disconnect power to door opener.
s /PENPOWERHEADLIGHTCOVER
s 2EMOVELIGHTBULBS
 s2EPLACELIGHTBULBS
DO NOT use light bulbs with greater than 100 Watt rating,
PowerLift® 900, GPower900 require light bulbs of no more
than 60 watts. Compact CFL's may also be used.
Close powerhead light cover.
2. Reconnect power to door opener.
s 4ESTLIGHTOPERATION
Reset Open/Close Travel Limit
Performing all eleven (11) Limits/Force setting steps (see pages 6-8)
erases previous Limits/Force settings.
NOTE: The opener will not close the door automatically unless the
Safe-T-Beam® System is installed and Limits are programmed.
Disengaging and Engaging Carriage/Bullet
Remote Battery Replacement
Replace remote battery with a CR 2032 coin cell battery.
1. Open remote case using a washer or coin that fits into the slot at
top of remote.
2. Replace battery.
3. Align components and snap case
closed.
(continued next page)
EngagedEngaged
OpenerOpener
Disengaged
Disengaged EngagedEngaged
OpenerOpener
Disengaged
Disengaged
Screw DriveScrew Drive Belt/Chain DriveBelt/Chain Drive
EngagedEngaged
OpenerOpener
Disengaged
Disengaged EngagedEngaged
OpenerOpener
Disengaged
Disengaged
Screw DriveScrew Drive Belt/Chain DriveBelt/Chain Drive
To engage bullet to carriage,
pull the release handle down and
toward the opener.
To disengage bullet from carriage,
pull relaese handle down and
toward the door.
To engage shuttle to carriage,
pull down and toward the opener.
To disengage shuttle from carriage,
pull down on relaese hanfle.
18
Maintenance and Adjustments
6
CAUTION
Door closing force is FACTORY set and requires no adjustment
for normal operation.
sNEVER adjust the force settings to compensate for damage,
including an unbalanced door, binding door track, or broken
spring.
s0ERFORMMONTHLYA#/.4!#42%6%23%4%34See page 8.
ADJUSTMENT GUIDES
Force Settings
Force settings are pre programmed at the factory and “learned”
during the Open/Close Limit settings steps (see pages 6-7). For normal
use, these settings should not need adjustment with this unit.
However, conditions possibly requiring adjustment are:
1. Doors with very stiff weather seals.
2. Doors that start down, STOP, and reverse before closing.
3. Doors that start up, but STOP before they completely open.
Force Adjustment
(continued next page)
Force Level
Powerhead LEDs
ROUND LED
LONG LED
LED indicator colors:
OFF Blue Purple Red
Force Level 1 BLUE
BLUE
BLUE BLUE
Off
Off
Off
Off
Force Level 3
Force Level 4 PURPLE
PURPLE
PURPLE PURPLE
Off
Force Level 6
Force Level 7 RED
RED
RED
RED
Off
Force Level 9
Force Level 2
Force Level 5
Force Level 7
PROGRAM
SET
PROGRAM
SET
The Current UP FORCE SETTING
will display. SEE CHART IN NEXT
COLUMN.
Action LED Indication/Result
Press and hold
both up and
down buttons
2 seconds or until round
LED turns RED.
Press either
until you reach
desired setting.
Press and
release.
Press either
until you
reach the
desired setting.
Press and
release.
USE CHART IN NEXT COLUMN
USE CHART IN
NEXT COLUMN
LOCKS IN SETTING.
Then the New
DOWN FORCE
SETTING will display.
OFF RED OFF BLUE
Flashes 3 Times
BLUE
Flashing
OFF
BLUE
BLUE
LOCKS IN SETTING.
Both LEDs turn
BLUE then OFF
confirms both
FORCE Settings are reset.
BLUE
BLUE OFF OFF
FORCE SETTINGS DONE
1
2
3
4
5
19
Maintenance and Adjustments
6
ADJUSTMENT GUIDES (continued)
Speed Settings (DC motors only)
Speed settings are pre-programmed at the factory for the maximum
speed. Speed settings should not need adjustment with this unit.
However, travel speed for the opener can be adjusted to a slower
speed in both the Open and Close directions, to minimize wear on
heavier sectional doors.
NOTE: One-piece doors are automatically set to the slowest speed
during Limits programming and cannot be adjusted.
There are 3-speed settings available for sectional doors. Please note
that speed may be affected by door weight and balance, along with
condition of door components and tracks.
Speed Adjustment
OFF Flashes BLUE 3 Times
PROGRAM
SET
PROGRAM
SET
PROGRAM
SET
1
2
3
4
5
PROGRAM
SET
LOCKS IN OPENING SETTING.
Then the Current Speed setting
for CLOSING travel will display.
SEE CHART IN NEXT COLUMN.
7
6
Press and hold for
about 10 seconds
or until both LEDs
turn BLUE.
Then release. BLUE BLUE
BLUE BLUE
Action LED Indication/Result
Press twice.
Press and
release.
Press either until
you reach the
desired setting.
Press and
release.
Press either until
you reach the
desired setting.
Press and
release.
OFF Flashes BLUE 3 Times
NOTE: Depending on the criteria
mentioned above, you may not
have the option to increase speed.
OFF
Flashes BLUE
3 Times
NOTE: Depending on the criteria
mentioned above, you may not
have the option to increase speed.
LOCKS IN CLOSING SETTING.
FLASH BLUE
FLASH BLUE
SPEED SETTINGS DONE
Then the Current Speed setting
for OPENING travel will display.
SEE CHART IN NEXT COLUMN.
Both LEDs FLASH
BLUE to confirm setting.
Speed Level
Powerhead LEDs
ROUND LED
LONG LED
High
Medium
Low
RED
RED
PURPLE PURPLE
BLUE BLUE
LED indicator colors:
OFF Blue Purple Red
NOTE: PowerLift® 900, GPower900 openers DO NOT have speed
adjustments.
LOCATING SAFE-T-BEAM PAIRS:
Source (Red LED) and Sensor (Green LED)
Single Garage Door
 s$ETERMINEWHICHSIDEOFTHEGARAGERECEIVESDIRECTSUNLIGHT
 s0OSITIONTHE3OURCE2ED,%$ONTHEDIRECTSUNLIGHTSIDE
Multiple Garage Doors
 s.%6%2POSITION3AFE4"EAMMODULESWHERESIGNALSWILLCROSS
 s0LACETHE3OURCE2ED,%$3AFE4"EAMSONADJACENTDOORSFACING
in opposite directions.
NOTE: Direct sunlight creates interference with Safe-T-Beam Sensor
(Green LED). Sensor modules CAN be positioned further away from
door opening if necessary to avoid sunlight but no further off the wall to
maintain alignment with paired Source module.
Red
LED
Red
LED
SunSun
Green
LED
Green
LED
One Door
Garage
One Door
Garage
Two Door
Garage
Two Door
Garage
Three Door
Garage
Three Door
Garage
Red
LED
Red
LED
Green
LED
Green
LED Red
LED
Red
LED
Red
LED
Red
LED
Green
LED
Green
LED Red
LED
Red
LED
Red
LED
Red
LED
Green
LED
Green
LED
Green
LED
Green
LED
Green
LED
Green
LED
Red
LED
Red
LED
SunSun
Green
LED
Green
LED
One Door
Garage
One Door
Garage
20
Opener circuit wiring diagram. This wiring diagram is for reference only.
Wiring Diagram
7
1 2 3 4 5 6
123
76
POWER CORD
CONNECTOR
WHITE
BLACK
GREEN
WHITE
WHITE
BLACK
RED BLACK
STRIPED WHITE
WALL CONSOLE
SCREW DRIVE MOTOR
STRIPED WHITE
SAFE-T-BEAM®
5432 1
(Purchased Separately)
INTELLIGENT WALL CONSOLE
4
BLACK
REDBLACK
CHAIN MOTOR
123
RED BLACK
YELLOW
1234
OPTICAL SENSOR*
GREEN
RED
PRINTED CIRCUIT BOARD
CHOKE
*SOME MODELS DO NOT COME WITH THIS FEATURE
(IWC or AWC)BWCSTB
STRIPED WHITE
MOTION DETECTOR*
WARNING
OPENING COVER MAY CAUSE ELECTRIC SHOCK.
Disconnect power from opener prior to removing cover.
WARNING
ELECTRICAL SHOCK.
  • Page 1 1
  • Page 2 2
  • Page 3 3
  • Page 4 4
  • Page 5 5
  • Page 6 6
  • Page 7 7
  • Page 8 8
  • Page 9 9
  • Page 10 10
  • Page 11 11
  • Page 12 12
  • Page 13 13
  • Page 14 14
  • Page 15 15
  • Page 16 16
  • Page 17 17
  • Page 18 18
  • Page 19 19
  • Page 20 20
  • Page 21 21
  • Page 22 22
  • Page 23 23
  • Page 24 24

Genie CB 1000 Operation & Maintenance Manual

Category
Garage Door Opener
Type
Operation & Maintenance Manual

Ask a question and I''ll find the answer in the document

Finding information in a document is now easier with AI