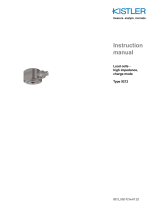
Instruction
Manual
9215A_002-936e-11.20
Low Force Sensors
Type 9215A, 9217A,
9217A1


Foreword
9215A_002-936e-11.20 Page 1
Foreword
Thank you for choosing a Kistler quality product
characterized by technical innovation, precision and long
life.
Information in this document is subject to change without
notice. Kistler reserves the right to change or improve its
products and make changes in the content without
obligation to notify any person or organization of such
changes or improvements.
© 2020 Kistler Group. Kistler Group products are
protected by various intellectual property rights. For more
details visit www.kistler.com. The Kistler Group includes
Kistler Holding AG and all its subsidiaries in Europe,
Asia, the Americas and Australia.
Kistler Group
Eulachstraße 22
8408 Winterthur
Switzerland
Tel. +41 52 224 11 11
www.kistler.com

Type 9215A, 9217A/A1
Page 2 9215A_002-936e-11.20
Content
1.Introduction .................................................................................................................................. 4
2.Important Notes ........................................................................................................................... 5
2.1For Your Safety ................................................................................................................... 5
2.2Unpacking ........................................................................................................................... 6
2.3Notes on using the Press Force Sensor ............................................................................. 6
2.4Hints on using these Operating Instructions ....................................................................... 7
3.General Description .................................................................................................................... 8
3.1What are Low Level Sensors used for? .............................................................................. 8
3.2Construction and functional principle of the low level force sensors .................................. 9
3.3Characteristics of Low Level Force Sensors ..................................................................... 10
3.3.1Seal-Tightness .................................................................................................................. 10
3.3.2Characteristics of Type 9215A .......................................................................................... 11
3.3.3Characteristics of Type 9217A/A1 .................................................................................... 12
4.Installation and Startup ............................................................................................................ 13
4.1Important ........................................................................................................................... 13
4.2Installing Low Level Force Sensors .................................................................................. 13
4.3Adaptation Possibilities ..................................................................................................... 15
4.3.1Adaptation A: Introduction of Force via Force Introducing Cap ........................................ 15
4.3.2Adaptation B: Force Introduced via Fixed Connection ..................................................... 16
4.3.3Adaptation C: Mounting with Coupling Element................................................................ 17
4.3.4Adaptation D: Mounting with Diaphragm .......................................................................... 18
4.3.5Basic Circuitry and Wiring of the Measuring Chain .......................................................... 19
4.3.6Notes on Wiring the Measuring Chain .............................................................................. 19
5.Operation .................................................................................................................................... 21
5.1Setting the Charge Amplifier ............................................................................................. 21
5.2Polarity of the Measuring Signal ....................................................................................... 21
5.3Resolution of the Measuring Signal .................................................................................. 22
5.4Quasistatic Measurements ................................................................................................ 22
5.5Tips for Good Measurands ................................................................................................ 23
6.Maintenance ............................................................................................................................... 24
6.1Recalibrating the Instrument ............................................................................................. 24
6.2Maintenance Work ............................................................................................................ 25
7.Troubleshooting ........................................................................................................................ 26
7.1Fault-Finding and Remedy ................................................................................................ 26
7.2Repairing the Low Level Force Sensor ............................................................................. 26
8.Technical Data ........................................................................................................................... 27
8.1Dimensions ....................................................................................................................... 28
8.1.1Dimensions Type 9215A ................................................................................................... 28
8.1.2Dimensions Type 9217A/A1.............................................................................................. 28
8.2Dimensions of Accessories ............................................................................................... 29

Content
9215A_002-936e-11.20 Page 3
8.2.1Dimensions of Force Introducing Cap for Types and 9217A/A1 ....................................... 29
8.2.2Dimensions of Force Introducing Cap for Type 9215A ...................................................... 29
8.2.3Dimensions of Coupling Element for Types 9217A/A1 ...................................................... 29
8.2.4Dimensions of Coupling Element for Type 9215A ............................................................. 30
8.3Accessories Included ......................................................................................................... 31
8.4Optional Accessories ......................................................................................................... 32
9.Annex .......................................................................................................................................... 33
9.1Glossary ............................................................................................................................. 33
9.2Measurement Uncertainty .................................................................................................. 36
9.3Linearity ............................................................................................................................. 37
9.4Frequency Range .............................................................................................................. 39
9.5Influence of Temperature ................................................................................................... 40
Total pages: 41

Type 9215A, 9217A/A1
9215A_002-936e-11.20 Page 4
1. Introduction
Please take the time to thoroughly read this instruction
manual. It will help you with the installation, maintenance,
and use of this product.
To the extent permitted by law Kistler does not accept
any liability if this instruction manual is not followed or
products other than those listed under Accessories are
used.
Kistler offers a wide range of products for use in
measuring technology:
Piezoelectric sensors for measuring force, torque,
strain, pressure, acceleration, shock, vibration and
acoustic-emission
Strain gage sensor systems for measuring force and
moment
Piezoresistive pressure sensors and transmitters
Signal conditioners, indicators and calibrators
Electronic control and monitoring systems as well as
software for specific measurement applications
Data transmission modules (telemetry)
Kistler also develops and produces measuring solutions
for the application fields engines, vehicles, manufac-
turing, plastics and biomechanics sectors.
Our product and application brochures will provide you
with an overview of our product range. Detailed data
sheets are available for almost all products.
If you need additional help beyond what can be found
either on-line or in this manual, please contact Kistler's
extensive support organization.

Important Notes
9215A_002-936e-11.20 Page 5
2. Important Notes
It is essential for you to study the following notes, which
are for your personal safety during work, and to ensure
long term, fault-free operation of this product.
2.1 For Your Safety
This product has been thoroughly tested and has left
the factory in a perfectly safe condition. In order to
maintain this condition and ensure safe operation,
compliance is required with the instructions and
warning notes in these Operating Instructions.
The press force sensor must be installed, operated
and maintained only by persons who are familiar with
this product and who are adequately qualified for the
work involved.
If it is to be assumed that safe operation is no longer
possible, the equipment must be shut down and made
safe against being accidentally started up.
Safe operation must be assumed to be no longer
possible when the product
shows visible signs of damage,
has been overloaded,
is no longer operating,
has been in lengthy storage under unsuitable
conditions and,
has been subjected to rough transport conditions.
Install the low level force sensor in position as pre-
scribed. Details can be found in Section 4.2 "Installing
the low level force sensor".
Secure all parts mounted on the low level force sensor
according to anticipated moments!

Type 9215A, 9217A/A1
Page 6 9215A_002-936e-11.20
2.2 Unpacking
Check all packaging for transport damage. Report any
such damage to the transporters and to the authorized
Kistler distributor.
Check accessories delivered (see Section 8.3) before
first use of the equipment. Report any missing parts to
the authorized Kistler distributor.
2.3 Notes on using the Press Force Sensor
The low level force sensor must be used only under
the environmental and operating conditions specified.
With piezoelectric sensors, insulation resistance is of
crucial importance; it must be approx. 1014 (but not
less than 5ꞏ1013 ).
In order to preserve this value, all plug-and-socket
connections must be kept absolutely clean and dry.
The insulation resistance can be measured with the
insulation tester Type 5493.
Protect the connector of the press force sensor
against contamination and on no account touch it with
your fingers (connector front). Fit the cover supplied
over the connector when it is not in use.
A high-insulation cable is used to connect the low
level force sensor to a charge amplifier. Once
attached, it should if possible remain connected to the
sensor. Use only specified connecting cables.
Protect the low level force sensor when it is not in use
by storing it in its original packaging.
Low level force sensors are sensitive measuring instru-
ments, which must be carefully handled. Since they do
not have mechanical overload protection, jolts and
shocks must be avoided!

Important Notes
9215A_002-936e-11.20 Page 7
2.4 Hints on using these Operating Instructions
We recommend that you read the entire operating
instructions carefully. However, if you are in a hurry and
already have experience with Kistler low level force
sensors, read the specific information needed.
We have attempted to give these instructions a clear
presentation to make it easier for you to gain direct
access to the information you need.
Please keep these operating instructions in a safe place
where you can retrieve them at any time.
If you lose these operating instructions, please contact
your Kistler distributor and ask them for an immediate
replacement.

Type 9215A, 9217A/A1
Page 8 9215A_002-936e-11.20
3. General Description
3.1 What are Low Level Sensors used for?
Low level force sensors are universally applicable, highly
sensitive force sensors for the measurement of quasista-
tic and dynamic tensile and compressive forces in the
range from less than 1 mN up to 50 N, 200 N or 500 N
depending on type.
The Main Areas of Application are:
Product Testing
Switches, connectors, springs, contacts
Process monitoring
Pressing, crimping, punching, precision cutting, deep
drawing and embossing in micromechanics
Research and development
Miniature force plates, micro-manipulators, material
testing equipment, measurement of the impact force
of particles etc.
Kistler low level force sensors are characterized by high
rigidity and a high natural frequency. Their effective
useful frequency range is, however, determined by the
natural frequency of the entire measuring setup. Their high
resolution allows minute dynamic changes to be
measured even with relatively large forces.
The mounting thread on the case and the inner thread at
the front for the introduction of force allow adaptation to
almost any task.
Kistler low level force sensors are supplied already cali-
brated and thus ready to use.

General Description
9215A_002-936e-11.20 Page 9
3.2 Construction and functional principle of the low level force
sensors
The construction of low level force sensors Types 9215A
and 9217A/A1 is similar and is described and illustrated
here using the example of Type 9217A.
With all types, the sensor element consists of a package
of three piezoelectric crystal rods between two pressure
distribution parts, which on the basis of their specifically
matched expansion coefficient simultaneously act as a
compensation element and minimize temperature-
associated stresses. In the case of types with tensile
force range, the sensor package is under preload.
All low level force sensors are seal welded and rust-
resistant. With the cable connected and the O-ring correctly
fitted in the cable connector, the plug connection is splash-
proof with degree of protection IP65. Special cables and
connectors allow degree of protection IP67, when the
connector housing is seal-welded to the connection on the
sensor, see section 3.3.1.
A frontal, centric mounting thread is provided for precise
coaxial introduction of force.
Fig. 1: Construction
The sensor element consists of three piezoelectric trans-
versal-effect rods sensitive in the Fz direction. Under
load, a positive charge appears at the outer lateral
surfaces and a negative charge at the inner surfaces.
The latter is picked up by an electrode and fed to the
connector.
The negative charge produces a positive voltage at the
output of the charge amplifier and vice versa.
The measurement is practically displacement-free due to
the piezoelectric measuring principle and the high rigidity
of the low level force sensors.
Fig. 2: Crystal package
Outer surface
positive charge
Inner surface
negative charge
Sensor element
Mounting thread
Plug connection
Pressure distribution and
temperature compensation
Pressure distribution and
temperature
com
p
ensation
Thread for introduction of
force

Type 9215A, 9217A/A1
Page 10 9215A_002-936e-11.20
3.3 Characteristics of Low Level Force Sensors
3.3.1 Seal-Tightness
Low level force sensors are provided with a hermetically-
sealed welded case and a ceramic-insulated, gas-tight
plug connection. The seal-tightness of the sensor is
therefore determined by the plug connection and the
cable connector.
With Kistler connecting cables, both the transition
between connector and connection on the sensor and
between connector and cable are sealed with an O-ring.
With the cable connected, the low level force sensors
have the degree of protection IP65 according to
EN60529.
IP67
The degree of protection IP67 can be achieved with the
connecting cable Type 1983A..., which on the sensor
side is provided with a protective connector cover
vulcanized with cable and connector. When additionally
the connector is welded to the connection on the sensor,
the connection is permanently sealed and complies with
degree of protection IP67.
The IP degree of protection according to EN60529 is
ascertained with water. Oils, emulsions, coolant/cutting
fluids etc. mostly have a better wetting and penetration
capacity. For contact with such fluids, the degree of
protection must correspondingly be considered lower.
Vacuum
The sensors are welded at normal pressure under
protective gas and are basically gas-tight. A certain
amount of outgassing can, however, take place after a
very long period of time in a high vacuum.
Overpressure
The sum of compressive force and process force caused
by overpressure must not exceed the measuring range.
During a long period of time in a pressure atmosphere, the
situation cannot be excluded that gases will enter the
sensor and a certain pressure equalization will take place.
The tensile/compressive force caused by a vacuum or
overpressure respectively can, in an initial approximation,
be estimated as pressure difference front face of the
sensor.

General Description
9215A_002-936e-11.20 Page 11
3.3.2 Characteristics of Type 9215A
Type 9215A is the smallest sensor of the type series. The
front side introduction of force is center-aligned with a
diaphragm in the case, laterally supported and transfers
the force to a transversal quartz package. Since the latter
is mounted in the case with only minor preloading, the
result is an asymmetric measuring range. The sensor is
thus mainly designed for the measurement of compressive
forces.
Type 9215A is a miniature sensor for industry, laboratory
and research with the following characteristics:
Very small size
Very high rigidity and very high natural frequency
Very low sensitivity to acceleration
High permissible lateral force
Low level force sensors are sensitive measuring instru-
ments, which must be carefully handled. Since they do
not have mechanical overload protection, it is essential
for jolts and shocks to be avoided!
For Technical Data see section 8.

Type 9215A, 9217A/A1
Page 12 9215A_002-936e-11.20
3.3.3 Characteristics of Type 9217A/A1
The front side introduction of force is center-aligned with
a diaphragm in the case, laterally supported and transfers
the force to a transversal quartz package. This is
mounted preloaded in the case, so that tensile and
compressive forces can be measured.
Type 9217A/A1 is a rugged industrial sensor with the
following characteristics:
Wide measuring range
For tensile and compressive forces
Very high sensitivity and resolution
Large permissible bending moment
Large permissible torque
High permissible lateral force
Low level force sensors are sensitive measuring instru-
ments, which must be carefully handled. Since they do
not have mechanical overload protection, it is essential
for jolts and shocks to be avoided!
For Technical Data see section 8.

Installation and Startup
9215A_002-936e-11.20 Page 13
4. Installation and Startup
4.1 Important
The low level force sensors Types 9215A and 9217A/A1
are precision instruments whose specifications can be
fully utilized only when the instruments are used correctly
and the specifications are retained only when the
instruments are carefully handled. Please ensure the
following:
Do not drop the sensor or expose it to hard impacts.
The peak force of such a shock can cause lasting
damage.
Do not use a hammer for positioning workpieces,
since hammer blows can also cause damage.
The following sections contain information for installing
low level force sensors and for setting up the measuring
chain.
4.2 Installing Low Level Force Sensors
Please comply with the following information for the
correct mounting of low level force sensors
The low level force sensors must be installed only by
persons who are familiar with the equipment and are
adequately qualified for this work.
The sensor for small forces is designed for measuring
tensile and compressive forces in the longitudinal axis.1
Although additional bending moments and lateral
forces can be included to a certain extent, these
should if possible be avoided.
The connecting cable must be connected only after instal-
lation of the low level force sensor has been completed.
Because dirt on the plug connections can cause
significant measuring errors (primarily drift), the protective
plastic connector covers must always remain screwed on
at both the sensor and the cable connectors during
installation. Scrupulous care should be taken particularly
in very dirty environments.
1 Type 9215A only for compressive forces

Type 9215A, 9217A/A1
Page 14 9215A_002-936e-11.20
Fig. 3: Installation with mounting thread
Mounting Thread
Type Mounting Thread Ti
g
htenin
g
Torque
recommended maximum
9215
A
M5x0,5 0,5 Nꞏm 2 Nꞏm
9217
A
/A1 M10x1 2 Nꞏm 10 Nꞏm
Head Piece Internal Thread
Type Internal Thread Ti
g
htenin
g
Torque
size depth recommended maximum
9215
A
M2 1,7 mm 0,05 Nꞏm 0,2 Nꞏm
9217
A
/A1 M3 3 mm 0,1 Nꞏm 0,5 Nꞏm
The force is introduced at the front via the cylindrical head
piece with internal thread. The length of the screw must
be selected, so that the depth of the internal thread is
utilized as much as possible, without the screw pushing
against the base of the blind hole. The mounting
clearance should not be less than half a thread turn.
Thread for the
introduction of force
Mounting thread

Installation and Startup
9215A_002-936e-11.20 Page 15
4.3 Adaptation Possibilities
Where not otherwise indicated, the adaptation
possibilities described and their requirements apply
similarly to all low level force sensors.
4.3.1 Adaptation A: Introduction of Force via Force Introducing Cap
Fig. 4: Introduction of force via force introducing cap
FZ = Compressive force
FS = Lateral force, for maximum permissible values, see
page 27.
Compressive forces should, wherever possible, always
be introduced without a fixed front connection, e.g. with a
force introducing cap or a customer-specific probe tip.
Since there is no fixed mechanical connection between
the sensor and the introduction of force, no great
demands are made in respect of the positional tolerances
for the introduction of force in relation to the mounting
plate. By this means, harmful bending moments can be
largely prevented, at least in the case of a force acting in
a purely axial direction.
For tightening torques see section 4.2.
Fz
Fs
Force introducing
ca
p
Mounting plate

Type 9215A, 9217A/A1
Page 16 9215A_002-936e-11.20
4.3.2 Adaptation B: Force Introduced via Fixed Connection
Fig. 5: Force introduced via fixed connection
FZ = Tensile/compressive force
FS = Lateral force, for maximum permissible values see
page 27
If the force is to be applied with a fixed screw connection to
the sensor, very stringent requirements are placed on the
parallelism of mounting plate and the force applied as well
as on the rectangularity of the sensor. If possible, there-
fore, this kind of arrangement must be avoided. The
positional requirement can be met with appropriate
clearance at the screw connection for the introduction of
force.
If the construction is in itself not stress-free, this
reduces the values for permissible lateral forces,
bending moments and torques. If these are exceeded,
the sensor can be overloaded to destruction.
For tightening torques see section 4.2.
Fs
Fz
Introduction
of force
Screw connection
Mounting plate

Installation and Startup
9215A_002-936e-11.20 Page 17
4.3.3 Adaptation C: Mounting with Coupling Element
Fig. 6: Mounting with coupling element
FZ = Tensile/compressive force
FS = Lateral force, for maximum permissible values see
page 27
If the force is introduced to the sensor with the coupling
element Type 9405 via a screw connection, this can com-
pensate for deviations to a certain extent, so as to reduce
slightly the requirements for parallelism of mounting plate
and force application as well as the rectangularity of the
sensor compared with a direct screw connection. The
positional requirement can be met with appropriate clear-
ance at the screw connection for the introduction of force.
If the construction is in itself not stress-free, this
reduces the values for permissible lateral forces,
bending moments and torques. If these are exceeded,
the sensor can be overloaded to destruction.
For tightening torques see section 4.2.
Fs
FZ
Coupling element
Introduction of force
Screw connection
Mounting plate

Type 9215A, 9217A/A1
Page 18 9215A_002-936e-11.20
4.3.4 Adaptation D: Mounting with Diaphragm
Fig. 7: Mounting with diaphragm
FZ = Tensile/compressive force
FS = Lateral force, for maximum permissible values see
page 27
Lateral forces can be included and decoupled from the
tensile/compressive direction. Depending on the rigidity
of the diaphragm, similarly high requirements as with a
fixed screw connection are placed on the parallelism of
mounting plate and force application as well as on
rectangularity of the sensor. The positional requirement
can be met with appropriate clearance at the screw
connection in the diaphragm.
The diaphragm represents a force shunt arrangement
and for absolute measurements, the sensor must be
recalibrated in situ.
If the construction is in itself not stress-free, this
reduces the values for permissible lateral forces,
bending moments and torques. If these are exceeded,
the sensor can be overloaded to destruction.
For tightening torques see section 4.2.
Fs
Fz
Diaphragm
Mounting plate
Page is loading ...
Page is loading ...
Page is loading ...
Page is loading ...
Page is loading ...
Page is loading ...
Page is loading ...
Page is loading ...
Page is loading ...
Page is loading ...
Page is loading ...
Page is loading ...
Page is loading ...
Page is loading ...
Page is loading ...
Page is loading ...
Page is loading ...
Page is loading ...
Page is loading ...
Page is loading ...
Page is loading ...
Page is loading ...
Page is loading ...
/


