Parkside PHS 160 B3 Operating instructions
- Category
- Power tools
- Type
- Operating instructions
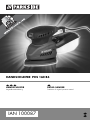
Parkside PHS 160 B3: Tackle your DIY projects with ease using this powerful and versatile detail sander. Ideal for precise sanding in tight corners, on profiles, or hard-to-reach areas. Equipped with a 160W motor for efficient performance, variable speed control for customized sanding, and a 360-degree rotating sanding plate for multi-angle sanding. Includes a dust collection box for cleaner作業.
Parkside PHS 160 B3: Tackle your DIY projects with ease using this powerful and versatile detail sander. Ideal for precise sanding in tight corners, on profiles, or hard-to-reach areas. Equipped with a 160W motor for efficient performance, variable speed control for customized sanding, and a 360-degree rotating sanding plate for multi-angle sanding. Includes a dust collection box for cleaner作業.


-
 1
1
-
 2
2
-
 3
3
-
 4
4
-
 5
5
-
 6
6
-
 7
7
-
 8
8
-
 9
9
-
 10
10
-
 11
11
-
 12
12
-
 13
13
-
 14
14
-
 15
15
-
 16
16
-
 17
17
-
 18
18
-
 19
19
-
 20
20


Parkside PHS 160 B3 Operating instructions
- Category
- Power tools
- Type
- Operating instructions
Parkside PHS 160 B3: Tackle your DIY projects with ease using this powerful and versatile detail sander. Ideal for precise sanding in tight corners, on profiles, or hard-to-reach areas. Equipped with a 160W motor for efficient performance, variable speed control for customized sanding, and a 360-degree rotating sanding plate for multi-angle sanding. Includes a dust collection box for cleaner作業.
Ask a question and I''ll find the answer in the document
Finding information in a document is now easier with AI
in other languages
Related papers
-
Parkside PHS 160 A1 Operation and Safety Notes
-
-
Parkside PHS 160 B2 Owner's manual
-
Parkside PHS 160 A1 - 6 Operation And Safety Notes Translation Of Original Operation Manual
-
-
-
-
-
-
Other documents
-
Worx WX240.X Safety And Operating Manual
-
Ikra IHT 550 Owner's manual
-
-
Vonroc LB501AC User manual
-
Scheppach DH6000 User manual
-
Scheppach DS200 Translation Of The Original Manual
-
Bosch PRIO Owner's manual
-
-
-