Page is loading ...

PENBERTHY SERIES N2/K2 TUBULAR GAGECOCKS
InstallatIon, operatIon and maIntenance InstructIons
Before installation these instructions must be read fully and understood
VCIOM-04034-EN 18/03
PRODUCT WARRANTY
Emerson warrants its Penberthy products
as designed and manufactured to be free
of defects in the material and workmanship
for a period of one year after the date of
installation or eighteen months after the date
of manufacture, whichever is earliest. Emerson
will, at its option, replace or repair any products
which fail during the warranty period due to
defective material or workmanship.
Prior to submitting any claim for warranty
service, the owner must submit proof of
purchase to Emerson and obtain written
authorization to return the product. Thereafter,
the product shall be returned to Emerson with
freight prepaid.
This warranty shall not apply if the product has
been disassembled, tampered with, repaired
or otherwise altered outside of the Emerson
factory, or if it has been subject to misuse,
neglect or accident.
The responsibility of Emerson hereunder is
limited to repairing or replacing the product
at its expense. Emerson shall not be liable for
loss, damage or expenses
related directly or
indirectly to the installation or use of its products
or from any other cause or for consequential
damages. It is expressly understood that
Emerson is not responsible for damage or injury
caused to other products, buildings, personnel
or property, by reason of the installation or use
of its products.
This is Emerson's sole warranty and in lieu of
all other warranties, expressed or implied which
are hereby excluded, including in particular all
warranties of merchantability or fitness for a
particular purpose.
This document and the warranty contained
herein may not be modified and no other
warranty, expressed or implied, shall be made
by or on behalf of Emerson unless made in
writing and signed by the company's general
manager or director of engineering.
TABLE OF CONTENTS
Product warranty ................................................ 1
1 About the manual..................................... 2
2 Introduction ............................................. 2
2.1 System description ...................................... 2
3 Available models ..................................... 3
3.1 Design ratings at max. & min. operating
temperatures ............................................... 3
3.2 Steam application ........................................ 3
4 Inspection ................................................ 4
4.1 User rating inspection ................................. 4
5 Installation ............................................... 4
5.1 Mounting ....................................................... 4
5.2 Tubular glass installation ............................ 4
5.3 Guard rod installation .................................. 4
6 Operation ................................................. 5
6.1 Hydrostatic test ............................................ 5
7 Maintenance ............................................ 5
7.1 Preventative maintenance ........................... 5
7.2 Ball check shut-off ...................................... 5
7.3 Troubleshooting ........................................... 6
8 Removal - disassembly - reassembly ..... 6
8.1 Disassembly ................................................. 6
8.2 Reassembly .................................................. 7
9 Disposal at end of useful life ................... 7
10 Telephone assistance .............................. 7
11 Exploded parts diagram .......................... 8
Tables and figures
Table 1 -
Standard features
.............................. 3
Table 2 -
Design ratings
.................................... 3
Table 3 - Tubular glass ratings ........................ 3
Figure 1 - PTFE tape wrapping .......................... 4
Figure 2 - Exploded parts diagram ................... 8
Emerson.com/FinalControl © 2017 Emerson. All rights reserved.

2
PENBERTHY SERIES N2/K2 TUBULAR GAGECOCKS
InstallatIon, operatIon and maIntenance InstructIons
2 INTRODUCTION
Penberthy tubular gagecocks are used to
isolate tubular glass or other apparatus from
the holding or pressure vessel when it becomes
necessary to drain and service the tubular gage.
Penberthy Series N2 and K2 gagecocks are
supplied in pairs, (upper and lower), that house
each end of a transparent sight glass tube and
are available with socketweld, flanged or NPT
connections. This gagecock/glass combination
forms a gage that accurately indicates fluid
level as well as fluid characteristics. These
gagecocks are equipped, as a standard feature,
with a union vessel connection and ball check
shut-offs to prevent leakage of contained fluid in
case of accidental tubular glass breakage.
Series N2 and K2 gagecocks for process use
should include a ball check shut-off feature.
Gagecocks without the ball check shut-off
feature will not stop leakage of contained fluid
automatically in the event of accidental tubular
glass breakage.
2.1 System description
Penberthy tubular gagecocks comprise six
basic components. Each component may vary
slightly, depending on the desired physical
and mechanical properties for the gagecock.
Use the exploded parts view in Section 11 as
additional reference material.
Body - a pressure retaining structure through
which fluid passes to enter a tubular glass or
other apparatus. Provides a rigid, union, or
spherical union connection to the vessel and
seating surfaces for most gagecock components.
Series N2 and K2 are offset pattern bodies.
Ball checks - sphere installed loosely within
the body of the gagecock that seats to prevent
significant leakage when a differential pressure
surge occurs (e.g., mechanical failure). Ball
checks for ASME steam service incorporate a
vertically rising lower and leaky horizontal upper
or omit ball checks completely. 'Reverse acting'
ball checks are available for vacuum service.
Trim - wetted parts that mechanically control
the fluid path from the vessel to the tubular
glass or other apparatus. The ball and stem
act to seal and release the fluid. In the event of
mechanical failure, the ball will seat to prevent
large quantities of the contained fluid from
exiting the vessel. Fluid is allowed to exit the
vessel into the tubular glass or other apparatus
when the stem is screwed away from its seated
position. The fluid is sealed when the stem is
screwed into its seated position.
The stem packing retainer provides a
compression surface between the process fluid
and the stem packing. A stem packing gland
is used to compress the packing against the
retainer and around the stem to prevent leakage.
Stem packing- under compression, the stem
packing is forced to mold around the stem and
prevent leakage of fluid during operation.
Gage connection - provides connection between
the gagecock and the tubular glass or other
apparatus. A stuffing box style which allows for
the glass packing to be forced to mold around
the tubular glass and prevent leakage of fluid
during operation.
Handwheel/lever - rotated to engage threads
and provide screw action of stem.
WARNING
Vessel fluids may be pressurized and can exit
vessel connections unexpectedly due to apparatus
or material failure. Safety glasses should be worn
when installing a gagecock. Failure to follow any
instruction could possibly result in a malfunction
of the gagecock with resulting sudden release
of pressure, severe physical injury or property
damage.
Safety instructions
Emerson does not have any control over the
manner in which its gagecocks are handled,
installed or used. Penberthy cannot and will
not guarantee that a gagecock is suitable or
compatible for the user's specific application.
1 ABOUT THE MANUAL
This manual has been prepared as an aid and
guide for personnel involved in installation or
maintenance. All instructions must be read and
understood thoroughly before attempting any
installation, operation or maintenance.

3
PENBERTHY SERIES N2/K2 TUBULAR GAGECOCKS
InstallatIon, operatIon and maIntenance InstructIons
3 AVAILABLE MODELS
Tubular gagecock standard features are listed in
the table below:
3.1 Design ratings at maximum and minimum
operating temperatures (see Table 2)
To determine the maximum allowable working
pressure for a specific temperature within
the design limits stated below, the user must
refer to relevant technical data sheets or, when
provided, the specifically stated design limits on
a product proposal.
TABLE 1
Model N2 K2
Offset pattern X X
Integral bonnet X
Union bonnet X
Stuffing box connection X X
Screwed in seat X
Integral seat X
TABLE 2 - DESIGN RATINGS AT MAXIMUM AND MINIMUM OPERATING TEMPERATURES
Gagecock series Material of construction
Maximum allowable working pressure
PTFE packing Grafoil
®
packing
N2A
K2A
Carbon 675 psig [4650 kPa] at -20°F [-29°C] to 100°F [38°C] 675 psig [4650 kPa] at -20°F [-29°C] to 100°F [38°C]
steel 555 psig [3830 kPa] at 500°F [260°C] 400 psig [2760 kPa] at 750°F [399°C]
316 STS 675 psig [4650 kPa] at -300°F [-184°C] to 100°F [38°C] 675 psig [4650 kPa] at -300°F [-184°C] to 100°F [38°C]
555 psig [3830 kPa] at 500°F [260°C] 400 psig [2760 kPa] at 750°F [399°C]
N2B
N2C
K2B
K2C
Carbon 750 psig [5170 kPa] at -20°F [-29°C] to 100°F [38°C] 750 psig [5170 kPa] at -20°F [-29°C] to 100°F [38°C]
steel 610 psig [4210 kPa] at 500°F [260°C] 450 psig [3100 kPa] at 750°F [399°C]
316 STS 750 psig [5170 kPa] at -300°F [-184°C] to 100°F [38°C] 750 psig [5170 kPa] at -300°F [-184°C] to 100°F [38°C]
610 psig [4210 kPa] at 500°F [260°C] 450 psig [3100 kPa] at 750°F [399°C]
Pressure/temperature ranges in the table above are subject to the limitations of the tubular glass.
See Table 3 below.
TABLE 3 - tubular glass - ratings ⅝" (16 mm) and ¾" (19 mm) OD
Center to center distance for vessel
connections
Inches [mm]
No corrosion up to 150°F [66°C] Steam boiler service up to 425°F [218°C]
High pressure Heavy wall Red line High pressure Heavy wall Red line
psig (kPa) psig (kPa)
10 [254] 410 [2830] 600 [4140] 340 [2340] 310 [2140] 345 [2380] 275 [1900]
15 [381] 385 [2650] 600 [4140] 310 [2140] 280 [1930] 325 [2240] 265 [1830]
20 [508] 355 [2450] 600 [4140] 285 [1960] 265 [1830] 315 [2170] 260 [1790]
25 [635] 300 [2070] 580 [4000] 260 [1790] 250 [1720] 300 [2070] 250 [1720]
30 [762] 275 [1900] 550 [3790] 230 [1590]
35 [889] 240 [1650] 500 [3450] 200 [1380]
40 [1016] 210 [1450] 420 [2890] 180 [1240]
45 [114 3] 200 [1380] 360 [2480] 170 [1170]
50 [1270] 180 [1240] 340 [2340] 160 [1100] Not recommended
55 [1397] 150 [1030] N/A 140 [970]
60 [1524] 140 [970] N/A 120 [830]
65 [1651] 125 [860] N/A 100 [690]
70 [1778] 100 [690] N/A 90 [620]
N/A - Not Available
WARNING
NEVER exceed these design ratings or application
data. Exceeding design ratings or
application data may result in mechanical failure
of gagecock components resulting in serious
personal injury or property damage.
3.2 Steam application
Penberthy series N2 and K2 gagecocks are
designed for process conditions. In low pressure
steam/water applications (< 350 psig [2410 kPa]
at 434°F [223°C], the use of N2 and K2 series
gagecocks is allowed because the potential
mechanical stress imposed on the gagecock
assembly by the thermodynamic steam
environment is relatively small.

4
PENBERTHY SERIES N2/K2 TUBULAR GAGECOCKS
InstallatIon, operatIon and maIntenance InstructIons
5 INSTALLATION
Installation should only be undertaken by
qualified personnel who are familiar with
this equipment. They should have read and
understood all of the instructions in this manual.
The user should refer to relevant technical
data sheets or the product proposal to obtain
dimensional information for specific size and
model gagecock set.
Recommendations on tubular gagecock
installations are limited to the installation of
tubular glass liquid level gages when used as
liquid level indicating devices. The number of
different types of gagecock installations is too
great to explain adequately in an installation
manual. Therefore, it is the user's responsibility
to assure that knowledgeable installation
personnel plan and carry out the installation in a
safe manner. The following procedures are some
of the guidelines that should be employed.
5.1 Mounting
1. Prior to installation, turn the handwheel or
lever of each gagecock clockwise until the
stem closes against the seat.
2. Remove union vessel connections from
gagecocks, where applicable, and apply heavy
grease (where allowable) to tailpipe seat. (The
grease minimizes galling of the seat surfaces
when tightening the coupling nuts).
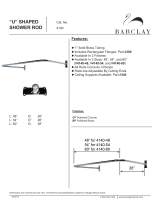
3. Wrench tighten tailpipes of upper and lower
gagecocks to the vessel using PTFE tape, or
equivalent, on all male tapered pipe thread
connections as shown in Figure 1. Make sure
the coupling nuts are in place on the tailpipes
prior to assembling to vessel. If the gagecock
is flanged or weld mount, use proper industry
standard procedures.
4. Mount upper and lower gagecocks to vessel
tailpipes making certain that tubular glass
connections are aligned vertically and to
vessel centers as called for on application
specification. Union vessel connection should
only be snug at this time.
4 INSPECTION
On receipt of a gagecock set, check all
components carefully for damage incurred in
shipping. If damage is evident or suspected,
do not attempt any installation. Notify carrier
immediately and request damage inspection.
Refer to exploded view drawing in Section 11 to
inventory parts.
4.1 User rating inspection
The user should confirm that:
1. The gagecock set model number and
pressure/temperature rating stamped on
nameplate conforms to the description on
the user's purchase order
2. The operating conditions described in
the purchase order agree with the actual
operating conditions at the installation site
3.
The actual operating conditions at the
installation site are within the application data
shown on the relevant technical data sheet or
product proposal referred to previously
4. The materials of construction of the
gagecock set are compatible with both
the contained fluid and the surrounding
atmosphere in the specific application.
Safety instructions
If the size, model or performance data of the
gagecock set as received does not conform with
any of the criteria above, do not proceed with
installation. Contact an authorized Penberthy
distributor for assistance.
5.2 Tubular glass installation
1. Turn upper gagecock counterclockwise
(approx. ⅛ turn).
2. Loosen glass packing nut to insure there is
no compressive force on glass packing.
3. Insert tubular glass up into upper gagecock
stuffing box connection.
4. Return upper gagecock to its original
position while holding tubular glass in place
with upward force to insure its clearing
of lower stuffing box connection. Check
vertical alignment of gagecocks.
5. Loosen glass packing nut on lower
gagecock and pull glass down into lower
gagecock stuffing box connection to a
positive stop.
6.
Tighten upper and lower vessel coupling nuts.
7. Tighten upper and lower glass packing nuts.
Note: in some circumstances, it may be
necessary to remove glass packing nut, glass
packing gland and glass packing and mount
them on tubular glass prior to insertion of glass
into upper and lower gagecock bodies. See
Figure 2 for proper assembly sequence.
PTFE tape
Direction of wrap
FIGURE 1
5.3 Guard rod installation
Guard rods (four required) are assembled
downward through upper gagecock star with
the swaged portion of rods at the top. Bottom of
rods are positioned into respective holes in the
lower gagecock star.

5
PENBERTHY SERIES N2/K2 TUBULAR GAGECOCKS
InstallatIon, operatIon and maIntenance InstructIons
6 OPERATION
Before initializing gagecock operation, check
that all installation procedures have been
completed. Use only qualified, experienced
personnel who are familiar with tubular
gagecock equipment and thoroughly
understand the implications of the tables and
all the instructions. Check to determine that all
connections are pressure tight.
WARNING
Gagecock installations should be brought
into service slowly. The tubular glass used
in gagecocks is tempered and can withstand
minimal thermal shock and mechanical stress.
Gagecocks should be opened slightly, and the
gagecock assembly temperature and pressure
allowed to slowly equalize. If the gagecocks are
equipped with ball checks, the gagecocks must
be opened all the way after the pressure and
temperature have equalized to permit operation
of the automatic ball check in the event of tubular
glass failure. Failure to follow the recommended
operating procedures can result in severe
personal injury or property damage.
6.1 Hydrostatic test
Take all precautions necessary to handle
the possibility of leakage during the test.
Hydrostatic pressure test all installations to
100psig (690 kPa) and correct any leakage
before proceeding.
7 MAINTENANCE
WARNING
Use only qualified, experienced personnel who
are familiar with tubular gagecock equipment
and thoroughly understand the implications of the
tables and all the instructions. DO NOT proceed
with any maintenance unless the gagecock
assembly has been relieved of all pressure or
vacuum, has been allowed to reach ambient
temperature and has been drained or purged
of all fluids. Failure to do so can cause serious
personal injury and property damage.
The user must create maintenance schedules,
safety manuals and inspection details for each
gagecock. These will be based upon the users
own operating experience with their specific
application. Realistic maintenance schedules
can only be determined with full knowledge of
the services and application situations involved.
During system shutdown, the gagecocks should
be left open to permit the tubular glass to lose
pressure and cool with the rest of the system.
Failure to leave the gagecocks open during
system shutdown may trap high-pressure fluid
in the tubular glass.
7.1 Preventative maintenance
On all installations the following items should
be evaluated regularly by the user for purposes
of maintenance:
1. Leakage around stem area
2. Internal stem leak
3. Leakage around stuffing box connection
4. Internal or external corrosion
The user must determine an appropriate
maintenance schedule necessary for his or her
own specific application, upon evaluation of
his or her own operating experience. Realistic
maintenance schedules can only be determined
with full knowledge of the services and
application situation involved.
7.2 Ball check shut-off
Safety instructions
Ball checks, when installed, may fail to seat
due to corrosion of the ball or seat, foreign or
viscous material in the ball chamber. A routine
operational test of the ball check can prevent
significant seepage of fluid in the event of
tubular glass breakage.
An operational check can be performed on the
gagecock ball check by closing both the upper
and lower gagecock stems completely. Drain
contents from and relieve pressure on tubular
glass to an appropriate safe container/area.
Note: some loss of process fluid to the drain
line is expected with this test procedure.
WARNING
Use only qualified, experienced personnel who
are familiar with tubular gagecock equipment
and thoroughly understand the implications of the
tables and all the instructions. DO NOT proceed
with any maintenance unless the gagecock
assembly has been relieved of all pressure or
vacuum, has been allowed to reach ambient
temperature, and has been drained or purged
of all fluids. Failure to do so can cause serious
personal injury and property damage.
With drain line in place, open BOTTOM gagecock
as rapidly as possible. Listen for 'click' sound,
which will indicate that the ball has seated. If
possible, observe the quantity of flow from the
drain line. Flow should either stop completely
or be no greater than single drips (no solid
stream). Close lower gagecock. Repeat above
procedure for UPPER gagecock. There must be
a pressure differential of at least 5 psig (35 kPa)
for the above procedure to work properly.
If the above procedure is not successful,
the only alternative is to isolate the tubular
gagecock assembly from the vessel or to shut
the process down completely. Disassemble
the gagecock as outlined in section 8.1 using
the exploded parts drawing in Section 11 as a
reference.
Visibly inspect ball check and ball seats in the
gagecock body. Remove any foreign matter and/
or replace with new ball checks if inspection
indicates this is required. If the ball seat is
damaged, consider replacing the gagecock
or the seat (if it is removable). Reassemble
gagecocks as outlined in Section 8.2.

6
PENBERTHY SERIES N2/K2 TUBULAR GAGECOCKS
InstallatIon, operatIon and maIntenance InstructIons
7.3 Troubleshooting
Stem packing leakage - can often be
stopped by tightening the stem packing nut.
If leak persists, the stem packing should be
replaced by following steps 1) through 4)
of the Disassembly and 1) through 7) of the
Reassembly instructions
Internal seat leakage - is an indication of a worn
or damaged stem or seat. To replace the stem
follow steps 1) through 4) of the Disassembly and
1) through 7) of the Reassembly instructions. To
renew the seat surface (Series N2), follow steps1)
through 3) of the Disassembly instructions.
Renew the seats by using a fine lapping
compound and a mandrel the same size, shape
and seat angle as the stem. Flush the gagecock
body clean and reassemble by following steps 4)
through 7) of the Reassembly instructions.
Renewable threaded seats (Series K2). Remove
the seat by inserting a ¼" (6 mm) square driver
in the seat and turning it counterclockwise.
Install the new seat by turning it clockwise
using the square driver, making sure that the
ball check, if used, is replaced in the body.
Tighten the seat in place.
Leakage around union connections - can often
be stopped by tightening the union coupling
nut or remake connection using PTFE tape, or
equivalent, on all male pipe threads as shown
in Figure 1.
Leakage around stuffing box connection - is an
indication of worn out glass packing or improper
compression of glass packing. To replace
glass packing, follow steps 7) through13)
of the Disassembly and 8) through 16) of
the Reassembly instructions. In the event of
improper packing compression, leakage can be
stopped by tightening the glass packing nut.
Internal or external corrosion - could be an
indication of a misapplication. An investigation
should be carried out immediately to
determine the cause of the problem. It is the
user's responsibility to choose a material of
construction compatible with both the contained
fluid and the surrounding atmosphere.
Broken tubular glass - replacement, follow
steps 7) through 12) of the Disassembly and
10)through 16) of the Reassembly instructions.
8 REMOVAL - DISASSEMBLY - REASSEMBLY
WARNING
Use only qualified, experienced personnel who
are familiar with tubular gagecock equipment
and thoroughly understand the implications of the
tables and all the instructions. DO NOT proceed
with any maintenance unless the gagecock
assembly has been relieved of all pressure or
vacuum, has been allowed to reach ambient
temperature and has been drained or purged
of all fluids. Failure to do so can cause serious
personal injury and property damage.
8.1 Disassembly
Refer to the exploded parts drawing in Section
11 for additional reference during disassembly
and reassembly of the gagecocks.
1. Remove handwheel nut (30), nameplate
(163) (lower gagecock only) and handwheel
(28) or lever (261) from stem.
2. Loosen and remove stem packing nut (26).
3. Remove stem by turning counterclockwise,
along with stem packing gland (19), stem
packing (25) and stem packing retainer (18).
4. Slip the stem packing gland (19), stem
packing (25) and stem packing retainer (18)
off stem (17).
5. On Series K2 gagecocks, remove bonnet nut
(21) and bonnet (20).
6. To replace seat on Series K2 gagecocks,
follow instructions as described in
maintenance procedures, section 7.3.
7. Remove guard rods (40) if present.
8. Loosen glass packing nut (37) on both upper
and lower gagecocks.
9. Loosen vessel coupling nut (13) on upper
gagecock.
10. Slide tubular glass (48) upward into upper
gagecock until bottom of tubular glass
clears the stuffing box connection on the
lower gagecock.
11. While holding tubular glass (48) in the
upward position, rotate upper gagecock
counterclockwise (approximately ⅛ turn)
to allow clearance to remove tubular glass
from upper gagecock.
12. Remove tubular glass (48) from upper
gagecock.
13. Remove glass packing nut (37), glass
packing gland (36) and glass packing (34)
from both upper and lower gagecocks.

7
PENBERTHY SERIES N2/K2 TUBULAR GAGECOCKS
InstallatIon, operatIon and maIntenance InstructIons
8.2 Reassembly
Refer to the exploded parts drawing in
Section11 for additional reference during
disassembly and reassembly of the gagecocks.
1. Prepare for installation of new packing by
cleaning all packing chambers and glands
of upper and lower gagecocks.
2. On Series K2 gagecocks, replace bonnet (20)
and bonnet nut (21) and tighten securely in
place.
3. Slip stem packing retainer (18) on stem.
4. Install new stem packing (25) and stem
packing gland (19) on stem.
5. Thread stem assembly into gagecock by
turning clockwise until stem seats and then
back off one turn.
6. Assemble stem packing nut (26) and tighten
in place.
7. Assemble handwheel (28) or lever (261),
nameplate (163) (lower gagecock only) and
handwheel nut (30) on stem and tighten
securely in place.
8. Replace glass packing nut (37), glass
packing gland (36) and new glass packing
(34) on each end of tubular glass (48).
9. Loosen vessel coupling nut (13) of the upper
gagecock.
10. With upper gagecock turned (approximately
⅛ turn) counterclockwise from vertical,
insert one end of tubular glass (48) into
the stuffing box connection in the upper
gagecock to sufficient depth to insure
clearance of the lower gagecock.
11. Rotate the upper gagecock clockwise to the
original position while holding the tubular
glass (48) in place with upward force to
insure its clearing the lower tubular glass
connection. Check vertical alignment of
gagecocks.
12. Slide tubular glass (48) down into lower
gagecock stuffing box connection to a
positive stop.
13. Tighten vessel coupling nut (13) on upper
gagecock.
14. Tighten glass packing nut (37) on both upper
and lower gagecocks.
15. Close both gagecocks by turning handwheel
(28) or lever (261) clockwise until stem
seats.
16. Replace guard rods (40) if required.
Refer to Section 6 for operation of the gagecock
when returned to service.
9 DISPOSAL AT END OF USEFUL LIFE
Penberthy Series N2 and K2 gagecocks are
used in a variety of fluid applications. By
following the appropriate federal and industry
regulations, the user must determine the extent
of preparation and treatment the Series N2 and
K2 gagecocks must incur before their disposal.
A Material Safety Data Sheet (MSDS) may be
required before disposal services accept certain
components.
Metal, glass and polymers should be recycled
whenever possible. Refer to order and
relevant technical data sheets for materials of
construction.
10 TELEPHONE ASSISTANCE
If you are having difficulty with your Series N2
or K2 gagecock, contact your local Penberthy
distributor. You may also contact the factory
direct at (956) 430-2500 and ask for an
applications engineer. So that we may assist
you more effectively, please have as much of
the following information available as possible
when you call:
- Model #
- Name of the company from whom you
purchased the Penberthy Series N2 or K2
gagecocks
- Invoice # and date
- Process conditions (pressure, flow rates, tank
shape, etc)
- A brief description of the problem
- Trouble shooting procedures that failed
If attempts to solve your problem fail, you may
request to return your Penberthy Series N2
or K2 gagecocks to the factory for intensive
testing. You must obtain a Return Authorization
(R.A.) number from Emerson before returning
anything. Failure to do so will result in the unit
being returned to you without being tested,
freight collect. To obtain an R.A. number, the
following information (in addition to that above)
is needed:
- Reason for return
- Person to contact at your company
- 'Ship-to' address
There is a minimum charge for evaluation
of non-warranty units. You will be contacted
before any repairs are initiated should the cost
exceed the minimum charge. If you return a
unit under warranty, but it is not defective, the
minimum charge will apply.
NOTES
Grafoil
®
is a registered trademark of Graftech, Inc.

8
PENBERTHY SERIES N2/K2 TUBULAR GAGECOCKS
InstallatIon, operatIon and maIntenance InstructIons
11 EXPLODED PARTS DIAGRAM
RECOMMENDED SPARE PARTS
Ref # Item Min. qty.
18 Retainer, stem packing 2
25 Packing, stem 4
26 Nut, stem packing 1
34 Packing, glass 4
36 Gland, glass packing 2
37 Nut, glass packing 1
48 Glass 1
Recommended maximum quantities should provide
spare parts for 10% of the gagecocks in service.
To ensure proper operation, use Penberthy brand
spare parts.
PARTS LIST
Ref # Item
11 Body
12 Tailpipe, vessel
13 Nut, vessel coupling
14 Retainer, ball
15 Ball
16 Seat
17 Stem
18 Retainer, stem packing
19 Gland, stem packing
20 Bonnet
21 Nut, bonnet
25 Packing, stem
26 Nut, stem packing
28 Handwheel
30 Nut, handwheel
33 Star
34 Packing, glass
36 Gland, glass packing
37 Nut, glass packing
40 Rod
48 Glass
163 Nameplate
261 Lever
Note: Seat (16), Bonnet (20) and Bonnet nut (21) are to be used on Series K2 gagecocks only.
FIGURE 2
Neither Emerson, Emerson Automation Solutions, nor any of their affiliated entities assumes responsibility for the selection, use or maintenance of any product.
Responsibility for proper selection, use, and maintenance of any product remains solely with the purchaser and end user.
Penberthy is a mark owned by one of the companies in the Emerson Automation Solutions business unit of Emerson Electric Co. Emerson Automation Solutions,
Emerson and the Emerson logo are trademarks and service marks of Emerson Electric Co. All other marks are the property of their respective owners.
The contents of this publication are presented for informational purposes only, and while every effort has been made to ensure their accuracy, they are not to be
construed as warranties or guarantees, express or implied, regarding the products or services described herein or their use or applicability. All sales are governed by
our terms and conditions, which are available upon request. We reserve the right to modify or improve the designs or specifications of such products at any time without
notice.
Emerson.com/FinalControl
/