Celestron 44106 User manual

Category
Microscopes
Type
User manual

This manual is also suitable for

INSTRUCTION MANUAL
MODEL #44121
Microscope Kit
ENGLISH
Congratulations on your Celestron microscope purchase.
Your new microscope is a precision optical instrument,
made of high quality materials to ensure durability and
long life. It is designed to give you a lifetime of pleasure
with a minimal amount of maintenance.
Before attempting to use your microscope, please read
through the instructions to familiarize yourself with the
functions and operations to maximize your enjoyment and
usage. See the microscope diagrams to locate the parts
discussed in this manual.
The microscope provides high powers from 40x to
600x. It is ideally suited for examining specimen slides
of yeasts and molds, cultures, plant and animal parts,
fibers, bacteria, etc. You can also examine small and
thin objects at low powers such as coins, rocks, insects,
various materials, etc. You can also explore the exciting
microscopic world by creating your own specimen slides.
An excellent book to get you started, which describes
various projects and activities along with techniques, is
“The World of the Microscope” by Usborne.
The final section of this manual provides simple care
and maintenance tips for you to follow to ensure that
your microscope provides you with years of quality
performance, usage, and enjoyment.
Note: This product was designed and intended for
ages 13 and older!
IntroductIon
1
Figure 1
1. Zoom
Eyepiece
2. Eyepiece
Tube
3. Nosepiece
4. Objective
Lens
5. Stage
6. Bottom
Illuminator 7. Base
8. Focus Knob
9. Stage Clips
10. Arm
11. Top
Illuminator
Standard Accessories Included with your Microscope
• 10x—20x Zoom Eyepiece
• 4x, 15x, 30x Objective Lenses
• Top Illuminator - LED
• Bottom Illuminator - LED
• Light Diffuser
• 3 Prepared Glass Slides, Hole (Clear) Slide,
2 Blank Glass Slides
• Honeybee Wing, Shrimp, Rock Pieces,
Tweezers, Needle Probe and Eyedropper
2
SpecIfIcatIonSModel # 44121
Stage Plain Stage with metal clips — 74 mm x 70 mm (2.9” x 2.8”)
Zoom Eyepiece Glass optics. Power continuous from 10x to 20x
Focuser Coarse focus — dual knobs
Objectives All glass optics — see magnication chart for powers
Illuminator — Top Pen light style. Uses 2AAA batteries (user supplied)
Illuminator — Bottom Uses 2AA batteries (user supplied)
Nosepiece Triple with click stop
Weight/Dimensions (with batteries) 22 oz. (624 g) — 5.25” x 3.13” x 9.75” (133 mm x 79 mm x 248 mm)
Objective Lens 4x 15x 30x
10x on Zoom Eyepiece 40x 150x 300x
20x on Zoom Eyepiece 80x 300x 600x
MagnIfIcatIon table
Use the following table to determine the magnification
of the different eyepiece/objective lens combination of
your microscope.
1. Take the Styrofoam container out of the carton.
2. Remove the tape from the Styrofoam container holding
the various parts in place.
3. Carefully remove the microscope and other parts from
the container and set them on a table, desk, or other
flat surface.
4. Remove the plastic bag covering the microscope.
5. Remove the plastic cap from the zoom eyepiece
Fig. 1 (1).
6. Install the batteries in the top illuminator Fig. 1 (11)
which uses two AAA batteries (user supplied). See the
image below Fig. 2 — Turn the top of the pen light (top
illuminator) counterclockwise to take it off. Next insert
the AAA batteries into the tube with the positive ends
going into the tube first. Screw the top of the pen light
clockwise until tight.
7. Install the batteries for the bottom illuminator in the
base Fig. 1 (7) of the microscope which uses two AA
batteries (user supplied). See image 3a, showing
the battery compartment closed at the back of the
microscope. Image 3b shows the batteries being
installed in the compartment (see the inside of the
battery compartment door to locate where the positive
(+) and negative (-) ends of the batteries go. Pull out on
the door to open it while holding the base firmly and
push firmly to close it after the batteries are installed.
Figure 3a Figure 3b
You are now ready to use your microscope for looking
at specimen slides or small objects through the zoom
eyepiece!
SettIng up Your MIcroScope
Viewing a speciMen
Carefully place a specimen slide under the stage clips Fig.
1 (9) and center the specimen directly over the hole in the
center of the stage Fig. 1 (5) – Figure 4a shows the stage
area with the hole in the center and Figure 4b shows a
specimen slide centered over the hole in the stage. It will
take some experimenting to place slides or objects in the
center of the stage as the image you see is upside down
and reversed but after some usage you will have an easy
MIcroScope operatIon
Figure 2
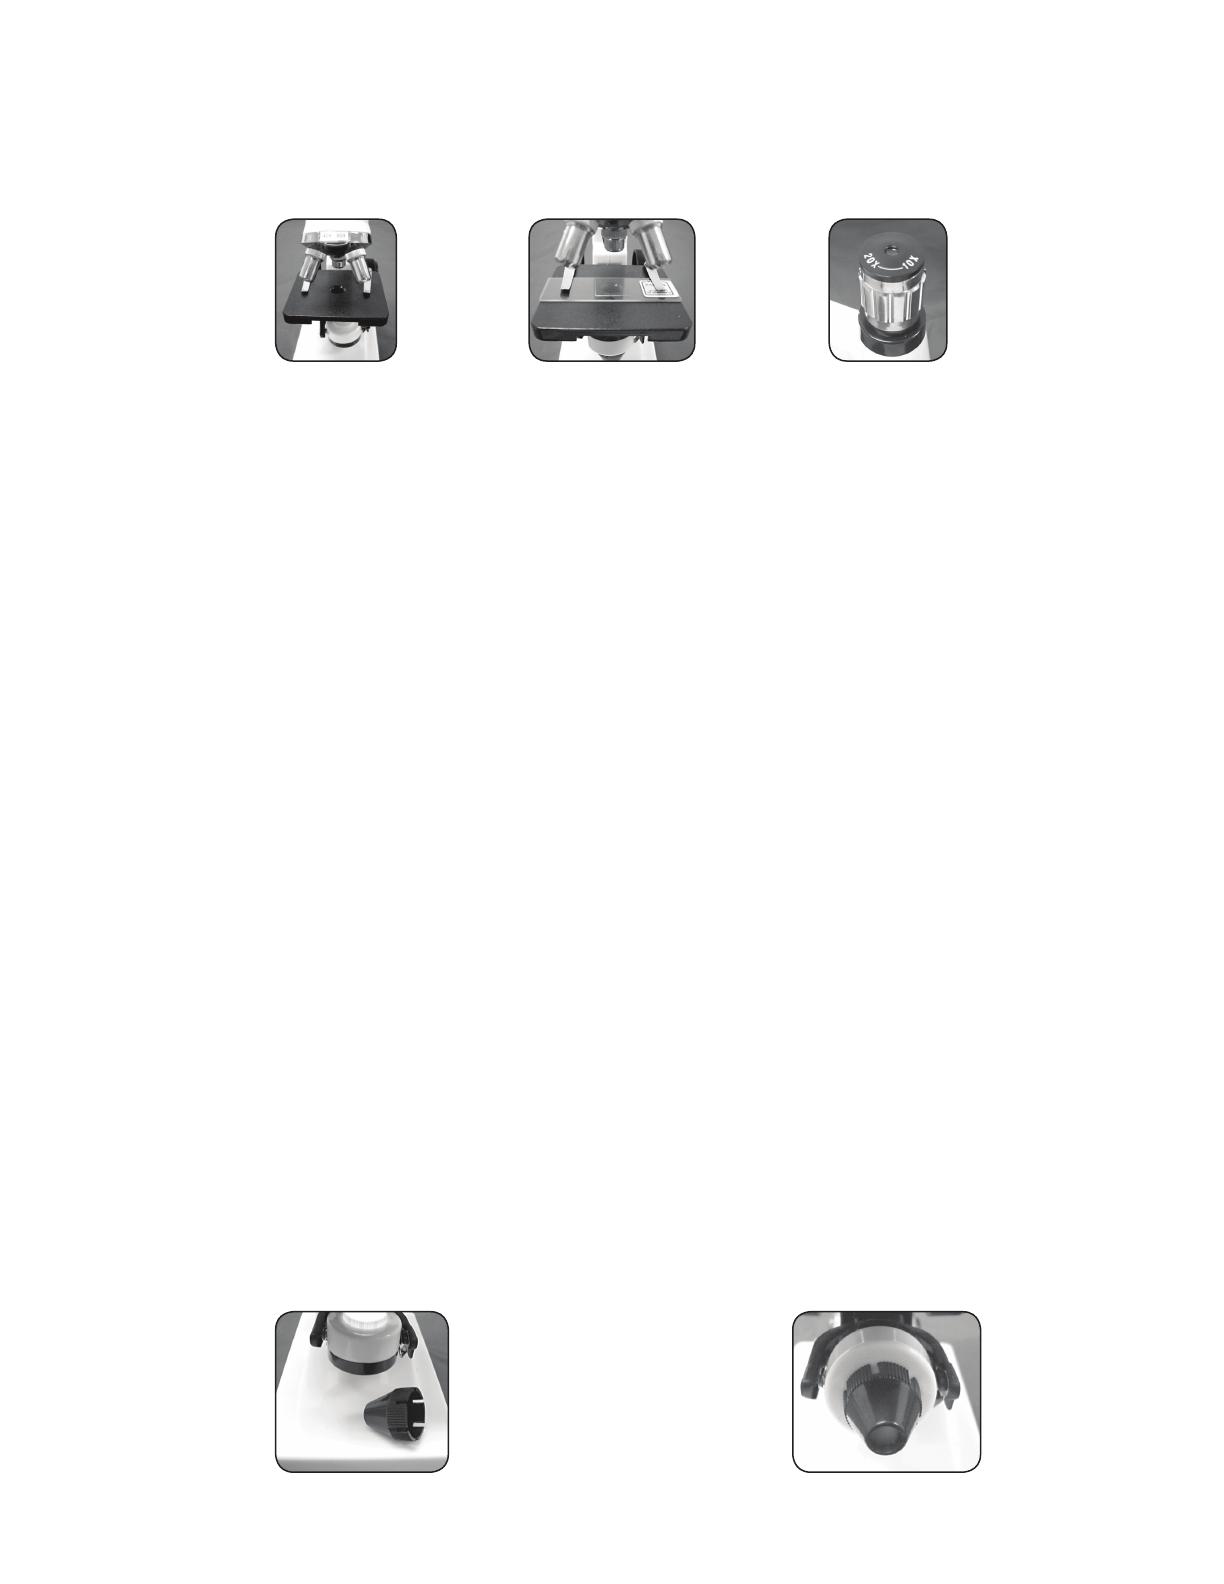
Figure 4a Figure 4b Figure 5
Focusing & changing power (MagniFication)
Now that the specimen slide (or object) is placed directly
under the objective lens, use the focus knob Fig. 1 (8) to
focus on the specimen. Note that for very small objects,
you should set them on the clear slide with a recessed hold
in the center.
1. Always start with the lowest power (4x objective lens) and
have the zoom eyepiece at the 10x position, all the way
counterclockwise (when you are facing the microscope
from the front) until it stops, so that the total power is 40x
this is the most useful power for solid objects.
2. For slightly higher power, you can rotate the knurled ring
on the zoom eyepiece (see Figure 5) clockwise to obtain
powers of 40x to 80x (or anywhere in between) as you
continue rotating to the 20x eyepiece position. Note
that you will have to refocus whenever you rotate the
eyepiece to obtain a sharp focus.
3. For much higher powers, you will have to rotate the
nosepiece Fig. 1 (3) to change the objective lens to 15x
(provides total power of 150x to 300x depending on what
position you have the zoom eyepiece in or 30x provides
total power of 300x to 600x). You rotate the nosepiece by
holding the microscope above the nosepiece with one
hand and rotate the nosepiece with the other hand until it
clicks at the position. Be cautious not to let the objective
lens touch the specimen slide or object when changing
to higher powers you should turn the focus knob rst
to lower the stage to a low position. Note the power
range of the objective lens you are using is shown on the
nosepiece after it clicks into position.
4. At the highest powers, your views will be greatly
magnified but somewhat darker. The most enjoyable
views can be at the lower powers which have a wider
field of view and brighter illumination.
illuMination
To get the sharpest and best views, the illumination
(lighting) will have to be adjusted.
1. The top illuminator Fig. 1 (11) is used only for solid
objects (not specimen slides) so that light shines down
onto the object. Push the button on the top of the
pen light illuminator to turn it on/off. You can change
the brightness by moving the illuminator up/down or
by rotating it left or right. After some usage, you can
determine the best way of adjusting the light to provide
the most pleasant views.
2. The bottom illuminator Fig. 1 (6) is used for specimen
slides which shine up through the hole in the stage
through the slide. You can see a close up of the
illuminator in Figure 6a below. The illuminator is turned
on by rotating it so the light goes up through the hole.
You turn off the illuminator by rotating it down so that
the mirror is on the upper part (the mirror is not useful
with this microscope since you have the much better
electric illuminator).
3. The light from the bottom illuminator can be increased
or decreased by rotating it with very slight movements.
As with the top illuminator, you will have to experiment
to provide the best lighting for the best views.
4. The bottom illumination may be too bright with some
specimen slides. Included with your microscope is a
light diffuser which reduces the brightness and glare
somewhat and can make the views sharper with a higher
contrast level. In Figure 6a the diffuser is the small black
piece. The diffuser fits over the bulb area by press fitting
it on. Figure 6b shows what the illuminator looks like
with the light diffuser in place. It will take experimenting
to get this right.
Figure 6a Figure 6b
3
time centering. Read the sections below on Focusing,
Changing Power, and Illumination before proceeding.
You are now ready to focus and view the specimen, but first
you must take some precautions so you do not damage a
specimen slide or valuable object. When using the higher
powers while you are focusing, make sure that the objective
lens does not hit the slide or object being viewed.
4
2835 Columbia Street • Torrance, CA 90503 U.S.A.
Telephone: 310.328.9560 • Fax: 310.212.5835
©2011 Celestron
All rights reserved. • Printed in China • 01-11
Product design and specications are subject to change
without prior notification.
Designed and intended for those 13 years of age and older.
FCC Statement
This device complies with Part 15 of FCC Rules. Operation is subject to the following two conditions:
1. This device may not cause harmful interference, and
2. This device must accept any interference received, including interference that may cause undesired operation.
care, MaIntenance, and WarrantY
Your Celestron microscope is a precision optical instrument and should be treated with care at all times. Follow these
care and maintenance suggestions and your microscope will need very little maintenance throughout its lifetime.
When you are done using your microscope, remove any specimens left on the stage.
Turn off the top and bottom illuminators when you are done using the microscope.
If you will not be using your microscope for a long period of time, remove the batteries from the top and
bottom illuminators.
Always place the dust cap over the eyepiece and the camera sensor when not in use or when being stored.
Store the microscope in a clean, dry place.
Be very careful if using your microscope in direct sun light to prevent damage to the microscope or your eyes.
• When moving your microscope, carry it by the “arm” with one hand.
Clean the outside surfaces with a moist cloth.
Never clean optical surfaces with cloth or paper towels as they can scratch optical surfaces easily.
Blow off dust with a camel’s hair brush or an air blower from optical surfaces.
To clean ngerprints off of optical surfaces, use a lens cleaning agent and lens tissue available at most photo outlets
and when cleaning do not rub in circles as this may cause sleeks or scratches to occur.
Never disassemble or clean internal optical surfaces. This should be done by qualied technicians at the factory or
other authorized repair facilities.
When handling glass specimen slides, use care as the edges can be sharp.
Your MIcroScope haS a tWo Year lIMIted WarrantY.
pleaSe vISIt celeStron WebSIte for detaIled InforMatIon
on all celeStron MIcroScopeS at WWW.celeStron.coM.
www.celestron.com
  • Page 1 1
  • Page 2 2
  • Page 3 3
  • Page 4 4
  • Page 5 5
  • Page 6 6
  • Page 7 7
  • Page 8 8
  • Page 9 9
  • Page 10 10
  • Page 11 11
  • Page 12 12
  • Page 13 13
  • Page 14 14
  • Page 15 15
  • Page 16 16
  • Page 17 17
  • Page 18 18
  • Page 19 19
  • Page 20 20

Celestron 44106 User manual

Category
Microscopes
Type
User manual
This manual is also suitable for

Ask a question and I''ll find the answer in the document

Finding information in a document is now easier with AI