8
2.2.2 Monitor Setting
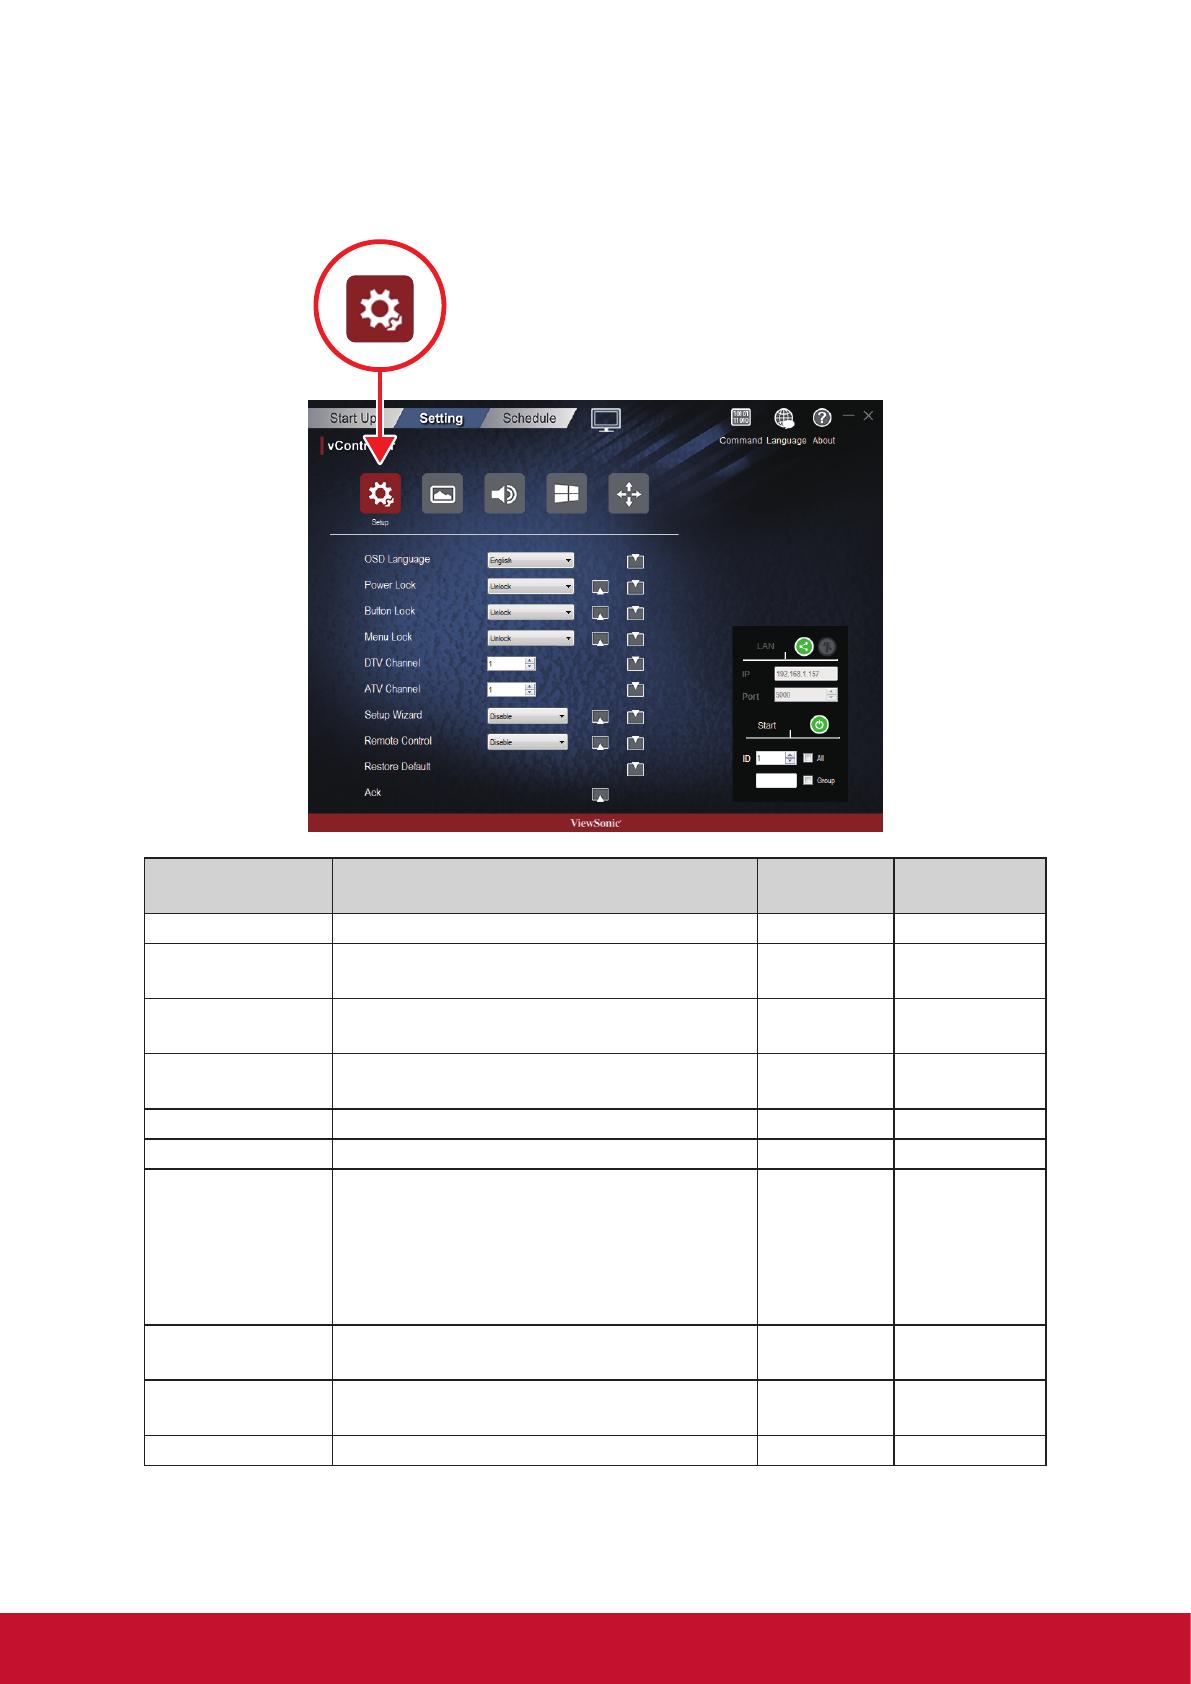
• Setup
Item Functional descriptions
Commands
supported
Devices
supported
OSD Language Select the language for the OSD interface. Write All devices
Power lock
Button used to activate or de-activate the
power source.
Write / read All devices
Button lock
Button used to activate or de-activate the
control panel buttons.
Write / read All devices
Menu lock
Button used to activate or de-activate the
main menu buttons.
Write / read All devices
DTV channel Select the digital TV channel Write TV types
ATV channel Select the analog TV channel Write TV types
Remote control
Choose whether to switch the remote
control on /off or select the IR pass through
mode. When the IR pass through mode
has been activated, the name of the button
would be displayed in the RC display frame
when the remote control is pressed.
Write / read All devices
Set-up wizard
Choose whether to switch the set-up wizard
on/off (only for TV devices)
Write / read TV types
Restore default
Return all settings to the default factory
settings
Write All devices
Ack Tests the communication connections Write All devices


